


It happens sometimes-the wrong expression on the right pose. Perhaps the smile looks more like a grimace, or everything else being perfect, the subject blinked at exactly the wrong moment. Even worse, an important person showed up too late to be part of the group photo. These are common occurrences that could spell catastrophe for a photographer or digital artist with a critical deadline. The good news is that with a few precautions and a little digital magic, these potential disasters can be corrected or avoided completely. This article will take you through the process of face swapping, and body inserting. No, this is not a creepy science fiction B-Movie; this is about using sophisticated editing techniques for seamless compositing of image content from multiple sources.
Insurance
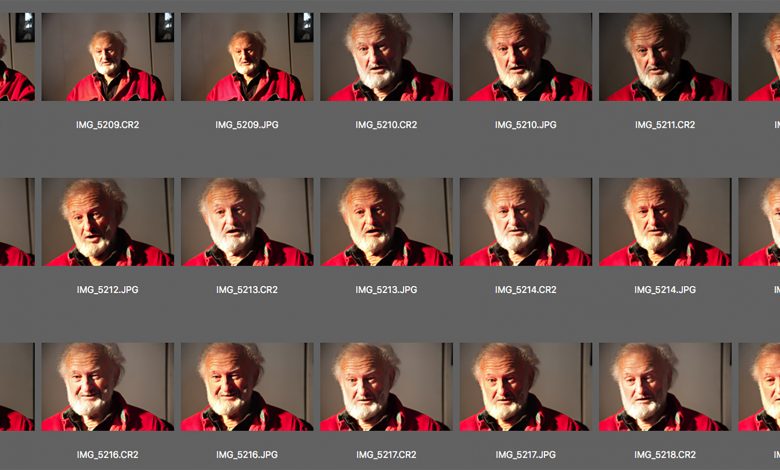
The process of compositing starts at the photo shoot. Professional photographers shoot dozens of photos of the same subject. Especially for portraits and group shots. Shooting multiple shots is sometimes referred to as the “Shotgun Technique” and practically guarantees success. If the “money shot” doesn’t happen in the first dozen it’s more likely to happen in the second or third dozen (see Figure 1). Even if there is no perfect shot, elements from multiple images can be combined to produce a perfect composite. Think of it like shooting a shotgun. The more pellets that fly out of the barrel, the more likely you are to hit your target.
When you take the photograph, work the scene. Engage with the subjects and try to make eye contact. Why? Because, if you engage with the subject you can get them to relax. And if they are relaxed, the more likely you are to make a great photograph. Sometimes a subtle difference between what is happening in the background, the eye contact of a person, or a hand gesture is what makes the photograph.
Swapping Features
Sometimes it comes down to a simple replacement of a sad mouth with a smile or closed eyes with open ones, as in the case of Figure 2A. This particular photo (a spontaneous snapshot) was taken quickly, and fortunately the amateur photographer snapped a few extras because it was later needed for publication in a newsletter (see Figure 2B).
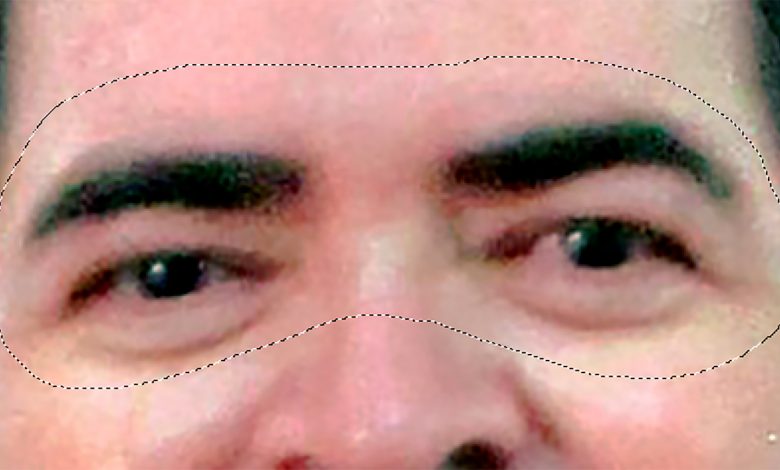
Start by encircling both eyes on the target image with Photoshop’s Lasso tool. Leave some space around the eyes, as in Figure 3. I’ve selected the eyebrows too, which I can always mask out if I don’t need them.
They Eyes Have It
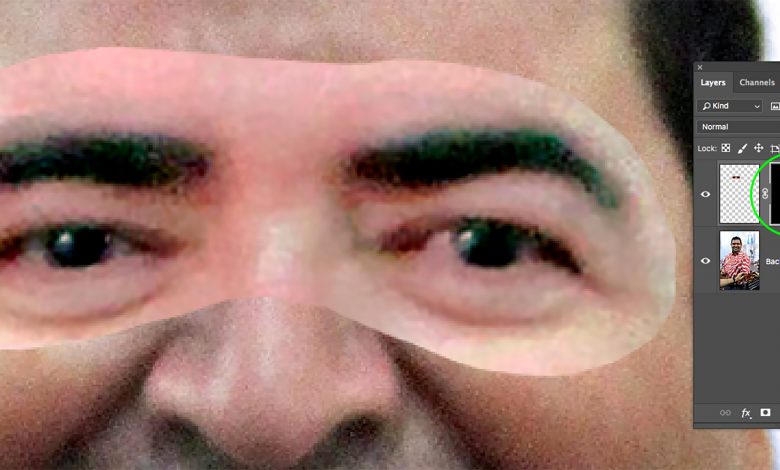
Copy and paste or drag and drop the eyes to the target document and roughly position them over the underlying eyes. They appear on a separate layer which you’ll name “Eyes”. It helps to reduce the opacity of the Eyes layer to between 30 and 50 percent so that the underlying content can be seen to better position and scale the content (see Figure 4). After they are properly in place, increase the opacity to 100 percent. Press the Cmnd (Mac) Cntrl (Win) key and click the Layer thumbnail to select the content. Go to the Layers menu and choose Layer Mask > Reveal Selection. You’ll see a layer mask thumbnail in the layers panel. Click on the mask thumbnail to select it (as in Figure 5).
Choose the Brush tool and a soft edged brush. On the layer mask, paint out the areas that you don’t need while you soften the edge of the mask. Reduce the opacity and the size of the brush to accurately blend the new content with the original.
Color Adjustment
It’s often necessary to perform a color adjustment to better match the color of the original. In this case I used Hue/Saturation and a Curves adjustment layers to balance the colors. The two adjustment layers are “clipped” to the Eye layer so that they only affect the color of the Eye content below them (see Figure 6). To clip the layers, place the cursor between the layers and press Opt (Mac) or Alt (Win) and click. Figure 7 shows the completed composite.
Missing Persons
A group shot can present difficulties if an important individual who, for one reason or other cannot attend the initial photo shoot. They’ll need to be inserted later, and that requires a separate photo shoot. If the initial group shot was taken outdoors, the rescheduled shot should be taken in the same location, at the same time of day, under similar lighting conditions.
Compositing an outdoor group has its own unique set of challenges. If you can decide where the missing person will be inserted beforehand, at the initial shoot, then you can plan to leave a space for them. More frequently however, you don’t have that luxury.
It’s easier to place them in front of the group, but sometimes that can appear awkward. Closer to the back requires that you limit content by masking. Finding a simple background for your subject will make compositing easier.
Figure 8 shows the initial shot of a group of artists. You can see where the photographer left a space on the right for the missing member. Figure 9 shows the results of the second photo shoot, where the missing artist is standing in the location where he will be placed. The work of compositing has been substantially simplified by shooting against a relatively simple background-the green door, the terrazzo tiles and the white column. The new content layer with the missing artist was drag-and-dropped into the document and the new layer’s opacity was reduced to 50 percent so that the figure can be sized and accurately placed (see Figure 10). An accurate layer mask was traced. Finally, the new layer’s opacity is increased to one 100 percent.
Shadows
The most common mistake when compositing an image is that the new content seems separate and does not look anchored to the ground, or it looks as if it’s been simply pasted onto the original. An easy way to avoid this problem is to select enough of the background where the figure stands so that the natural shadow in included.
If you’re unable to select the background and have to make a tighter selection of the figure, you can add a slight shadow with the Burn tool to darken the areas that contact the ground (see Figure 11). It’s a quick fix, but it works to better anchor the new content to the image.
The final image shows the composited figure as if he had always been there (see Figure 12).
Compositing Tips
- Take care when choosing content. Be sure that the light sources are similar in both images.
- Pay attention to the details when selecting content. Be sure to include everything that is relevant in your initial selection and then some. It’s much easier to eliminate content by masking than it is to include elements that you neglected.
- Feather the edges of your selections one or two pixels for better transitions.
- Use a soft-edge brush on your layer masks and reduce the size and opacity of the brush to blend adjacent areas.
- Correct color of the new content so that it perfectly matches the original document.
Standard Practice
The techniques shown here are standard practice for salvaging images and I’m sure you’ll find them useful. Compositing can be a lifesaver and sooner or later everyone needs to accurately combine the content of two or more images. Of course, it’s always better to get the “money shot” the first time, but in the real world that rarely happens.