Vehicle wraps and fleet graphics are our specialty, and we have many different small-to-large companies we work with. Often, the work we do for them is ongoing, meaning we’ll wrap or letter one to three or so vehicles at a time. We keep track of their artwork and graphics placement and make the reordering process as easy as possible. Most of our fleet accounts started with one or two vehicles and grew from there.
Over the years, we’ve also bid on large fleet projects. Usually, these projects are for a set number of vehicles that will need to be completed in a pre-specified time period, unlike with our ongoing accounts. Some of these projects are posted through a bid portal in the form of a Request for Proposal (RFP) and have a
packet of information that needs to be completed. These are more formal estimates with a lot of paperwork and specific requirements.
We’ll often bid on a fleet project less formally, especially when we’ve worked with a company on other projects before. While they may not have an RFP in place requesting specific documents, you’ll still need to provide plenty of information in addition to the estimate itself.
Rapport
Meeting with the customer and gathering information is essential to the project because that’s when you establish a rapport. On projects with many vehicles, the customer should have a pretty good idea of the end goal and will need your assistance in organizing the process to achieve that goal.
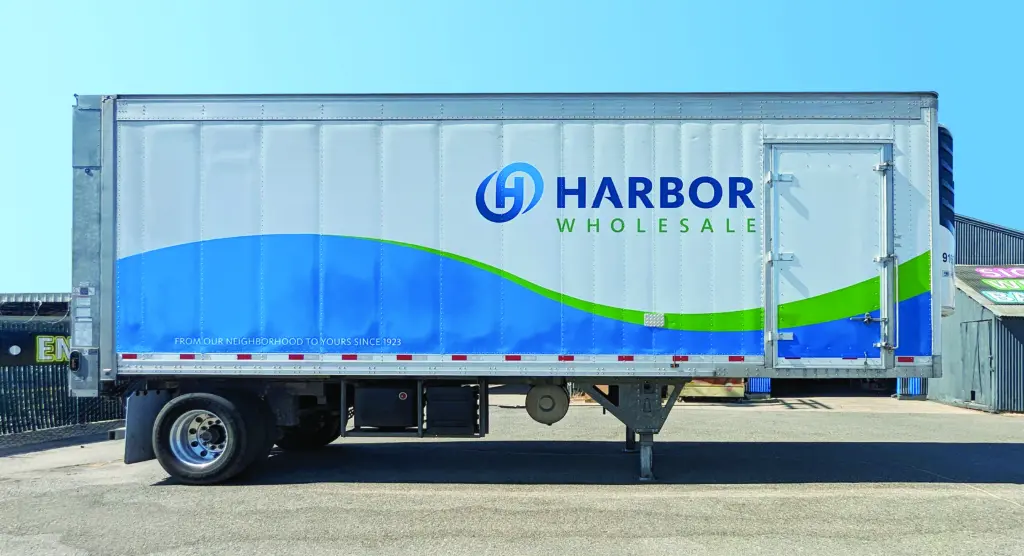
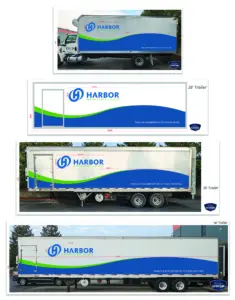
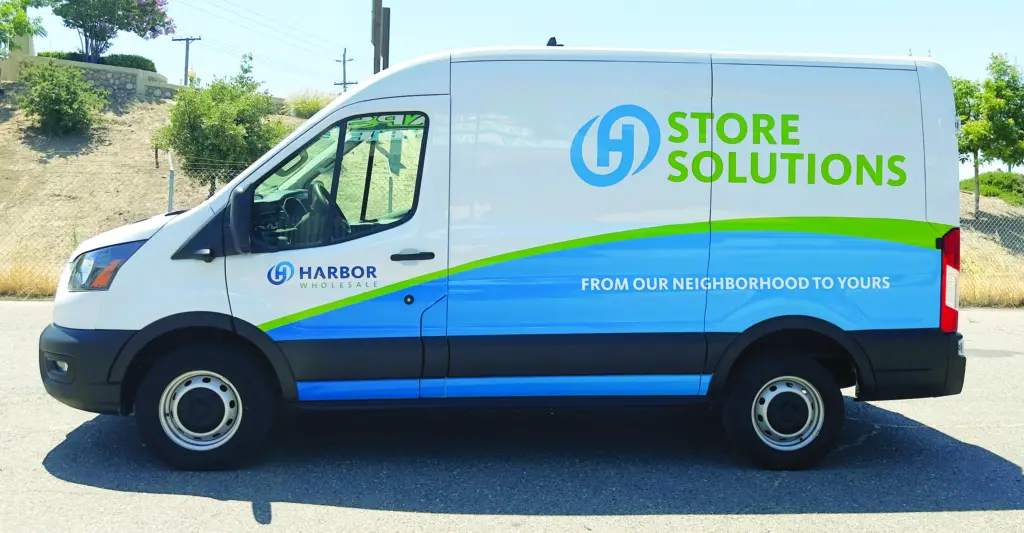
We’re currently in the middle of a large project involving multiple vans and box trucks, over 30 semi-truck cabs, and 45 trailers ranging in size from 28′ to 45′. The client is a local distributor that was bought out by another company up north. Their goal is to rebrand all of the vehicles by the fall.
We’ve worked with people in different departments over the years, but this project is overseen primarily by one person locally. We met with him numerous times as we gathered information on their goals for the project, measured and photographed the trucks and trailers, and worked through final vehicle quantities.
We also met with representatives from the main company to clarify artwork and coverage to be sure we’d maintain consistency with the other fleets they have up north. Since this is a great company to work with, and we’ve had experience with them on smaller projects over the years, the process has been relatively smooth.
Assessment
We met with the customer to assess the vehicles and began putting together an estimate. We took straight-on photos of all sides of each type of vehicle and trailer they planned to wrap. We looked at the condition of the paint and noted any obstacles like doors, rivets, or brackets.
We got a close estimate of the number of vehicles we would be doing, and some examples of other fleets they’d had branded in the past. This helped speed up the process since we weren’t starting from scratch in establishing the size of the fleet and the coverage.
Proposal
When you fill out an RFP, and even when you do a less formal estimate on a large project, it feels like you’re also submitting a company resume. In some cases, you do exactly that. For some proposals, you’ll need to establish your company’s experience, provide referrals, and show examples of past work while also providing information on the primary company representatives and all pertinent contact information.
You should also provide product bulletins for the materials you plan to use and a written warranty for both materials and workmanship. Usually, you’re bidding against other companies on large accounts, so be sure to spell out precisely what you’re providing for the price and ask for an apples-to-apples comparison. If another company is providing something different, note those discrepancies.
For example, we use a 3M Scotchcal 8548 non-PVC overlaminate on all our wraps to help prevent the browning issues we commonly have in our area. Many other companies use a premium 3M 8518 gloss laminate. Both would work for this application, but we noted why we wanted to use a different material and why we feel it is a better choice.
The written estimate we provided spelled out the vehicle types, the coverage, the number of vehicles at each size, and the price per vehicle for graphics and installation. We quoted the rears of the trailers separately for this project because some had a lift gate and some didn’t, which affected the amount of rear coverage.
Design
Typically, we only do artwork for an order, but on large projects like this, some amount of design needs to be provided to clarify coverage. Providing an initial proof helps the customer compare your estimate to other bids and shows the customer that you understand the direction they want to go in.
One project we’re currently working on has van wraps, a box truck, and multiple trailers that are 28′, 36′, and 48′ long. The artwork for most of the vehicles is very similar, just fit to the different sizes. Using photos of the trailers and templates for the vans, we created proofs for each one and submitted those along with the estimate.
As the bid process moved along, we also provided sizing notations to ensure the coverage size was consistent for all companies providing bids. There were some adjustments and things to clarify along the way, but we worked hard to answer any questions and provide any requested information quickly.
Since we could not get artwork early in the process, we created similar artwork to provide an accurate quote. When we received the go-ahead on the project, we worked with the company to gather vector artwork and Pantone colors. Once we had this artwork, we provided updated proofs of all vehicle types for final approval.
We also provided color samples printed on the wrap media we use for final color approval. After a couple of variations, we had the company sign off on the final print sample, and we kept it on file for future reference.
Printing
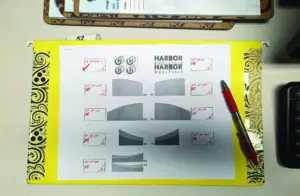
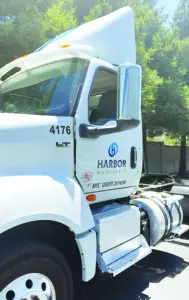
Only once we had a signed-off print sample did we start setting up the graphics for production. The cab graphics, which involved spot logos on the two doors and the front fairing, were approved first, so we started by printing all of those.
As I set up these files, I added small boxes to indicate the midpoint of the graphics to make it faster to line up pieces on the truck doors. We rotated the graphics during the printing process for the upper fairing logos so we could print them in one piece. To ensure the logo was applied straight, I added a line and noted the top of the logo to avoid confusion during installation.
We also did this with the spot logos on all the sides of the trailers. By printing the logo separately from the text, we were able to better stack the graphics for output. And, by aligning the side weed borders and adding bright boxes that lined up to one another, we were able to quickly and accurately realign the graphics on the vehicle.
While installing the cab graphics, we received the final artwork approval for the three vans, so those were wrapped next. The art approvals came in waves, which worked great for us, as we could plan and print the various vehicle graphics in batches.
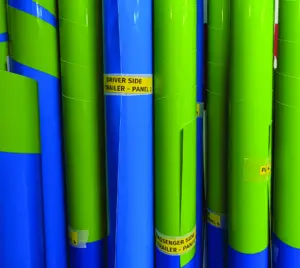
Once we received final approval on the trailers, we established with the customer that the thirty-one 28′ trailers were the priority. When I set up the print panels for these trailers, I also printed proofs showing where the print breaks were and how the panels would look. They were also labeled by the side of the trailer and what number panel they were, starting at the back of the trailer since we install from back to front.
A separate proof was created to track the panels as they were printed so we wouldn’t accidentally under- or over-print them. Matching labels were added to each printed panel so that, as we cut down the panels in production, those labels could be added to the rolled media for clarification. Our labels indicate the trailer size, which side of the trailer, and the panel number.
Workflow
We’re not a big company, so large projects like this mean we have to be super organized in our workflow. Other projects are still coming in, and they have to go through the production process, too, and we don’t want to drop the ball on anyone.
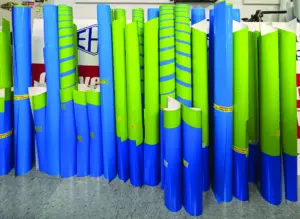
We typically wrap one or two trailers a day, depending on the weather, and then try to leave a couple of hours for production time to prepare the next batch of panels. The printing, drying, laminating, and finishing process is straightforward and streamlined to ensure we’re as efficient as possible.
The rolled panels are labeled and then sorted by truck/side so they’re all ready for installation. We make sure to print an entire trailer in one day to lessen the chance of color variation, and the printed panels are relatively easy to sort. We don’t print multiples of one type of panel; rather, we print all the panels for an entire side before moving to the other side.
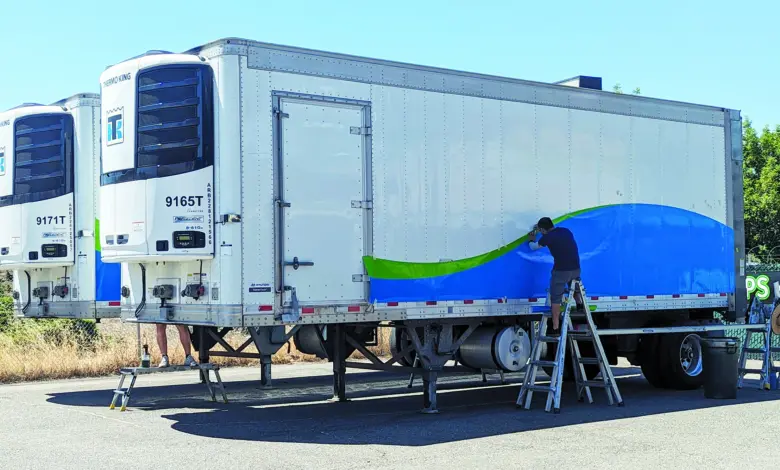
Installation
The first installation on a new vehicle type always takes longer than subsequent ones. On the first one, we establish placement and make clear notations on the proof so we know exactly where to place the panels on each trailer for consistency.
We also ensure we have scissor lifts and scaffolding in place to speed up the process. Proper tools and handy tips and tricks also make the installation faster, especially on rows and rows of rivets.
Since we’re in California, we also have to consider the weather. Other than the vans and smaller box trucks, all the installations must be done outdoors. Installing in the early morning, setting up a large portable
umbrella, and installing the side in the sun first thing are all little adjustments we make to get it done. Once the temps get too high, we switch gears and move in to prep the next trailer. Something is always getting done on the project.
Tips
Throughout the process, we make sure to communicate with the customer. We track trailer numbers and install dates and work hard to rotate the trailers out as efficiently as possible. If the weather is too hot, we let the customer know we’ll need an extra day to finish.
We require a deposit up front to start a project for companies we’ve never worked with. For our current project, we’ve worked with the client for years, so we didn’t require a deposit; instead, we’re just billing the project in batches. This way, they’re not hit with a huge bill all at once, and we’re not putting out a ton of money upfront for materials and not billing it for months at a time.
A lot of material is purchased for these fleet projects. We can get the graphics for approximately two 28′ trailers out of each roll of vinyl and laminate. Since we can only print, prep, and install so many wraps at a time, I spread out the material purchases from our suppliers. In the end, we’ll still order and pay for the same amount of vinyl, but rather than ordering it all up front, we can bring it in and pay for it because the customer is also being billed for the completed work.