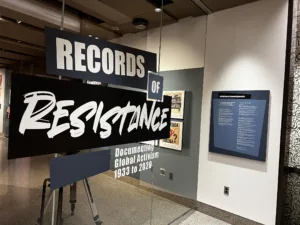
Windows, windows everywhere… Windows are prime real estate space for sale signage, new promotions, and branding. Window graphics are so common that manufacturing them on the right combination of ink, base, and laminate should be a piece of cake, right?
The truth is producing window graphics can be more complicated than you think. Chances are, if you are reading this magazine, you’re similar to me, inspecting and picking at graphics everywhere you go, taking away valuable lessons from other shops’ failures or successes, and making your shop more profitable by learning from observing.
An example of a recent mistake I noticed was a retail chain static cling campaign. Ink was printed to the edge of the cling; the tension of the ink was stronger than the cling holding to the glass. This caused the cling to dog ear in the corner of the graphic. Once this happens the cling rolls onto itself and causes graphic failure.
For shops large enough to have clients like this particular chain, how did they not realize this would be a problem? Below are some important considerations you should think about before putting window graphics into production:
- Should the ink be transparent, translucent or opaque?
- If the project demands clear vinyl, should it be optically clear or an economy clear?
- What build of the adhesive is needed for clear vinyl (solvent or water based)?
- Does the client want direct or reverse application (first or second surface)?
- Which seam should be used for overlap (standard, butt, or ghost)?
- Is the window one large piece of glass or are there multiple pieces? Breaks such as mullions, silicone, or gaskets between panes allow a nice place for panels to begin and end rather than having overlap in the middle of the window.
- Ask if the client is aware of security film or tint on the glass. Window graphics can potentially damage these films if they are installed on top.
- Consider glare and natural tints to the glass (green or blue) that can affect the final look of a second surface graphic
- Should pre-mask be used for install?
Transparent vs. translucent ink
A transparent graphic means you can see through it when printed on optically-clear film. Sometimes this is desirable with window graphics, but can only be achieved on certain ink sets. When we get this request we print on our Mimaki solvent printers. The properties of the ink formulation will allow you to see color but allow a clear view of what is on the other side of the glass. You can also achieve denser transparent/translucent solvent prints by running higher passes or double striking.
Translucent graphics cannot be seen through. The ink is opaque and has more of a privacy film effect when printed on optically clear film. This is typically a result of printing with UV ink or double striking on a solvent printer.
UV ink still needs to be used in combination with white ink for opaque graphics (not dead opaque, which does not allow any light through). You can tell if it is light or dark outside, but you cannot see through the combination of film and ink. UV-printed inks allow for day/night applications when printed with Color / White / Color or Color / White / White combinations of ink. This allows for a front-lit graphic during the day but has enough density to be backlit at night from the lighting from a lightbox or inside a building.
“Clear” films
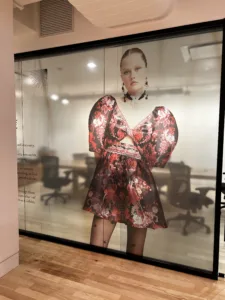
It is important to know there are clear and optically clear films available. Optically clear films allow spot graphics to seem like they are floating or CAD-cut on the window. They also allow specific areas to be translucent or transparent with the right ink.
More cost-effective clear vinyls that come on a paper liner have a natural haze to them. This is okay for second-surface window applications that have a white vinyl backer. The clarity of the film will not be noticed because it is intended to be viewed as an opaque graphic.
Polyester films like Lintec or Wincos are the clearest films available. There is a solvent version available, but a majority are intended for UV printing. While they deliver exceptional clarity, the film is delicate to work with for a novice installer. On the plus side, registration is easier because the film does not stretch. We typically do not laminate when printing with UV ink so there is cost savings on optically clear lamination.
I have learned a lot from having the right suppliers. Frank Corey (frank.corey@qmls.com) at Quality Media and Laminating Solutions (www.qmls.com) has been my go-to for specialty films. Feel free to reach out if you are looking for specific products; he is very knowledgeable and can recommend the right film over the phone.
Water-based vs. solvent-based adhesives
When you are shopping for vinyl, take into consideration what you are getting for the cost. Noticing what adhesive is being used and what properties the adhesive holds is very important. Does it need to be removable, permanent, or changeable? How long will the film be applied for? Is it expected to last a day, months, or years?
Also pay attention when buying calendared vinyl. Is it monomeric or the higher-quality polymeric vinyl? Water-based adhesives are typically cheaper and not intended for a wet install. If you apply an application fluid to them, it attacks the adhesive and causes the adhesive to haze.
Solvent acrylic adhesives can resist app fluid and will install soundly without haze or cloudiness. Solvent acrylic adhesive is typically found on more expensive vinyls. Realizing what type of adhesive is important for both clear adhesive vinyls as well as colors for CAD-cut films.
Water based adhesives should never be applied with app fluid. If they are mistakenly installed wet you might get away with a first-surface application. The haze of the film may not be noticeable because it is on the back of the print. It will be a problem with second-surface applications using CAD-cut vinyl or printed graphics on clear with a white backer. The water-based adhesive being attacked from the app fluid will be noticed as soon as the film is installed, and the haze will typically not clear up.
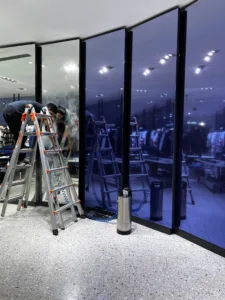
First surface vs. second surface
First surface (direct application) means the graphic is installed on the outside of the glass. This would be considered a standard install that would be used on drywall as well. Second surface means the graphic is printed in reverse on clear film. With this process the graphic is typically backed with white ink or a white vinyl backer. When second-surface graphics are installed they are done from the inside of the store.
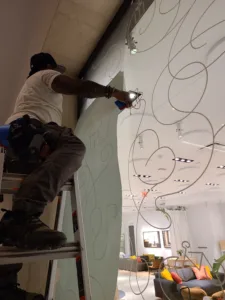
Pressure pots for wet application
As our shop evolved, so did the method of applying application fluid. We started with a standard trigger spray bottle for wet application. Then we graduated to pump hand sprayers which were nice for smaller jobs but needed to constantly be refilled for larger installs.
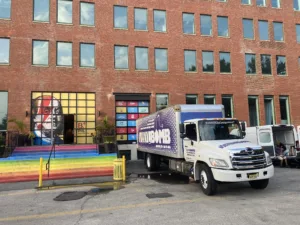
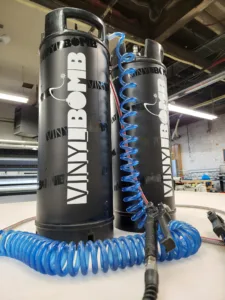
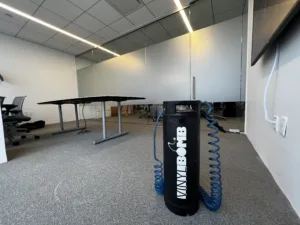
The king of all wet application sprayers is the Keg Tank or Pressure Pot. These are 3- or 5-gallon containers that get filled halfway with your application fluid. The rest of the tank is filled with compressed air using an adapter for your air compressor. No pumping or refilling necessary; just pull the trigger.
We have gotten through some large jobs without our tanks emptying. Everyone has different formulations for their app fluid. We decided to print our custom formula right on the Vinylbomb wrap we applied to our tanks. This allows any employee filling the pot to get consistent app fluid for great results.
CAD-cut vinyl
CAD-cut vinyl can be as simple or complicated as you want to make it. When we cut our
vinyl, we always put registration marks in the corners, typically, 1” x 1” blocks that are cut along with the design. Registration blocks can be used for straight cutting of the vinyl after it has been pre-masked. Imagine installing a circle or script text on an angle. The registration blocks allow reference as to what straight actually is.
Using the cut as a guide, a laser level or tape measure can be used to make sure the vinyl is installed straight. Registration marks can also be used for paneling larger cut vinyl jobs that need alignment on glass.
When we install CAD-cut vinyl we always install dry unless there is a lot of solid vinyl in the design. At that point we will install wet. Wet install works great, but sometimes waiting for the graphic to tack up enough to remove the pre-mask is very time-consuming. To aid in helping the pre-mask release, you should keep the pre-mask soaked with app fluid. Once you see tunnels forming in the pre-mask, it is ready to be removed.
Overlap
Overlap can be executed in a variety of ways on glass. A standard 1” overlap, butt seam, or ghost seam could be utilized depending on the demands of the job. The type of graphic being printed and film being used will determine what overlap should be used. Below is a general guideline and how to utilize the three options…
Anything produced on white vinyl film or with a white vinyl backer needs a standard 1” overlap. This is regardless of the film being cast or calendared. The film is opaque enough where the overlap cannot be seen.
A butt seam should only be used on cast films because they are dimensionally stable. Calendared films with a butt seam will shrink over time and leave a gap between the panels. Butt seams are effective for larger light box graphics where the overlap will be an obvious density change.
If a butt seam is executed it has to be done in the shop pre-installation. Both panels would have to be aligned on a large flat table. Once the overlap is good both pieces should be taped down to the table or the panel underneath. If you have a 1” overlap you have to measure 1/2” over and make a solid cut with a ruler through both pieces at the same time.
Ghost seams are effective with optically clear film with UV ink. A ghost seam still has overlap but the film where the overlap is does not have anything printed on it. The ghost seam is essentially a butt seam with ink, but still has overlap for easier alignment. This allows faster production, cutting the panels down for install. Remember, the ghost seam should always be on the bottom of the overlap. If the ink is matte and the ghost seam is on top you will have gloss overlaps showing on top of matte ink.
Handling pre-mask
A note about pre-mask… It should not be used to pre-mask optically clear vinyl. When optically clear vinyls are made they have a smooth polyester liner, not paper. Vinyl is soft and conformable. Pre-mask is a paper that has a slight texture to it.
When pre-mask is applied to optically clear vinyl, the texture of it is transferred to the vinyl, causing distortion. What was once optically clear will look textured and cloudy.
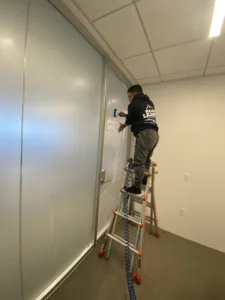
Privacy films
Entering the market of privacy films like Avery Etchmark or 3M Dusted Crystal is profitable, but it has to be done right. The repeat customers that order this film are professionals, and they expect professional results.
Confirming if it should be applied first or second surface, knowing what door hardware to remove, and what not to touch are important considerations. Site surveys are typically always needed for these, so charge accordingly.
For one of our repeat customers we bring a roll of Etchmark, straight ruler and folding table with a cutting mat mounted to the top of it. Ultimately, it is easier and more profitable to cut the panels on-site.
Also, if they needed an extra panel the installers have the film on site to cut if need be. This saves a trip from NJ to NYC and also saves material if we cut extra panels that are not being used. We also bring towels to sop up the application fluid so it does not get all over the carpet and floor when installing.
Being neat and clean goes without saying, but it must be done for repeat business. Handle squeegees work really well for these applications. You could even use a window washer squeegee in a pinch.
Window perf
Perforated window film allows natural light to come in from the outside. This is great if there
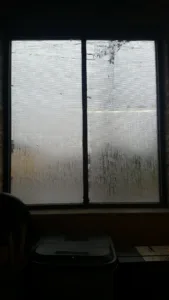
is poor lighting inside the building. With the right lighting conditions, you can see outside but no one can see inside through the perf. The only exception is at night.
If the lighting inside the store is brighter than the lighting outside at night, customers will be able to see inside the store through the perf. What we get asked a lot is if the window perf needs the optically clear gloss lamination. Yes, especially on cars. It will aid in removal of the perf film and not allow water to collect in all the holes when it rains. Rain completely blocks visibility and this is extremely dangerous with vehicle wraps.
Dust can also start to collect in the perforated holes over time if it is a longer-term installation. The other question we get asked is if a luster or matte lamination can be used. It can, but it will block all visibility. The only way to do it right is with optically clear gloss lamination. At times, I have seen a gloss polyester lamination be used that is a less expensive alternative.
Another quick tip — and I have never seen it done — is do not install window perf wet. The solution will get trapped in the holes behind the lamination, blocking visibility and eventually causing graphic failure.