


Wet Paint
Applying color to a surface is one of the oldest and most common forms of self-expression. From the meticulous application of thinned glazes with fine sable brushes to render exacting detail on photo-realistic paintings, to pigment splashed by the gallon on Abstract Expressionist canvases, the application of color is the artist’s way of whispering, speaking or shouting. Paint is indeed a versatile medium.
Painting Software
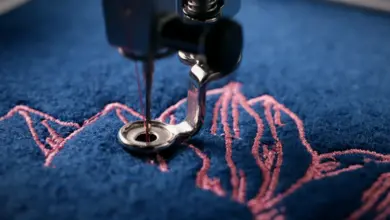
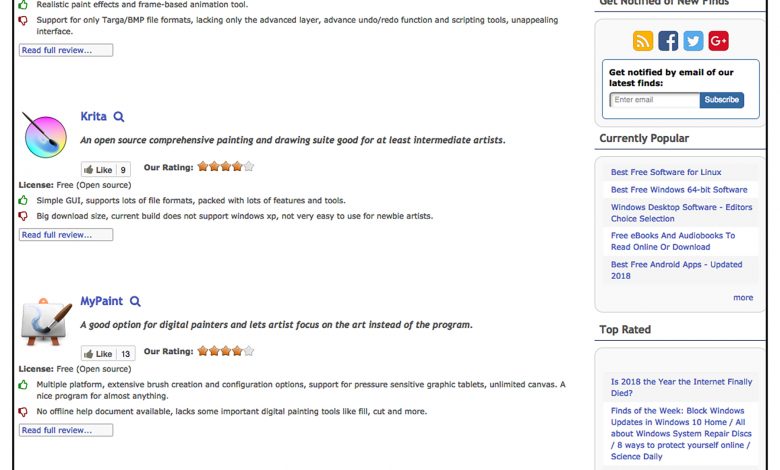
When it comes to the digital application of color, there are several dedicated painting programs on the market such as Corel’s Painter and a host of art-based pixel editors that you will find online like ArtRage, Rebelle 2, and DogWaffle and Krita freeware that all contain features designed to simulate real paintings (see Figure 1). Adobe Photoshop too has a virtual paint studio built right into the interface.
The advantage of using Photoshop is that if you have a print shop you probably already own it, and it has many other useful image manipulation features that fit neatly into your workflow. That being said, it’s worth downloading the freeware, (because it’s free after all!) if you’re in the mood to try something new.
Painting with Light
Painting software uses light instead of physical compounds to render images. Specifying digital color and applying it with one of the painting tools is fundamental to digital imaging. The painting tools go far beyond just the ability to apply color in an artistic capacity. They are essential for spot-editing, photo retouching, creating textural surfaces, and image compositing.
Color Modes
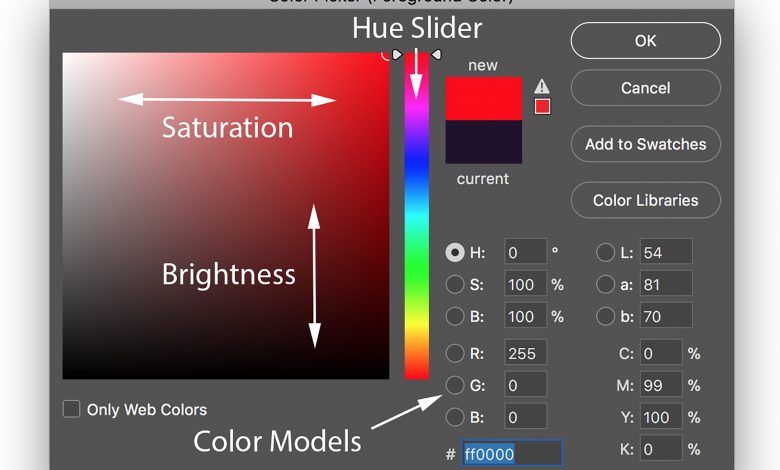
A color mode (or color model) is a system of displaying or printing color. The RGB (red, green, blue) color mode is most commonly used for producing full-color artwork, however choosing RGB colors based on their numerical values can be challenging. Instead, HSB (Hue, Saturation, Brightness) is used when creating new colors. HSB is a representation of the three physical characteristics of color; hue is the position of the color on the color wheel expressed in degrees (0-360) where 0 and 360 is red, saturation is the intensity of the color expressed in percentage (0-100) where 0 is gray and 100 is full strength, and brightness is how light or dark the color is also expressed in percentage (0-100) where 0 is black and 100 is the maximum brightness of the color.
Color Picker
Picking a digital color in is as simple as squeezing paint from a tube. When specifying color, no matter which software you are using, a color picker of some kind is used that controls the relationship of these three characteristics (see Figures 2A, 2B). Color is created based on specific color models. Colors can be selected in HSB, RGB, Lab, or CMYK.
Photoshop’s Hue slider (shown in Figure 2A) displays a spectrum of color that is actually a color wheel that has been cut at the 0/360 degree mark. Red is on both the top and bottom of the slider. The square field to the left is the saturation and brightness picker. Saturation is controlled by the horizontal position and brightness is controlled by the vertical position of the curser when clicked or dragged. A swatch to the left of the Hue slider indicates the current foreground color when the dialog box is opened and the newly selected foreground color. Most paint programs offer a floating color panel that is essentially the same as a Color Picker but displays sliders for each color mode separately or has a clever interface for selecting colors.
Swatches
After a color is created, it can be saved to a swatches panel so that it can be accessed later (see Figure 3). The swatches panel saves solid colors, but in some software programs such as Adobe Illustrator, it saves gradients and patterns. These colors can be applied with a brush or by filling or stroking a selected area.
Brush Work
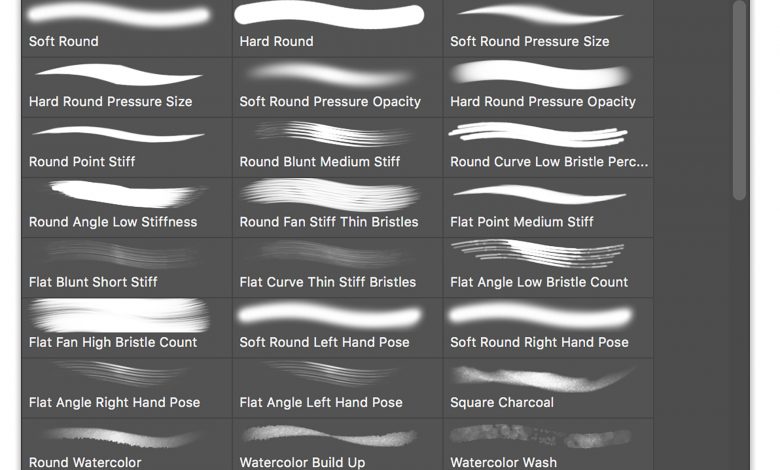
Most paint programs provide an abundant supply of built-in brushes that can be used to apply or modify color in a variety of ways with the painting and editing tools. You can create new brushes and control such characteristics as size, hardness, spacing, roundness, and angle. In some programs, custom brushes can be made in virtually any shape.
Brushes are usually displayed by means of a pop-up panel when a painting or editing tool is currently active. By default, brushes are displayed as a brush stroke (see Figure 4). Clicking on the thumbnail selects the brush. Then the size, roundness or hardness can be modified. Photoshop and Painter have the most extensive collection of pre-made brushes and that’s one of the reasons you pay the big bucks for these programs.
Brush Dynamics
As with brush tip shape options that control the size and roundness characteristics, brush dynamics control brush behavior (see Figure 5). A combination of brush dynamics can produce infinite possibilities in the behavior and appearance of brush strokes. Experimentation will yield the perfect brush for the job. For example, an ordinary soft round brush can be modified into a scatter brush with variable widths and angles. When applied to a document color shifts can be programed into the brush (see Figure 6).
Brush Technique
Here is a technique that uses a single tool, a variety of brushes and a filter to simulate an oil painting.
- Open a good photo, the resolution should be 300ppi (see Figure 7).
- Duplicate the Background layer.
- Select the Smudge tool and choose a big art brush (a fan brush is good).
- Follow the contour of the face and smudge very roughly at first.
- Use long flowing brush marks. The aim is to smudge everything, eventually
- In the Options Bar, adjust the strength of the smudge tool to get different effects.
- Duplicate the layer and smudge again.
- Change your paint brush and brush size often, so the brush marks are not all the same. The eye for instance will need a smaller brush than forehead. At this point the painting should look something like what’s shown in Figure 8.
- Sharpen the image to reveal the brush marks and pop the painting to life. Go to Filter > Smart Sharpen and set the Amount to 500% and radius of 1.8 (see Figure 9).
- To add a canvas texture, click the new Fill Layer icon at the bottom of the Layers panel. Click the little arrow to reveal the pattern menu. Click the gear shaped icon and pick a texture from Artist Surfaces (see Figures 10A, 10B).
Artistic Filters
Painting software offers a variety of filters that produce realistic painterly effects. Like brushes, the variety of filter effects is staggering, especially when combinations of filters are applied. Any painterly effect from translucent overlays to thick impasto-looking images can be achieved with the right sequence of filters. Freeware, like DogWaffle and Krita have nice filter effects that simulate a credible looking hand painted image, but the Photoshop’s Filter Gallery that you will see in the tutorial that follows, has a massive assortment of artistic filters plus additional filters in the Render submenu. There are specific filters that produce dedicated types of surfaces like watercolors or oil paint. I find that these effects look a little too standardized when applied directly to an image. Certain enhancement techniques improve the effect for a more custom look. What follows is a technique that enhances the look of the Oil Paint filter.
Filter-Based Oil Painting
- Open an image file in Photoshop. The image size should be somewhere around 1250 pixels x 1000 pixels, horizontal or vertical.
- Duplicate the background layer. Name it “Oil Painting”.
- To intensify the colors choose Window > Adjustments > and click the Hue/Saturation icon in the Adjustments panel. Increase the saturation to +50.
- Click the Brightness and Contrast icon in the Adjustments panel. Increase both values to +20 (see Figures 11A, 11B, 11C and 11D).
- Now for the oil painting effect using a few filters. Duplicate the background layer by choosing Duplicate Layer from the Layers panel menu. Then choose Convert to Smart Object.
- Go to Filter > Stylize> Oil Paint. Play with the controls until you get the effect you want (see Figures 12A, 12B).
- Choose Filter > Filter Gallery > Artistic > Plastic Wrap and use these settings: Highlight Strength 4, Detail 10, Smoothness 15. Do not click ‘OK’ yet as we are going to apply few more filters.
- Click on the New Effect Layer icon again and choose Paint Daubs. Brush Size 3, Sharpness 5, Brush Type – Simple.
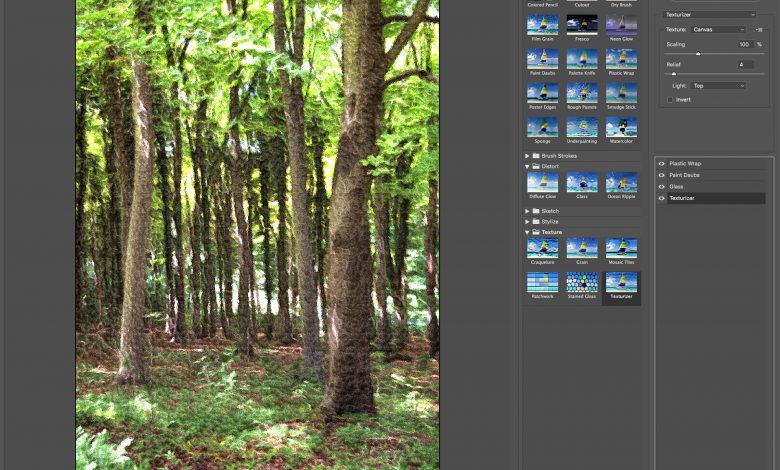
- Once again click on New Effect Layer icon. Then click on Texture folder and select Texturizer. Texture Canvas, Scaling 100%, Relief 4, Light Top.
- Again click the new effect layer icon and choose the ‘distort folder’. Select Glass from the menu. Distortion 2, Smoothness 4, Texture – Frosted, Scaling 50%. Click OK.
- Next, we’ll enhance the strokes by embossing a copy of the layer. Duplicate the original layer. Convert it to a smart object. Place it above the Oil Paint layer. Go to Image > Adjustments > Black and White to desaturate the image.
- Choose Filter > Stylize > Emboss Angle 180 degrees, Height 7 Amount 40 (see Figures 14A, 14B).
- Change the blend mode to Vivid Light (see Figures 15A, 15B).
- Because you converted your layers to smart objects you can go back to make adjustments and tweaks by clicking on Filter Gallery under the smart filter mask. If you want more detail, reduce the Glass filter settings, or play around with each filter to get the best possible results.
Tutorials
Painting on a computer is all the rage these days. Many illustrators have abandoned their paint boxes and brushes and work exclusively on computers primarily because it is so easy to make changes at any time during the workflow. The simulated effects of wet media based artwork can be extremely convincing.
It’s really irrelevant which software you use. The freebees certainly offer enough to get you started and the big packages are an entire art store in a box. You can find dozens of tutorials online that produce other types of oil painting effects using additional filters and brushes. There are also tutorials for watercolor, marker and even fresco effects. Researching information and exploring new methods always pays off and painting on a computer is fun and satisfying. As usual, I encourage you to experiment with different techniques that combine multiple filters, brushes and colors.