CorelDRAW Tips and Tricks: Creating realistic mock-ups
In the December issue of A&E, Shon Roti, owner of 9inthStreetDesigns, demonstrates how to give clients a glimpse of the final product.


There is nothing better than word-of-mouth advertising. So, when I received a call from Rudy, a new business owner in my hometown, and he said another client of mine recommended me, I was eager to engage and impress.
As a new business owner, I assumed Rudy would need all kinds of promotional products to help brand the business. Fortunately, I was right. Rudy was on the cusp of opening a wine bar downtown. He was looking for someone to laser engrave bar tables with his new logo. Social media was his motivation. Rudy explained that customers often take photos of their glass of wine to share with friends, and he thought it would be great if his logo was beside that glass of wine. “Genius,” I thought to myself. “What a clever way to get some free advertising!” I was more than happy to help.
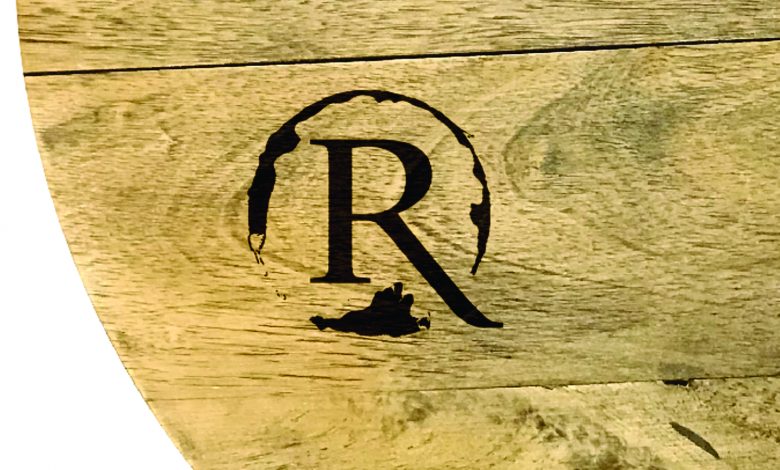
But, before I could begin, I wanted to create a mock-up to provide this potential client with a glimpse of what the final product would look like. After a brief discussion of his ideas for the tables, I rushed back to my store to create the mock-up. Figure A shows the mock-up I first sent to Rudy. Figure B shows the final result.
Mock-ups are a good idea for several reasons.
1) Mock-ups expedite the approval process. It can serve as the proof for approval.
2) Mock-ups ensure both you and the client are on the same page. The client understands what he is getting. In this case, he approves the size and placement of the logo.
3) Graphically speaking, I wanted Rudy to understand I possess the necessary design skills that could be put into play for other projects. The same goes for your business.
4) Price is perhaps the most important reason to do a mock-up in this instance. I wanted to get the client excited about the project prior to sharing the quote. I knew once he saw his new logo “burned” into the table, he couldn’t say no. (It doesn’t hurt that I was the only local guy with a laser that could handle such a large object.)
MOCK-UPS CAN BE BASIC OR ELABORATE
Because time is money, spending a substantial amount of time creating a mock-up may not be worth the effort, but this tutorial offers a way to create mock-ups with increased efficiency.
In this tutorial, I use several tools and techniques within CorelDRAW (version 2017). The tools and techniques used are not unique to version 2017, however. Older versions can accomplish the same outcome, although the tool placement and look may have changed in previous versions. The first step in creating Rudy’s mock-up was to make sure the logo was ready for production. He sent me a high-resolution JPEG, which needed to be turned into a vector graphic. CorelDRAW excels at this. Here’s how I did it.
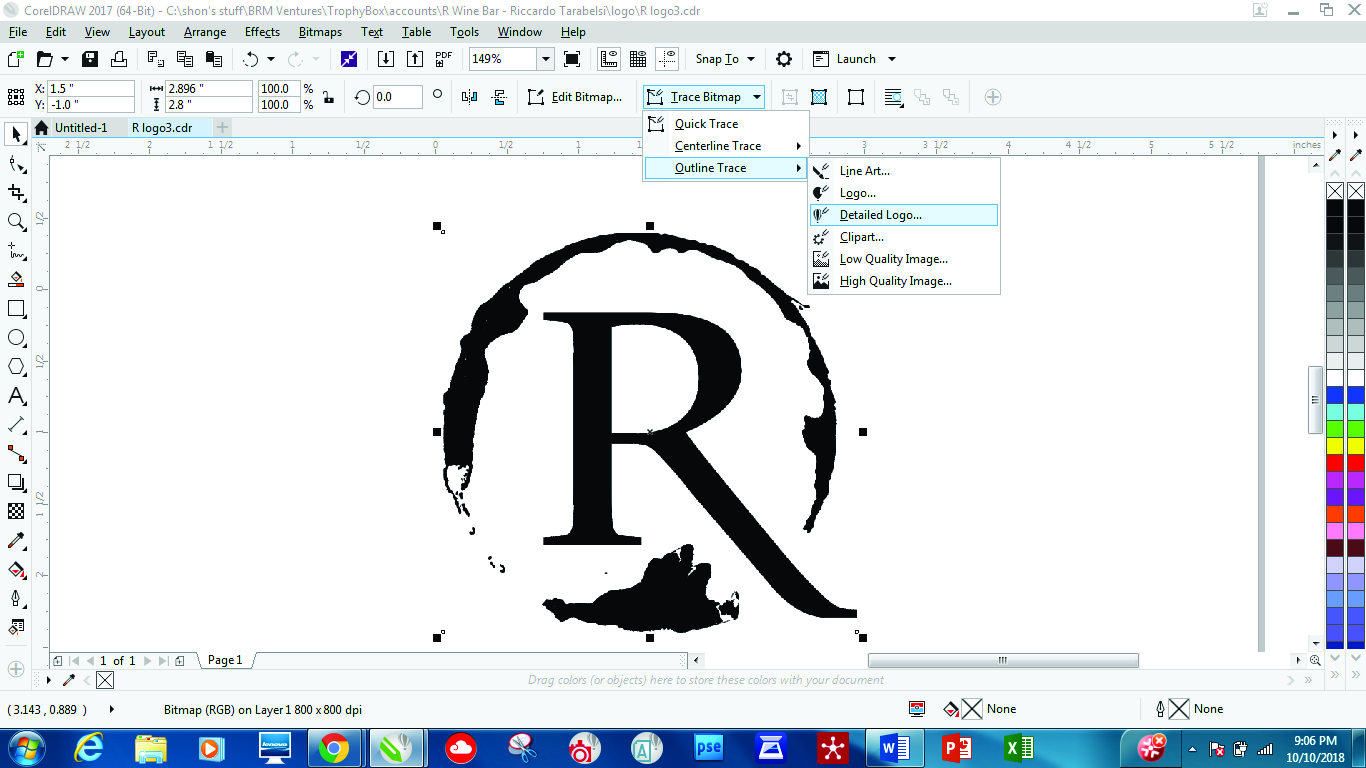
First, import the artwork into the workspace (Ctrl+I). With the object selected, go to Trace Bitmap>Outline Trace>Detailed logo (Figure C). This option allows for a significant amount of control over the rendering of the image. If you’re asked to reduce the bitmap size before this option is launched, do so.
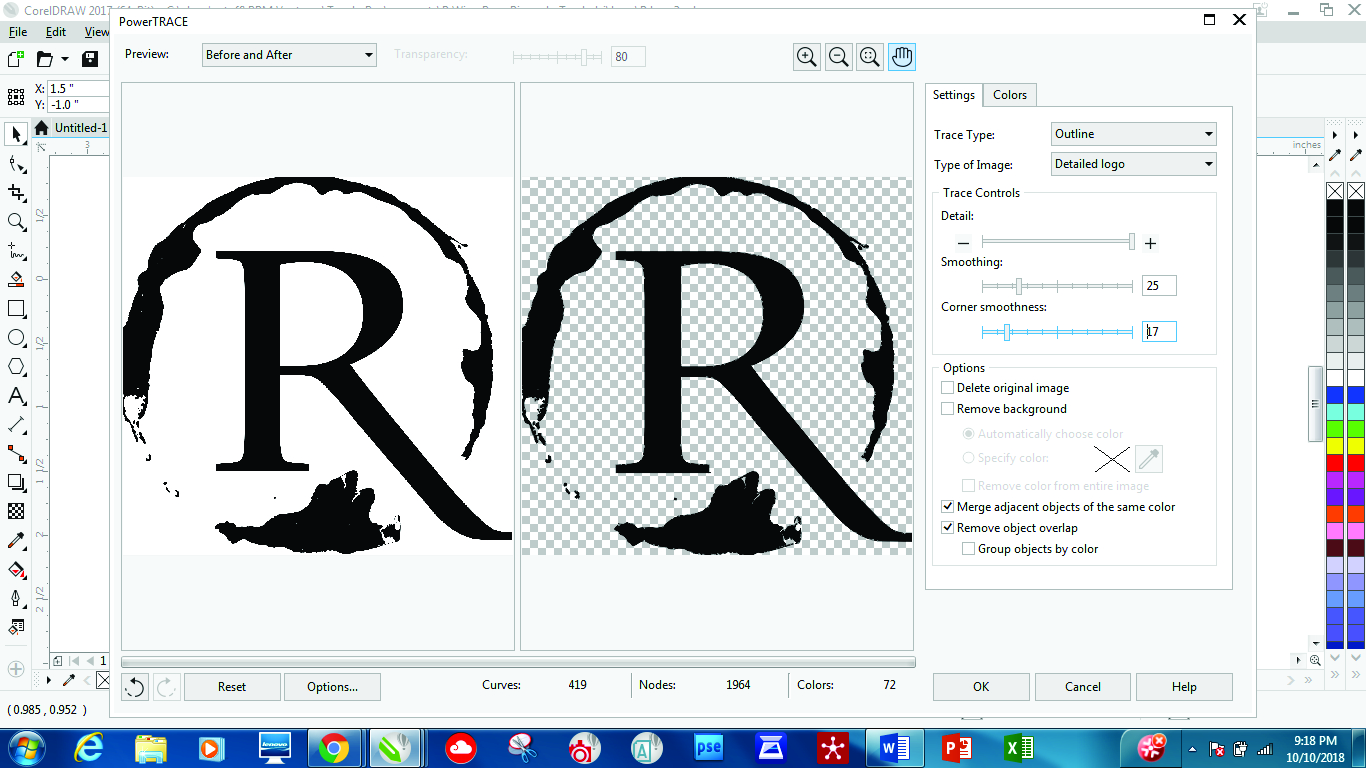
Because the JPEG image provided was black and white, many of the variables that go along with a full-color logo using this tool were irrelevant. For this artwork, I simply adjusted the Details slider to the maximum and positioned the sliders for Smoothness and Corner smoothness about a quarter way to the right (Figure D). If you’d like to get a closer look at the smaller details, left-click on the image on the left to zoom in; right-click to zoom back out. Click OK when you are satisfied with the rendered results shown (vectorized image on the right).
I could spend an entire article discussing this powerful tool, but for now, the best way to understand how this tool works is to zoom into the image and start playing with the sliders to see how it affects the image.
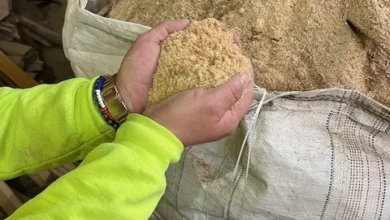
The next step could not have been possible had I not taken a photo of the bar stool before leaving Rudy’s bar. Fortunately, I had already planned on creating a mock-up for him, so it was at the top of my mind during my visit. It’s always a good idea to take the before and after photos of custom objects prior to production, even if you’re not going to do a mock-up. You can always use these photos for PR/social media.
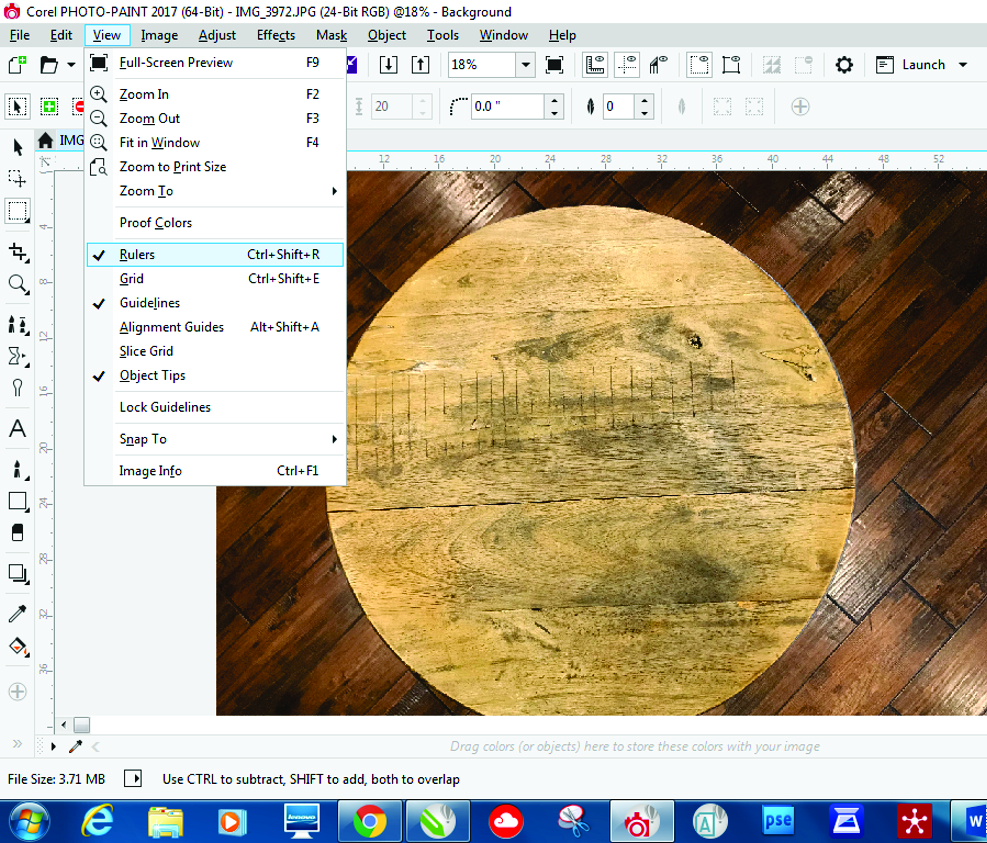
I wanted to remove the background from the table photo, so I used Corel PHOTO-PAINT to do so. Because the table is an almost-perfect circle, I used the Ellipse mask to select the table. To do this, open the image in PHOTO-PAINT. If rulers are not already in the workspace, add them by going to View>Rulers (Ctrl+Shift+R) (Figure E).
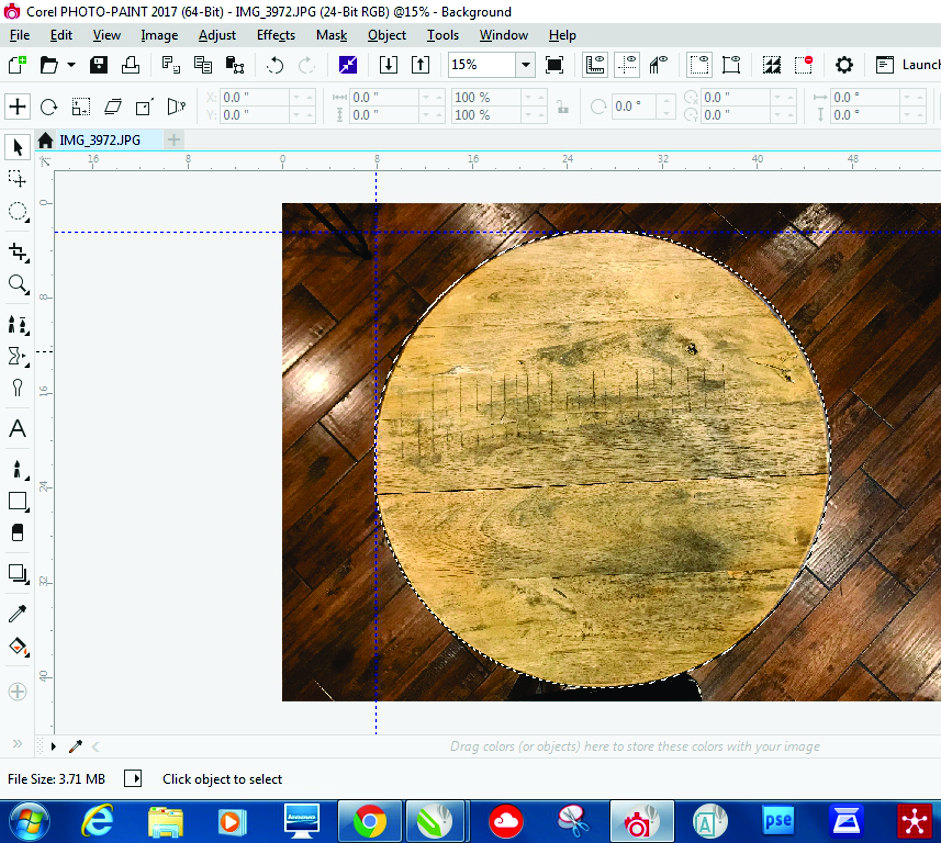
Using the Pick tool, drag a guideline from the top and left rulers and bring them to the edge of the table. Now select the Ellipse tool and click at the point in the upper left corner where the guidelines intersect and drag to the opposite corner until the entire table is encompassed by the mask (Figure F). Copy (Ctrl+C) the selection and go to File>New from Clipboard (Ctrl+Shift+N). Now, a new file is created containing the image without the background. To preserve the transparent background, save the file as a PNG file, being sure to check the box next to Transparency (Figure G).
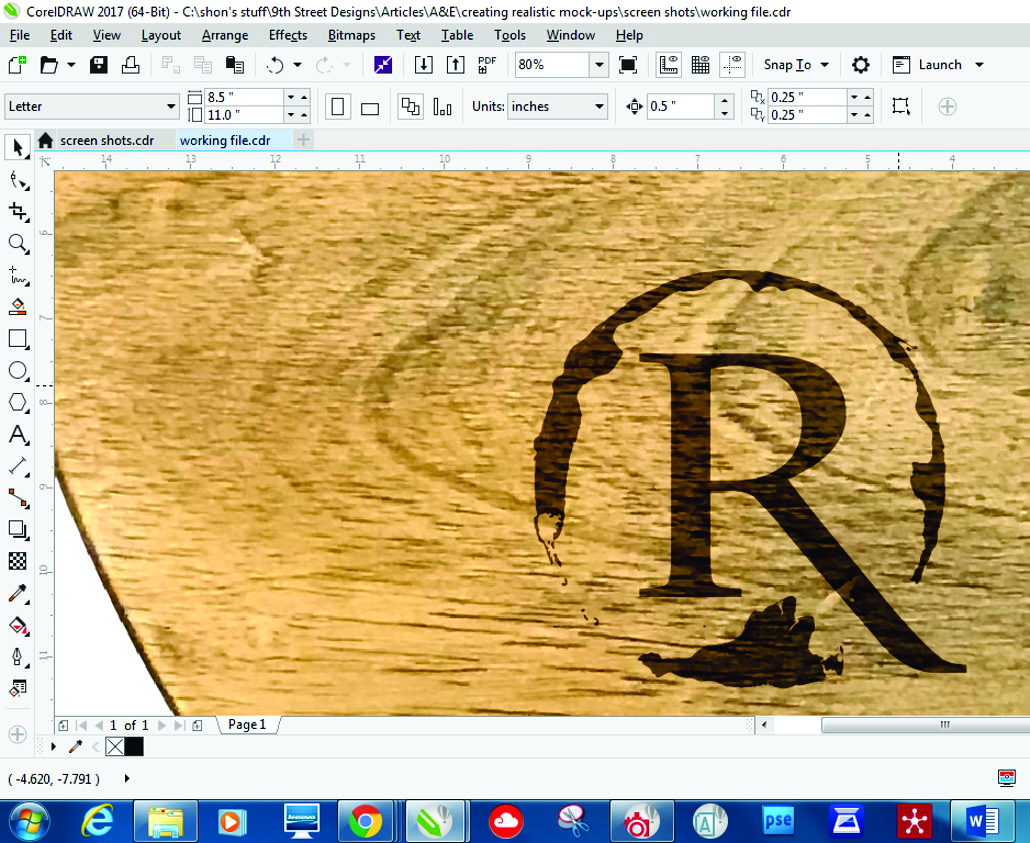
Next, go back to the CorelDRAW workspace and import the new image, and then position the newly created vector logo on top. Resize the logo for proportionality if needed. This logo will remain an RGB black – R:0. G:0. B:0.
Now we need to make the logo look like it was lasered into the table. We use a couple of tools and techniques for this. One of the tools I employ is a Merge Mode. A Merge Mode changes the way an object or layer looks with object or layer beneath. There are many types of Merge Modes, but the one that I used in this mock-up is called Subtract. Make a copy of the logo, paste it, and set it aside for the moment. We will need this duplicate copy later for another step.
Select the logo on the table, click the Transparency tool, and select the Uniform Transparency option in the Property Bar (Figure H). Click on the dropdown menu in the Property bar and select Subtract. Notice how the logo becomes a slightly darker shade of the wood below. If the logo needs to be darker, simply copy and paste this logo on top of itself until the logo matches the expectations of what the lasering will look like (Figure I).
I could have stopped at this point, as I think that this would give the client the gist of the outcome, but it lacks the depth that a real lasered logo would have on a wood table. So, bring back the copy of the logo set aside earlier, and place it next to the other stack of logos. Copy and paste this logo on top of itself but change the color to white. Deselect the logo. In the Property bar, change the Nudge Distance to .005. Now select the white logo and use the arrow keys to nudge the logo down and to the right.
Repeat the arrow key movements until you see a black sliver of the logo beneath. Now select both the white and back logos and use the Trim tool located in the Property bar (Figure J) to remove the white logo from the black logo. Delete the white logo to reveal a new black sliver of the logo (Figure K). Move the logo sliver over to the other stack of logos until it reaches the left side (Figure L), and voilà – depth effect created!
I then used the Snipping tool (a non-Corel tool located in the Programs of the PC) to take a snapshot of the results and emailed them to the customer. I was given the project by Rudy that same day.
To be sure, there are numerous ways to get to the results needed for this mock-up. This tutorial represents a technique that is not too elaborate, looks realistic, and is fairly simple to accomplish.
Word-of-mouth advertising works when we put our best foot forward.