One way to approach color separating is to properly prepare each image to reach a few common standards before you even begin to separate it. Once you decide if any color correction needs to be made to an image, it’s the printer’s preference how to get it done as quickly as possible.
Photoshop is the most popular tool for color correcting photos and bitmap illustrations. There are several tools in Photoshop that can save hours if they are used conjunctively to limit a color palette and smooth out problems in images. A good starting place is to consider the fastest way to isolate the problem in the image and then the quickest way to generate an acceptable solution.
Within Photoshop, there are many tools to isolate an area or select a particular area in a graphic. The most common tool to select an area of a similar color that is touching is the magic wand tool. This tool is also super helpful to select pieces of positive and negative space in typography to edit out elements or change background pieces quickly. Pay special attention to the tolerance setting in the property bar. This bar includes tool-specific options below the top command menu. This setting dictates how much of the edge will be included in the selection that you click on, so it can affect whether you get too much or not enough. Using the shift and alt keys in conjunction with the magic wand allows you to add and subtract to areas that you have selected.
A great way to quickly select a color to correct when screen printing is to use the Color Range command. You will find this command under the Select/Color Range dialog. You can open this tool and then use the eyedropper to select a color or range of colors in your image that can then be defined as a selection.
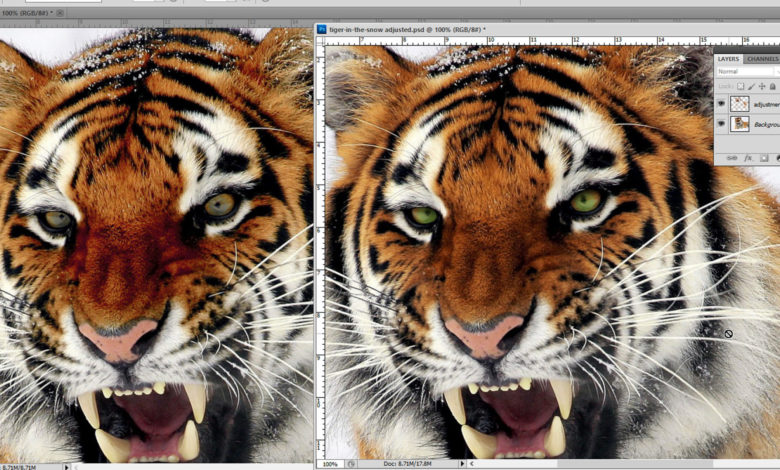
In the tiger image shown here, the orange fur was selected using the color range tool to be averaged and then color edited, so just one screen would be needed in the final print for that color. Other colors in the image were then selected as well. An efficient way to edit the image was used by selecting a specific color, and then the final selection was copied and pasted to a new layer in the image on top of the original. This new layer was then edited using the hue/saturation command dialog and selecting the “colorize” box option that forced the defined layer to the same color family. Since the corrected element was on a new layer, it could be blended into the original if the edit was too much of an adjustment without damaging the source file.
Each area of an image can be selected using a similar method or combination of the magic wand or the color range tools and then edited to compress the hues to a similar set of colors or edited to look correct. However, it should be noted that some images and color correction jobs will require a much more painstaking process.
Sometimes the image doesn’t have a simple flat color, or it may have a busy background that needs to be isolated from the foreground elements. In these cases, the decision must be made whether it is worth creating a shape using some of the artistic tools in Photoshop, or detailed path creation tools, such as the pen tool. Sometimes, the work can be overwhelming, such as a model with their hair blowing around, creating hundreds of tiny negative shapes. These are cases where some practice with path creation tools inside of Photoshop will save hours. In a worst-case scenario, it can be beneficial to have a trained Photoshop artist available, so you don’t have to spend days on a graphic. Instead, you pay someone for a couple of hours and bill the client.