I assume we all get our cars serviced regularly, based on mileage, usage, and time. How we use our vehicles will determine how and when we decide to get maintenance carried out. Similarly, our laser engravers require regular maintenance. They are precision machines, so it’s vital that this is done regularly. As with our cars, we can decide whether to do the work ourselves or have a dealer-recognized technician do it. As I’ve mentioned in previous articles, I have always used engravers from one manufacturer, so I only have these machines to use as a reference. Regardless, the essentials will be very much the same.
Basic routine laser maintenance
Depending on what you’ve been engraving and for how long, basic maintenance will be carried out on a varying schedule. I try to perform the basic stuff on a weekly basis, but if the machine has been working very hard, or if I’ve been working on a lot of “dirty” materials, such as certain plastics, I’ll do it sooner. Another indication that cleaning is required is the quality of the final result. Dirty optics will produce poor engravings.
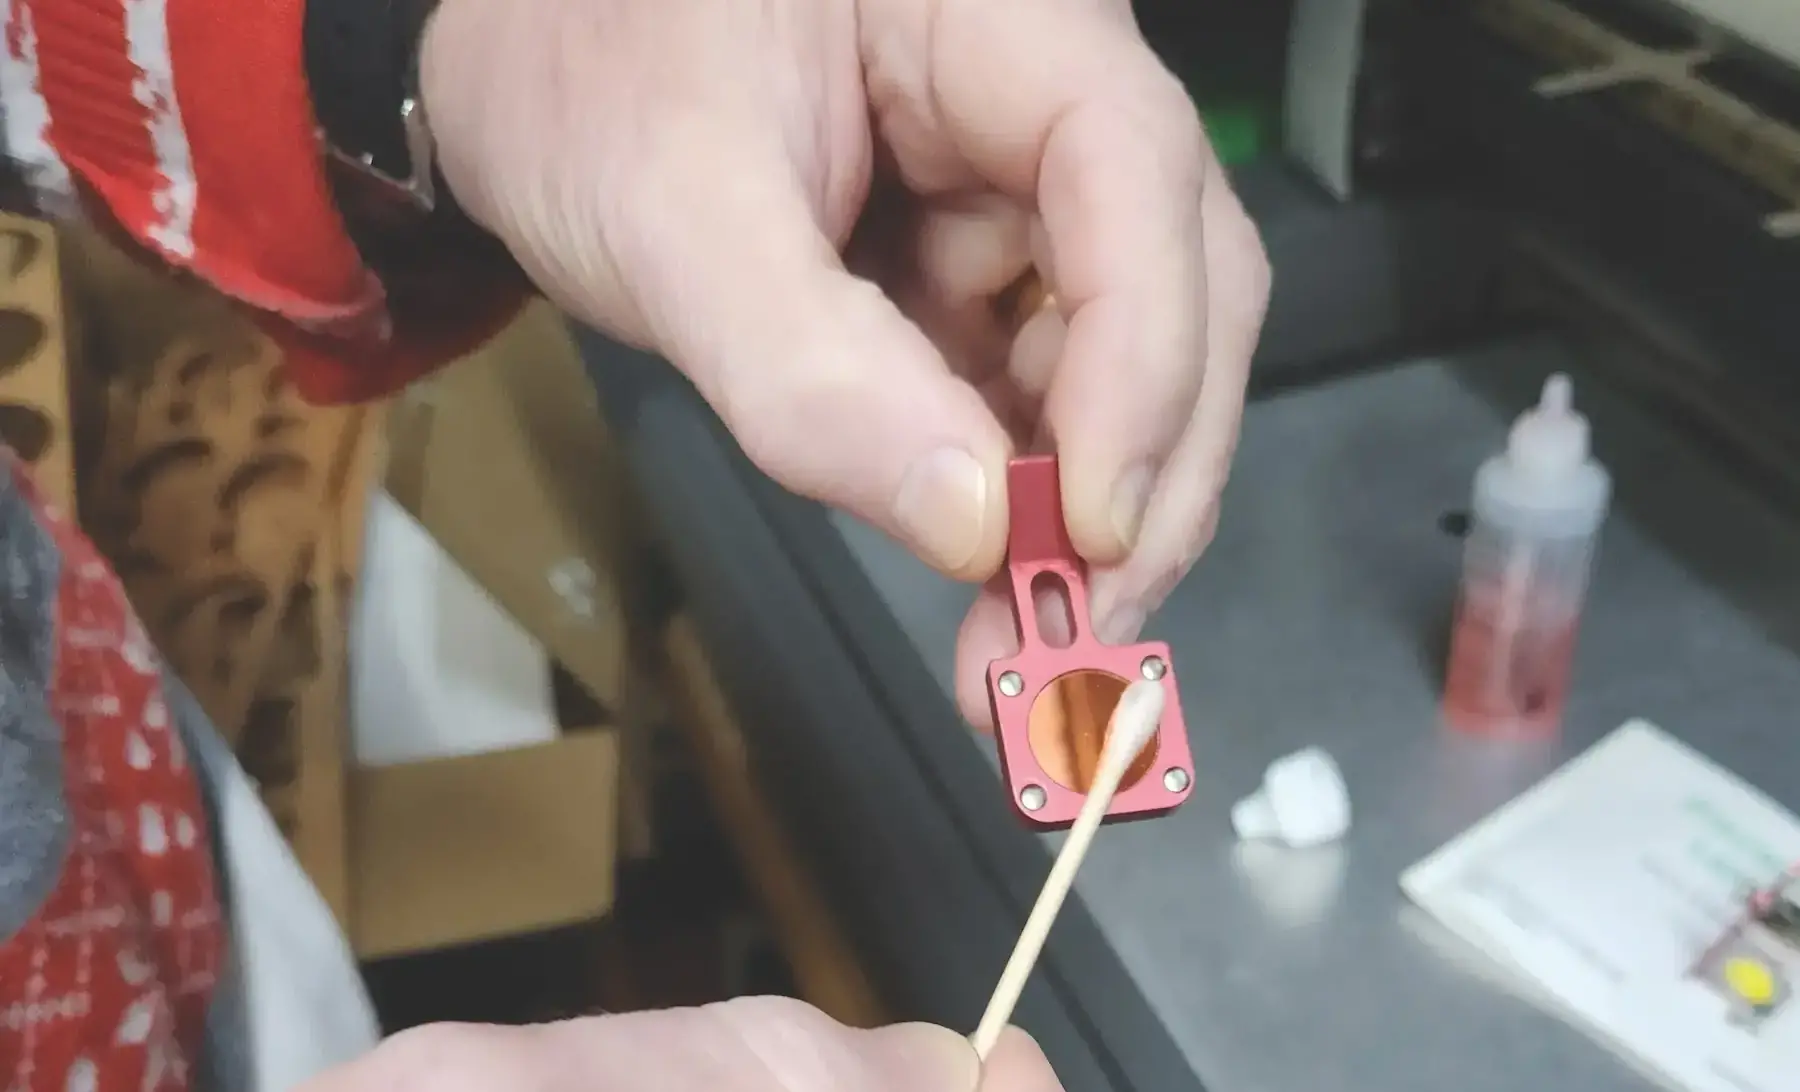
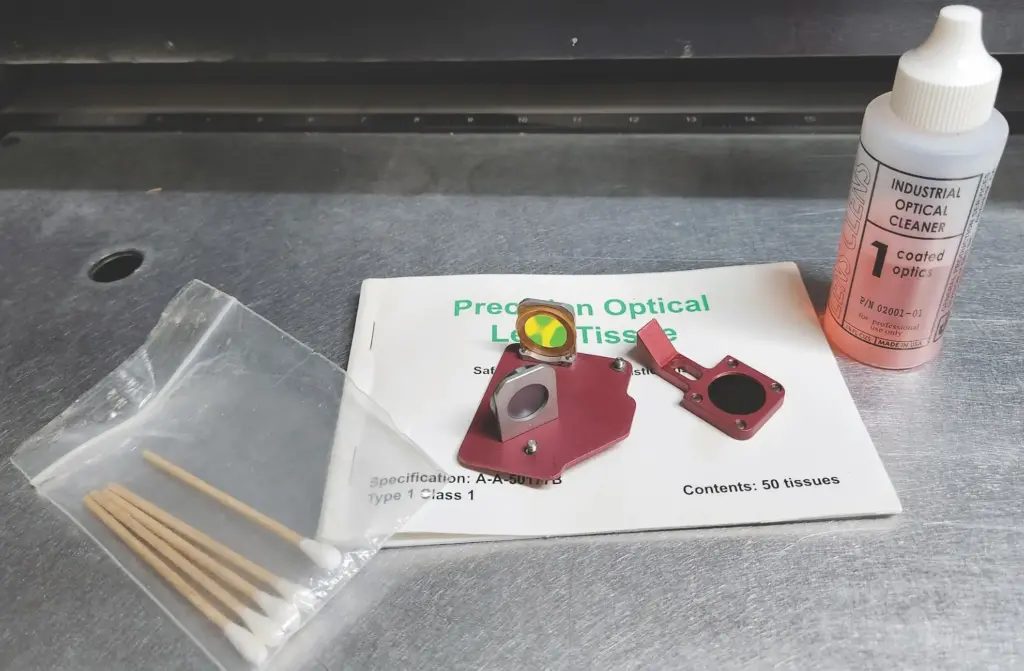
So, this will mean cleaning optics, rails, and drive belts, as well as clearing out the debris created during engraving or cutting. To clean the optics, you’ll need some cotton swabs or cotton buds, lens-cleaning solution, and a lens-cleaning tissue. These will be available from your machine’s manufacturer or from one of the suppliers you already use for other consumables.
Depending on your machine, you may need to partially disassemble the optics housings to get good access to the mirrors and lenses. Apply the cleaner using a cotton bud and use the cleaning tissue to dry off the lens. It is recommended that you do this keeping to one direction. If you go back and forth, or around in circles, you run the risk of harming the optics by dragging a contaminant or something potentially abrasive across the lens.
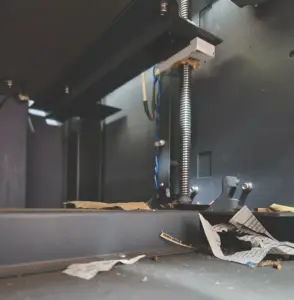
While you’re doing the optics, you might as well clean the bed, tracks, and drive belts. Residue will build up on these components and can contribute to any number of issues, mainly premature bearing wear and poor engraving. You can use a mild soap solution, denatured alcohol, acetone, or other mild cleanser to clean the bed. Do not use acetone, denatured alcohol, or any other solvent on anything except the bed. Do not use lubricant to clean the tracks or the belts — a mild soap solution or other mild cleanser will be fine.
If you have a “closed” frame machine, remember to clean under the table. There is the risk of a fire starting if there is too much debris lying around. A shop vacuum followed by a simple hand brush and dustpan will quickly remove the material. While you’re at it, clean the lead (drive) screws. Make sure there is no junk sticking to the threads. I use a simple silicon grease (small tubes of garage door lubricant works great) to lubricate the threads. Silicone or PTFE spray and white lithium grease also work well.
That takes care of the most frequent items. For less frequent maintenance, refer to your machine’s manual. Requirements may change from manufacturer to manufacturer — I’ll talk about my machines in particular.
Other maintenance
I have no need to adjust the bearings or drive belts. The bearings will self-adjust as they wear, and the drive belts are fiber-reinforced so there is no need to adjust tension under normal use. Lubrication is only necessary for the lead screws. Applying this anywhere else can lead to the bearings binding up due to debris sticking. Clean the old lubricant from the lead screws and, after applying fresh lubricant, run the table up and down a few times to distribute it evenly.
It may be necessary to upgrade the electronics periodically. These updates will be provided by the manufacturer. On my machines, I can install updates directly from the control panel, with any adjustments being applied automatically, but it may be necessary to download and apply any necessary changes by some other method.
If there are any batteries installed, I’d recommend changing them annually.
Closed-frame machines will have cooling fans fitted. Their filters, usually a fine foam material, need to be cleaned periodically to avoid building up any contaminants in the ambient air. Note: never run the machine with these filters removed. A simple soap solution is perfect for washing out the filters. Let them dry before reinstalling.
These steps are easily carried out and don’t require any specialized training or equipment. However, there are some additional maintenance items that you may or may not want to bring in a technician for.
Checking that the machine bed is level is relatively easy. If you think your machine is not level, a simple bubble level is all you need to check. On my machines, there is a sub-routine that can be utilized through the control panel to check that the bed is level over several points. If the bed is off, the lead screws are adjusted as necessary using the appropriate Allen key (also called a hex key).
If your business runs anything like ours, January is generally very quiet after all the fun of the holiday season. This is when I like to take care of the more involved maintenance items — since I can afford to have the machine out of action for a longer period of time if necessary. It doesn’t matter how you schedule your maintenance checks, because to a great extent, your machine will tell you when checks and adjustments are necessary. Above all else, it’s important to ensure your machine is clean.