The process to create a foil print using a vinyl cutter and heat press is simple.
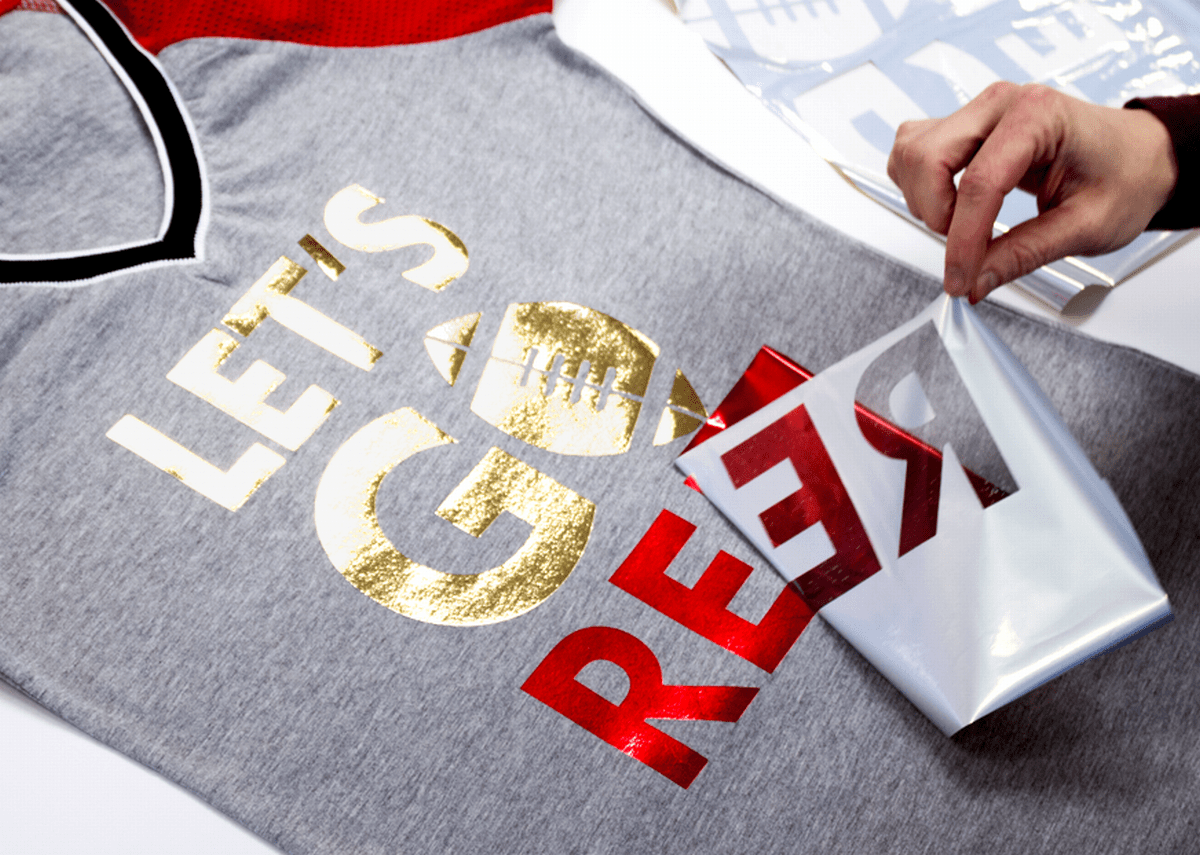
- Cut a graphic from an HTV adhesive roll in a mirror image.
- Weed away the unwanted components from the graphic.
- Flip the graphic over, adhesive side down.
- Heat apply to your fabric item of choice, removing the carrier when complete.
- Heat apply a foil overlay sheet on top of the adhesive in the desired foil color.
In concept and practice, the process is straightforward. However, just like screen printing foil, there are steps to ensure top-notch efficiency and quality.
First, when cutting your graphic from the adhesive roll, ensure that the blade is set properly. Remember, the adhesive is quite thin so it feels soft when applied to the garment. Minimal blade extension and downforce is required when cutting with a vinyl cutter. If you cut too deep, you will have challenges weeding the design.
Next, when weeding, position the clear, milky adhesive on top of a dark-colored base to make it easier to see the cut lines. Ensure that small, unwanted pieces of adhesive make it to the garbage and not back onto your design. To speed up weeding, use a heated weeding table.
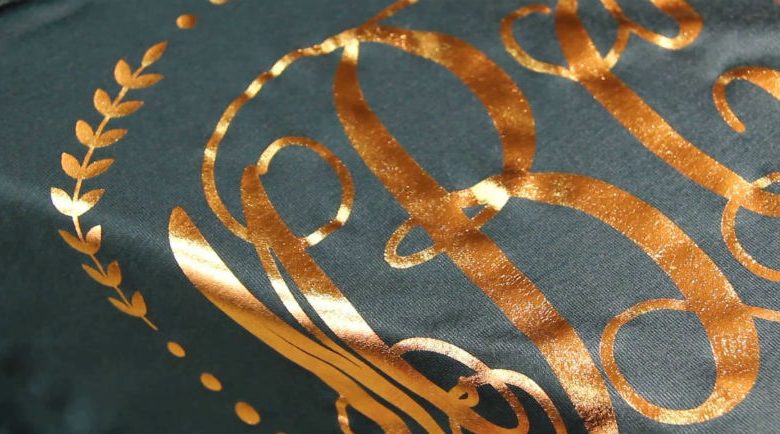
The goal is to keep the adhesive as smooth on the garment as possible to prevent fibrillation and pinholes, appearing in the foil layer. To achieve this, heat apply the adhesive with very light pressure.
The next step is to consider the item you’re working with. A blank garment with a tighter weave will deliver better results. While noticeable only at a microscopic level, a premium ring-spun cotton blank will perform much better than open-ended, carded cotton that’s typically a value price item. Also, blends that contain rayon, polyester, modal, and other synthetic fabrics tend to perform well when trying to achieve a clean foil print. Just ensure these fabrics can receive the temperature needed to adhere to the foil, typically 300 degrees F for 10 seconds, without scorching.
It’s recommended that firm pressure is applied when pressing the foil, as well as good contact and coverage of all areas of the foil. After 10 to 15 seconds of heat and pressure, the foil will bond. It’s critical that the foil remains in contact with the adhesive until the adhesive has cooled down to room temperature. At this point, the foil sheet can be removed, and a bright, mirror-like finish will be left behind. If a low-luster finish is preferred, press the foil area an additional time for 5 seconds with a cover sheet.