Fiber Lasers: A How-To Guide to Tumblers
If you shy away from marking stainless-steel tumblers, check out this feature from the November issue of A&E.
Note: This article appears in the November issue of A&E magazine. To ensure that you can access this and other industry-focused pieces, be sure to subscribe today!
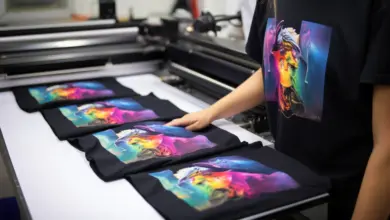
I don’t know about everyone else’s market, but my market has an insatiable appetite for stainless-steel tumblers. Before adding my fiber laser (Radian RL-GT3 60 Watt Mopa), I would shy away from taking orders that required me to use my CO2 lasers for metal marking. The prep time, machine time, clean up time, and costs of the metal-marking solution caused me to decline such orders.
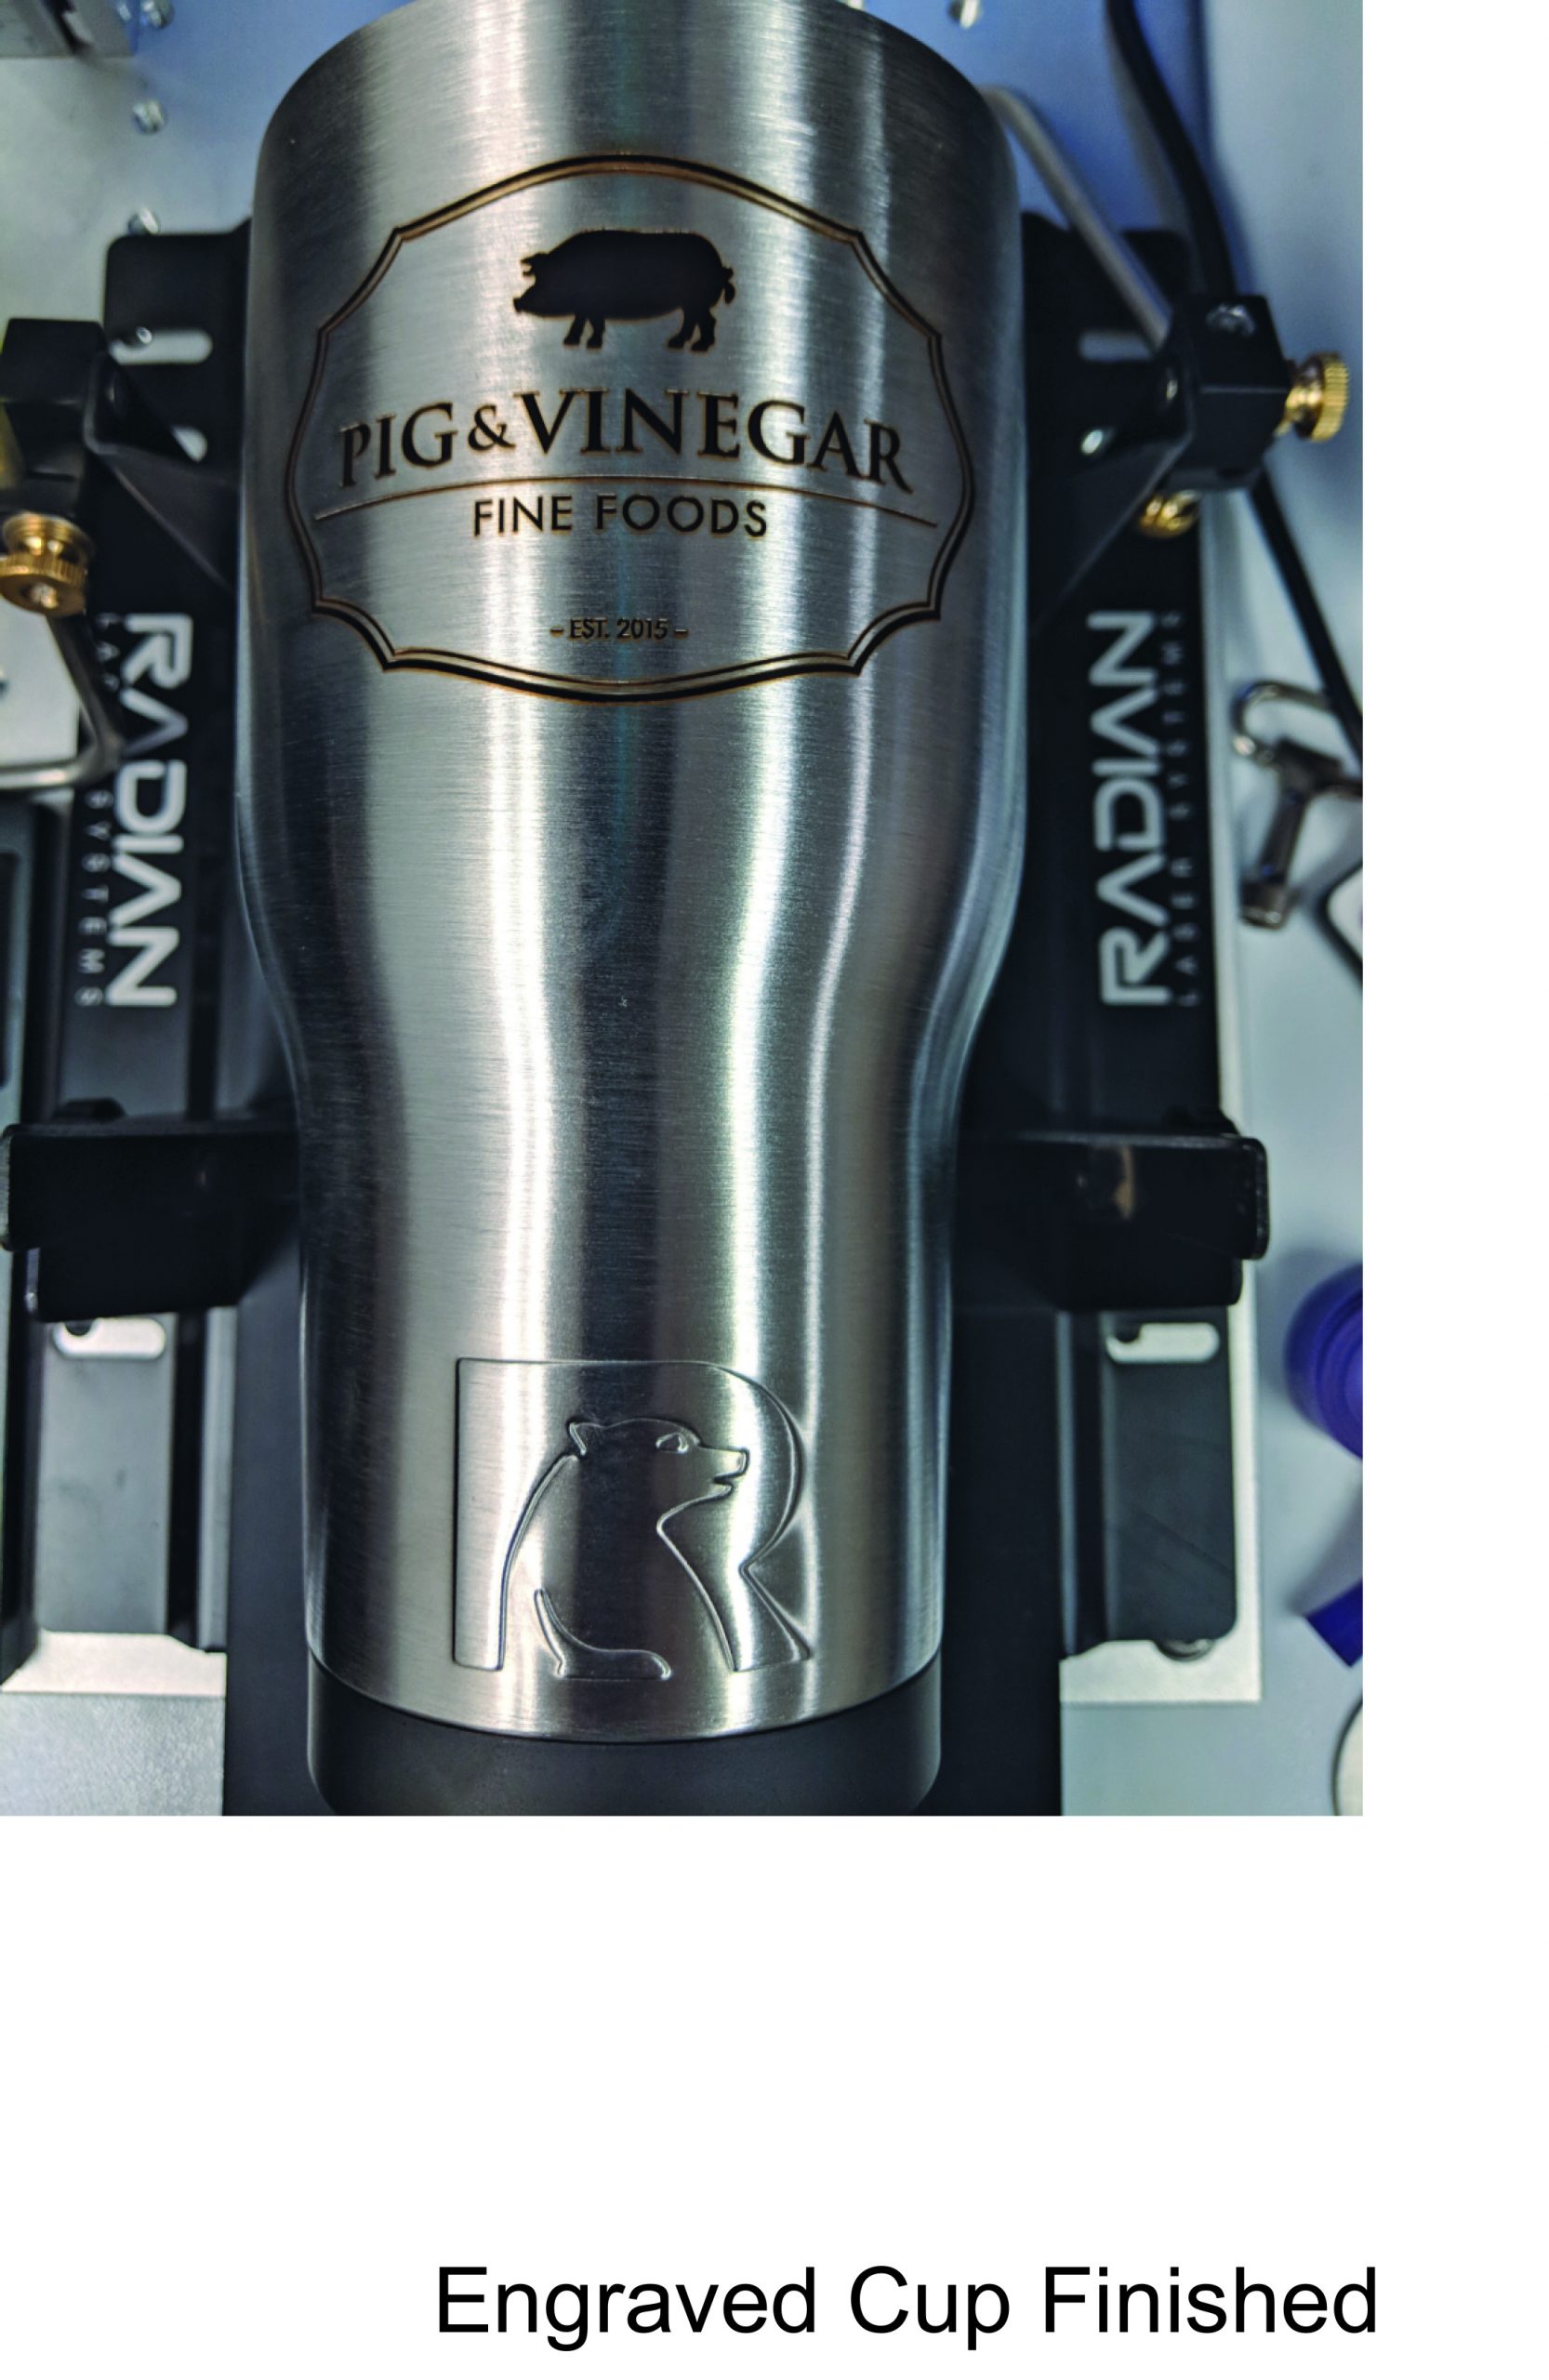
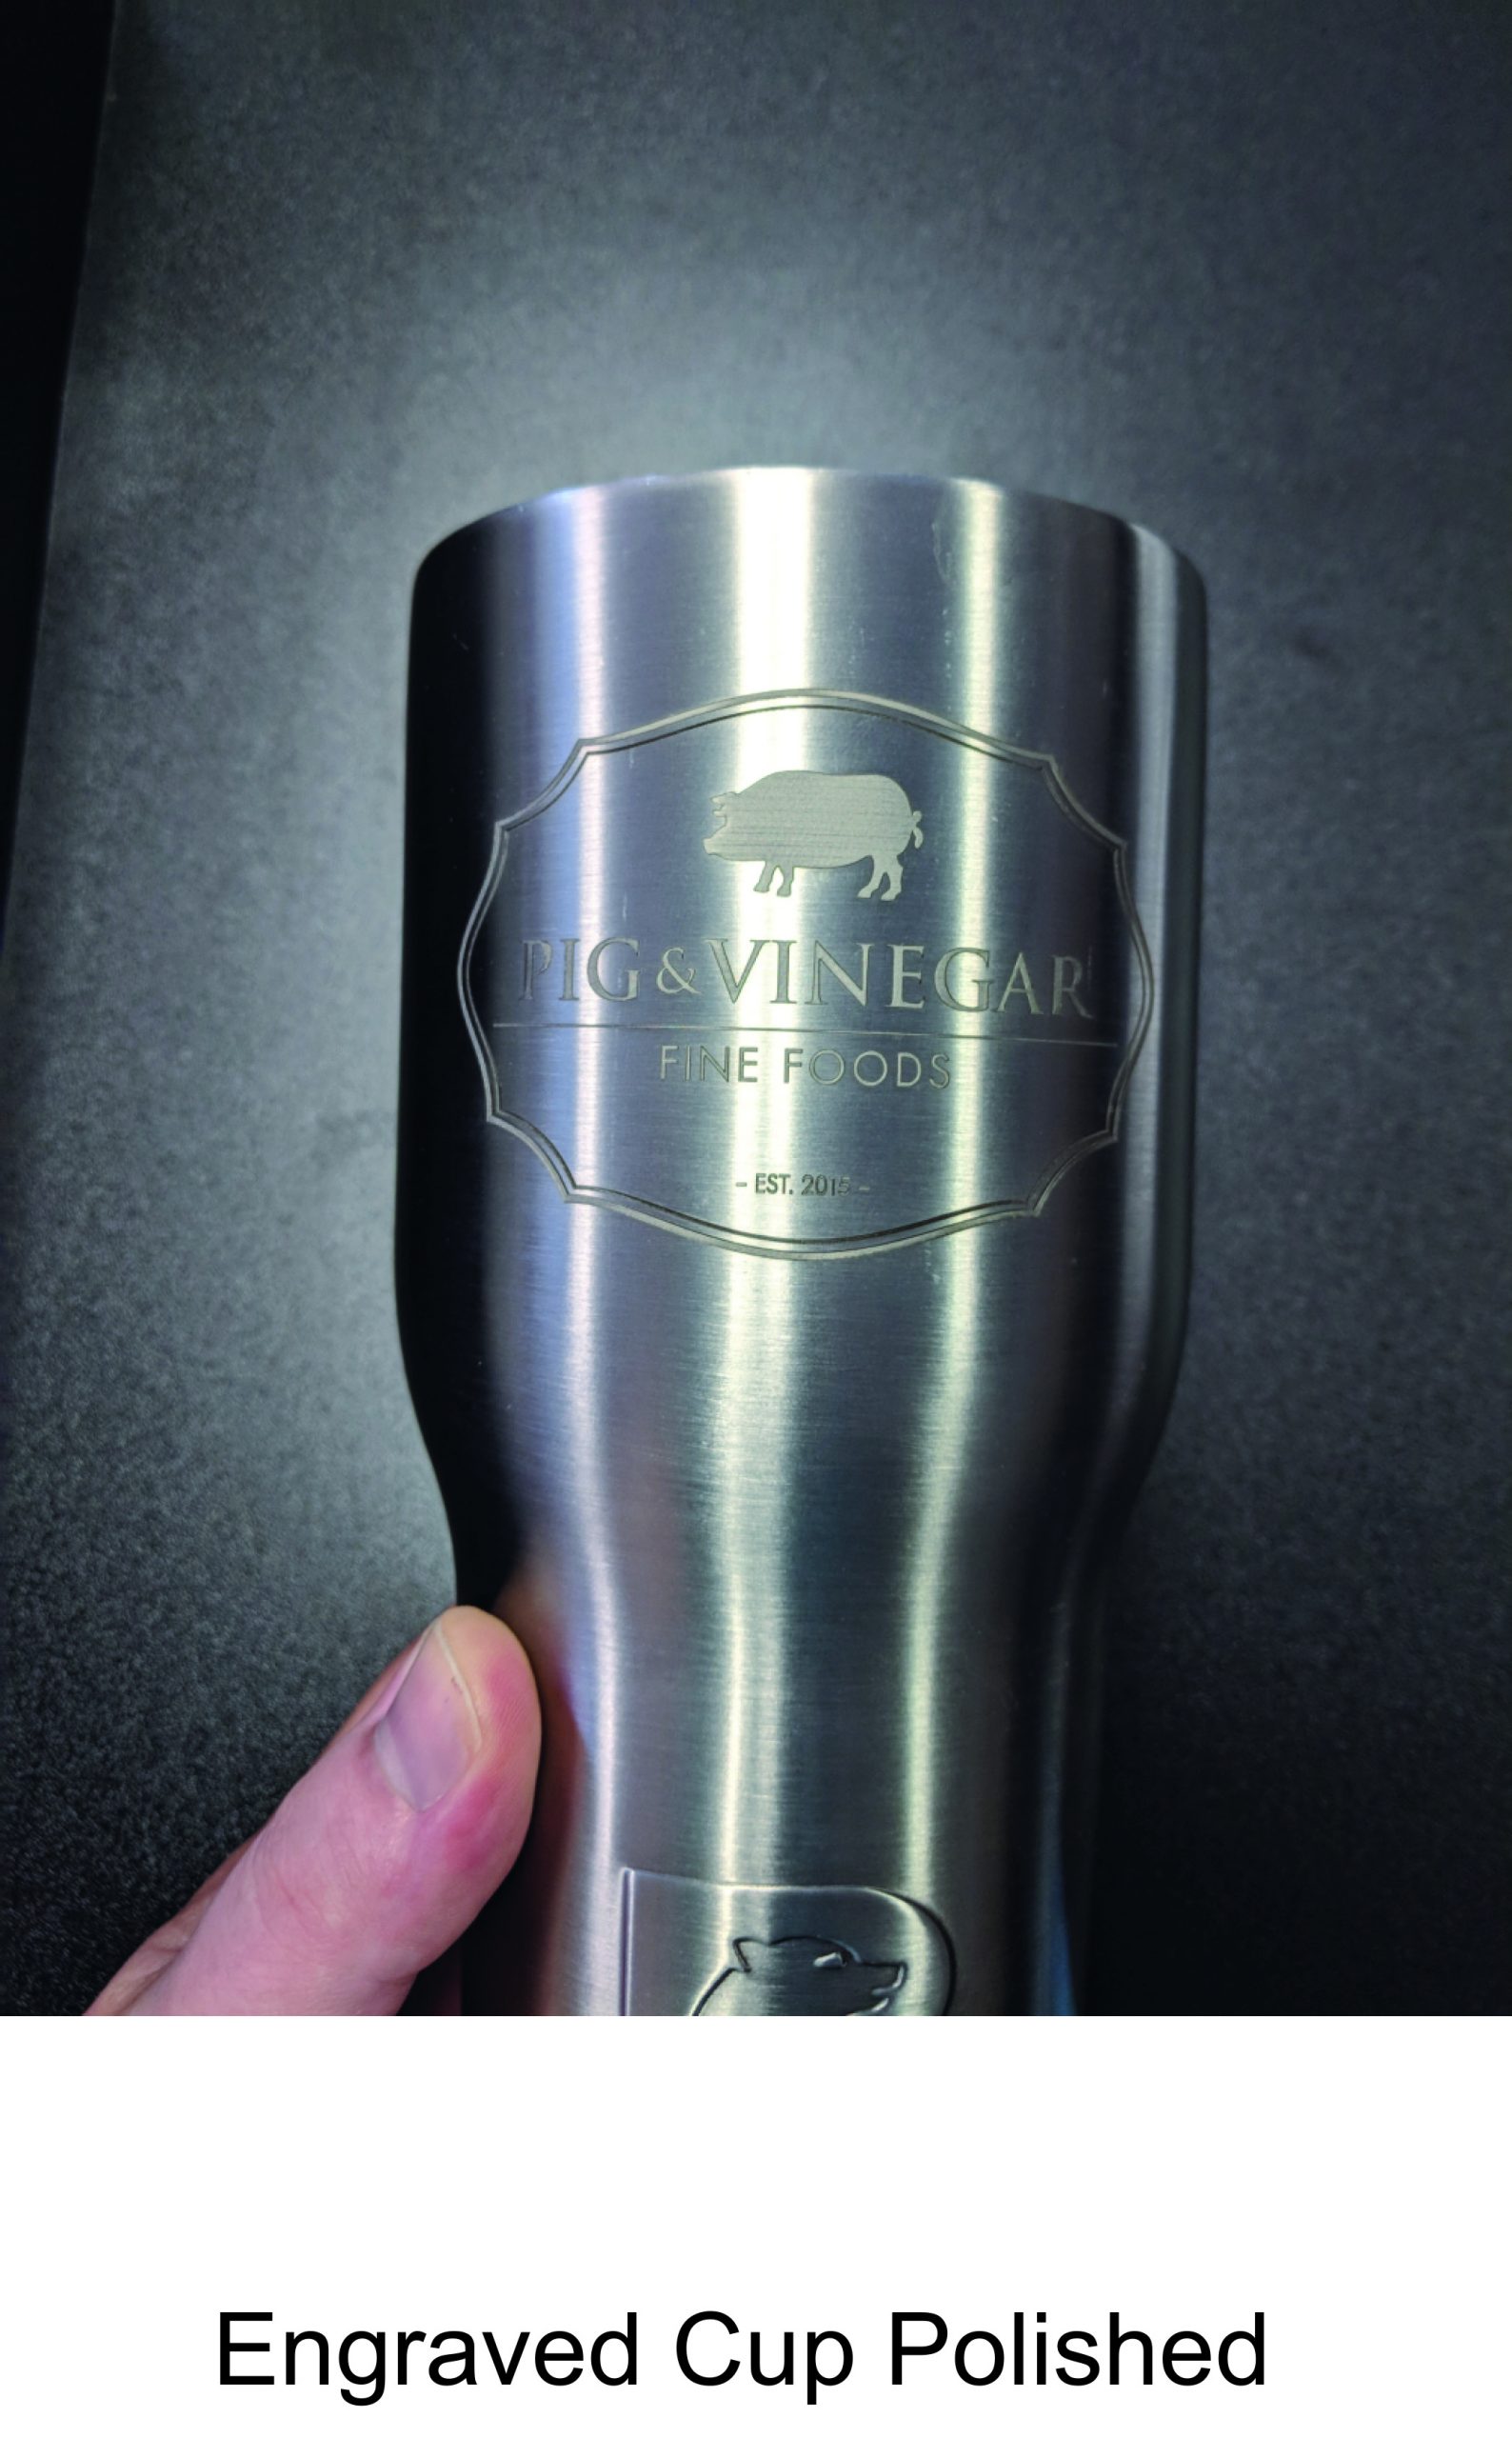
I am happy to say that now my engravings are fully permanent, and short of using a grinder, they are impossible to remove. With one pass on our fiber laser, we have a beautiful black engraving cut into the stainless steel; with a second pass, we can remove the black, utilizing a polish pass that leaves a stunning engraved silver mark. Our galvo laser is definitely the right tool for these jobs!
As I mentioned in my first article (Fiber Lasers: A Beginner’s Guide, September page 28), a major factor in my purchase decision was that Radian’s galvo lasers have a 3-D option for the engraving. This option isn’t just for carving a 3-D design, but rather to engrave around 3-D objects without having to use a rotary system. With this feature, we can engrave 55 degrees off center without rotation. I admit that I was initially skeptical to such a claim, but I can now attest that this feature works and is a major time saver.
Now, let’s get into some how-tos when using this equipment. Since tumblers are so popular, I thought it fitting to go through the steps to complete this project using the fiber laser.
ART SETUP
As with all engraving, your artwork needs to be set up properly to engrave properly. I like to use CorelDRAW for my editing needs, but feel free to use the program that you are most comfortable with that allows you to export an AI file.
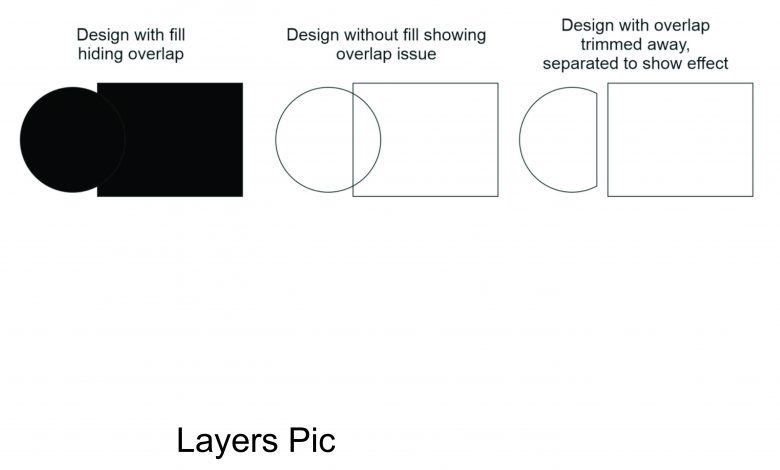
To start, I open the design in CorelDRAW and remove the color fill, and then add a hairline outline to the design. My goal here is to make sure there aren’t any hidden elements that will have a negative effect on my engraving. If there are overlapping elements hidden by a color fill, this may show when engraving your design into metal. Generally, if I find overlapping elements, I use the Trim feature in CorelDRAW to remove the bottom element and preserve the section that is on top.
In the first photo below, you see that when filled, the circle and rectangle look like a clean design, but in hairline mode you can see that the circle cuts through the rectangle and if ran, your engraving could show this as well. Using the Trim feature, I removed the excess amount of the circle and got clean lines for my engraving. To send the image to my engraving software, I saved it as an AI file and then imported it into the Radian Laser Studio software.
ENGRAVING SETUP
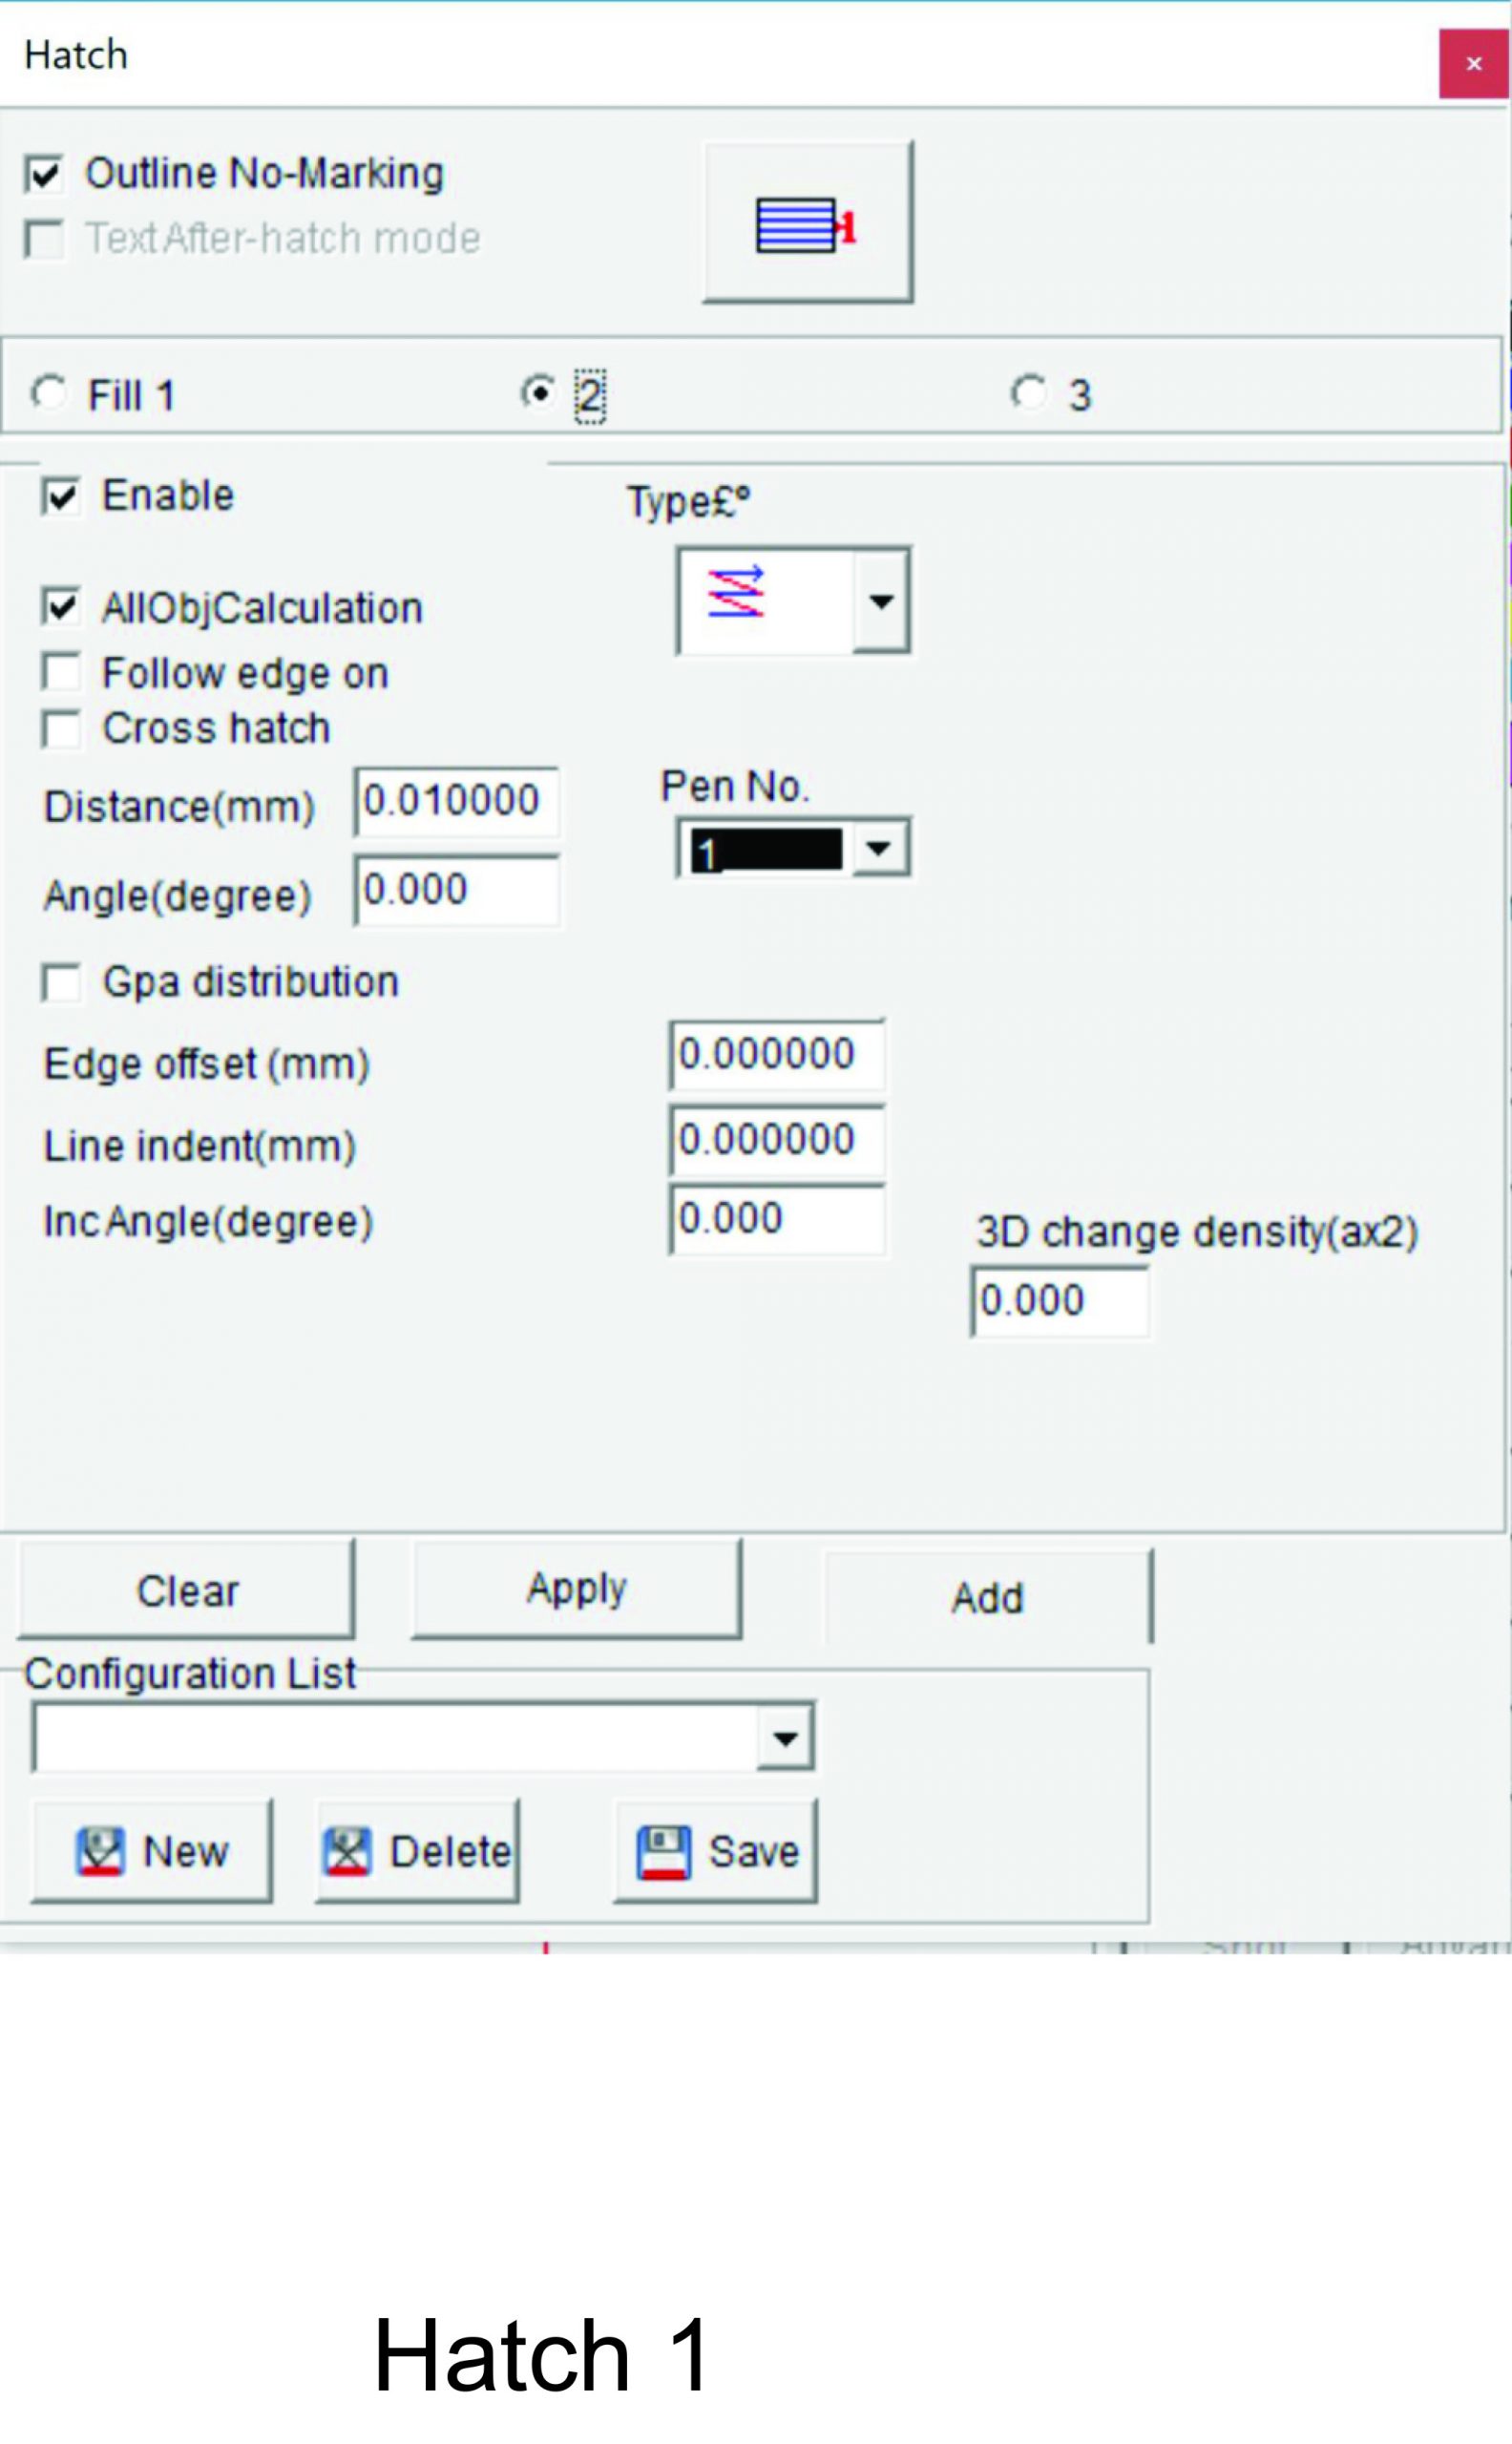
Once I imported the file into the laser software, I double checked the image’s size and confirmed it was sized properly. Next came the hatch settings. As you can see in the second photo below, I selected a .01 spacing and no angle applied. Originally, I was going to run the design with a tighter hatch but with a tighter hatch comes a longer run time, and there were no details lost at this spacing, so it worked well for the project.
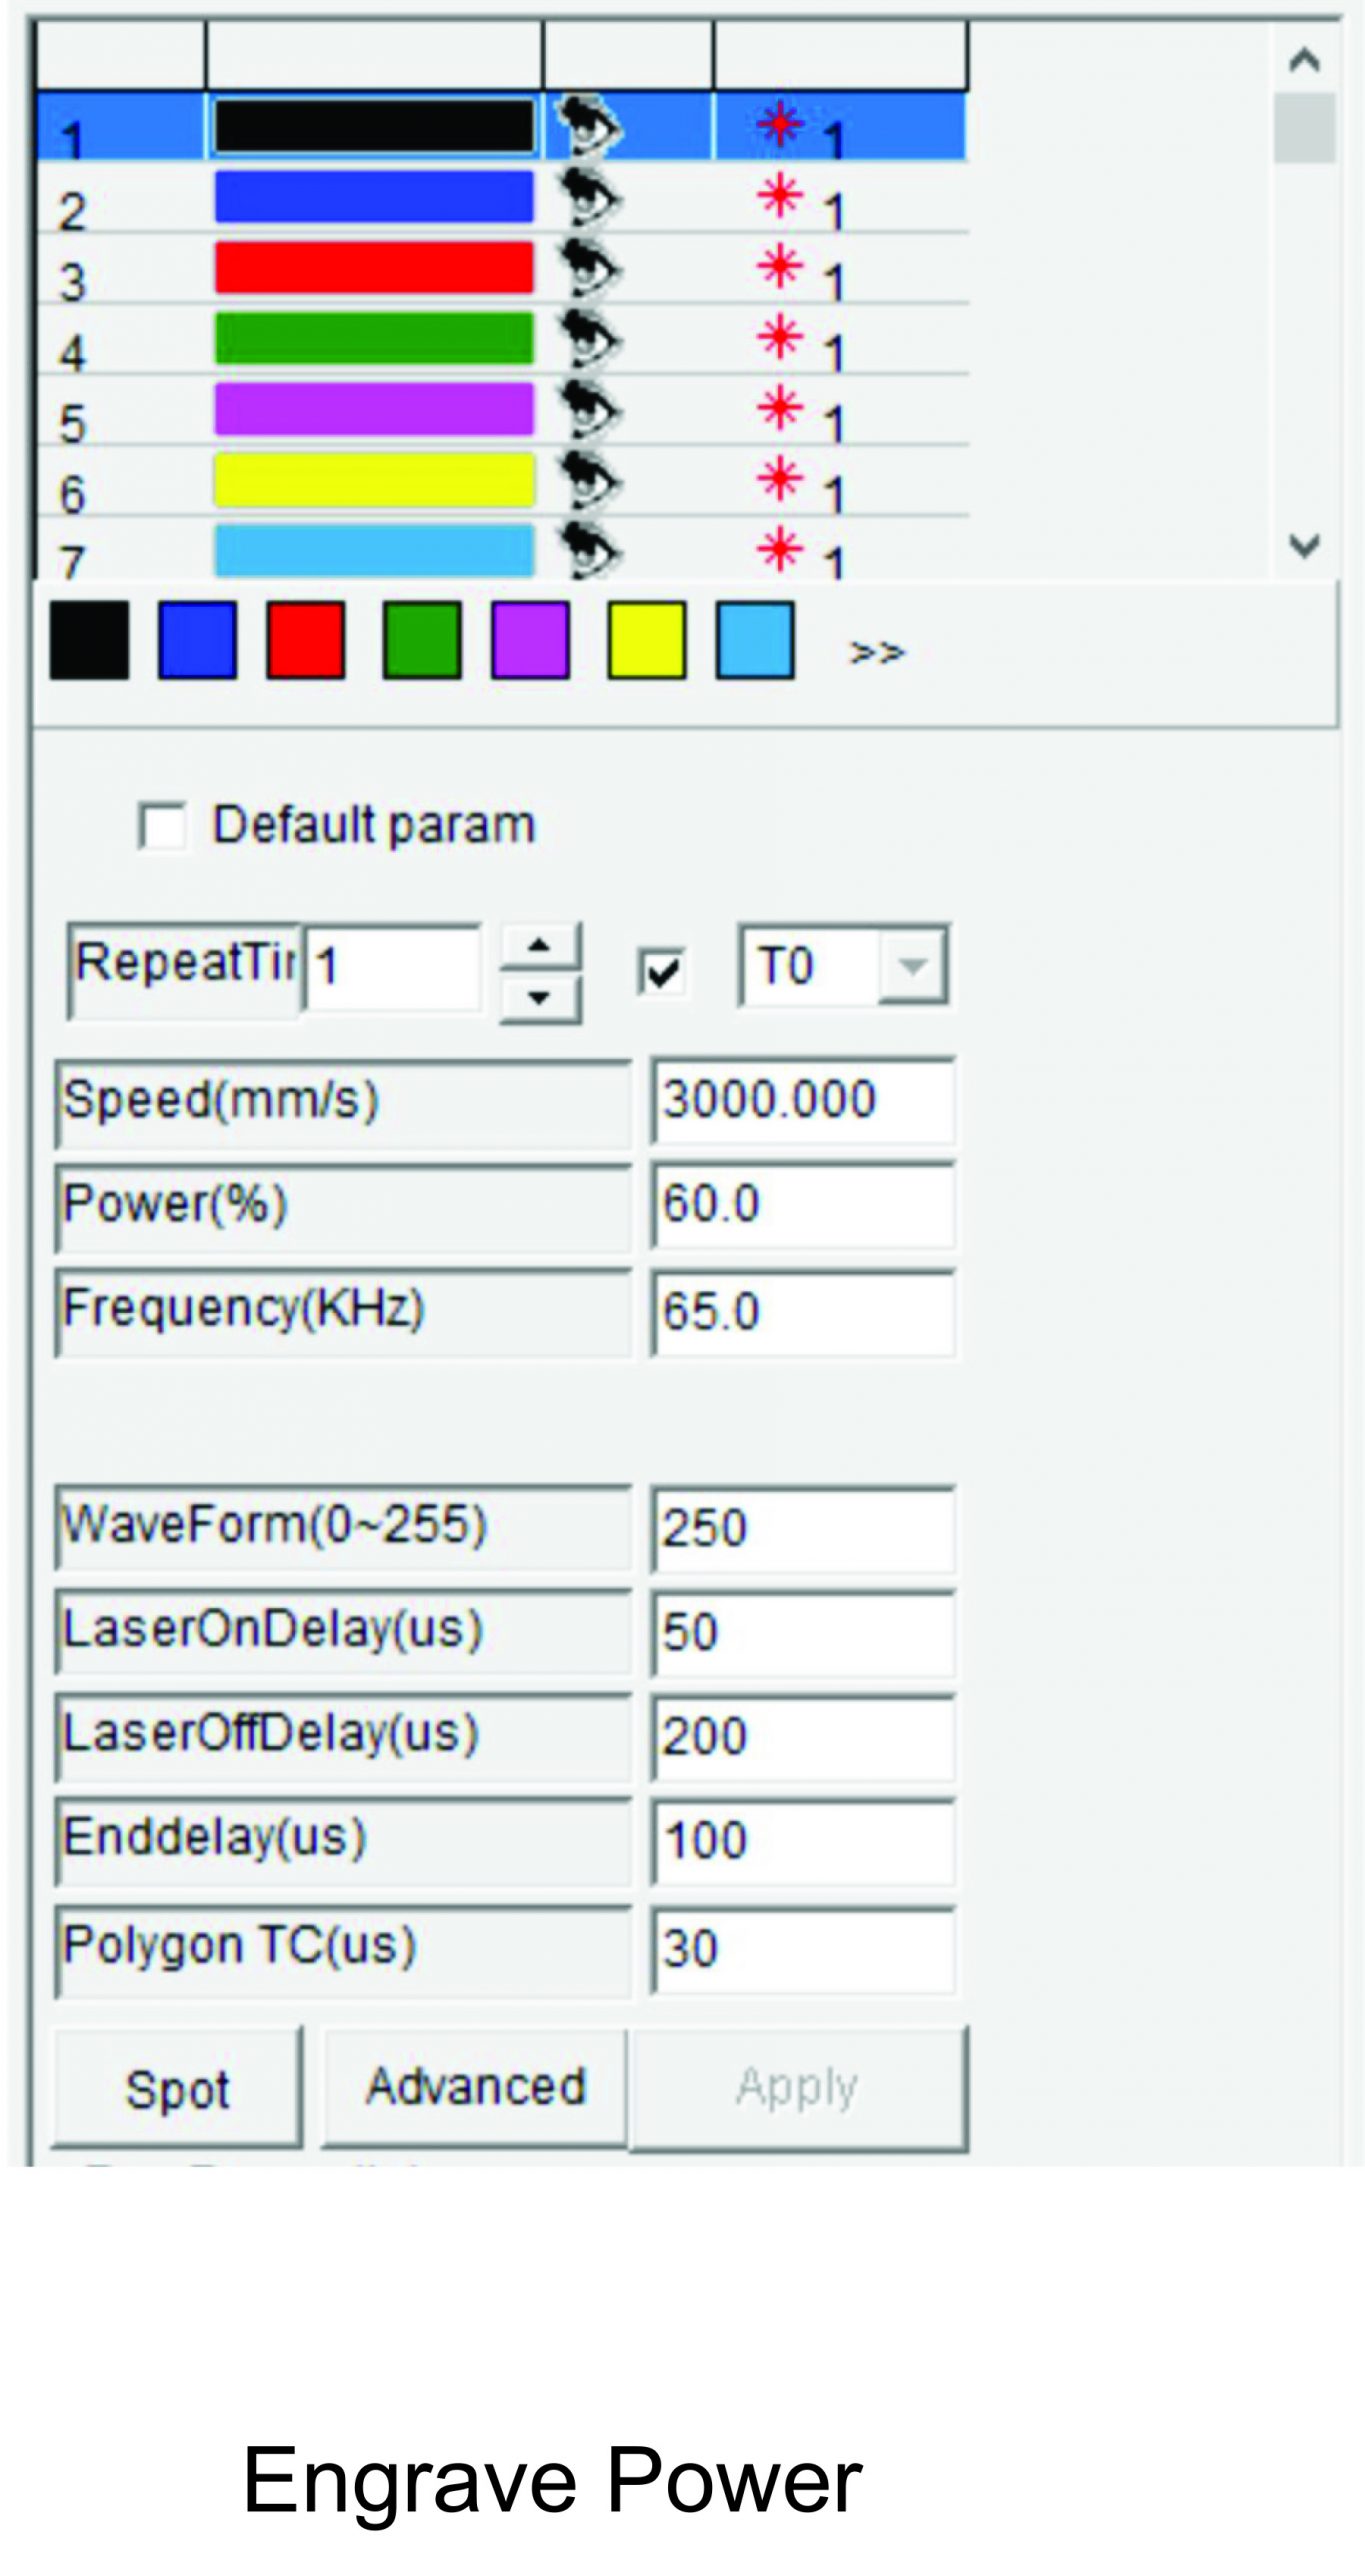
After setting my hatch, I went on to select the speed and power needed for the engraving. There is definitely a balance to power and speed; if you run too slow or with too much power, you can discolor the stainless steel. I highly recommend having a sacrificial cup or piece of metal around to test settings on. As seen in the third picture below, I selected 3000 mm/s with my power at 60% and frequency at 65KHz. My settings allowed for a nice dark engraved mark without overheating the metal surrounding the engraving. If the metal does overheat, one of the first signs is a tan almost roasted marshmallow appearance on the metal around the engraving.
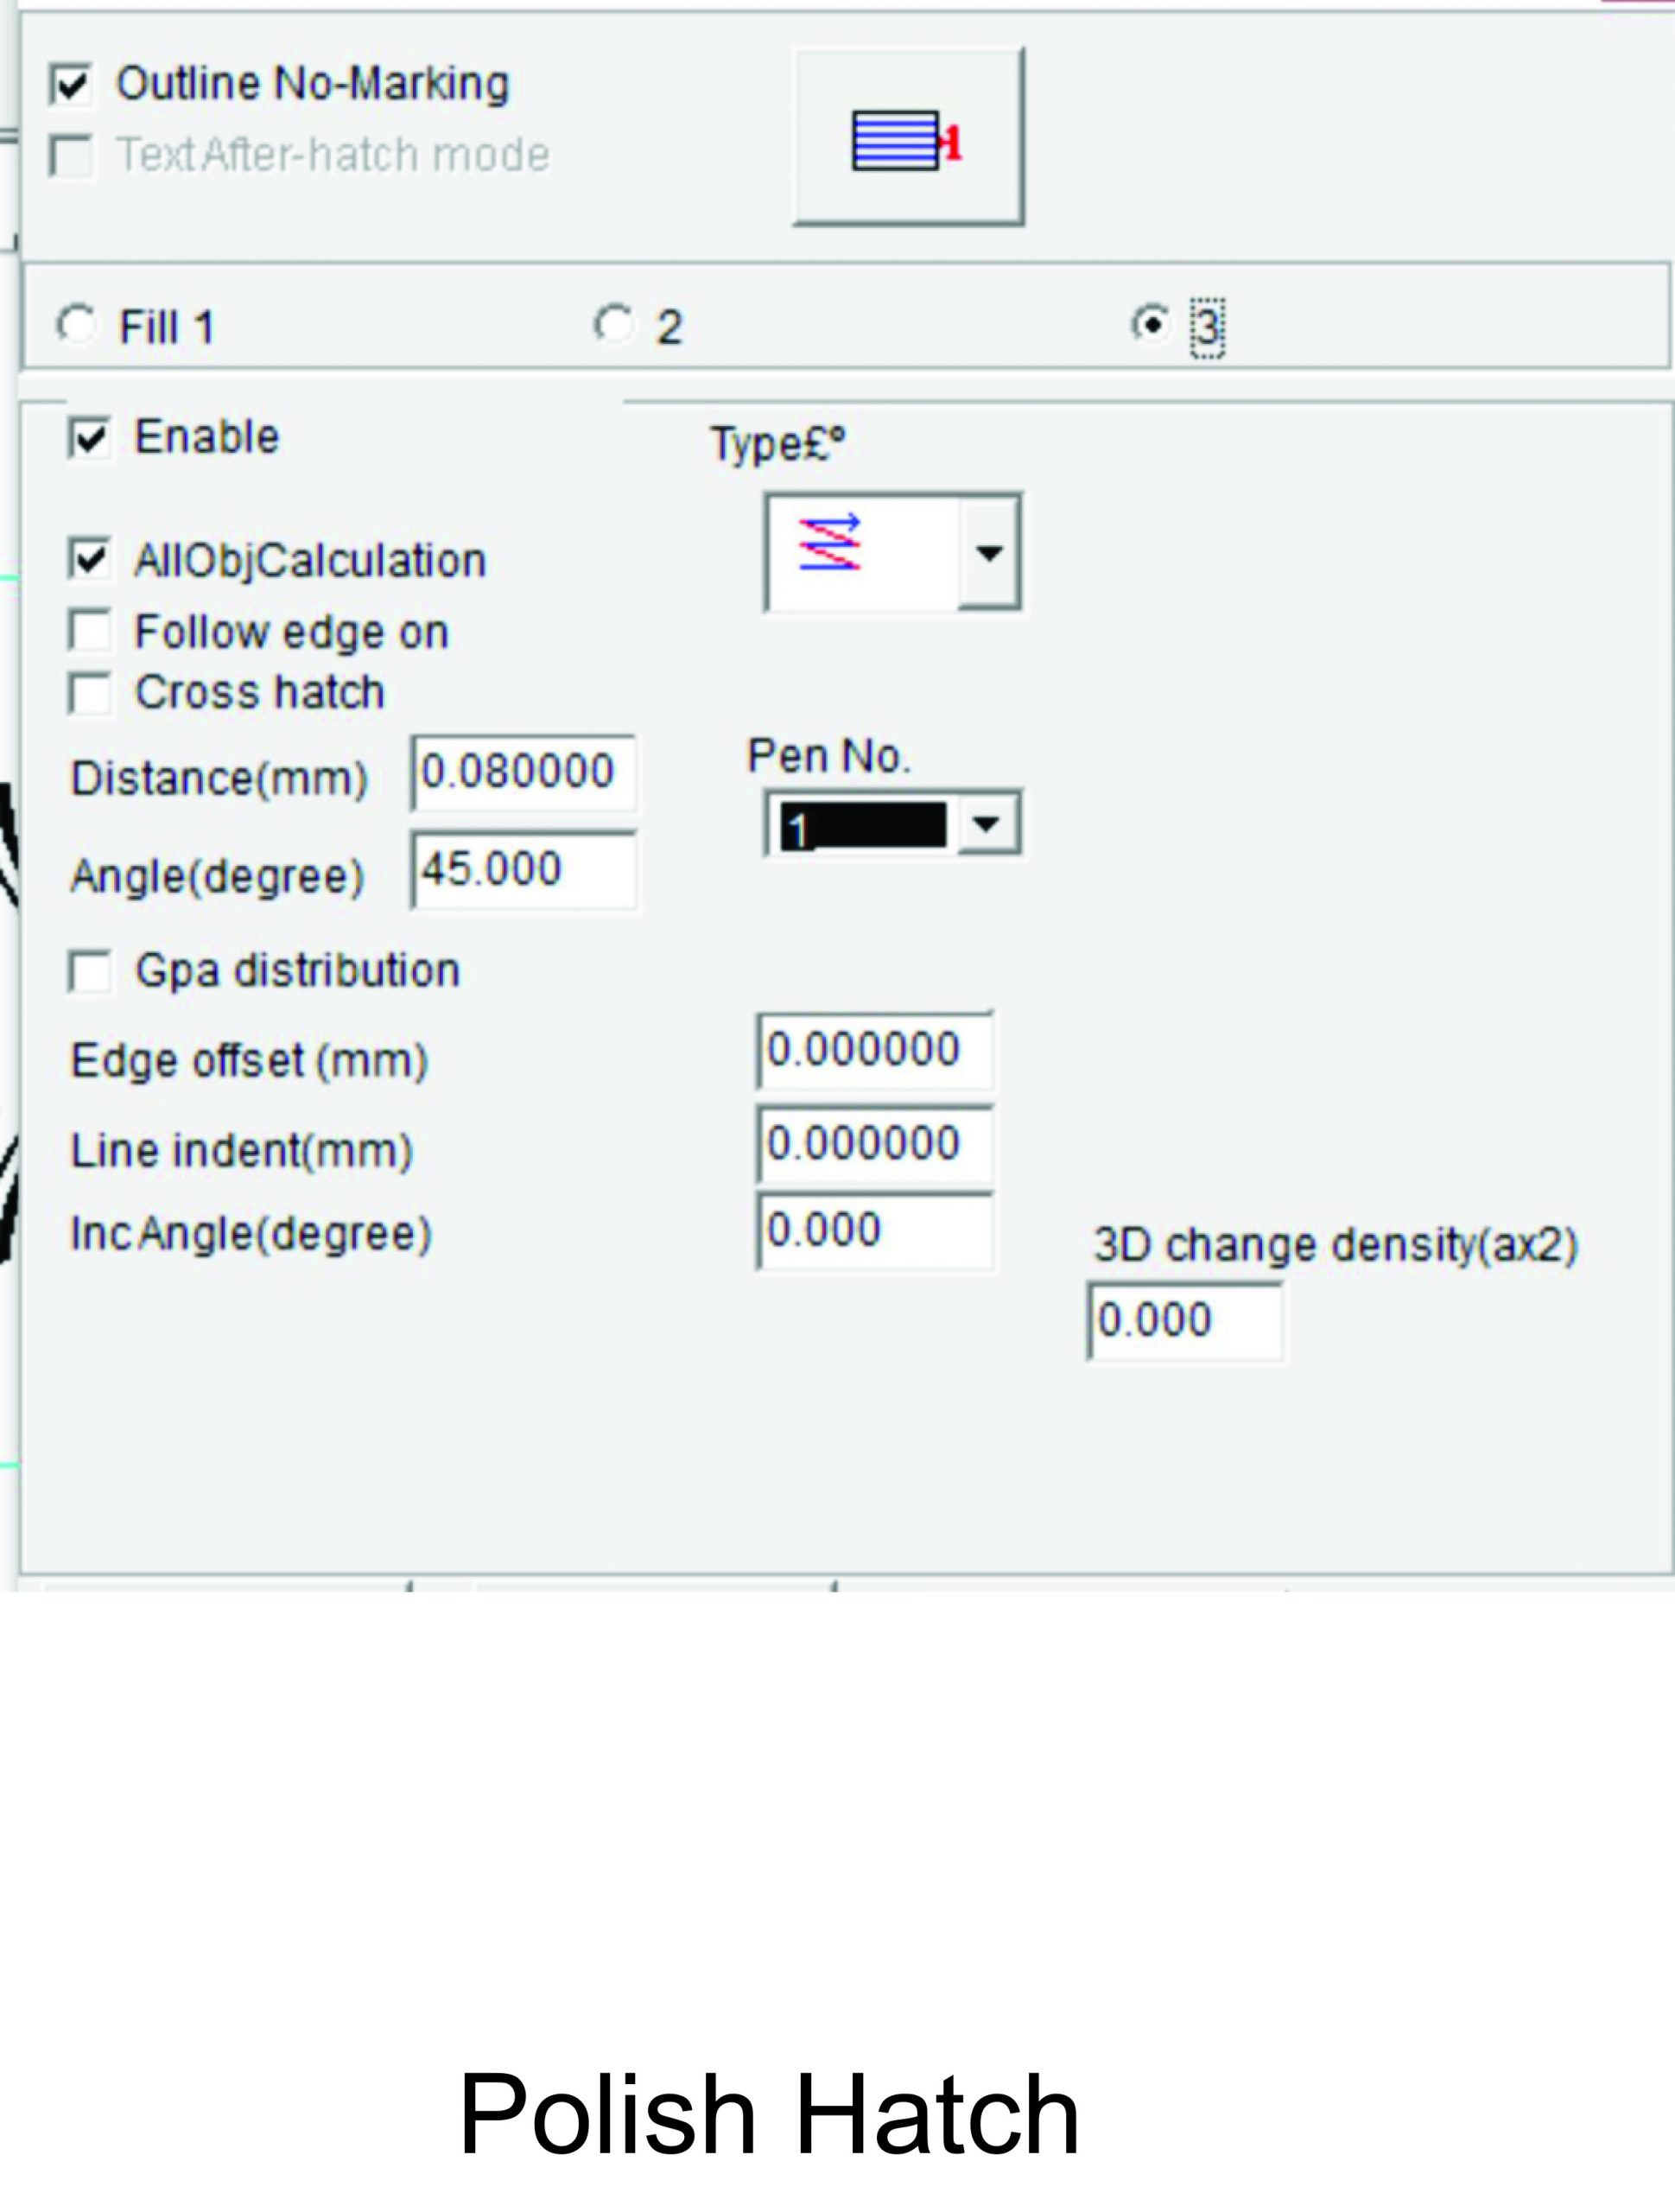
Although the engraving looked great dark, I wanted to run a cleanup pass to remove the black coloring and leave a silver engraved look. The polish pass had a hatch of .08 and a 45-degree angle applied. If you’re wondering how I got these numbers, it was after testing a few options and selecting the best outcome for my design.
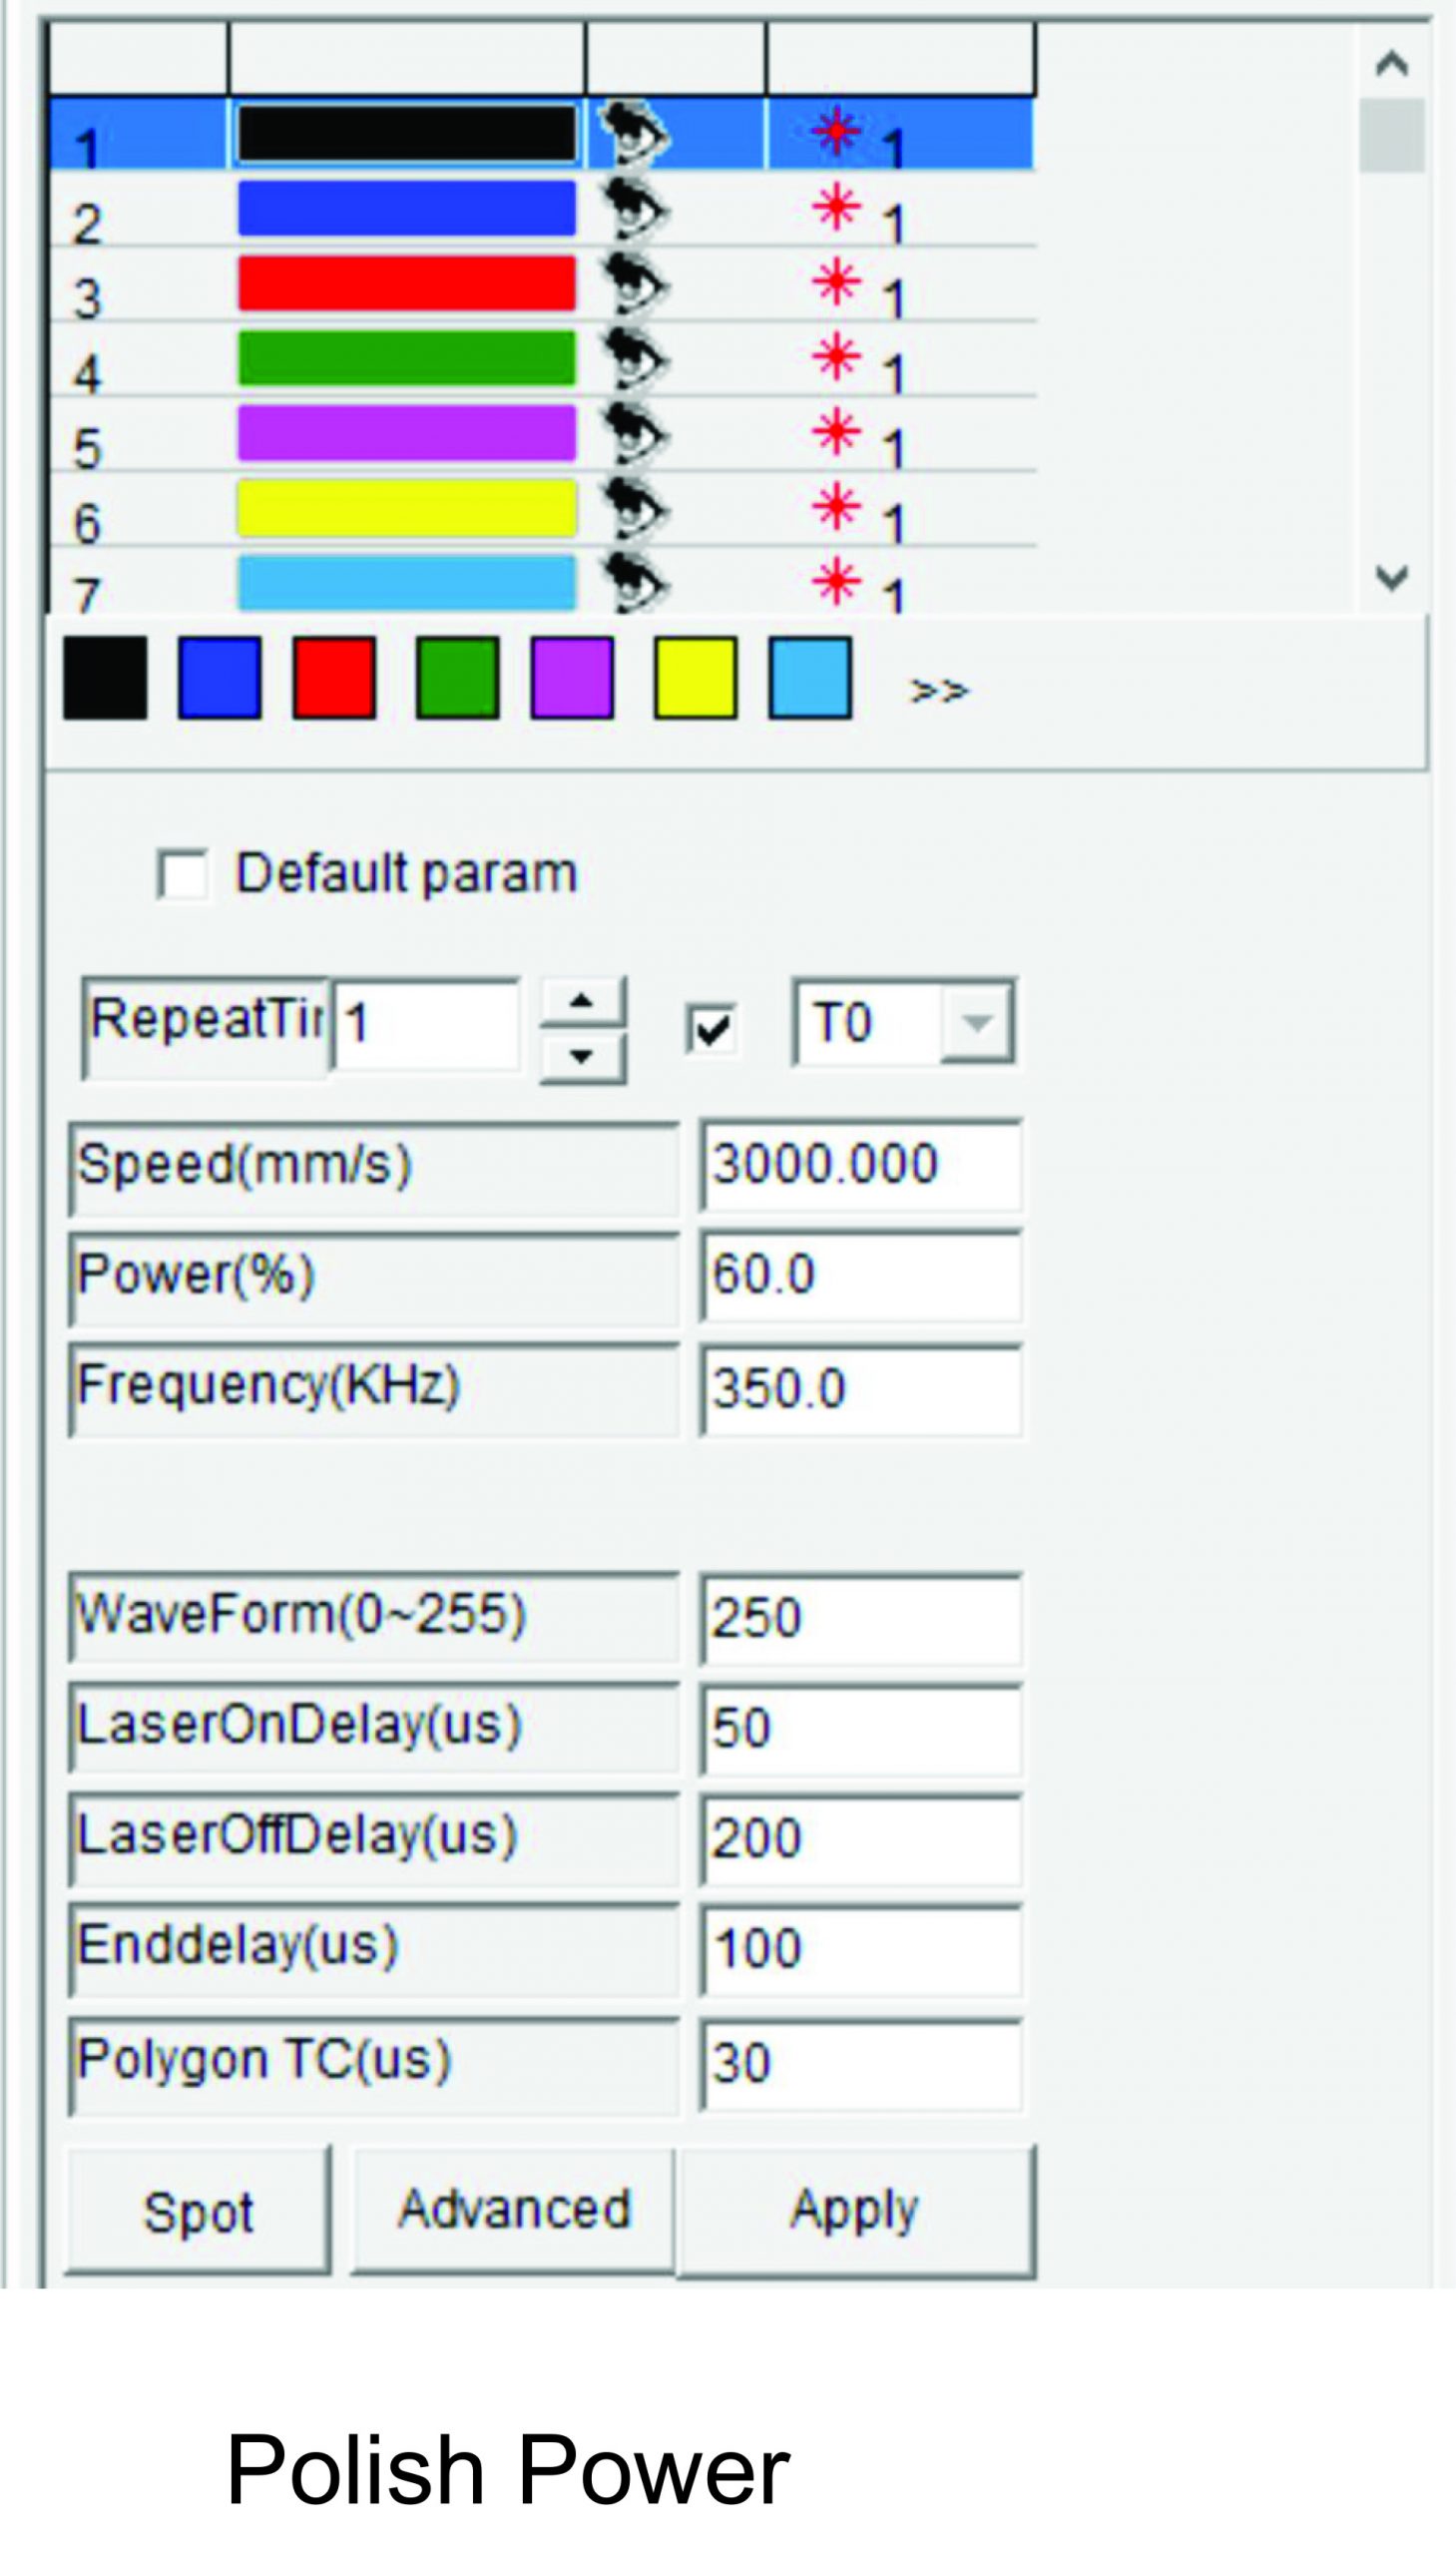
The only change on my power settings was to increase my frequency to 350KHz – the higher frequency reduces the amount of energy going into the metal and allows for the cleanup process to work.
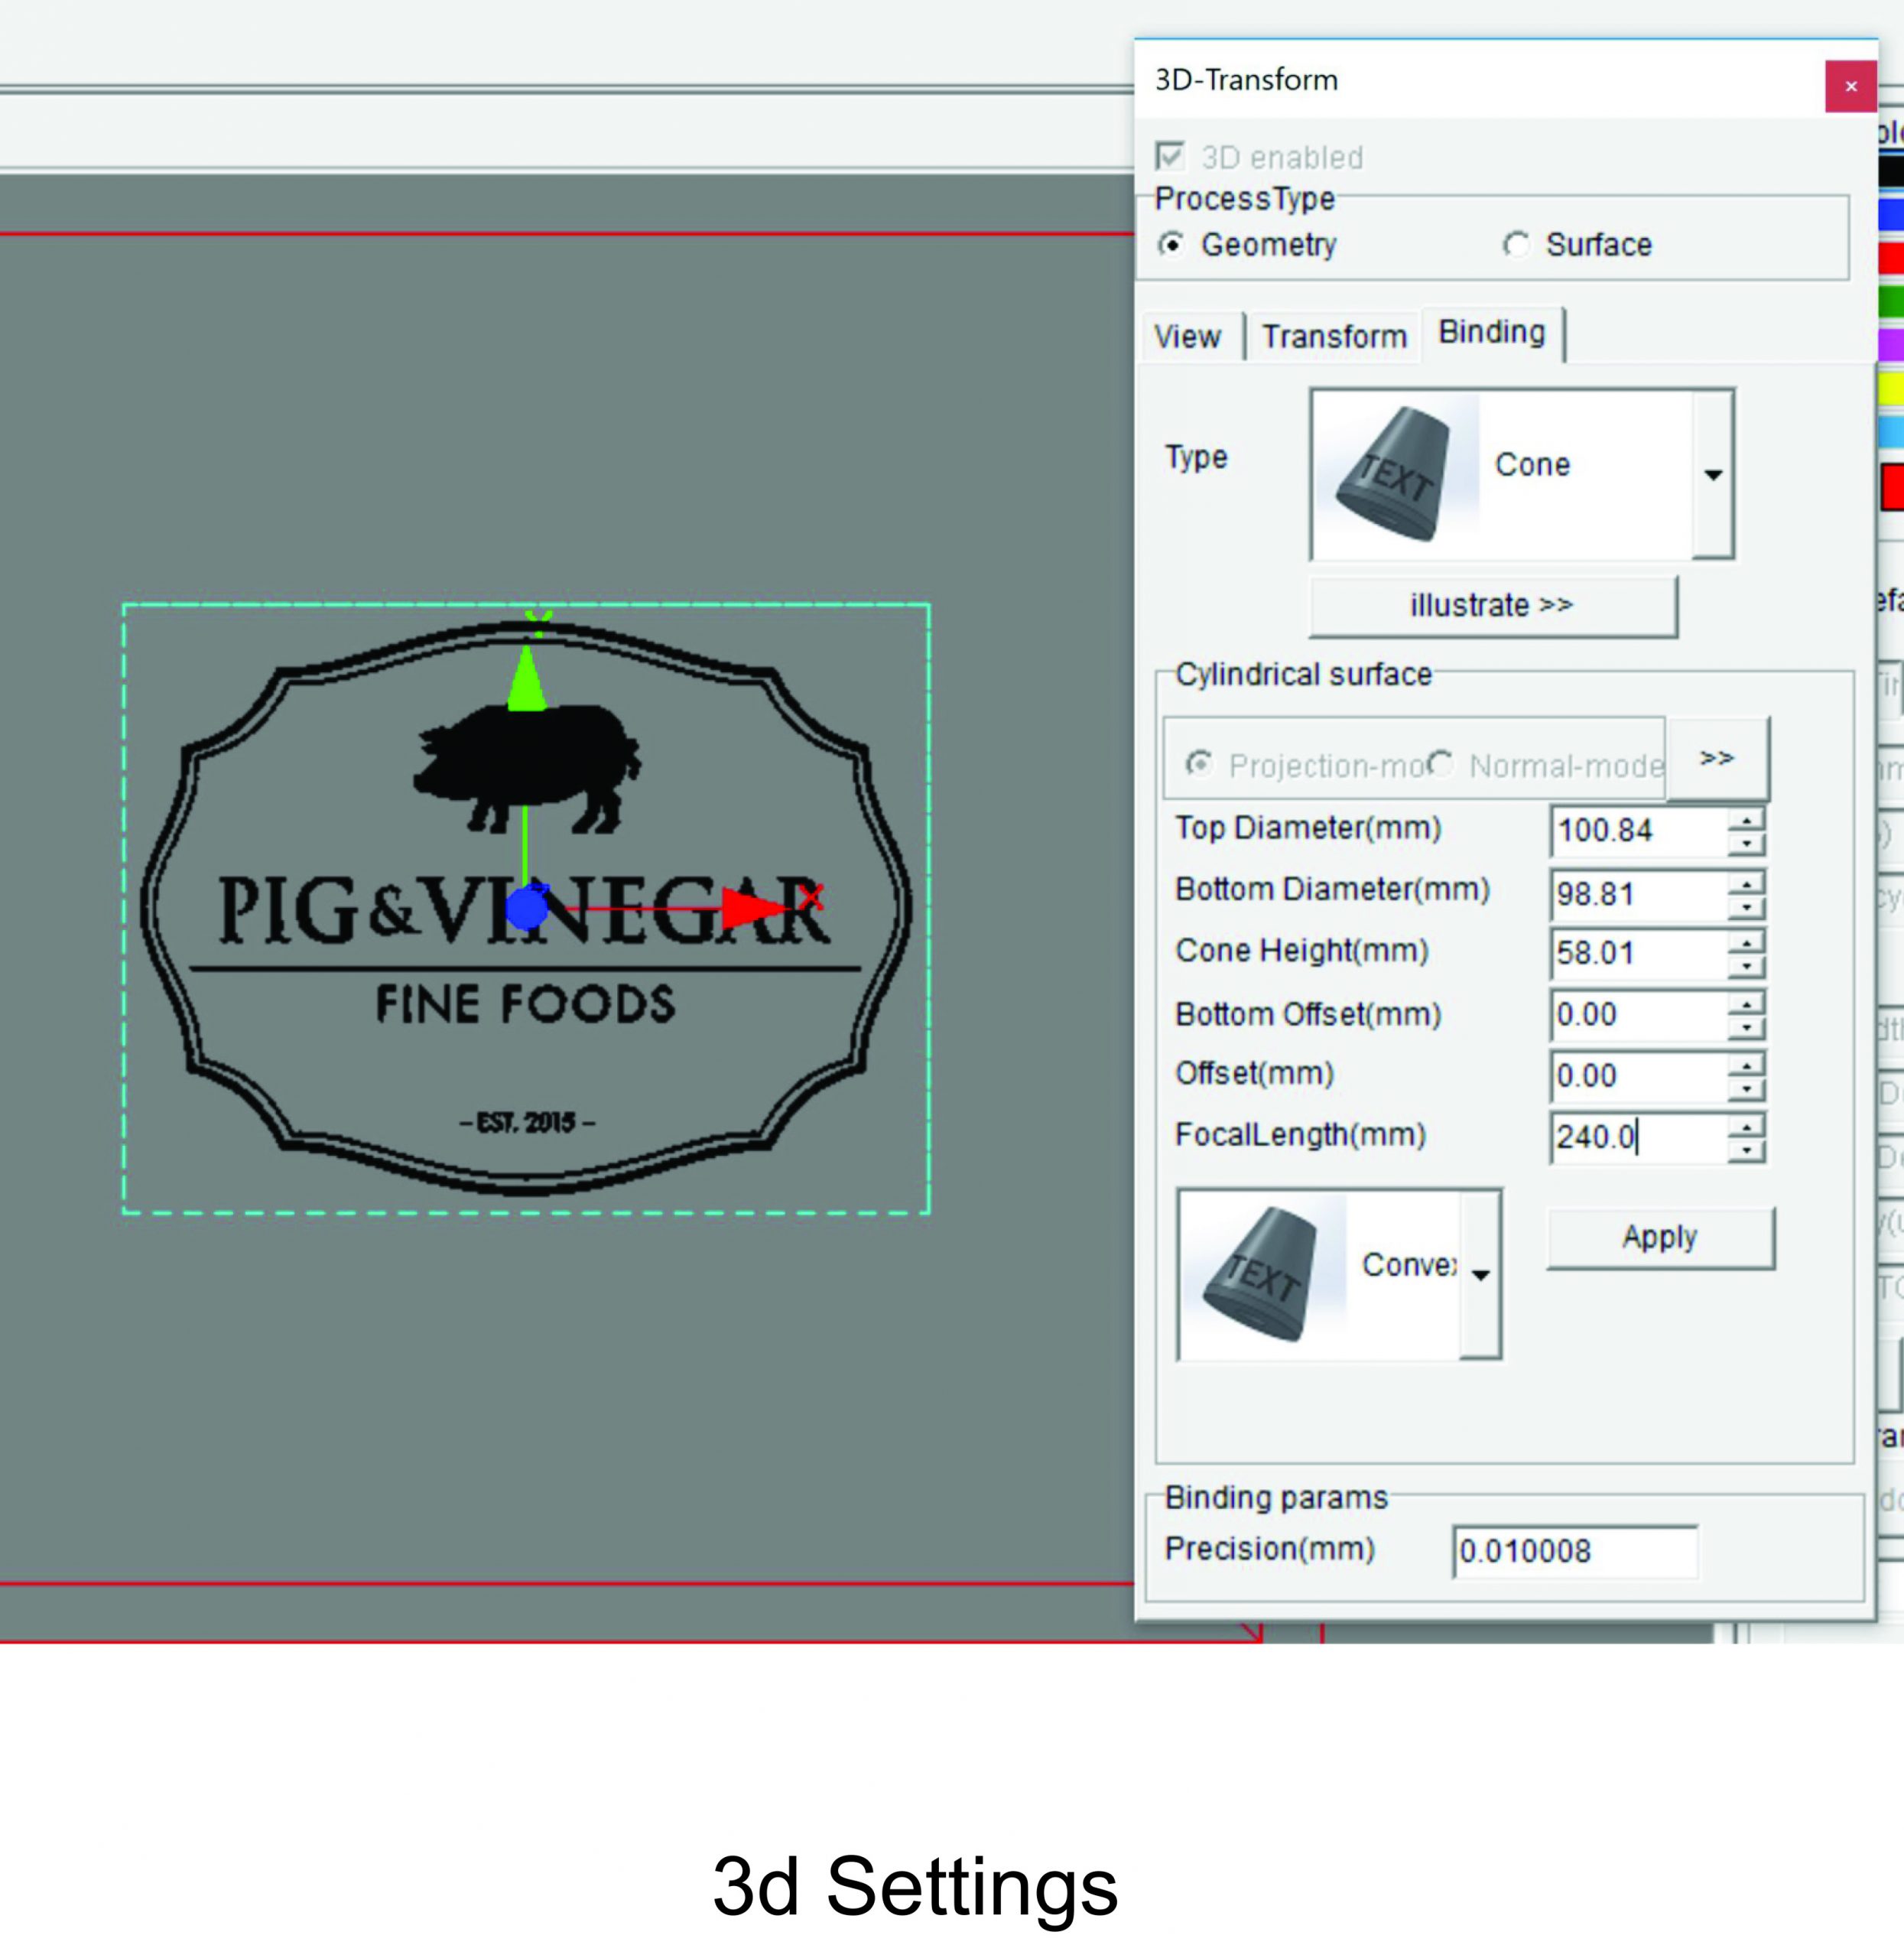
Once I set the hatch and power and speed settings, it was time to program the laser for the 3-D marking. If you don’t mix up diameter and circumference, this will be a breeze; my math teacher was right – I did need to learn math for later in life! In the sixth picture in the photo gallery you can see that I selected the Cone option – I did this because my cup had a taper from the top to the bottom of my engraving.
Using my red dot, I applied a bounding box and marked on the cup where my design would be. Then I measured the diameter of the cup at the top and bottom of the design and entered it into the system. My cone height was simply how tall my pattern was. Since I measured where my design was going to engrave at, I didn’t need to use any of the offset options. After hitting apply, I saw my pattern had a curve to it that would match my cup’s surface. This is also a good time to ensure there aren’t any strange angles in the design that shouldn’t be there. If there are, re-check and re-enter the diameter numbers.
After all this hard work and dreaded math, I was ready to engrave. I ran two different engravings, one to engrave and then one to polish the engraving. In the future, I will program my laser to run both without stopping, but for this project, I wanted to check every step before going to the next engraving. As you can see in the eighth photo, there is a nice black mark and a beautiful polished mark. I loved both, but the customer preferred to have the polished engraving.
For those wondering about run times, this cup ran for a total of 3:56 and only needed a quick dusting before going into its box. For the same image on my CO2 laser, it ran 4:10 and required pre-cleaning, metal-marking spray to be applied, and extra clean up.
FINAL TOUCHES
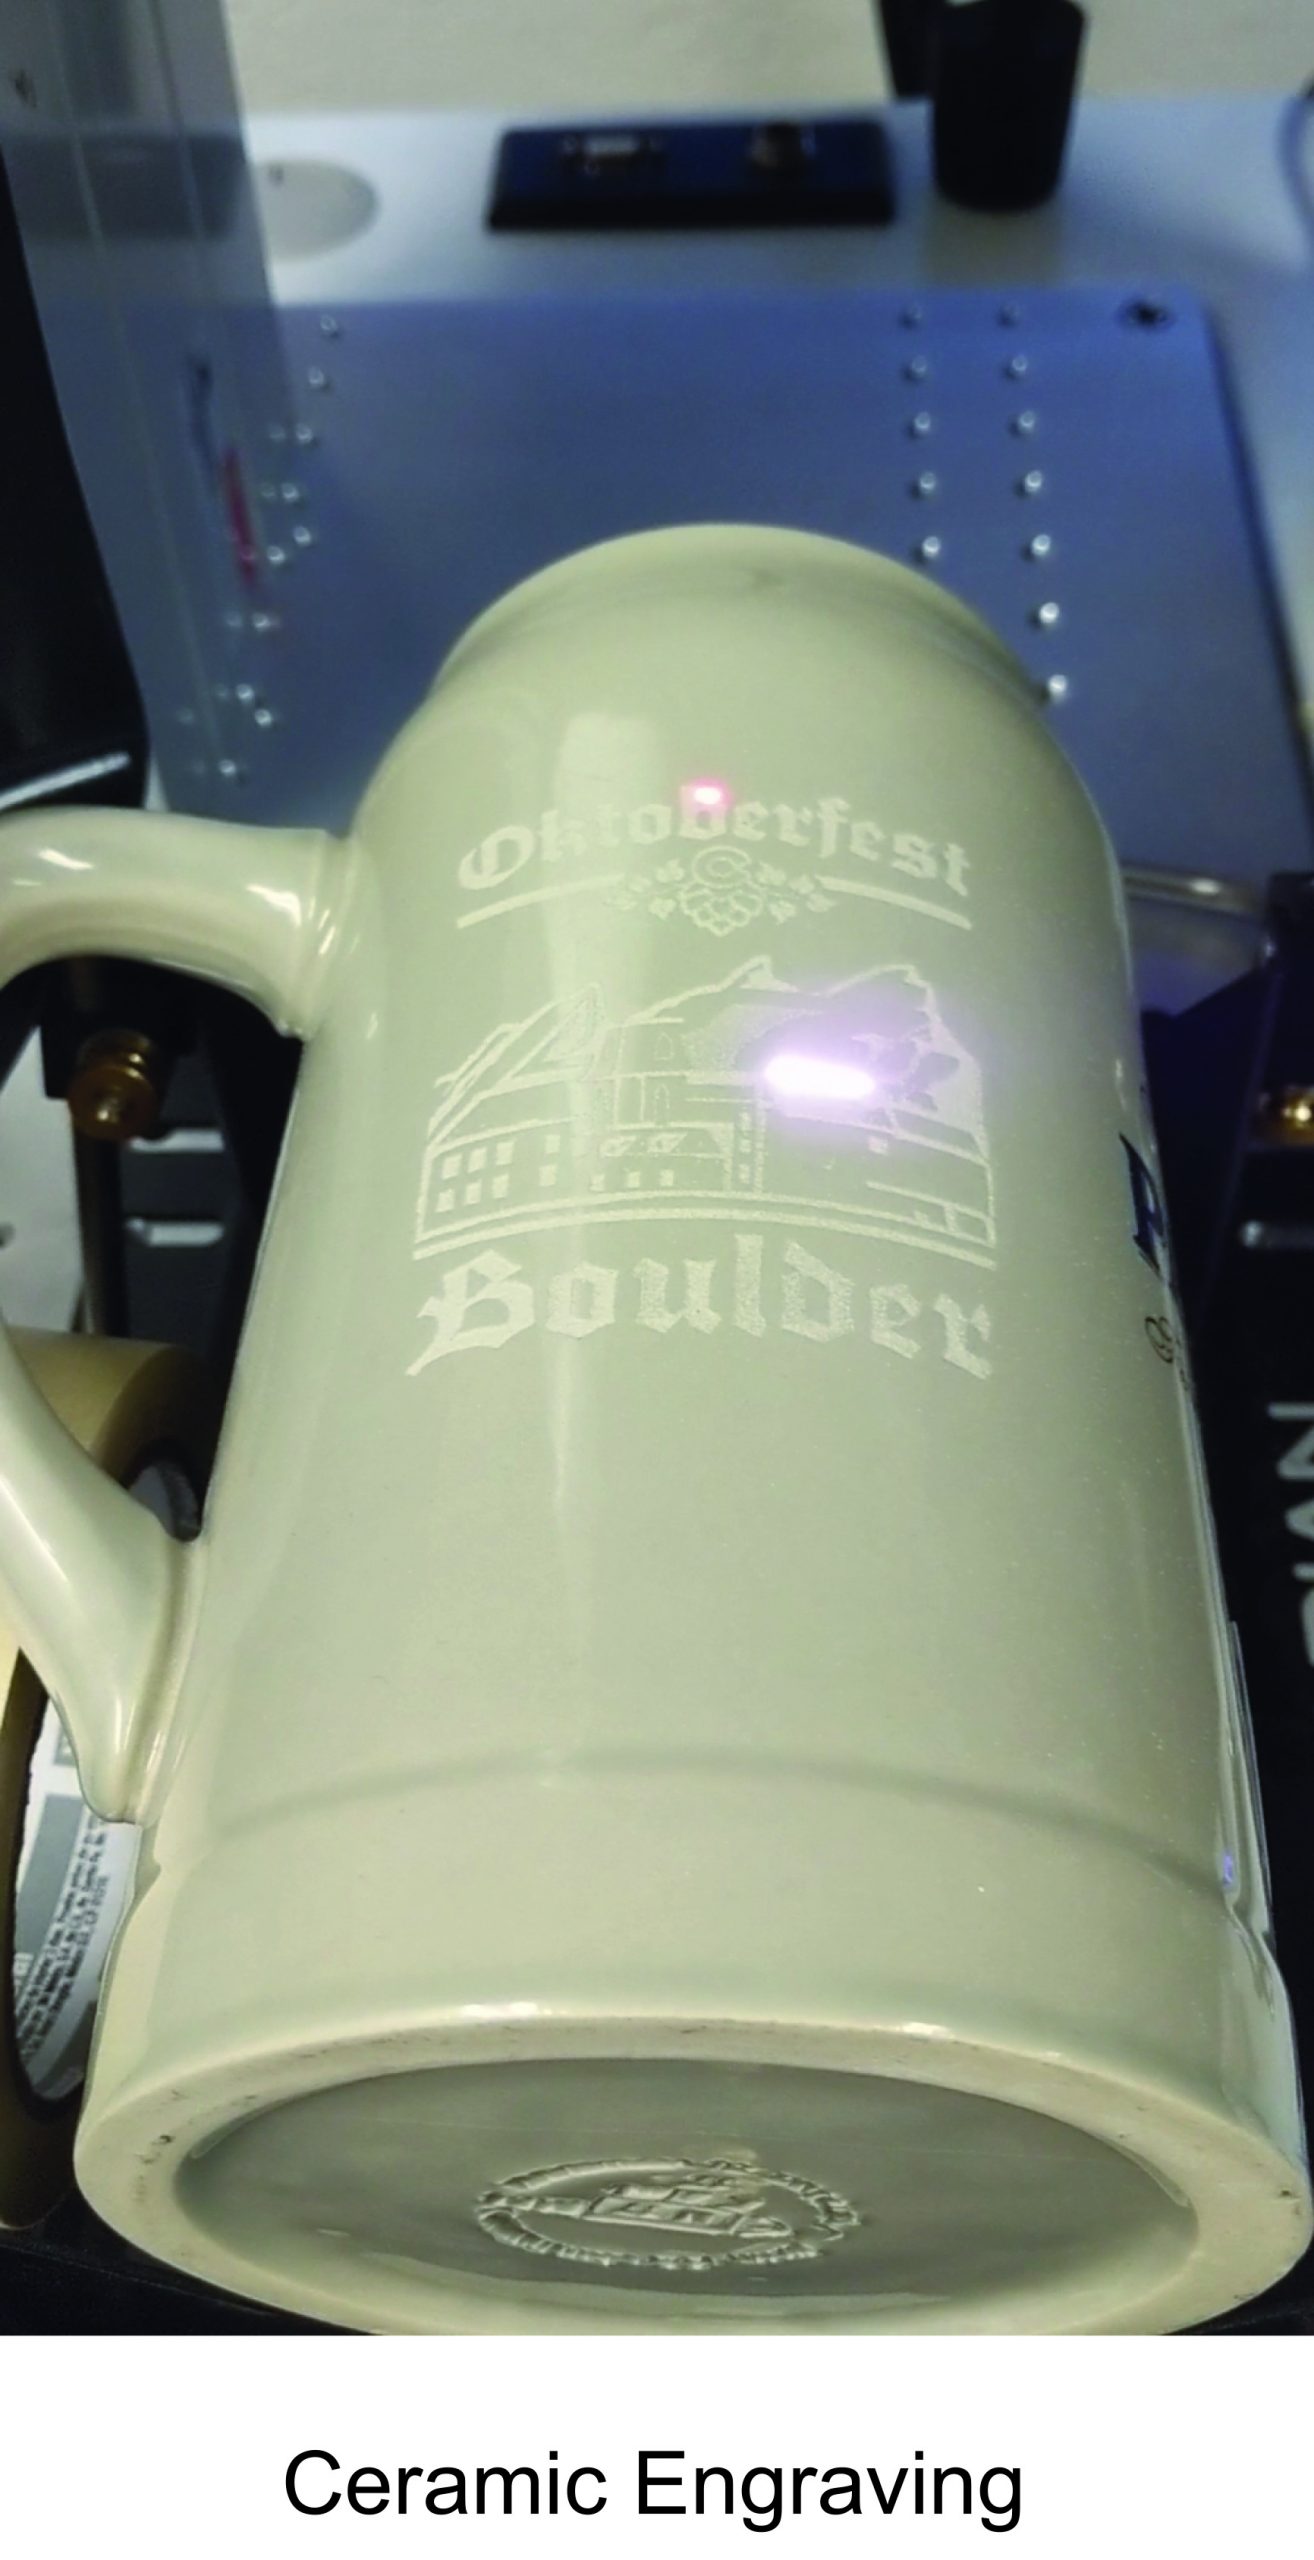
Once I figured out how to properly program my 3-D settings, it was easy to move on to other jobs. I even tested engraving on ceramic and was able to complete the mark in 46 seconds, which was great because we ended up with 500 mugs to do.
I hope this has been of value to everyone. While my settings will be different from other machines, this should give those just beginning a good starting point and real-world run times.