


Signage in a box – the venerable cabinet sign. In a completely elementary sense, that’s essentially what users are receiving with an LED cabinet sign. Of course, to the sign provider, it’s much more intricate than that. There are measured tactics and design methods, installation techniques, and much consultation. There is a process to providing an effective, long-lasting cabinet sign.
And sign makers must address the process by first answering a number of important questions when tackling LED cabinet sign projects. One of the biggest and most common questions often is whether to use an existing cabinet sign and retrofit it with LED components or to start from scratch with a brand new build. Here we will explore some of those issues and solutions.
To Retrofit or Not
Of course, there are benefits and drawbacks to both retrofitting and doing a new build. When working with the customer, a sign maker needs to uncover an assortment of details, including budget figures, the size of the sign, the placement, desired brightness and more. It’s this information that will help guide sign makers to make the right decisions and avoid missteps.
“The biggest mistake is not knowing the overall size of the cabinet and depth-along with any structural members and current light source-and selecting a suitable LED for the conversion,” says Bill Uline, general manager at Pelham, Alabama-based Faces Wholesale Custom Sign.
With that, let’s take a look at some of the factors that go into retrofitting a cabinet sign versus a new build.
Customized Lighting
Lighting is what brings a cabinet sign to life, so naturally sign makers will want to provide the most impactful illumination possible. Sometimes this means replacing an existing light source with LEDs, and since “fluorescent lamps come in a variety of fixed lengths,” explains Bob Ponzini, channel development manager, digital systems, North America at OSRAM, “some LED sign module manufacturers have introduced LED stick products in similar lengths designed to mimic and replace fluorescent. Other LED system options are available that are completely adaptable to any size sign and shape of a sign.”
Generally speaking, LEDs can give sign makers additional versatility over other options to position lighting components in desired locations.
“With some LED module products,” Ponzini continues, “one might be relegated to specific lengths of available product while other manufacturers have products that are flexible enough to be made and installed at any length in either a new sign or in a retrofit application.” The fact that LEDs will work well in both retrofitted or new applications, is great benefit to sign makers.
“The use of LEDs in sign illumination is virtually limitless,” says Uline. “With the number of LED manufacturers and LED modules on the market today, including border tubing, it is hard to find an application where LEDs couldn’t be used.”
However, when placing LEDs in a cabinet sign, it seems there is a sweet spot when trying to generate the optimal amount of brightness.
“I don’t know if people would find it desirable, or even necessary, to retrofit a sign cabinet with LED sticks at closer than one foot on center since the existing sockets will likely be on one-foot centers,” says Ron Farmer, CEO at US LED, Ltd. “If the cabinet has 20 sockets and they want the cabinet to be 20 percent brighter, the sign installer will need to use a mounting foot for attachment and put them on 10-inch centers, adding four more sticks. It is more work and added cost. Since the LED sticks will likely be brighter than the fluorescents being replaced, it seems unlikely that it would be worth the effort, unless there is some reason the added illuminance is advantageous. One of our products gives even lighting when placed on 24-inch centers. So, depending on the customer’s needs and preferences, using less product can be an option.”
Price Differentials
One of the biggest factors in providing a cabinet sign is the size of the customer’s budget.
According to Farmer, “Is it more cost effective to retrofit an existing sign than make a new one? Yes, absolutely. But if the sign and framework are severely rusted, it’s a different story. Many times, we took down an old sign and replaced it with a new one mainly because it was just too much trouble to repaint the interior and exterior and redo the wiring and sockets (before LEDs). It was a safety issue, as well, in some cases.”
Sign makers should make suggestions based on their expertise on whether a retrofit or new install would work best. But, ultimately, it’s the customer’s choice to decide which way he or she would like to proceed.
“Existing sign owners have the choice of continuing with fluorescent and replacing tubes as needed upon failure,” Ponzini says. “This is the least expensive option from a material cost standpoint but could ultimately be a more expensive long-term option due to service and maintenance calls required to maintain the sign.”
Weighing cost versus quality should always be on the customer’s mind and sign makers can emphasize this point as they discuss the costs associated with the sign.
“Brand image issues also arise due to regular outages of shorter-life fluorescent lamps,” Ponzini continues. “Obviously, building a brand-new sign would be the costliest, but it gives the opportunity to improve the brand image and gives the owner a brand facelift easily noticeable by customers.”
As a final point, the cost between using LEDs and older forms of lighting will not have such a large gap as we trend toward more LED usage. According to Uline, “a competitive market demand continues to drive the price of LEDs and power supplies down.”
Addressing Unknowns
“Is the sign going to be a stand-alone unit or will it be located alongside other signs?” Asks Uline. “What building codes and/or tenant restrictions or requirements need to be met concerning the allowable amount of light or colors that are allowed?”
These are just a couple of questions to bring up before a job. Going into a project blind is never a recommended strategy. A good rule of thumb is to gather as much information as possible before actually starting on the work.
“Not knowing what’s inside the cabinet before going up to it is one mistake, though I don’t know if it’s the most common,” says Ponzini. “For example, assuming the existing fluorescent lamps are eight feet when they are really seven feet, or two rows of four-feet lamps, may be a problem if retrofitting with LED retrofit sticks unless those LED retrofit sticks are field adaptable to any size, like the OSRAM BoxLED retrofit system is.” The answer of course, is to do a thorough site inspection of the current sign before making decisions as to how to proceed.
Inside the Sign
Farmer points to the reflectivity of the sign interior as an important aspect not to overlook. Especially in a retrofit project, there can be issues with the wear and tear of the sign that may not always be top of mind.
“One of the differences to pay attention to is that the reflectivity inside the sign has changed over time,” he explains. “The sign will be dirty inside and a lot of companies-good intentions aside-probably don’t wash and repaint those signs inside when they retrofit them.”
If the inside of the cabinet is dirty or rusty, you shouldn’t anticipate the same amount of light level on the sign’s face, according to Farmer.
“They need to remember not to expect the same reflectivity out of an old sign and act based on the budget and their desired outcome,” he says.
Sign makers should also factor in how the lighting will be arranged into either scenario, retrofit or new.
“The distance from the sign face to the light source determines whether you can use a double-sided LED module or if you need to use two single-sided LEDs,” says Uline. “A general rule of thumb is six-inches to eight-inches from the module to the face based on that particular LED’s specifications that indicate distance from the face and row spacing. So, a 12-inch cabinet would be fine with a double-sided LED, but might be a problem if the cabinet was 24 inches deep. Again, check with the manufacturer as to what would be the best application, they are the experts on what their product is capable of.”
Completing the Job
One of the biggest factors in completing a cabinet sign is making it stand out as the most noticeable in its surroundings, especially in a location with competing signage such as a shopping center. Brightness becomes a very important element.
“I would tell my customers that if their sign is brighter than the other signs in the shopping center by 25 to 50 percent, their sign is going to get noticed every time someone drives by,” says Farmer. “If their sign has the same brightness as every other sign, their sign has only an equal chance of being noticed.”
Color can also play a big part in being noticed. And white LEDs should not be seen as equal across the board.
“LEDs range in color from white, red, blue, green and yellow in various shades depending on the manufacturers,” Uline explains, stating that the Kelvin (K) value of the LED can determine its proper use with a colored sign face. “Lower numbers such as 4,000 K or 5,000 K can be used for softer, warmer colors, whereas a 6,500 K is a good all-around choice that does well with most colors. The higher values such as 7,200 K to 8,000 K is where you would have a blue color spectrum that stands out. Using an 8,000 K LED on a red background face will cause a big change in how that red will look when illuminated.”
Farmer references an example of a pole sign where “you have a clutter of signs up on poles out front of a strip center, for instance. The question is, how to get your sign to stand out,” he says. “Of course, it’s going to be the sign design and size as primary reasons, but brightness plays a role. The brighter the sign, the easier it is to read, provided it isn’t so bright that the copy is washed out.”
Beyond the pure lighting aspect, sign makers should be cognizant of what is driving the power of the cabinet sign and how it is installed.
“Initial awareness of power supply mounting location, manufacturer mounting hardware/accessories to aid in ease of installation, module spacing recommendations for various sign module options at available sign depth, whether true double-sided modules are available or if they will double up on single facing sign modules or LED sign sticks are all important,” notes Ponzini.
Power Supplies
First, regarding the power supply according to Uline, “Most power supplies made today can operate between 120 volts to 277 volts with wattages as low as 20 watts to 180 watts for 12-volt systems. There are also 24-volt systems that are coming out on the market designed to operate 24-volt LEDs, which further reduce the amperage and/or increases the amount of LED footage that a single power supply can operate.”
If the need to include a new power supply is part of the project, then “The most important thing is that the power supply is installed in accordance with UL 48 and 879 standards, and the installation instructions for that power supply,” states Uline. “The location of the power supply will depend on whether it should be dry, damp or wet rated power supply.”
Moving Forward
Well-learned in color additions and other minor enhancements, there isn’t a whole lot that sign makers don’t know about LED advancements. However, it’s how they implement these products that can change the way a cabinet sign performs.
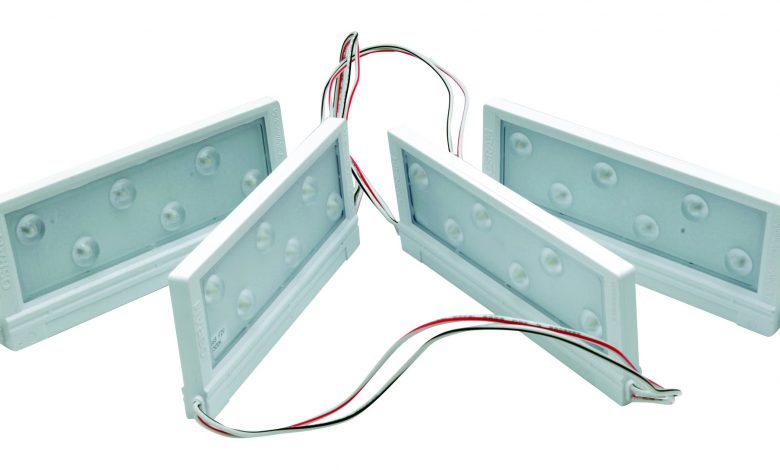
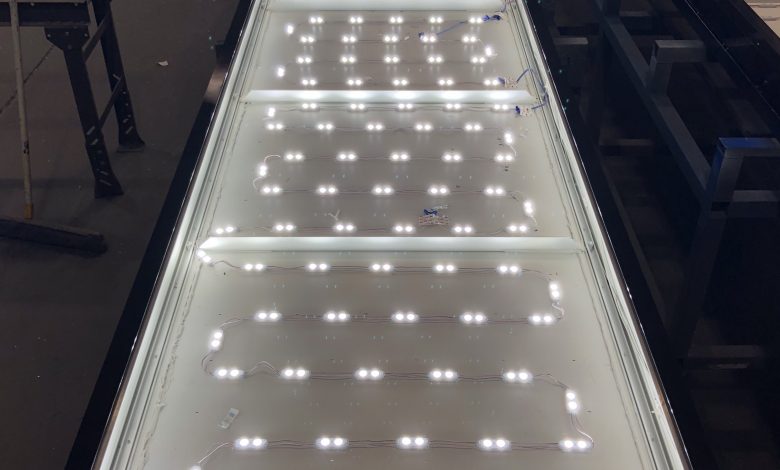
Farmer references US LED’s CP360 cabinet module that can be used in double-faced or single-faced signs. “It’s installed along the return of the sign and projects the light toward the middle and evenly lights up to an eight-foot sign by having one row of CP360 at the top and one at the bottom,” he explains.
Ponzini too notes that both single- and double-sided options can make very noticeable impacts.
“OSRAM BoxLED Plus single side and BoxLED Plus double side sign modules offer excellent luminance uniformity at typical cabinet sign depths due to their wide batwing photometric distribution and adjustable module spacing,” he says. “Available with click-and-play near tool-less mounting hardware, OSRAM BoxLED products are very easy to install, saving on labor and they are very flexible and adaptable for nearly any size sign in both new and retrofit applications.”
Smarter Cabinet Signs
Today, with all the advanced technology available, cabinet signs are even becoming smarter with palm-of-your-hand style control capabilities.
Says Uline, “Some of the newer cabinet LED systems that are coming out on the market can retro fit into an existing T12 lamp socket to remote controlled RGB systems. They have an unlimited amount of colors, and you can arrange the change of the colors all from your smart phone.”
Cabinet signs are making strides to constantly improve upon a customer’s current solution. Whether it is updating a current sign with a retrofit or offering a completely new build, sign makers have the freedom to think outside of the box – even when they are basically offering, well, a sign in a box.