Manually repeating a command to perform the same task several times in a computer program is tedious. At this stage of the game, the expectations we have of our computers and software are not unreasonable, and an important aspect is for the software to easily repeat a series of commands.
In the commercial large-format printing environment there are a lot of automated tasks that can be made more efficient with actions, automations, and scripts. These commands can be run directly from Adobe Photoshop, Illustrator, and Bridge. They are also available in Corel software.
Let’s look at a couple of the automations that, in my opinion, are most useful.
Batch
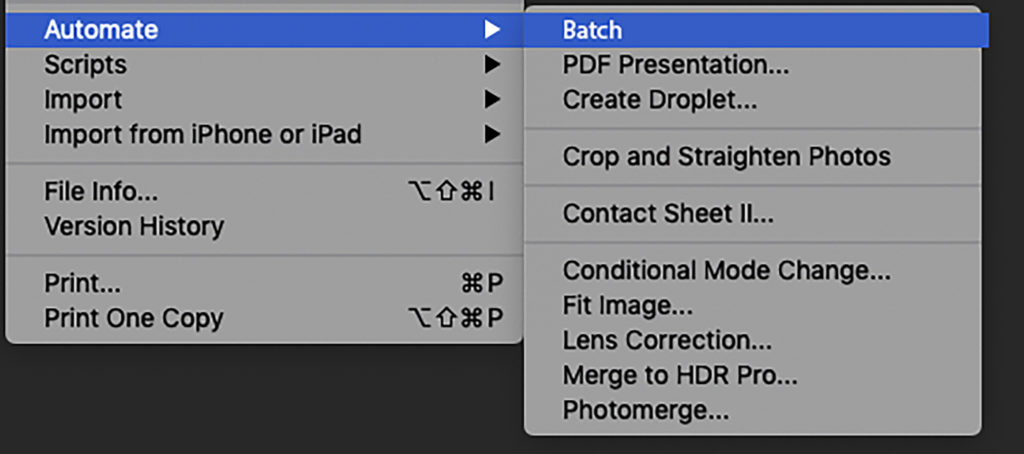
Looking at the file > automate menu (Fig. 1), you’ll see ten automations. Batch, at the top of the menu, applies an action to several images and is a fantastic time-saver. The batch dialog box specifies the action, the source folder (where the images are stored), and the destination of where the newly processed images will be saved.
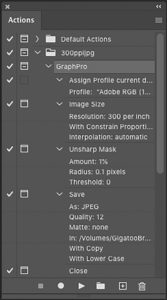
I begin by making a set (a folder containing the action). I create a new action and begin recording. I first apply the Adobe RGB 1998 profile to the picture. Then size it to the specifications. If the image is a screenshot, I usually sharpen it to tighten it up a bit. Next, I save it to a specific location in JPEG format. Finally, I close the image. Then, I stop recording. Fig. 2 shows the actions panel with the recorded sequence.
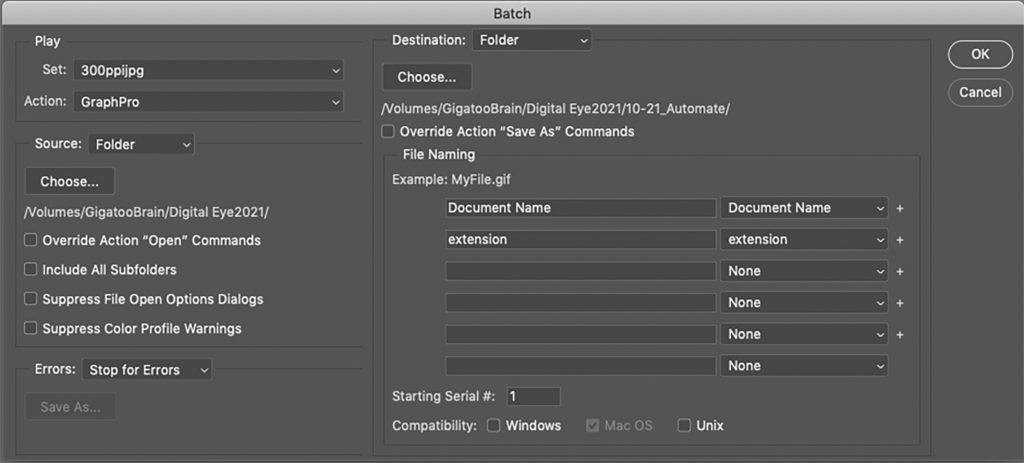
Then I place all my screenshots, and any additional images into a single folder that will be the source folder. I create a destination folder where the altered images will ultimately be saved once they are processed. I choose file > automate > batch (See Fig. 3). I choose the action, the source file, and the destination file. I click OK.
Droplet
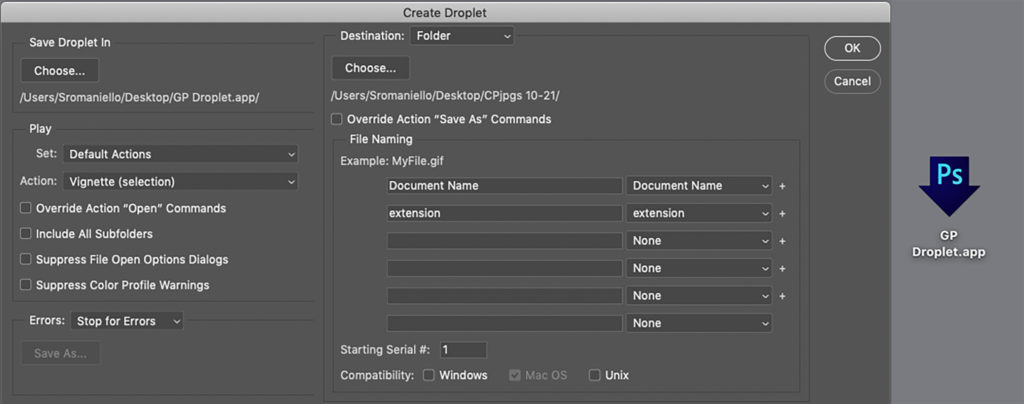
A droplet is an icon that sits on your desktop (or anywhere else) that triggers an action simply by clicking on it. Another great time-saver, a droplet is a push-button image editor. The dialog box (Fig. 4) is similar to the batch dialog with a few exceptions. Designate where you would like the droplet to reside, specify the destination folder where the edited images will be saved, make any necessary changes to the naming conventions, and click OK. The droplet will appear. Click on the droplet icon and voila! The new revised images are saved to the destination folder.
Crop and straighten
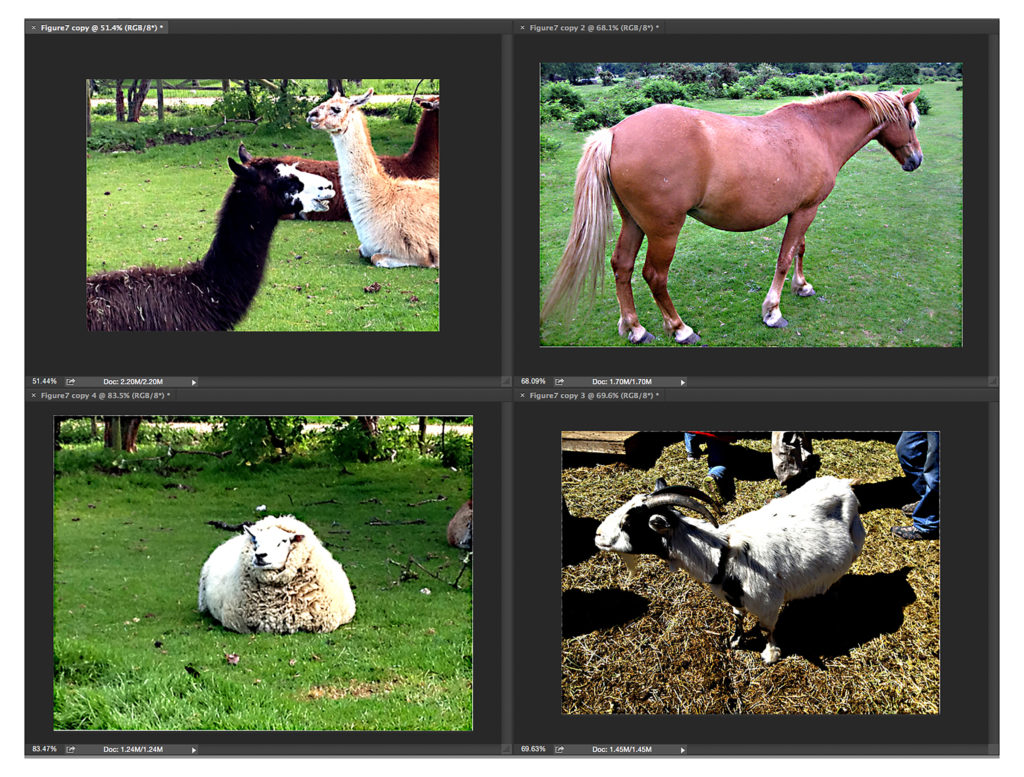
This automation is designed to separate images that have been batch scanned. Lay your multiple images on the scanner bed face down and scan them. Open the file in Photoshop. Choose crop and straighten from the automate menu. Bingo! Done! All the images are separated into different files (See Fig. 5A, 5B) and the original is untouched. The automation uses the white scanner cover as a background, so be sure that it is clean. You may lose white borders, but you can replace them with Photoshop’s add canvas command. Think about how efficient this process is as opposed to cropping and rotating each image manually.

Learn more about automations in the October issue of GRAPHICS PRO.