The busy “gift” season is winding down, we all survived another pre-holiday rush, and it’s time to take a deep breath and then get busy getting ready for the next one! It’s a great time to organize your workspaces and refresh your showroom with new products, displays, or a layout, and order any supplies you don’t want to be caught without during a busy production time. Even more importantly, it’s also a great time for performing the maintenance needed to keep equipment running smoothly and optimally.
Sublimation printers
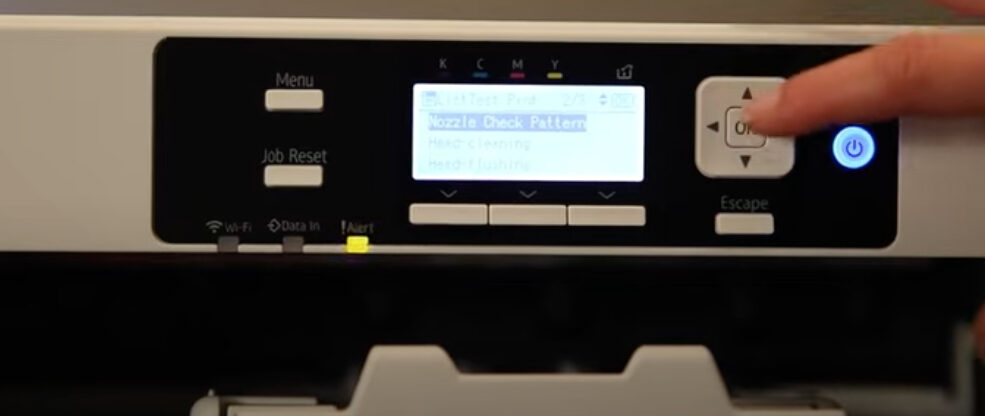
Head cleaning and nozzle checks are probably a part of your weekly routine with your sublimation printer, but there are times you need to go a little deeper with your cleaning to make sure you get the best printing results. Consult the manufacturer’s instructions on deep cleaning for your printer; the following steps will apply to all Sawgrass printers.
When you do a manual cleaning on your Sawgrass printer, it’s also known as cleaning the capping stations. If you do several head cleanings and can’t get your lines to all come back, it’s time to do a manual cleaning. You will need a cup of hot water, a syringe to put water into the capping station, a flathead screwdriver, and a paper towel to soak up excess water.
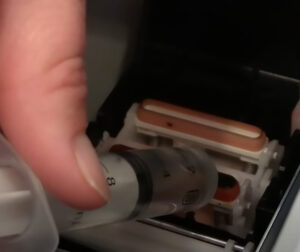
The first thing to do is open the lid and insert the flat head of the screwdriver into the slot the lid would snap into. This will trick the printer into thinking the lid is shut when it’s open so you can do the cleaning. Turn your printer off. When you turn the printer back on, the printer head will move to the other side of the printer. At this point, you’ll unplug the power cord so the print head stops where you need it to be. This will give you access to the capping station.
Once you have access, fill your syringe with hot water, fill the front capping station with the water level to the top, and add a small amount to the other section. Let the water sit and soak for 30 minutes to help break down the ink clog. After 30 minutes, if the water has not drained from the first section, insert a paper towel to soak it up and refill it with hot water. Continue doing this until the water drains when you add it.
Once that happens, you can plug the printer back in, remove your screwdriver, close the lid, and turn the printer back on. Your next step is to run a head cleaning and then another nozzle check. If the lines are not all there and accounted for, you’ll want to go back and repeat the manual cleaning steps. This video will take you through the manual cleaning process step by step.
Laser engravers
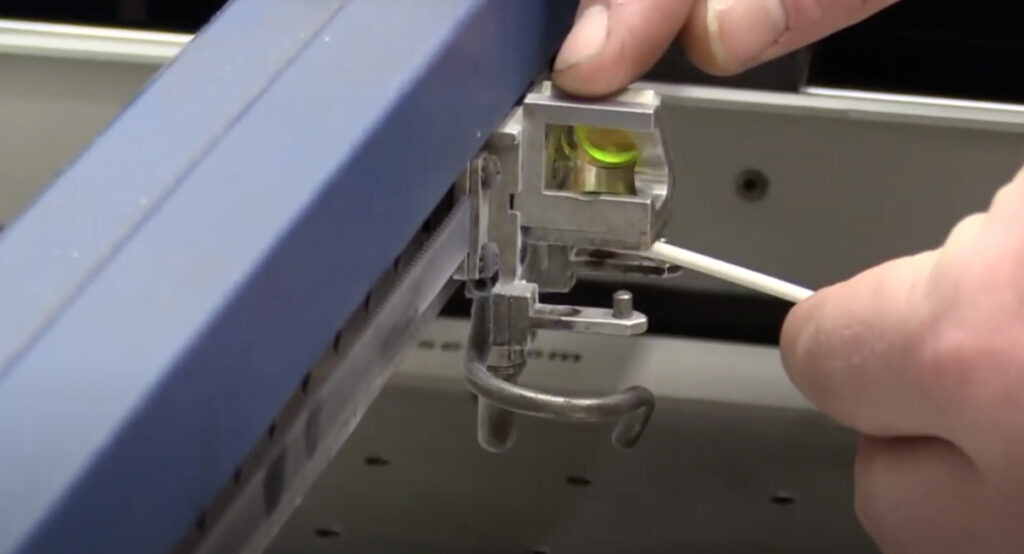
If you do a lot of laser cutting or engraving you probably already make sure you clean the optics (lens and mirrors) of your laser regularly to keep them free from soot, smoke, and debris. If left dirty, it can cause poor focusing and reduce power — which means poor engraving or cutting quality. Cleaning the lens is simple. All you need is a couple of cotton swabs and any lens cleaner that isn’t acidic. They should be cleaned daily, if not several times a day, to prevent problems down the road. This video shows the best way to clean your optics.
This is also a good time to make sure your chiller is free of debris and replace the water. If you’re in a cold winter climate, you might want to add a little antifreeze in case of a power outage where you lose heat.
The rail and track also need to be maintained to ensure optimal performance. X-axis rail guides should be oiled regularly to give the gantry a friction-free path while processing. You’ll want to keep the work surface of the laser free of debris and soot buildup by vacuuming up any loose debris that has accumulated, then wiping down the tube and laser bed with a paper towel and a little isopropyl alcohol. Gently wipe the encoder strip with water every six months to clean and inspect. Wipe rubber wheels, stoppers, and cones with a neutral cleaner or soap and water.
This is a good time to check your filters and vents to make sure they are clean and free of any buildup that would interfere with your system’s ventilation.
UV direct printers
Daily cleaning of the wiper, cap, and print heads is a must to avoid clogs, streaks, and splattering. Wipe down the outside of the printer to prevent ink build-up. The outside should receive a thorough dusting at least once a month or more, depending on the environment. Check waste bottles regularly and dispose of them properly.
Plotter cutters
To avoid a drop in performance or an untimely breakdown, perform these steps during this downtime. Grease the carriage rod. Clean out and oil and/or replace the plunger (blade holder). Replace the blade. Clean the grit rollers and replace them if they show signs of wear.
Large-format printers
Maintenance will vary by manufacturer, so check your manual to see what’s recommended for your brand. A couple of examples for an Epson would be: replace the filters, auto fabric wiper, and flushing pad. For HP-Latex: grease the carriage rod.
This is also a good time to check the blades on your metal or plastic sheer and your engraving tools, if you have them, to see if they should be sharpened or replaced.
Taking the time to maintain your valuable equipment when production slows down will save you from expensive repairs and loss of production when it’s busy.