Vehicle wraps and fleet graphics are our specialty, so using tools that make us more efficient is extremely important. One of those tools is vehicle templates. We use them in our shop for so many areas of the vehicle lettering and wrapping process that I consider them an essential tool.
This new year is already starting out with a lot of requests for wrap quotes, especially for fleets. So far this year, two of our existing customers are planning to rewrap their entire fleet because of a complete rebrand of their company logo. A third company we are currently working with is adding quite a few vans to their fleet all at one time.
Vehicle templates are a tremendous help in moving these accounts along. For one of our clients, we’re using scaled photos of past vehicles to do the rebrand on their fleet. They have unique vehicles with a utility box bed and templates aren’t readily available. In this case, we’re essentially using templates we’ve custom created. But more on that in a minute.
For the other two customers, templates allow us to gather information for the customer without seeing the vehicles. Time is crucial for big companies, so we strive for a streamlined process. Personally, I order more from places that make the process quick, easy, and accurate, so we do our best to be that kind of business ourselves.
Pricing
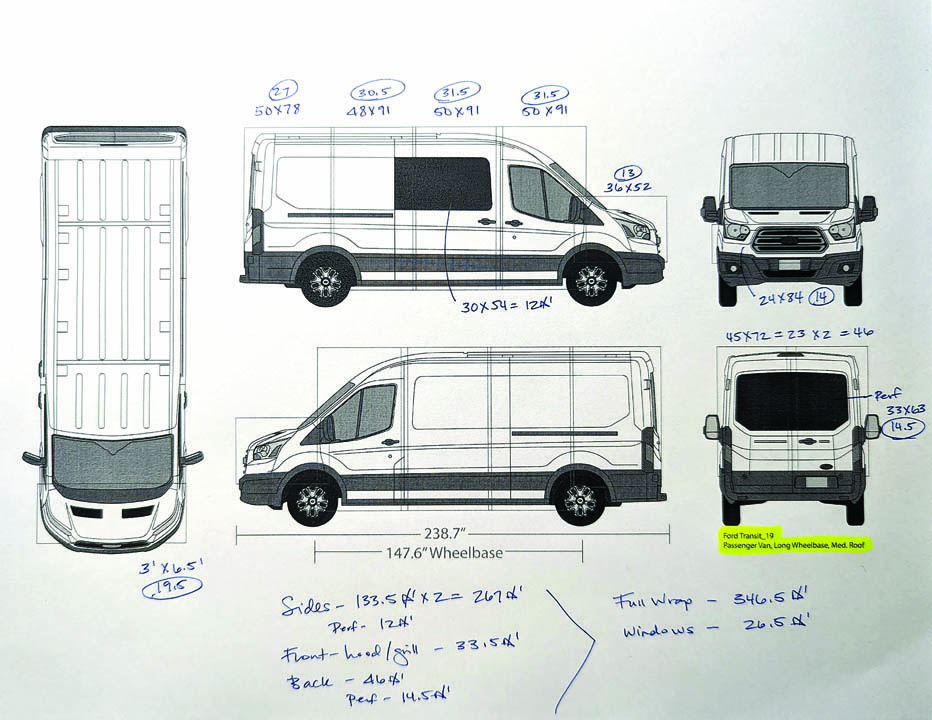
I received a call a couple of days ago from the first of the two customers saying they planned to do a total rebrand and rewrap of their entire fleet of vehicles. As part of the process, they want to gather estimates for the new wraps. To get started, we retrieved the templates we have saved from our previous installations. Using the templates, we are able to figure out the total square footage for each vehicle and can start putting together some pricing. We’re not at the designing stage yet with this account, but the templates are a great tool for pricing.
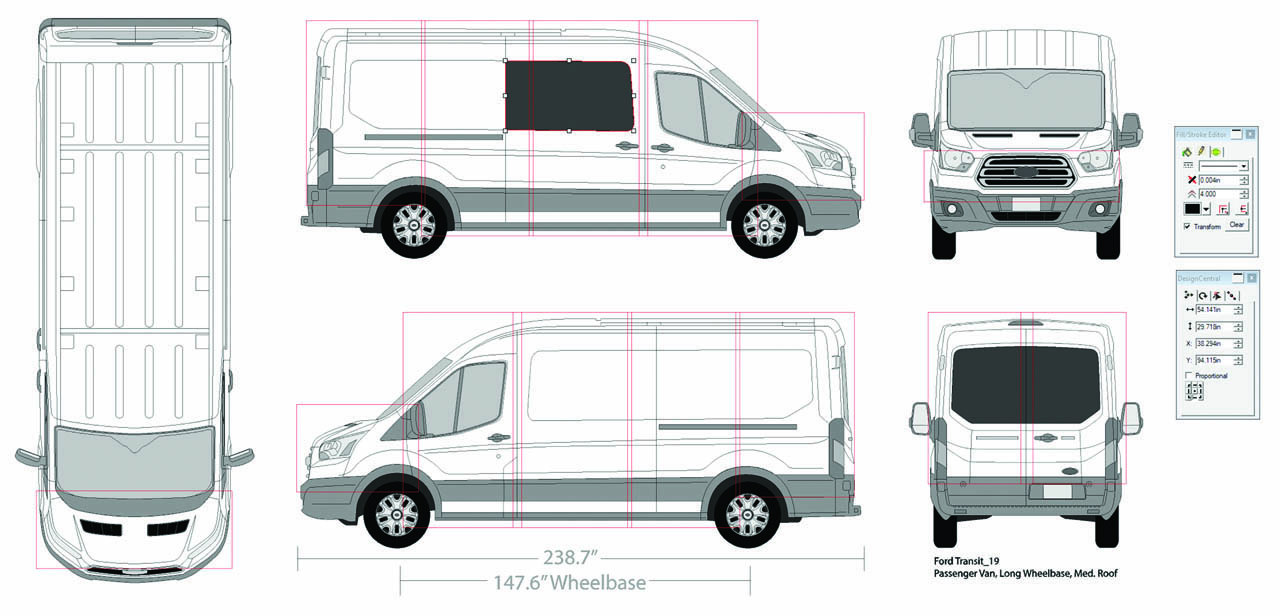
Art Station Vehicle Templates is our go-to source for vector template files. They also offer a Wrap Dimensions guide. The guide has a huge catalog of commonly wrapped vehicles with prefigured square footage for each side. For ease of estimating, we note the square footage for different areas on each side separately. Additionally, the guide provides separate calculations for the windows, allowing you to estimate the cost of perforated view-through film.
We receive requests for partial to full vehicle wraps often. By pulling up a template, we can quickly provide an estimate based on the amount of coverage the customer wants. We don’t do any design work until we get an order, so it’s a matter of asking the customer a series of questions to help them form an idea of the wrap they want. If their budget is less than what we’ve quoted, this is also a great time to adjust the coverage to keep them on budget.
Design
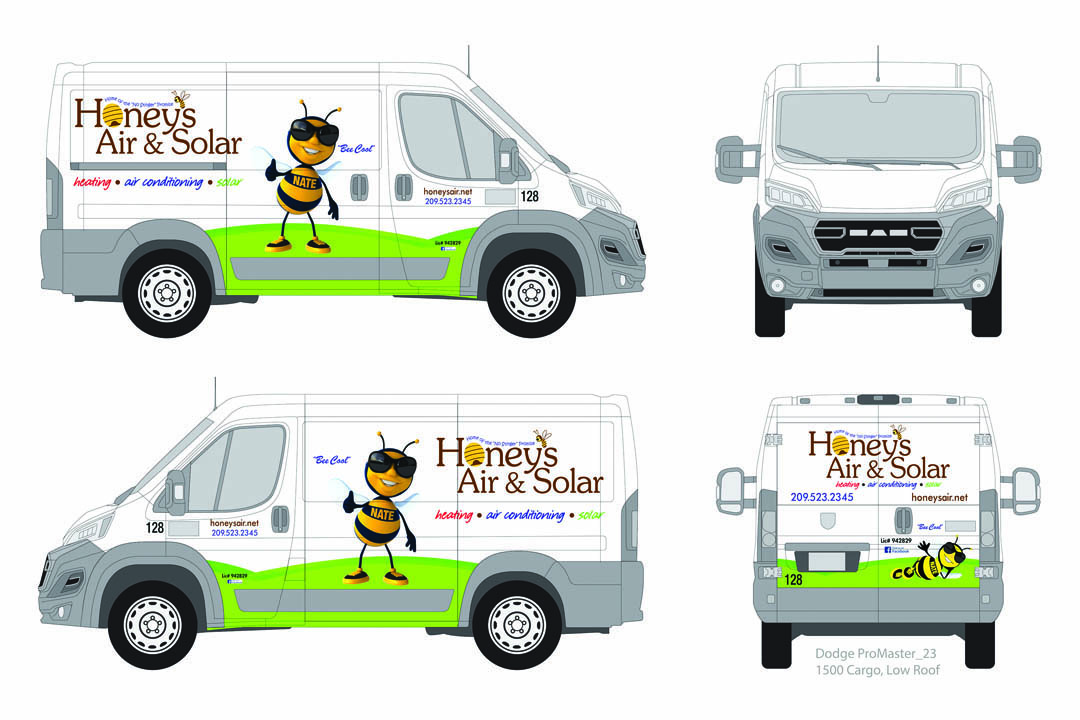
For the second company I mentioned, we’re using vehicle templates primarily as a design tool. We’ve done dozens of vehicles for this company over the years. The vehicle types vary from compact sedans to vans and box trucks. The new batch of vehicles coming in are all brand-new Dodge Ram Promasters with no windows. Once we had the year, make, model of the vans and clarified if there were any windows, we could pull up the correct template.
Taking existing artwork and the template for the new vans, we quickly worked up a proof for the new wraps. We sent a quick proof over to the customer for approval and then coordinated the drop-off of the blank vehicles with the transport company. Other than approving the artwork — essentially one email — we’re handling the rest of the process for our busy customer.
Another way to use templates in the design process is as a sketching tool. Customers are visual, so often we can speed the process along by sketching out some rough ideas with them at the front counter as we’re discussing their artwork and goals for the advertising. Sketching a curved border, a stripe down the side, an angled logo, or other ideas not only ensures that you and your customer agree on the direction of the design, it also makes the entire process more efficient. When it’s time for you to sit down at your computer and start the actual design process, you’ll already be a few steps ahead.
Measurements
Another great use of vehicle templates is for noting measurements. When we’re doing a partial- to full-wrap, especially on a vehicle with obstacles, we take careful measurements. These are essential to scaling the graphics correctly during the printing process to be sure that everything fits the vehicle properly during installation. Using the template, we note where we’re taking measurements from point A to point B. This ensures we’re scaling photos accurately.
For example, if you measure the width of a truck door above the door handle, the width may be a few inches different from if you measured lower on the door, since doors often angle. If you don’t note where you took the measurement accurately, you won’t know if you’re being precise. I’m particular about getting plenty of key measurements so that I know that I’ve scaled photos of the vehicle correctly. When we create custom templates, these measurements are even more important.
Custom templates
If we’re doing a full wrap, especially on a unique vehicle or one with many obstacles, I like to create a custom template. It’s a fairly quick process, and it accomplishes two important things. It gives me a completely accurate template that includes obstacles, after-market parts, and other trim or existing graphics I need to work around, and it also provides a professional presentation to the customer.
The first step in creating a custom template is to get straight on photos of each side of the vehicle. Using accurate measurements of multiple areas of the vehicle, I scale the photos to actual size. To do this, crop the image down a bit so there’s not a ton of space around the vehicle itself to help keep the file sizes manageable. Then, draw a box on a section of the vehicle, like a door width or length of the truck bed, and scale the box to the measurements you took. Once that reference section is at actual size, the entire image is actual size, too. You can double-check yourself on a few other horizontal areas.
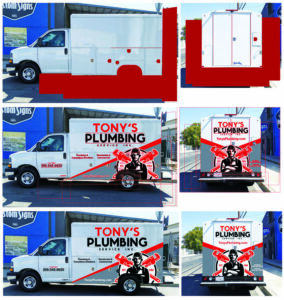 A quick note: in a photo, the image appears flat so your vertical measurements may not seem accurate, because the flat image doesn’t account for the curve of the vehicle body. It’s important to take plenty of horizontal measurements and use these for scaling the image, but be sure to get vertical measurements as well, so you’re accounting for the full height when you set up your graphics for printing.
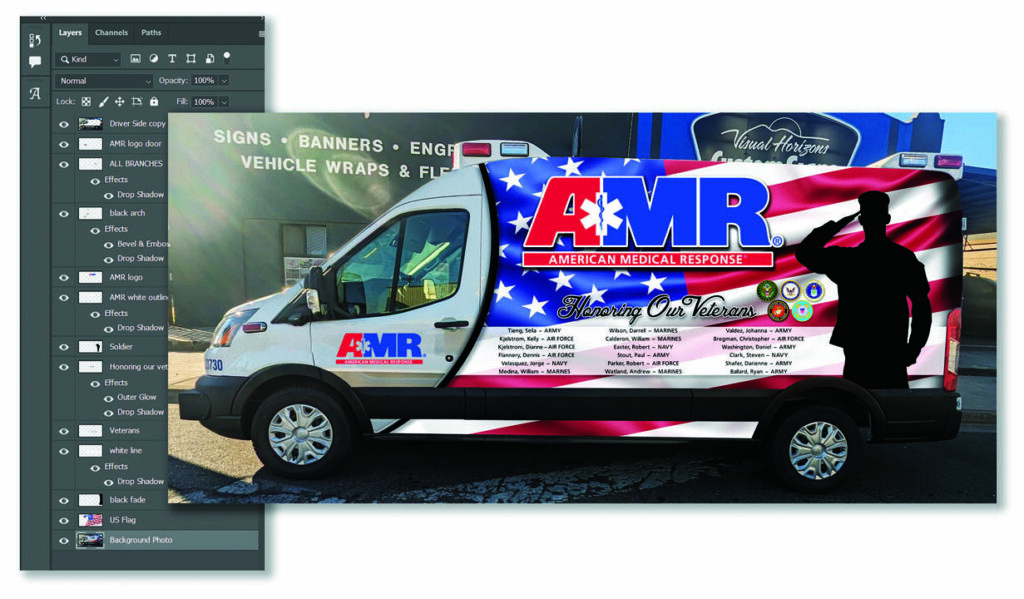
Once I have a scaled image, I can use it to figure out square footage. But I can also use it for designing. Whether I’m designing in Photoshop or in Flexi Sign Pro, I create a background layer of the vehicle image and then a top layer duplicating that file. But, in the top layer, I mask out the areas that we won’t wrap. I place the design elements between these two layers. This allows me to move things around, change scale, rearrange the order of the design, etc., quickly and easily.
Whether you’re creating your own template or purchasing template software, it’s an essential tool to have in your arsenal. The Art Station offers the option of purchasing their templates individually or as a complete set. The Bad Wrap also sells their templates individually or as part of a collection. Another template source is SignElements, which also offers flexible purchasing. Make sure to choose the software that best meets your company’s needs.
