Try This: UV Texture Prints for High-Margin Applications
Separate yourself from the competition.

UV texture prints can help separate your company from offering the same products that all the other printers offer. If you are a UV printer, you have some serious weapons at your disposal – you just need to learn how to sell and produce these products. Most customers will not call and ask for gloss clear enhancements on their products, so you have to learn how to sell this stuff. Let’s get to UV texturing.
Tools needed:
- Photoshop
- Mimaki Rasterlink 6*
- Mimaki UJF 7151 SG, or an equivalent UV-LED printer
*Note: Mimaki Rasterlink 6 is used in this example, but an equivalent from another manufacturer can also be used.
Step One: Setup the Artwork
All images courtesy Steve Weist, PDS Equipment
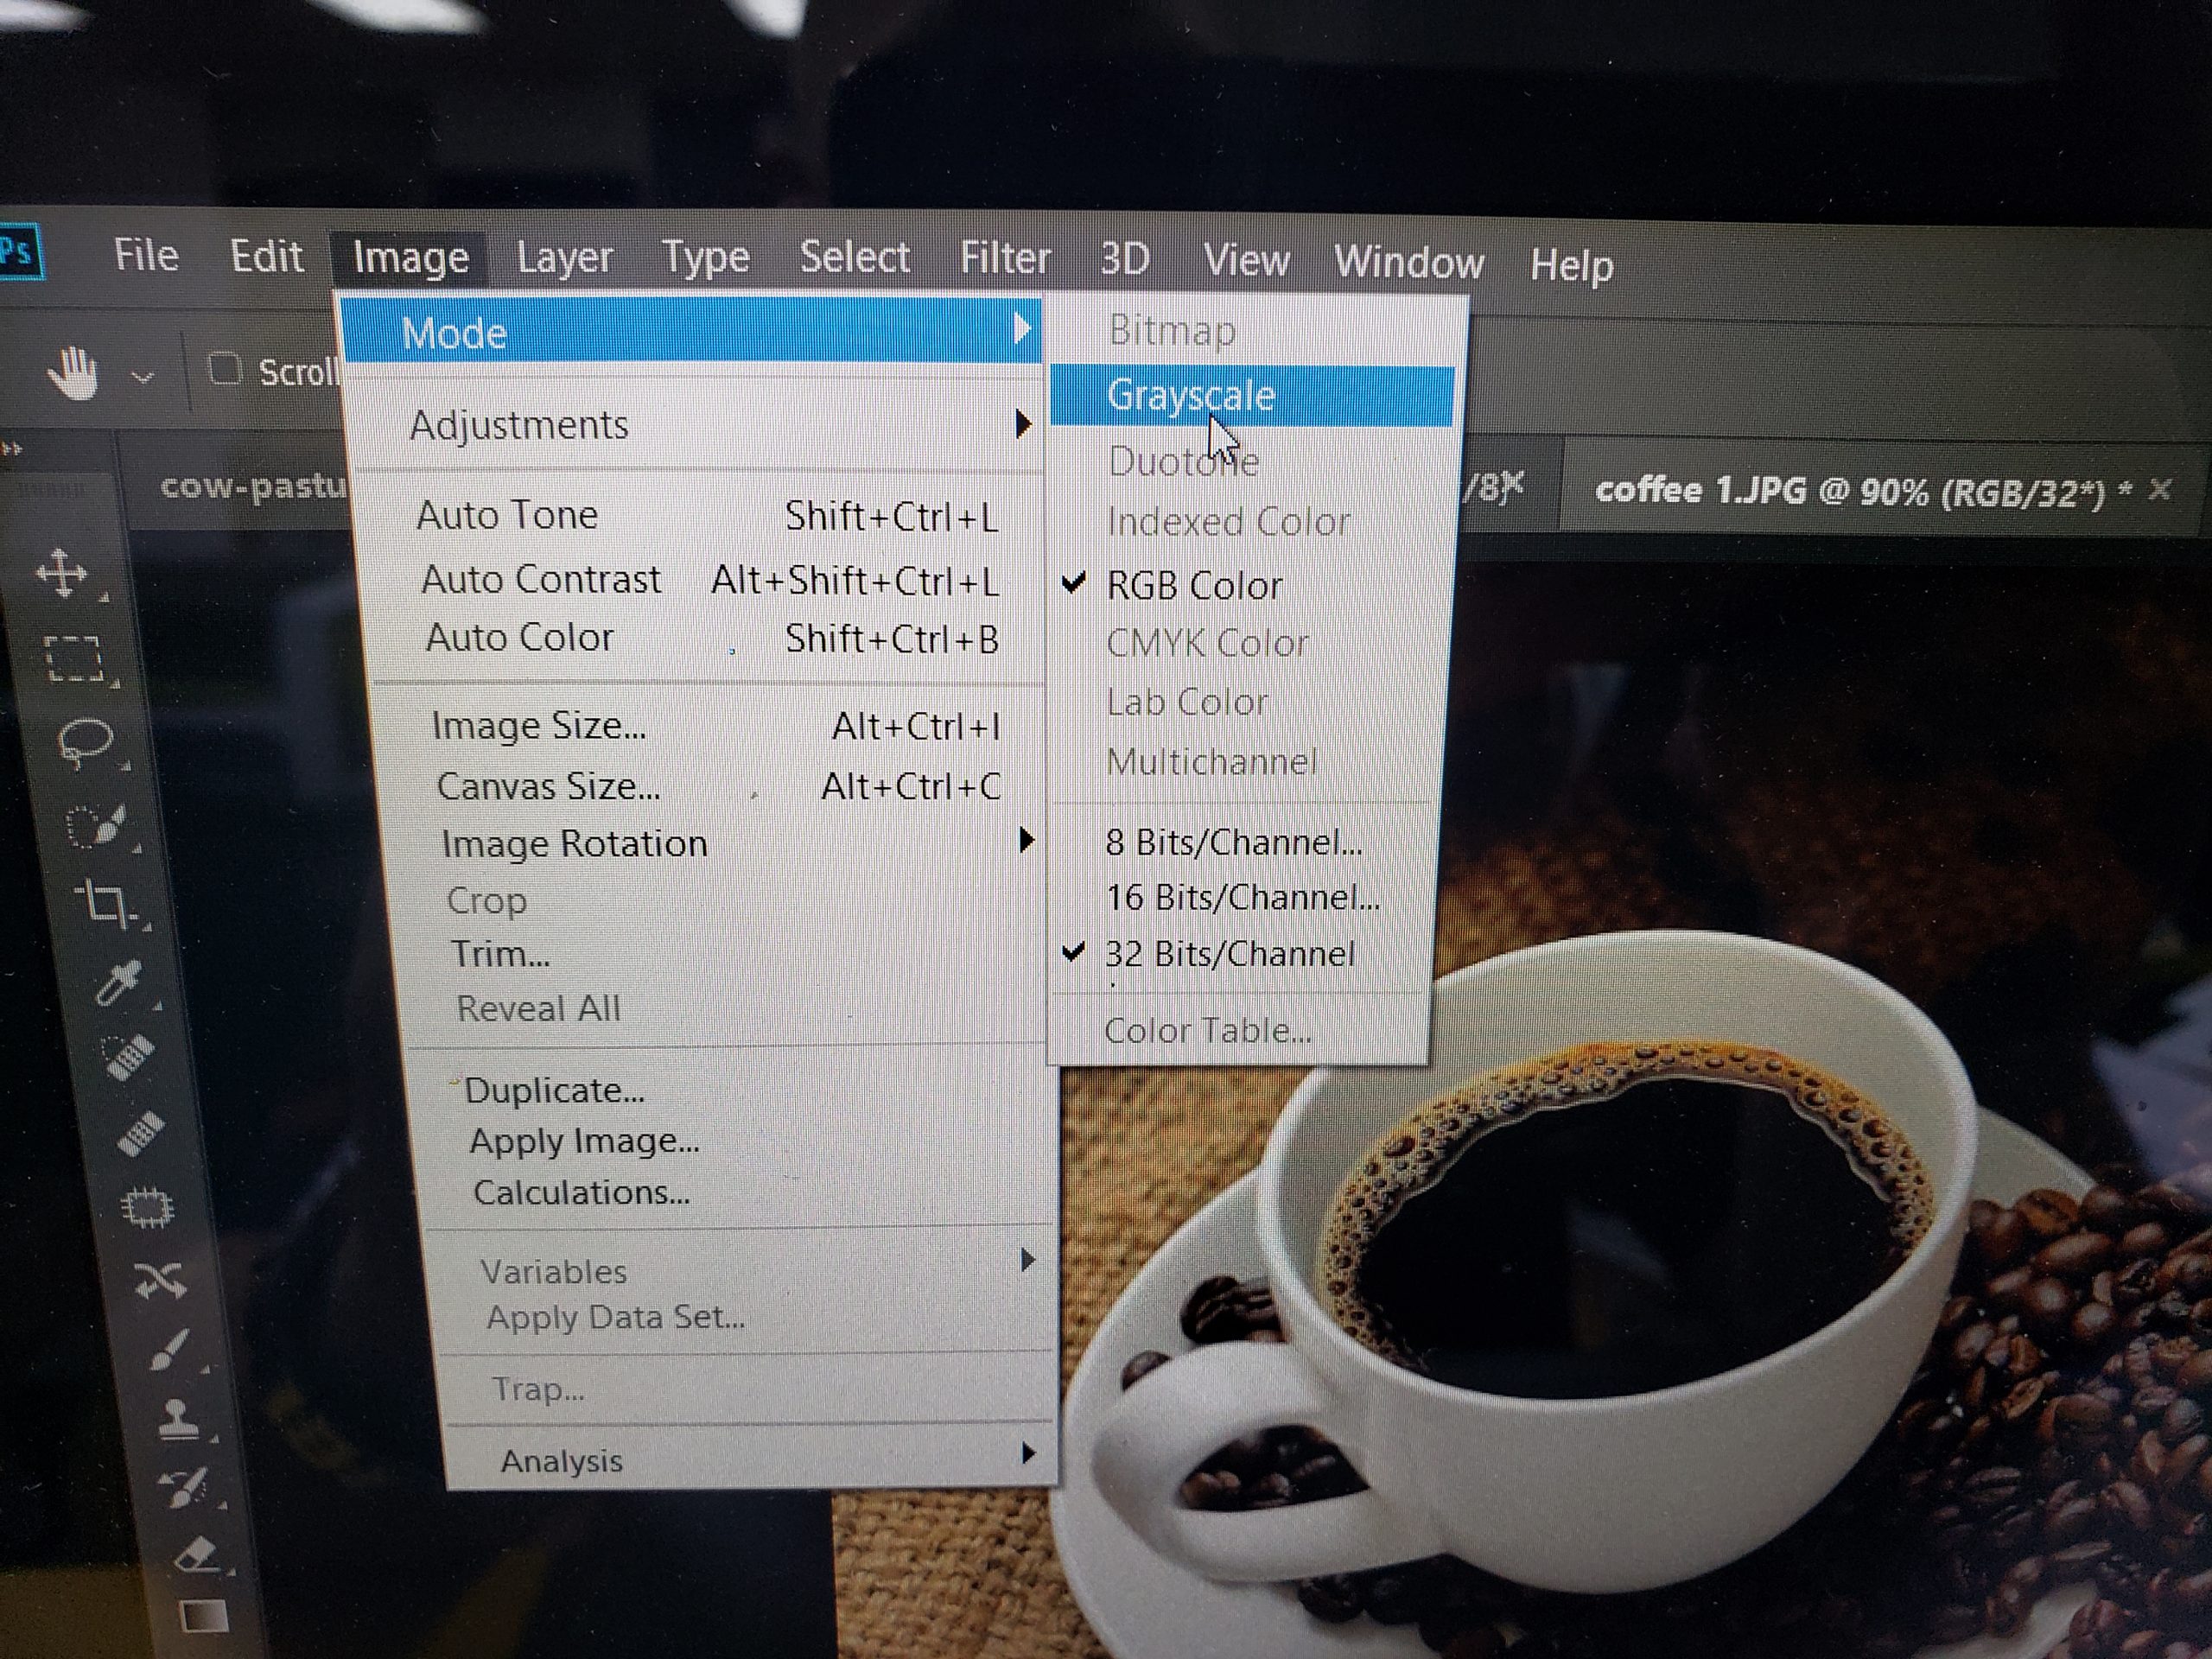
Grab a print file that has a good bit of contrast between dark and light areas of the image. Import the color file into Photoshop, or a similar software, and convert the color image into a grayscale image and save this file as the Clear Layer. Next, save the full-color image file as a base layer. Now we have two identical-size files saved on our PC. Load these files into the Mimaki RIP software.
Step Two: Prepare to Print
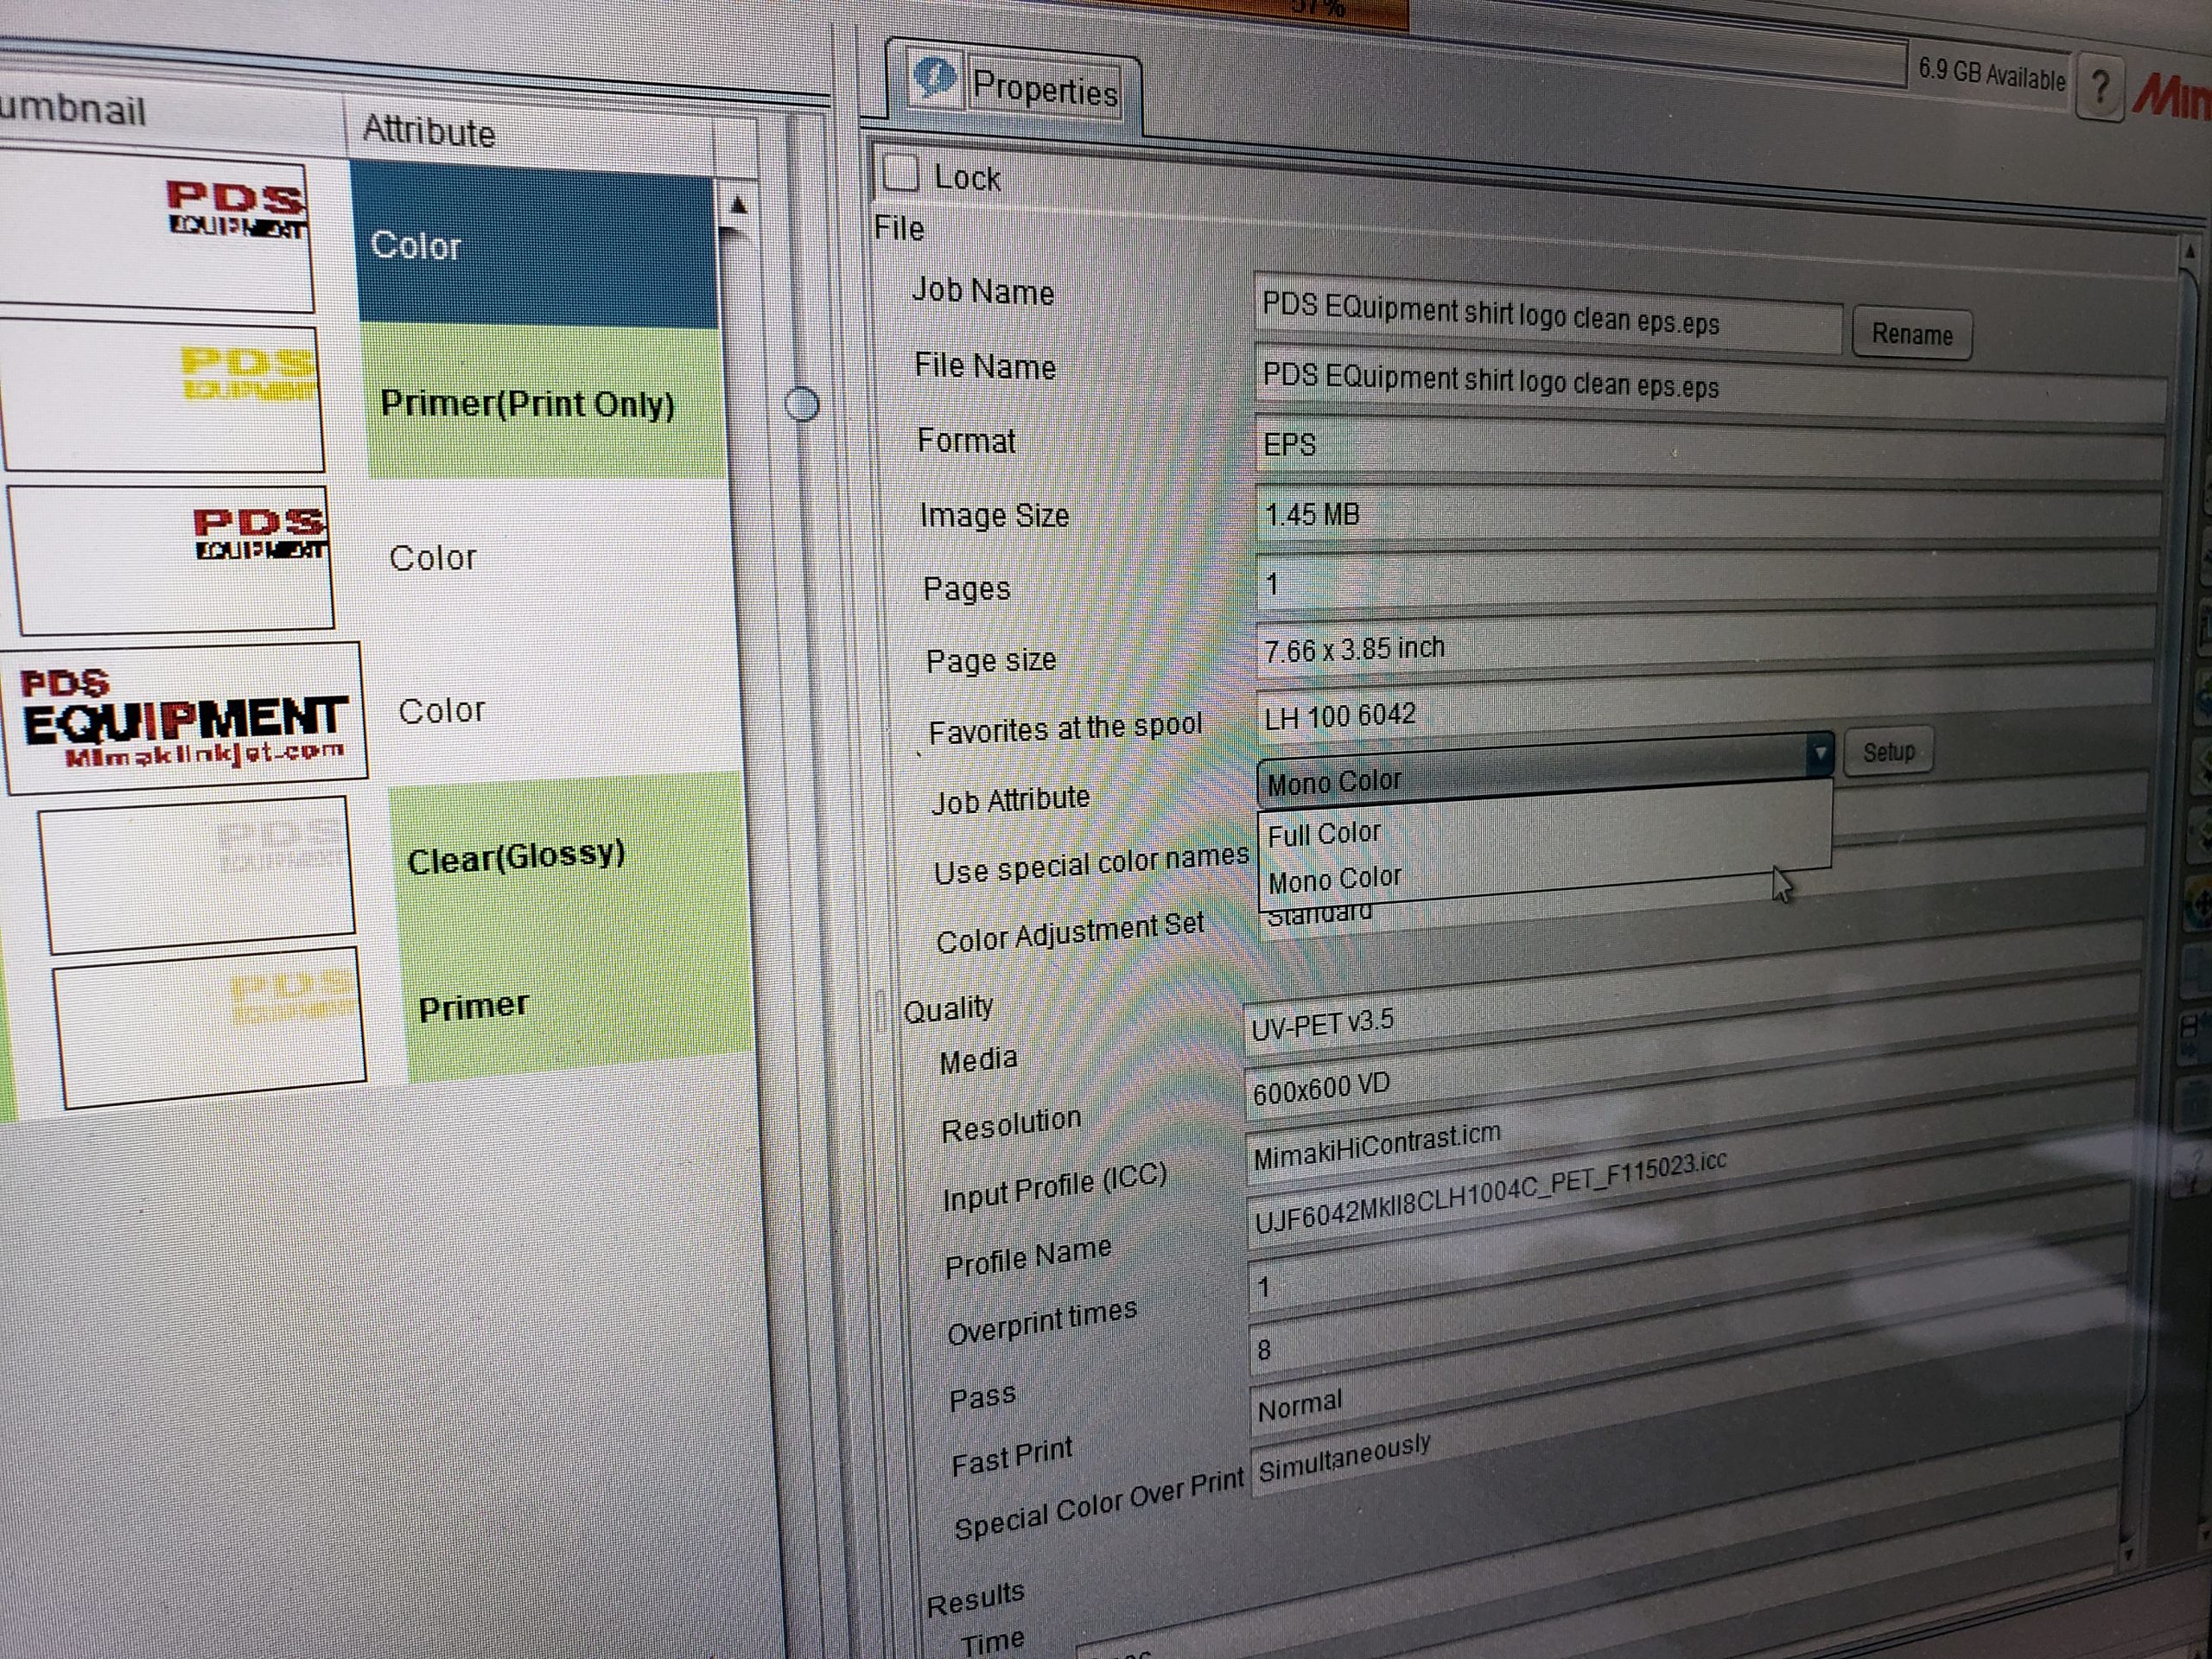
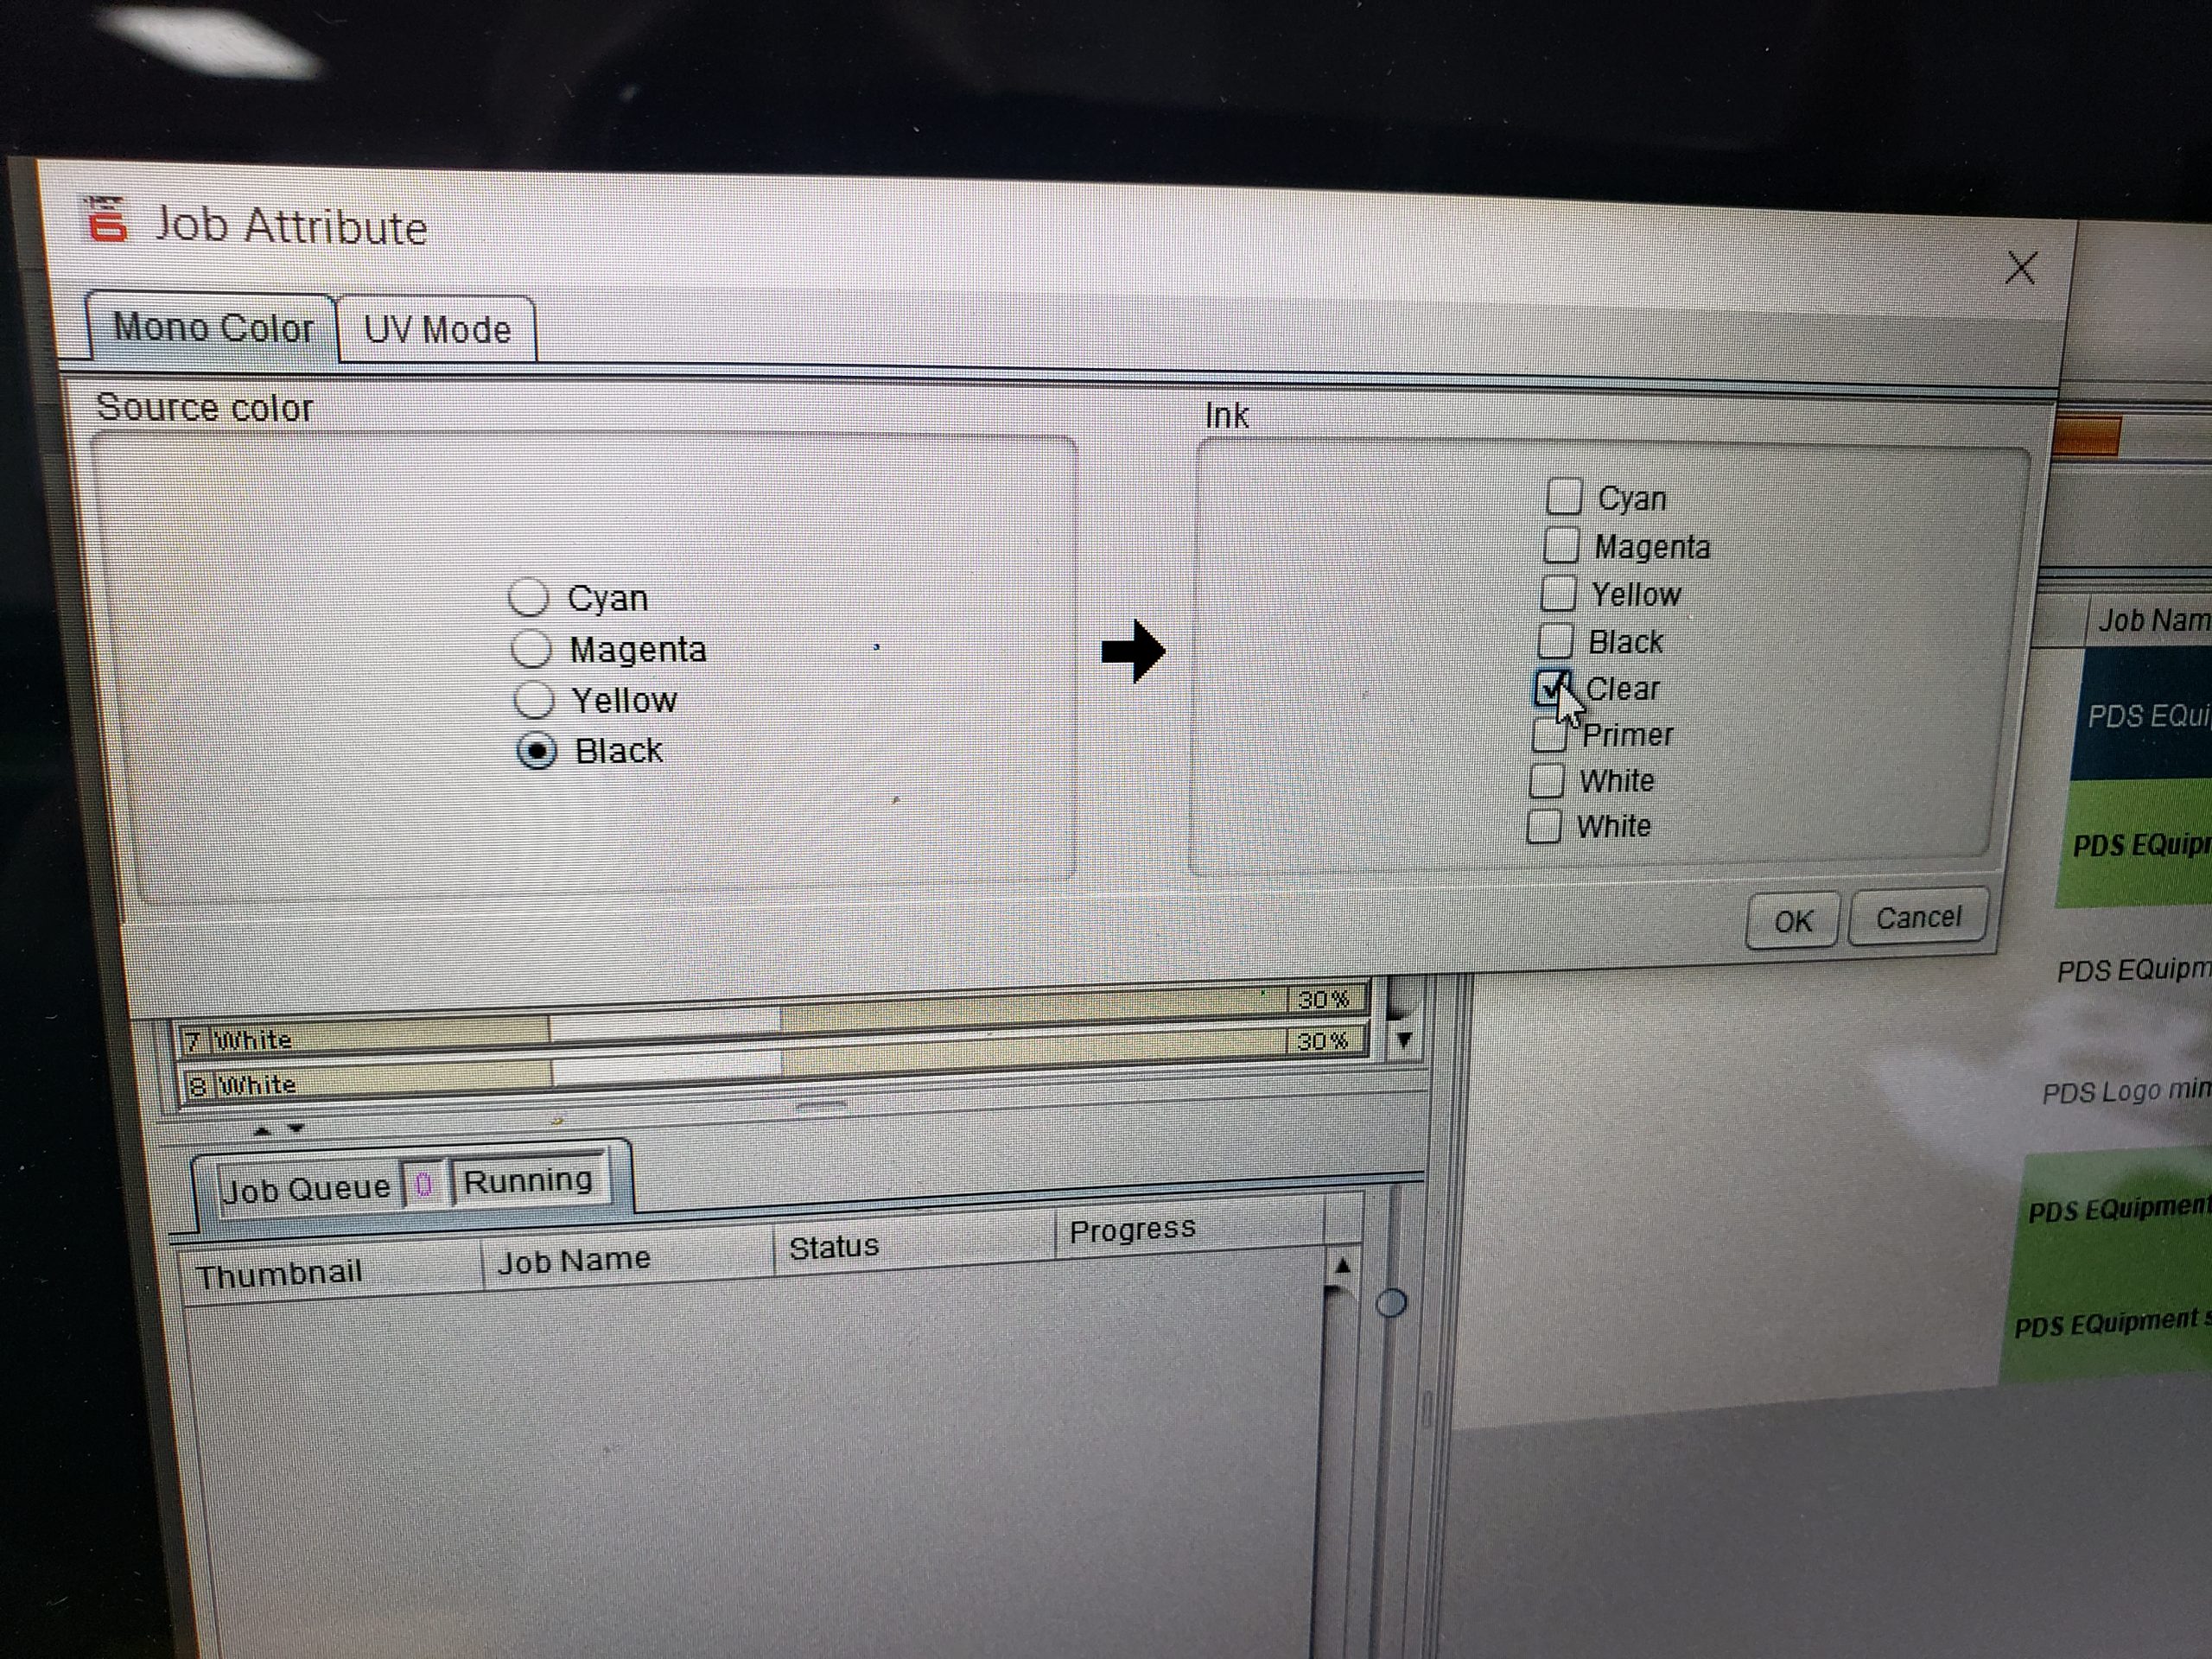
Once both files are into Rasterlink 6, grab the file named Clear Layer under the Job Attribute tab and change the grayscale file into Gloss Clear. Now everything in the grayscale file that was black will be gloss clear.
Step Three: Print the Image
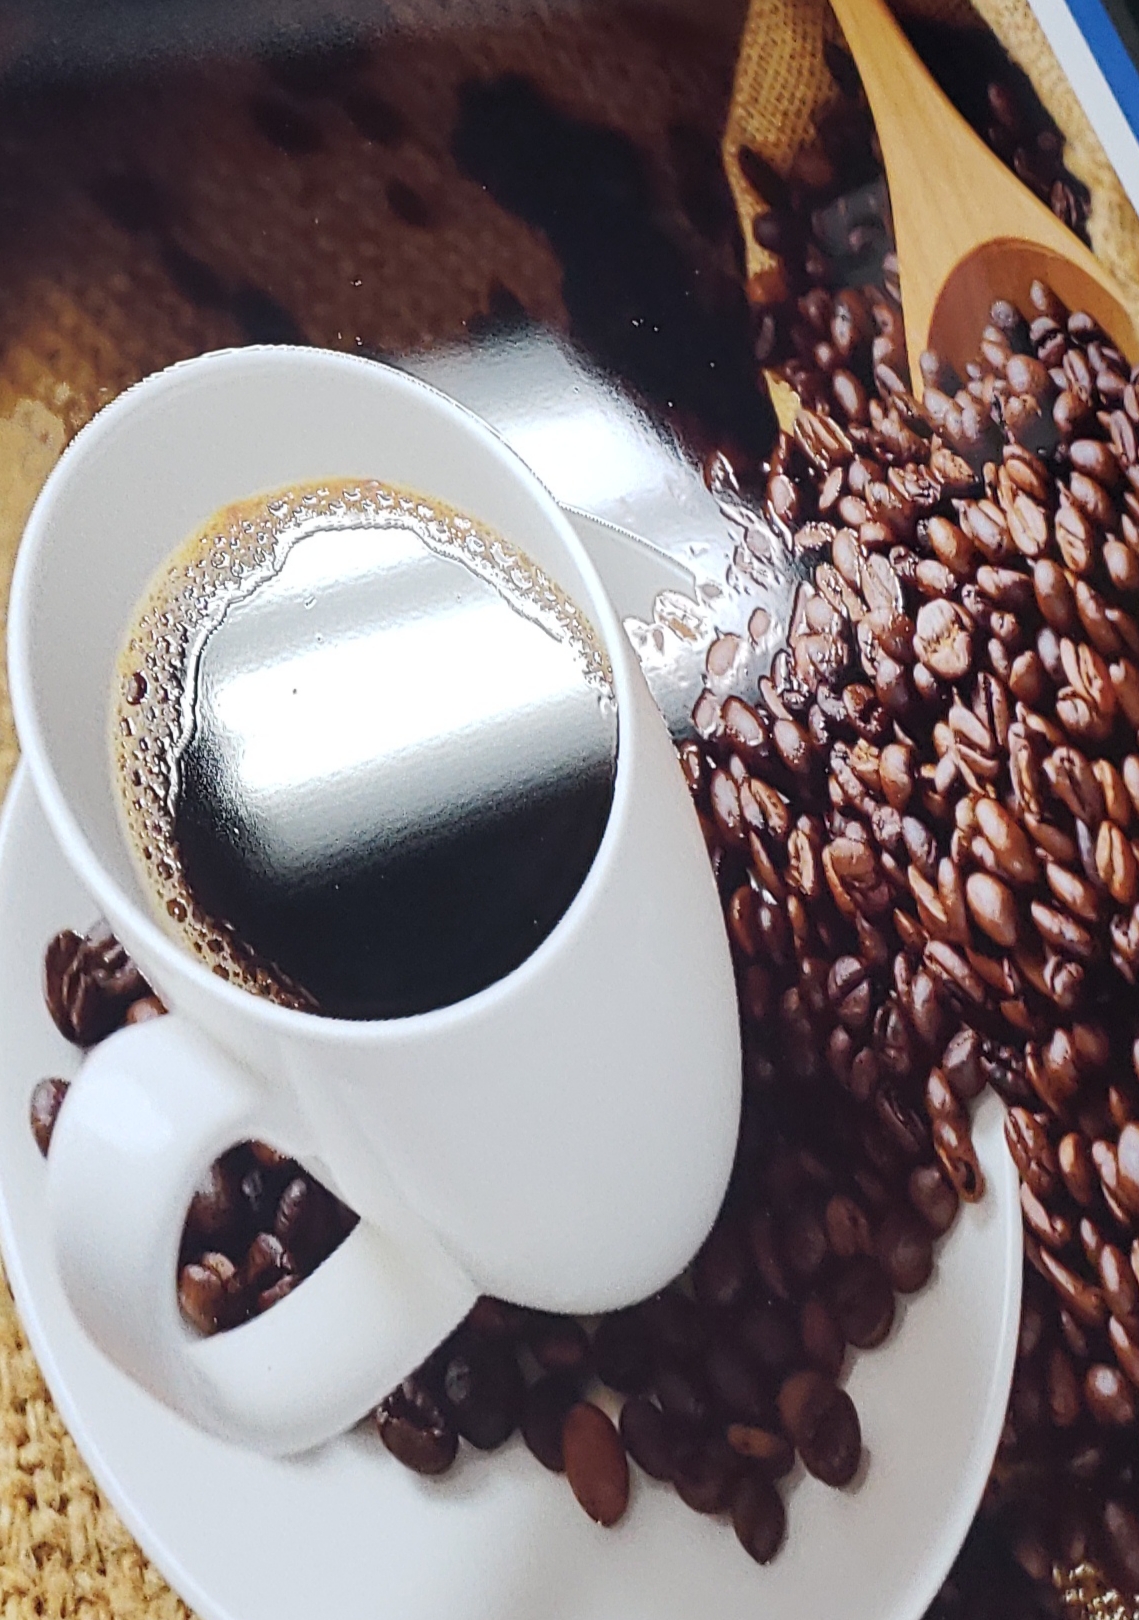
Once the Gloss Clear file is ready, all we need to do is composite the base color file and the gloss clear file together and make some magic. The printer you have will determine what profile is best.
Watch this video to see how it’s done.