Try This: Laser Engraving Wooden Spoon Garden Markers
Warmer days will be here before you know it - prepare for those days by taking on this project.
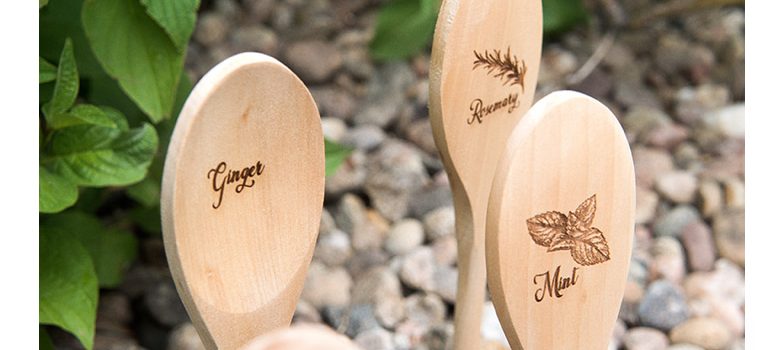
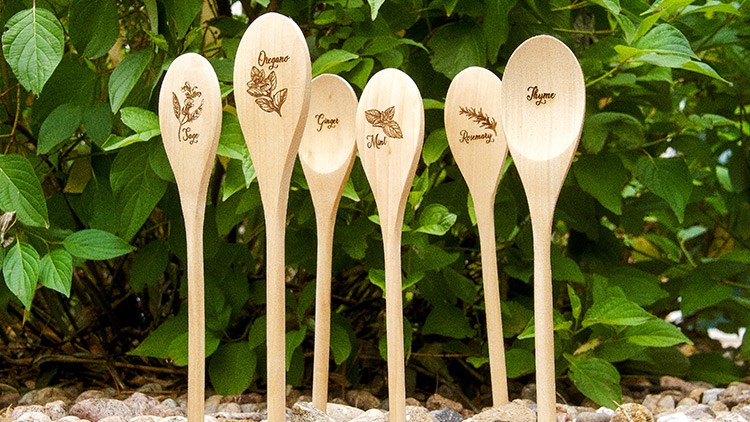
Gardening is a popular activity for many, and as warmer months roll around, it’s always exciting to see seedlings sprouting and flowers blooming. But how do you remember what you planted and where you planted it? Plastic garden markers that come with plants and herbs are often small, difficult to read, and flimsy. Engraving garden markers – like these sturdy wooden spoons – is a great alternative to traditional plant markers.
Whether you go with acrylic, wood, or other hearty material, laser engraving garden markers allows you to add pop and personality to any garden. Keep reading to access the design files, machine model, and laser parameters we used for laser engraving garden markers.
Materials Needed:
- Wooden spoons
- Polyurethane spray
- Laser system
We used a Fusion M2 40 120w:
Engrave: speed 80%; power 100%; 600 DPI; Raster engraving
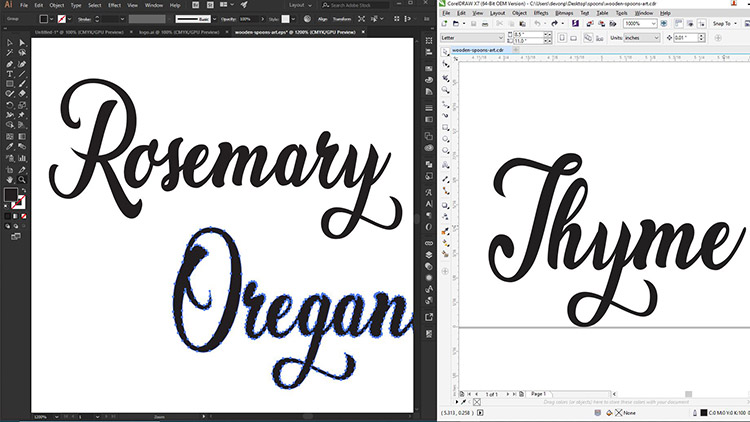
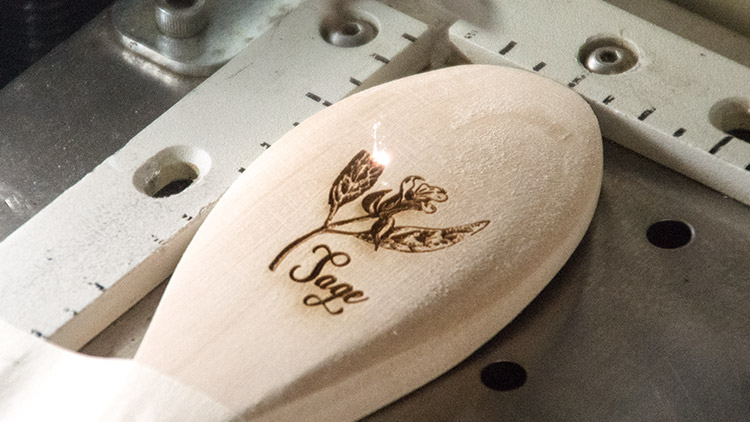
Step 1: Prepare artwork
Download the graphics and import the design into your graphics software. Make adjustments as necessary.
(All images courtesy Epilog)
Step 2: Send to the Laser
Send the job to the laser with the correct parameters for your machine wattage. (You can check your user’s manual or call your manufacturer if yours is different from the one we use here.)
Step 3: Add finishing touches
Wash off the residue and coat the spoon with polyurethane once dry.
Where can you sell laser engraved garden markers?
- Home/garden stores
- Specialty gift shops
- As personalized housewarming gifts