Try This: Embed Coins and Medallions in a Wood Plaque
Inset coins to specific depths using this process.
I get a lot of requests from customers to embed military coins, or medallions, on plaques so it sits flat to the surface. This requires insetting the coin to a specific depth. The customer may want the coin to sit proud of the surface, meaning slightly above. Perhaps the coin has raised graphics or text that they want sitting above the surface as well.
For some coins, the mounting is as simple as designing a layout and gluing the coins onto the wood plaque. The coins are typically two-sided and are often not flat, as some of the graphics and text rise off the surface providing a rounded surface. You can use a thick epoxy to attach the coins to the plaque. This may not be the best solution as they will tend to sit too much off the plaque surface providing a strange look.
Recommended tools:
- A caliper for accurately measuring the thickness of the coin
- A small tabletop drill press to accurately drill the hole to a specific depth
- Glue to adhere the coin to the plaque (Loctite GO2 glue is used in this example)
- A Forstner bit set to drill the hole to the right round size and depth
Note: I have a SteeleX 16-piece Forstner set that includes drills from 1/4” all the way up to 2 1/8“. This set covers most projects*.
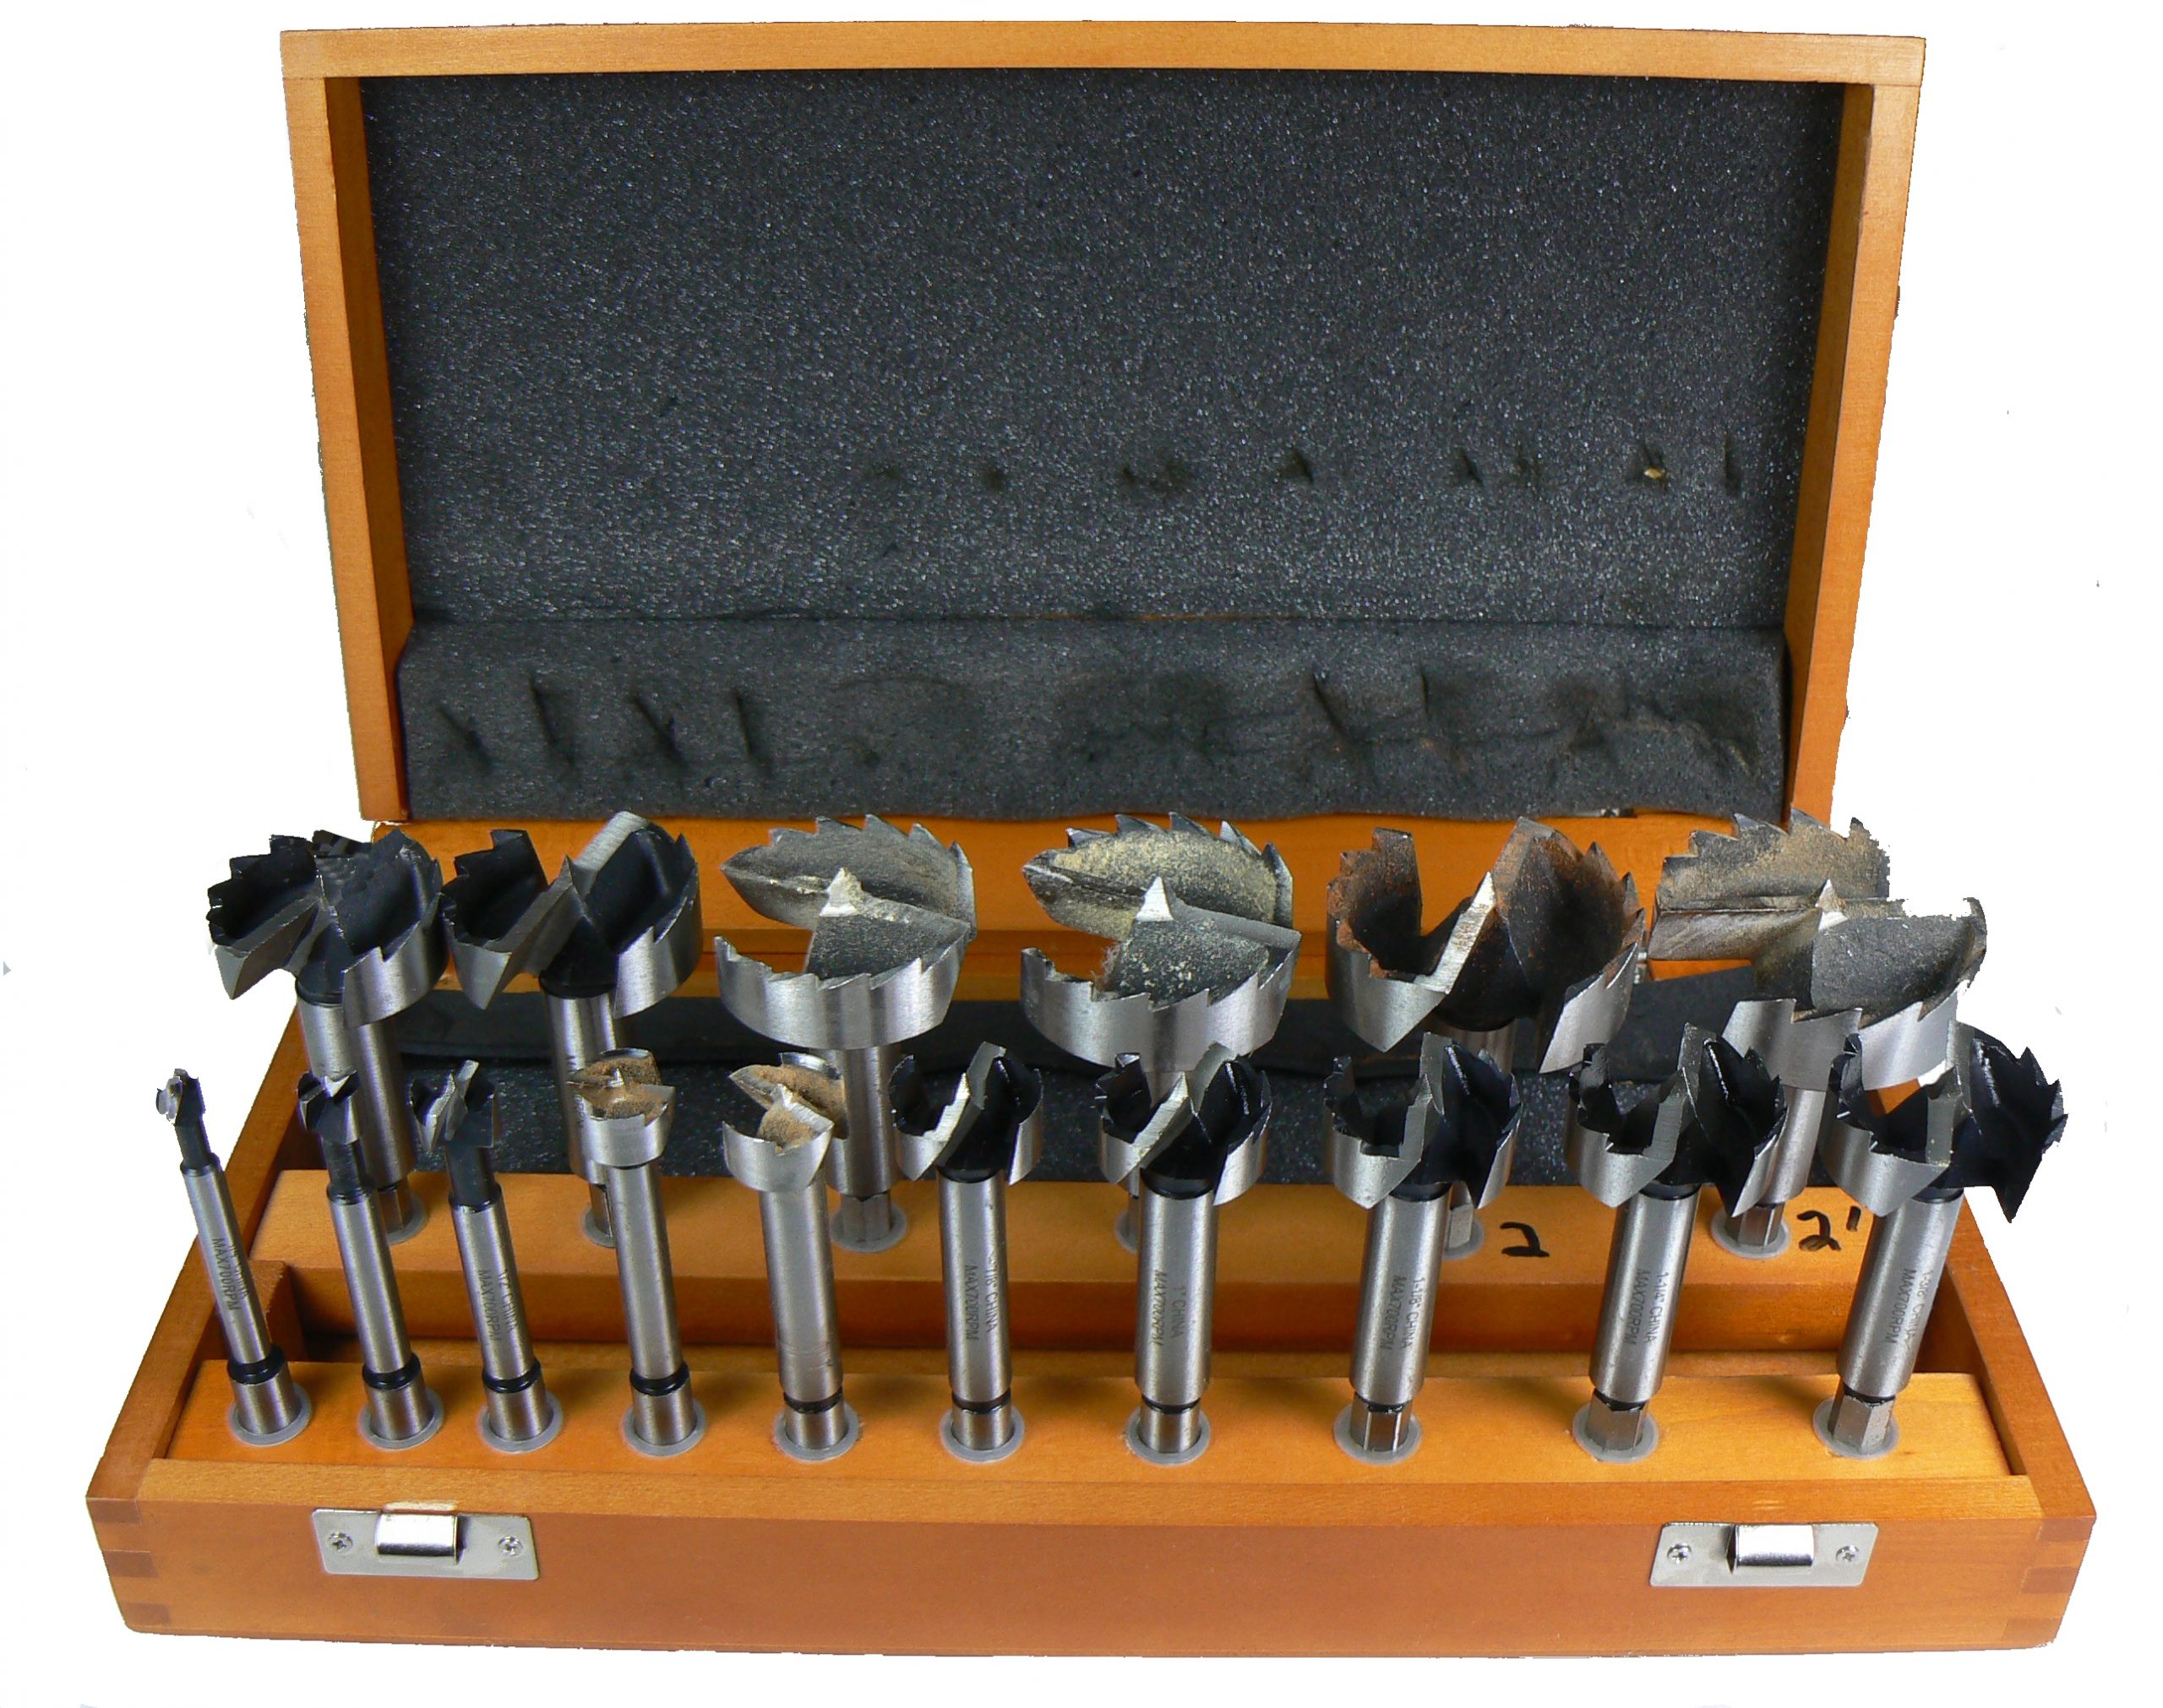
A Forstner drill set. (Image courtesy Bob Hagel)
Step 1: For these coins, I grind down the side that will attach to the plaque using a bench grinder. A bench grinder is a good investment, and unless you are going to use it as an everyday tool, you don’t need to spend a lot of money on one.
My grinder has two stones, one fine stone and one that is more coarse, allowing me to grind down the surface quicker. A pair of work gloves is also a good investment as grinding heats up the metal quickly and you can easily burn your hands. Grind down the surface as flat as you can. It doesn’t have to be perfect.
Step 2: Make sure the surface of the plaque is not too slick. You can laser in a round mark smaller than the coin. This will aid in the coin placement and roughen up the surface to better hold the coin on the plaque.
Step 3: Many glues work well to adhere the coin to the plaque. I use the Loctite GO2 glue, which works on most types of materials and sets in 30 minutes. Faster glues may be your choice; however, watery glues and those that set almost instantly are not good choices. Aligning the edge of the coin to a plate, photo, or another coin requires small adjustments and instant setting does not allow for any adjustment. Watery glue may run away from the coin and ruin the plaque.
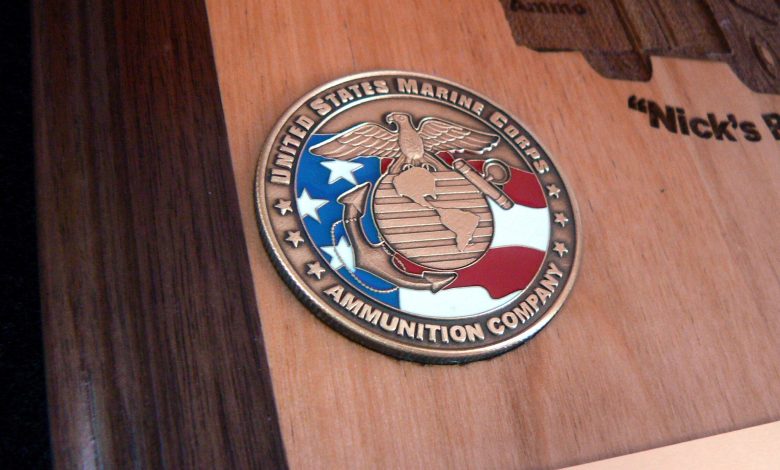
An embedded coin.
Mount a Plaque Mount
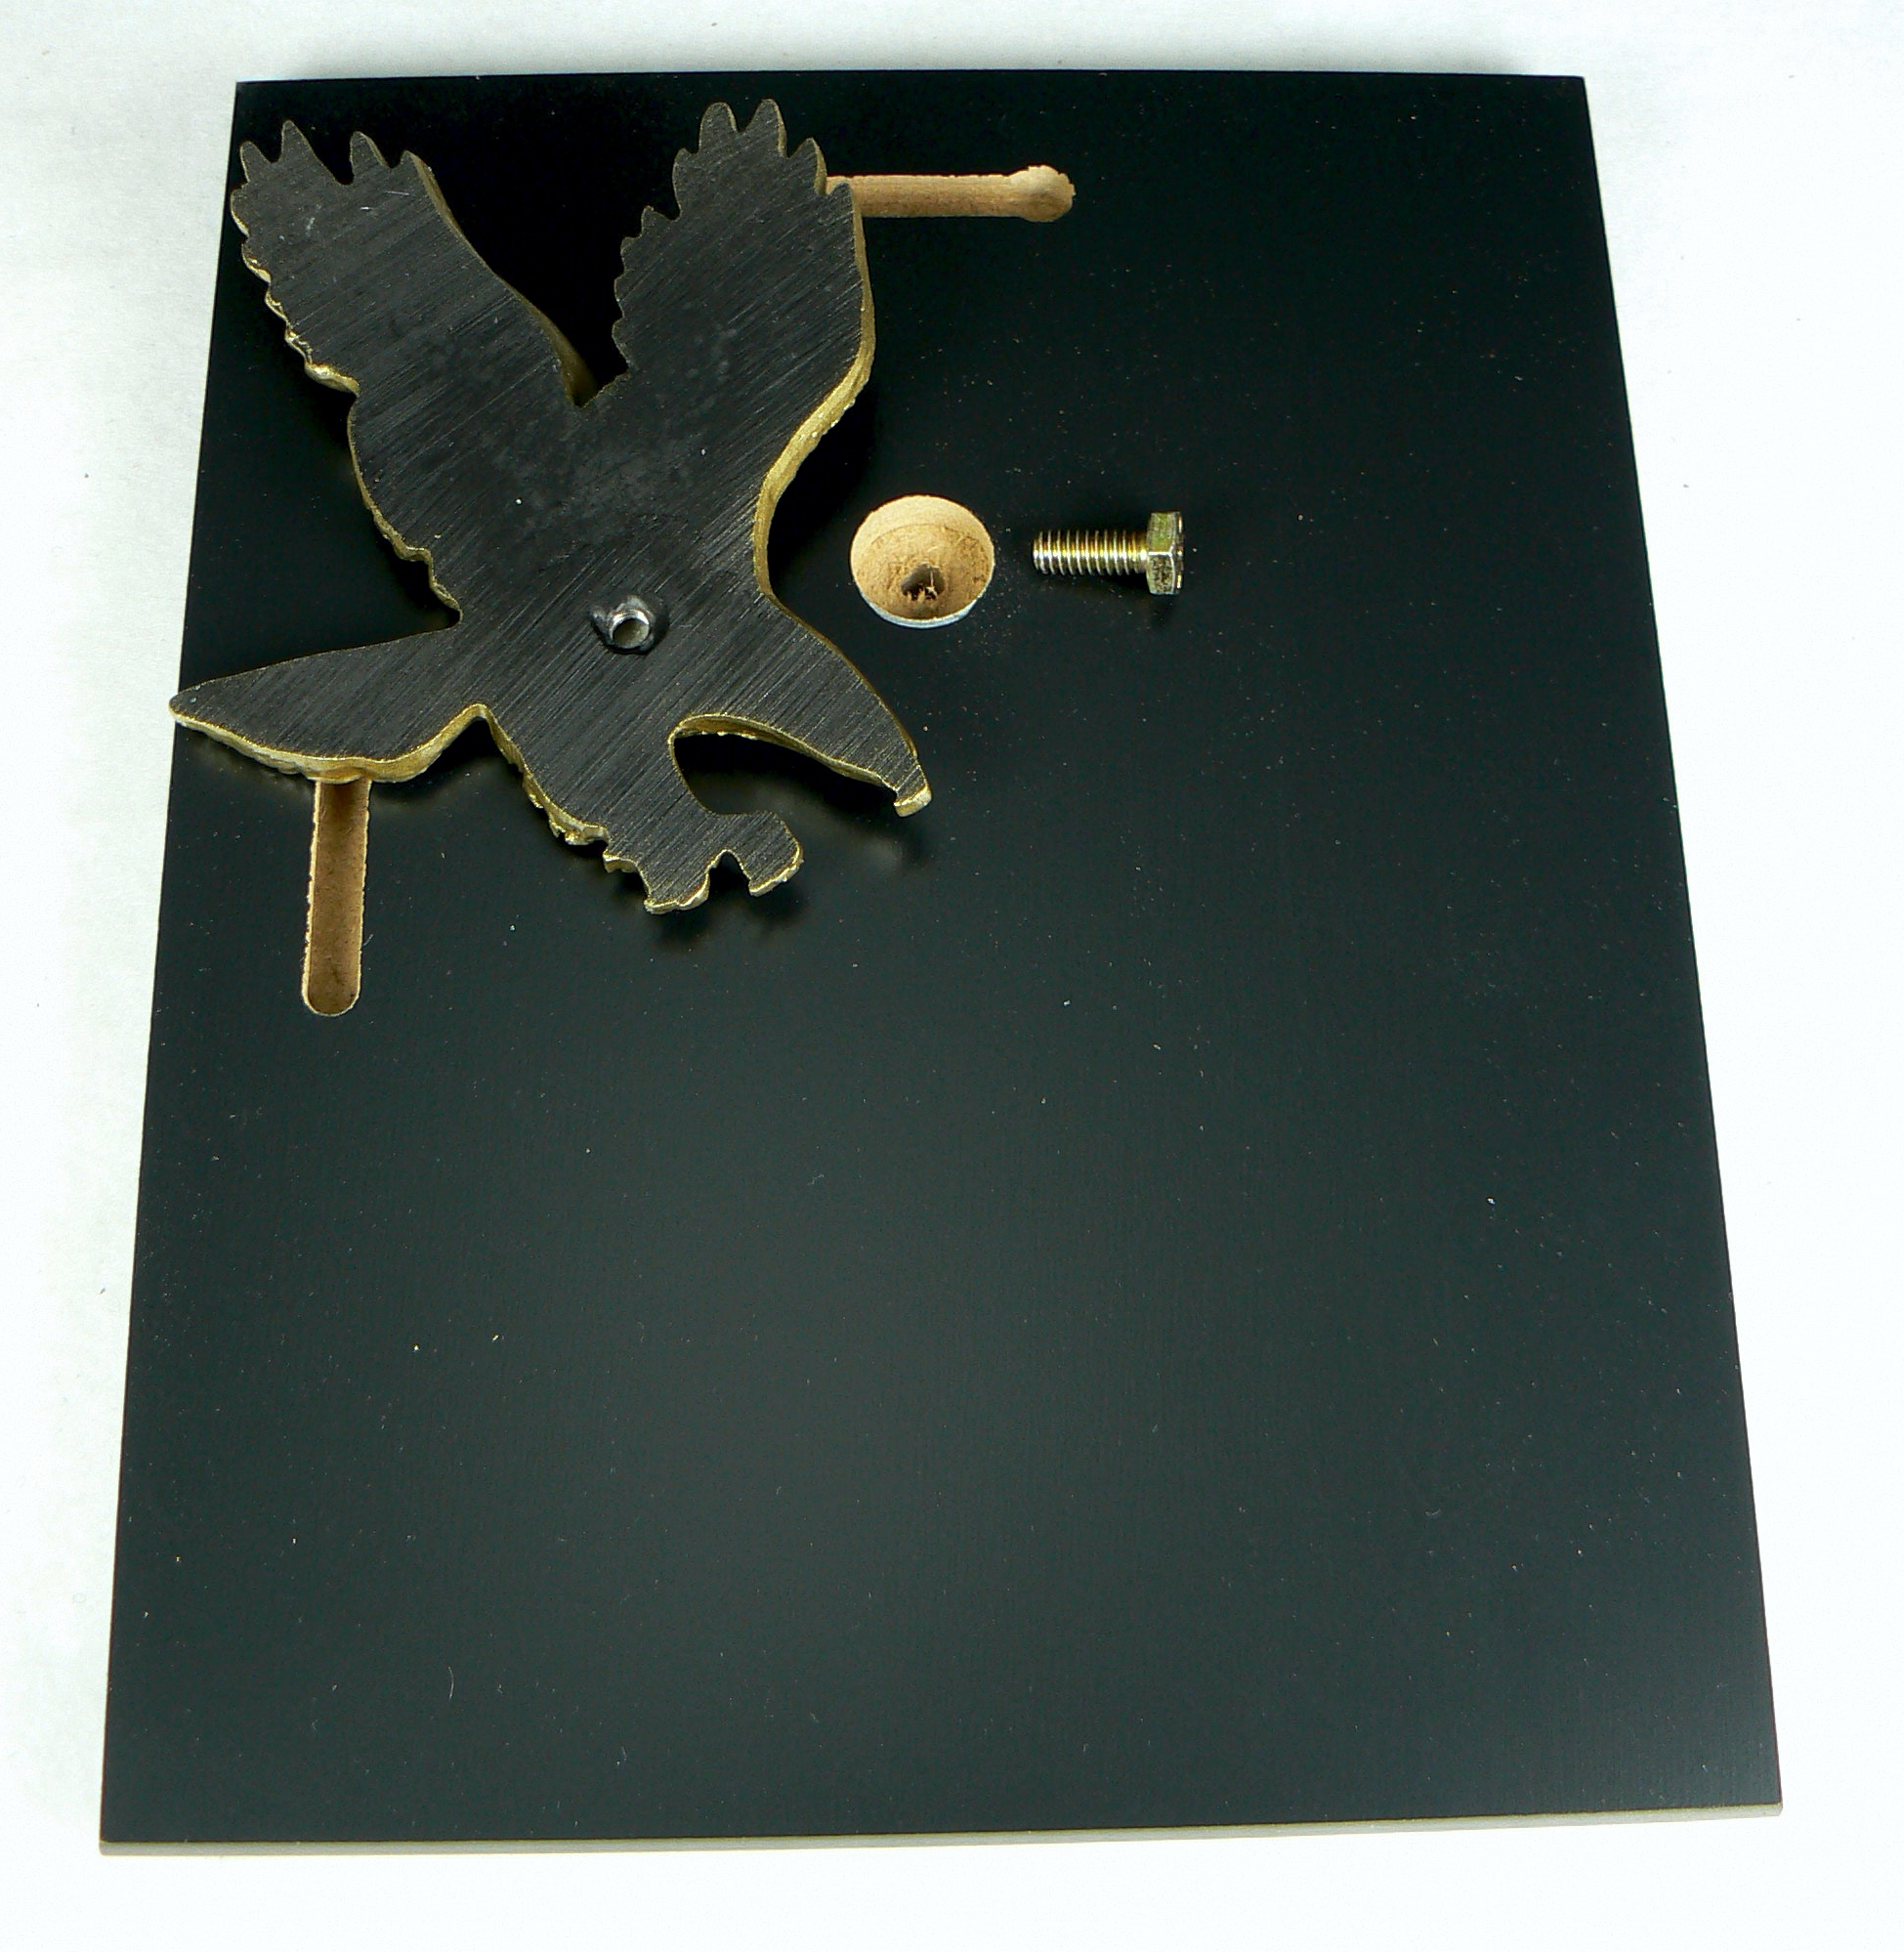
A plaque mount is attached to a plaque by a nut on the bolt attached to the back of the plaque mount. It screws onto the bolt just like a trophy part. In order to mount a plaque mount, a hold must be drilled through the plaque.
However, it’s not that simple. If you place the bolt through a drilled hole, the nut, when attached, will protrude from the back of the plaque. This will make it difficult to hang the plaque on a wall and could easily damage a wall. The nut must be inset so it doesn’t protrude out from the plaque.
This requires a hole large enough to fit the nut and a nut driver into the hole. The depth of the hole should only be deep enough to hide the nut; it cannot go all the way through, or it will be difficult to attach the plaque mount without it loosening over time. This hole can be drilled using a Forstner bit, which drills a flat hole so the nut snugs up tight. A second hole must be drilled for the bolt. It will be smaller and should be sized to only allow the bolt to go through. A regular drill can be used and the Forstner bit leaves a small indentation in the middle as a starting point to drill the second hole. The second hole should be drilled from the back of the plaque using this starting point.
*For most projects, Forstner bits are our go-to solution. To begin using Forstner bits, drill as many test holes as you need to become competent at placing the plaque under the drill press in the right spot and getting experience setting the depth accurately on the drill press. You can drill the hole with a hand drill but getting it flat and at the right depth is difficult. If you find it difficult to place the Forstner bit down in just the right location on the plaque, drill a small hole first to better locate the point of the Forstner bit in this hole for an accurate placement.
Extra tip: You can also contract out certain jobs. We have a client who had us embed medallions we cast for them that are 4” round. We had our woodworker partner route out several wood plaques to have on hand as this client used them often for special recognition. He used a professional router and an acrylic guide we cut out of 1/2” clear acrylic with our laser.