Color management (CM) is frequently ignored by the novice print technician. When an image is printed, simply choosing to let the printer manage color and relinquishing control of the final output to a single device will not produce the best quality print. The disparity can be observed by comparing the print to the image on the monitor. Disappointing at best!
The idea of synchronizing color output on all of the many devices in the digital workflow can be pretty daunting. The hard reality is that a color-managed environment is essential for consistent quality output.
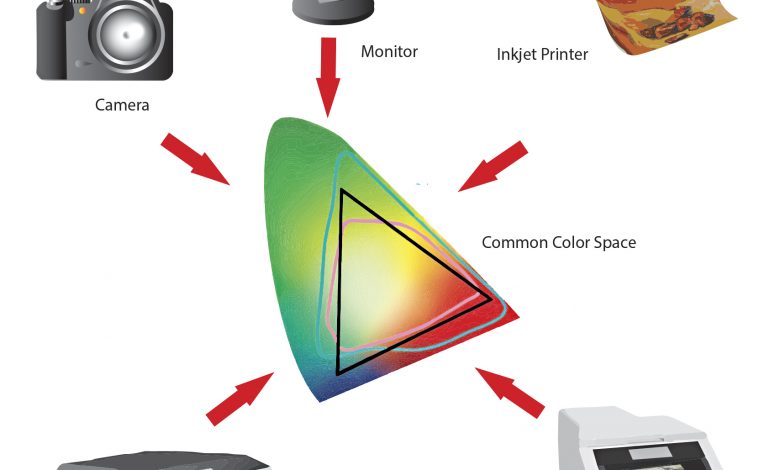
Fortunately, CM, though technical, is not that complicated. The basic concept is that color varies between different capture devices such as digital cameras and scanners, and between different output devices such as monitors and color printers. Managing color is the process of finding a common color workspace for all of the devices in the workflow to ensure that colors appear and print on each device as similarly as possible. (Figure 1).
Color Difference
The same colors appear differently from device to device even though the same data is being processed. Input devices like scanners and digital cameras and output devices such as monitors, inkjet printers, color copiers, web and offset presses have individual color capabilities. CM helps to resolve these color inconsistencies and match color on all of the devices in the workflow. That being said, CM does not guarantee identical color reproduction. It does, however, enable significantly more control over the color produced by each device.
Nuts and Bolts
Before we embark in exploring new CM options let’s get a little more specific about what we do when we manage color. CM is about manipulating the numerical color values of the pixel data in an image to conform to the color potential of a specific output device, whether it be a monitor or a printer. An ICC (International Color Consortium) profile defines an image’s “color space” so that it can be configured on-screen to match how it will look when printed. To get a printed image to match the monitor’s display is achieved by systematically following a few steps.
Quick Calibrate
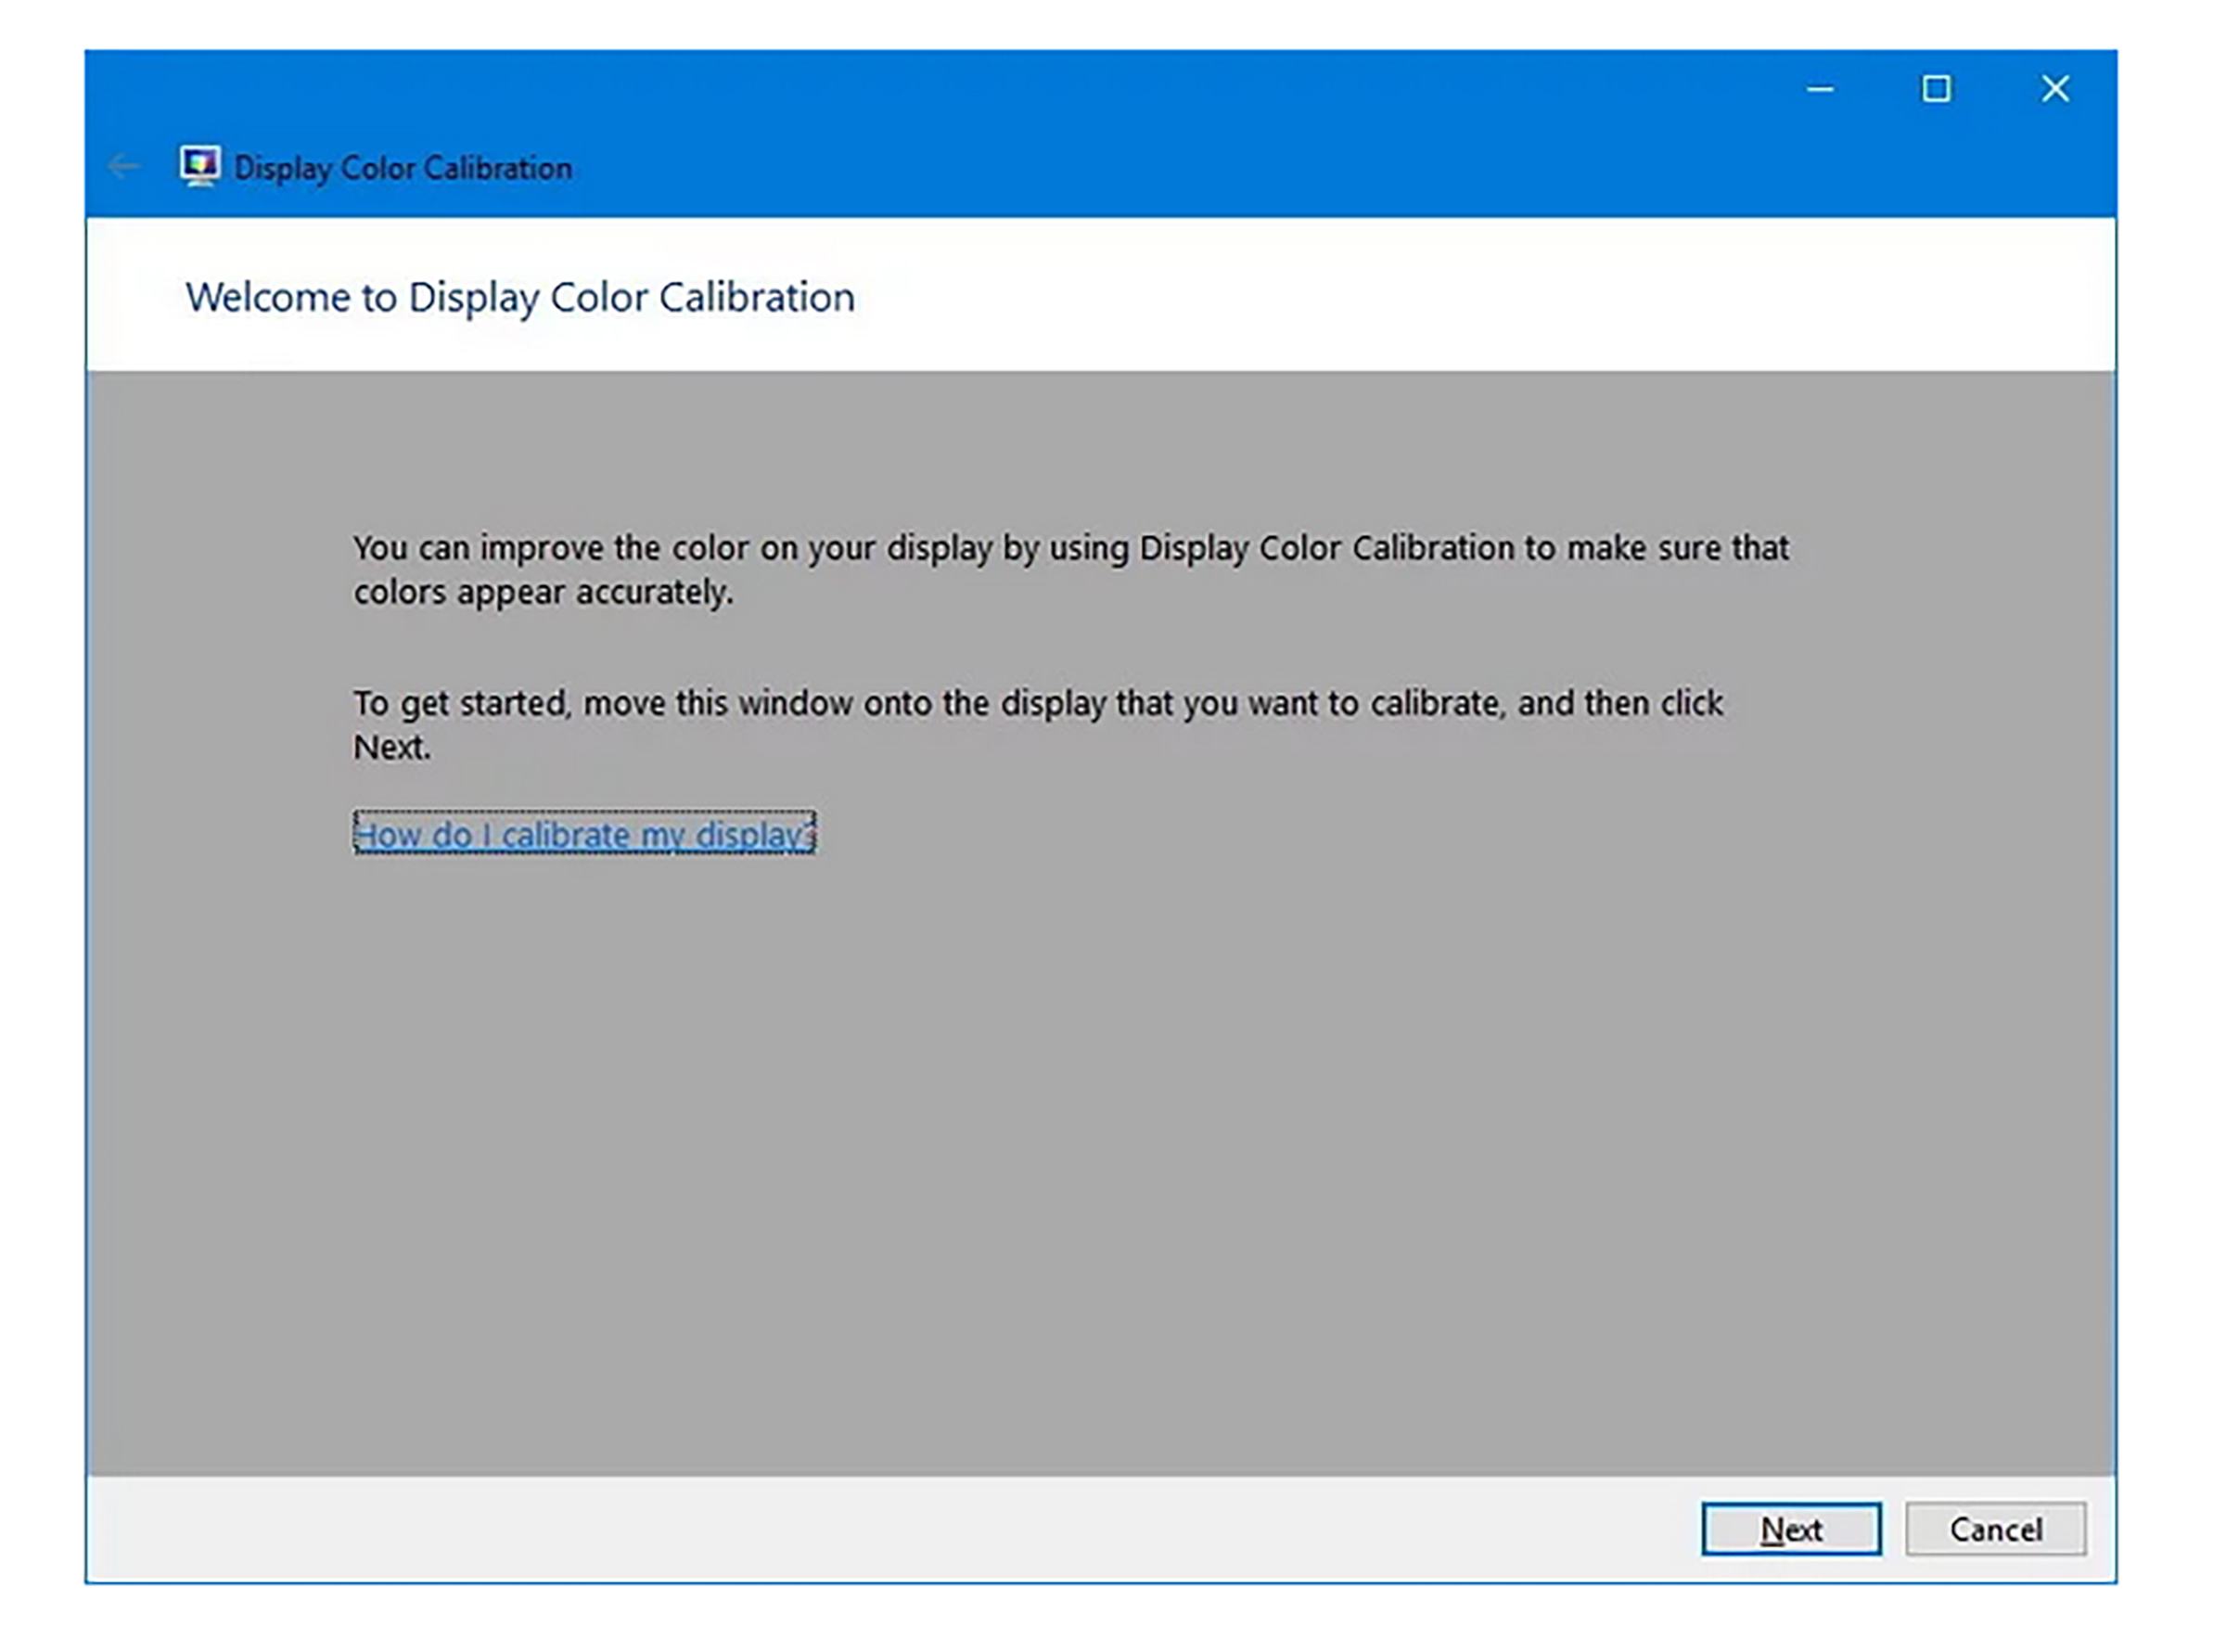
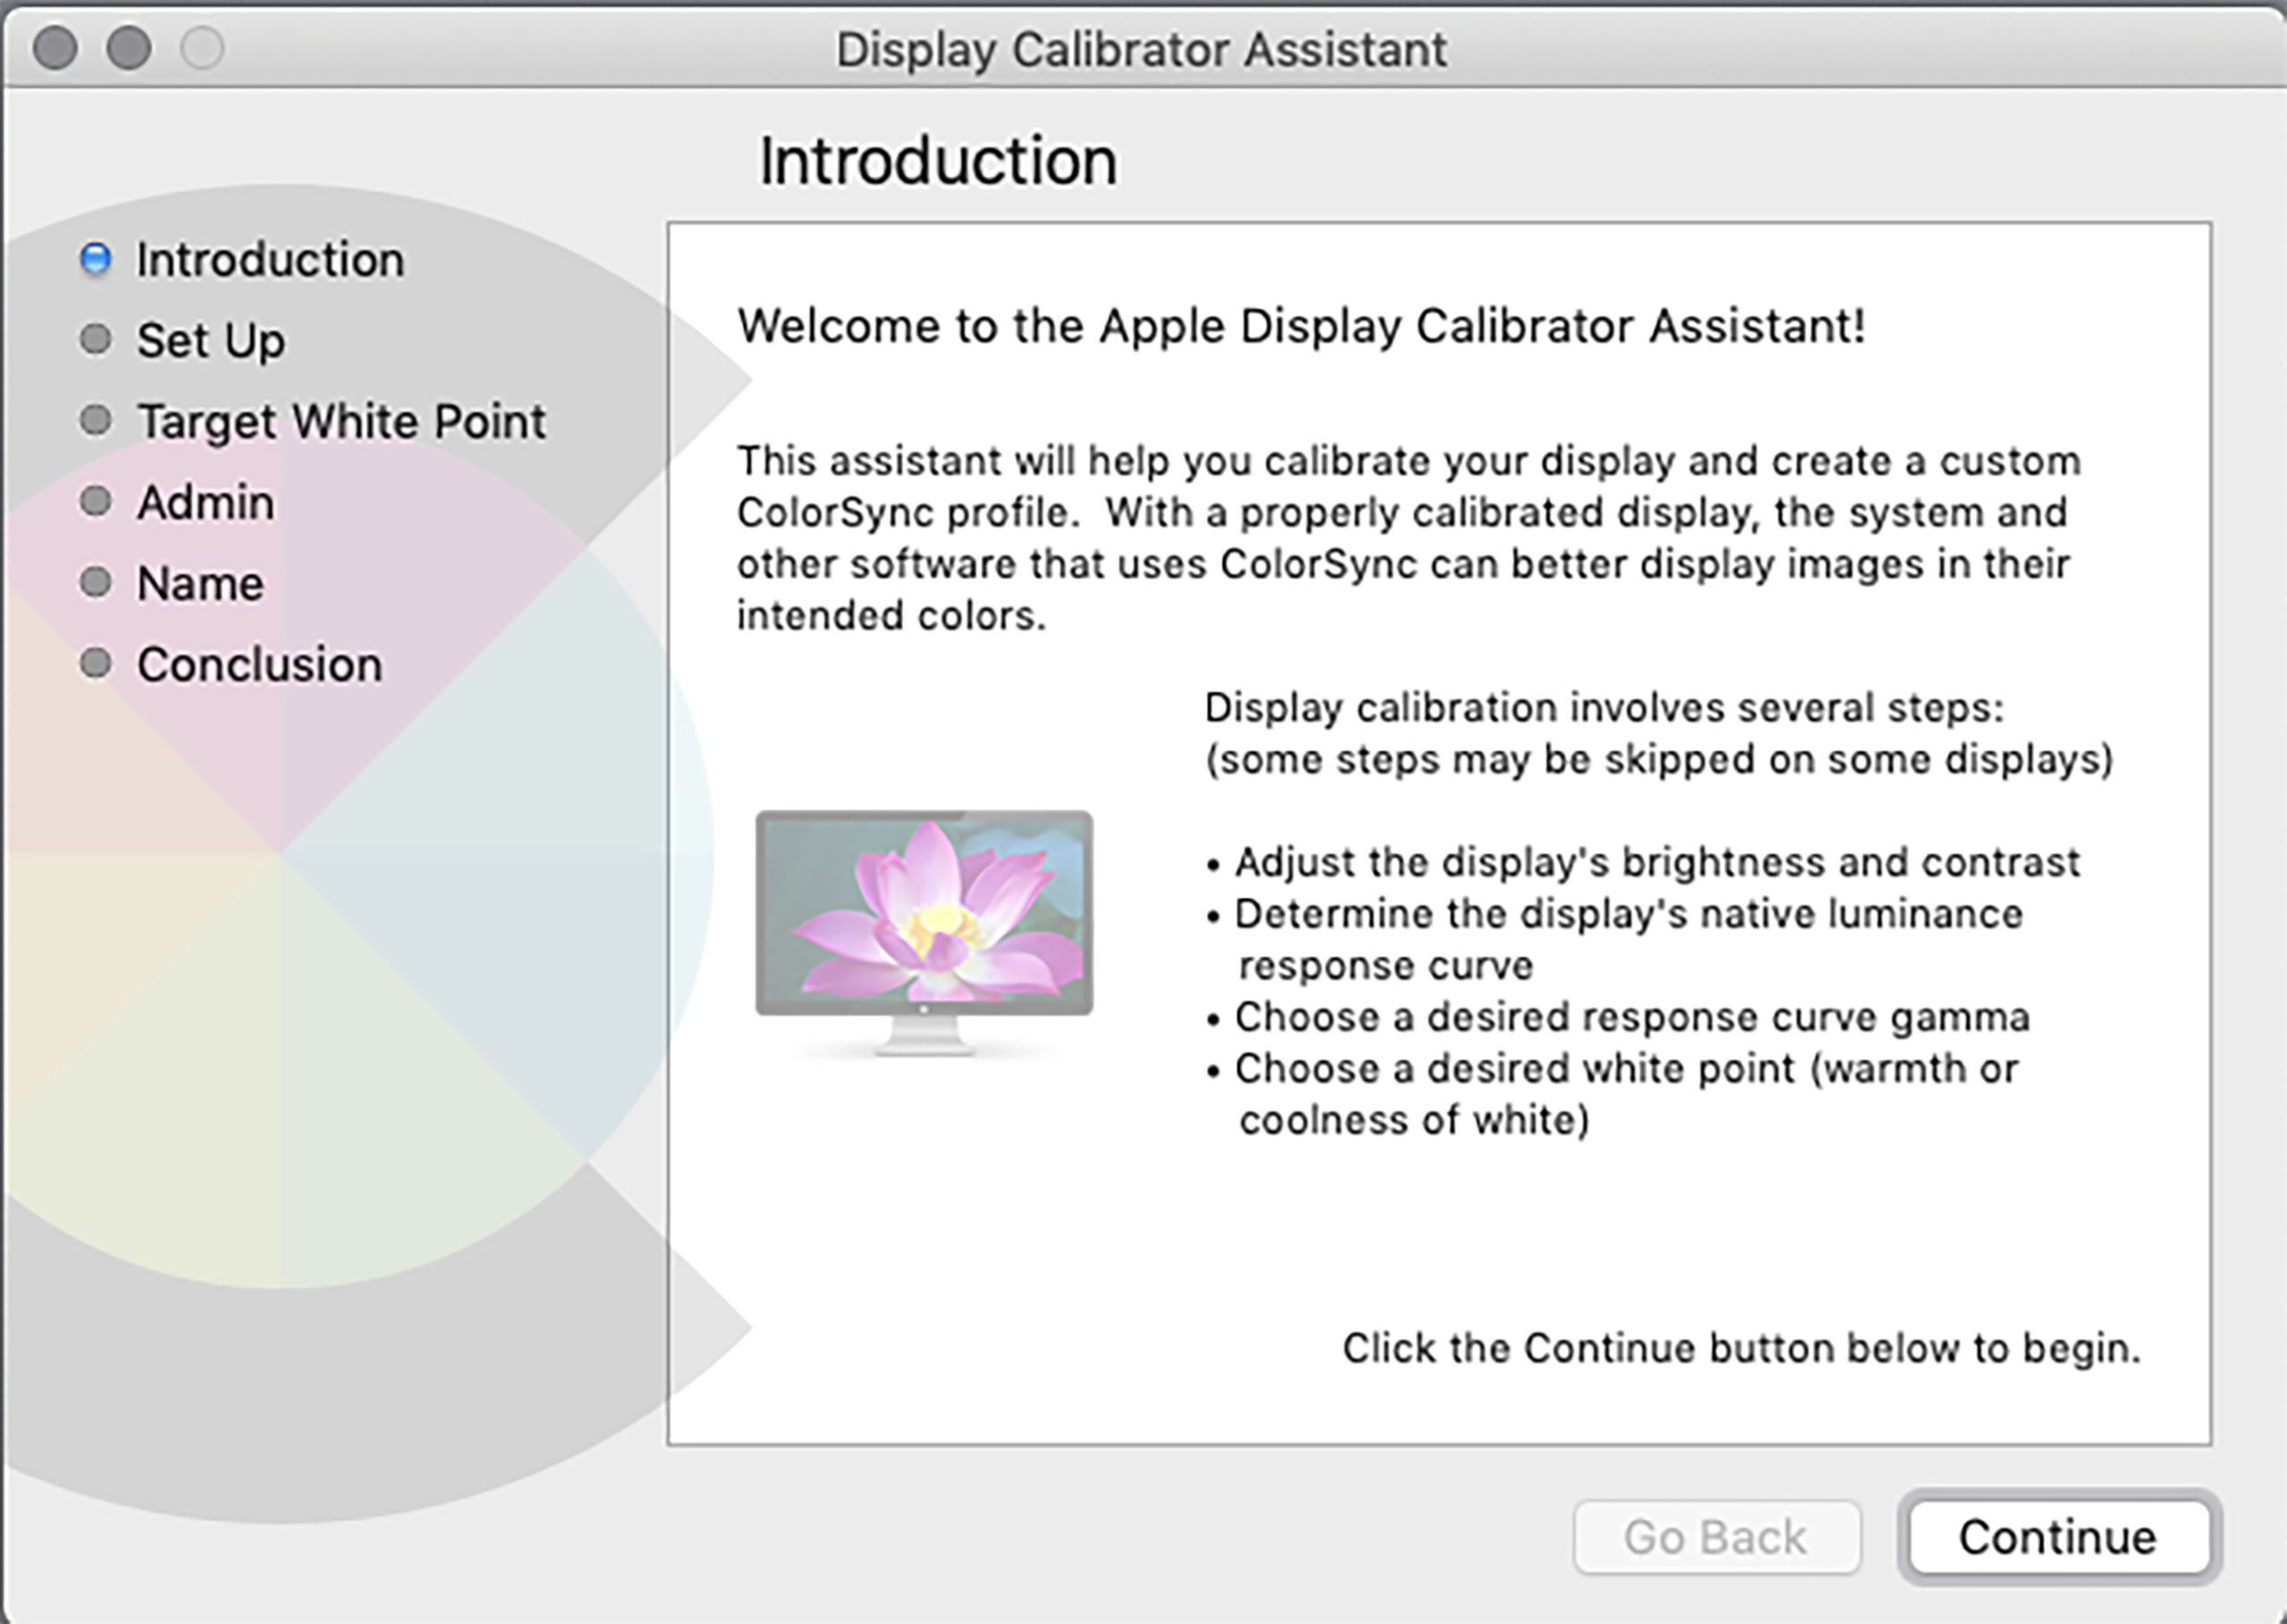
The first step in the CM process is to calibrate the monitor so that the on-screen image looks its best. The quick and cheap option is to use a software calibration utility bundled with the computer’s operating system. Both Windows and Mac now have calibration utilities and step-by-step instructions on how to proceed. To use new Windows 10’s built-in color calibration utility, go to Start > PC Settings > System > Display. Scroll down to the Multiple Displays section and click Advanced Display Settings. Click on Display Adapter Properties for Display 1. Select the Color Management tab, and then click Color Management to start the Wizard. (Figure 2a) On the Mac, go to System Preferences > Displays > Color > Calibrate to launch the Display Calibration Assistant. (Figure 2b)
If you have a monitor with specific brightness and contrast controls, adjust them to the recommended settings. If not, the software will direct you to the automated calibration process that includes brightness and contrast adjustments.
Both the Windows and Mac software programs are OK for a quick fix, but they rely on your observations to determine color accuracy, which is a subjective analysis.
Colorimeter
A better solution is a tristimulus colorimeter that measures the temperature of the light displayed on screen. The colorimeter attaches to the screen and measures the color temperature, gamma, and white point of the display. The calibration software sequentially generates screen images of several tonally different red, green, blue, gray, black and white color swatches that the colorimeter analyzes and feeds back to the software. (Figure 3) Based on the analysis of the temperatures of projected swatches, the software writes a profile based on the colors on the chart and saves it to the appropriate folder.
Screen to Print Matching
Matching a print to a monitor is a bit more of an extensive process. After your monitor is calibrated, you can make specific profiles for your printer and substrate to assure color accuracy. Proceed by printing a color chart (provided by the calibration software) on the target printer and on the substrate that you are profiling. The color chart consists of multiple swatches of color (Figure 4). The chart is scanned with a spectrophotometer that records the wavelength of each swatch. (Figure 5) The spectrophotometer software then analyzes the data and writes an ICC color profile based on the characteristics of ink-set and the substrate and places it into your Color folder in Windows or ColorSync folder in Mac.
Color Management Hardware
The number of calibration devices for managing color has expanded over the years as the importance of CM has been integrated into the graphic arts/printing workflow. Digital Photography Review is a buyer’s guide to the most current CM hardware devices. The Website details 10 critical devices that are either necessary or useful in the CM workflow. It includes popular products by companies such as X-Rite, Data Color, Color Confidence and others.
Color Settings
The profile is accessed in Photoshop’s Color Settings dialog box (Figure 6). The Settings menu lists a set of profiles that are primarily for conversion to color separations for offset lithography, including North American, European and Asian pre-press working spaces. The Working Spaces field is where the RGB menu is and where you’ll choose or load profiles for your RGB, laser, inkjet or large format printer. Choose More Options first and then scroll down the menu to choose an RGB profile.
A No-No
An important item to remember is to never convert your file to CMYK even though you may be outputting to a CMYK printer. The RIP on the printer software uses the RGB profile to convert the image to its unique CMYK component. Converting the file to CMYK first will produce a muddy, undesirable print.
Canned Profiles
Many printer manufacturers include premade profiles with their driver software or downloaded from the internet that are automatically loaded and accessed from the Color Settings menu. These profiles were made for specific printing environments. They change RGB values of the image to match the color capabilities of the ink-set and the reflective qualities of the substrate to produce an on-screen image that mimics the potential gamut of the printer’s capabilities. Profiles for many common substrates are available from most major printer manufacturers.
Embedded Profiles
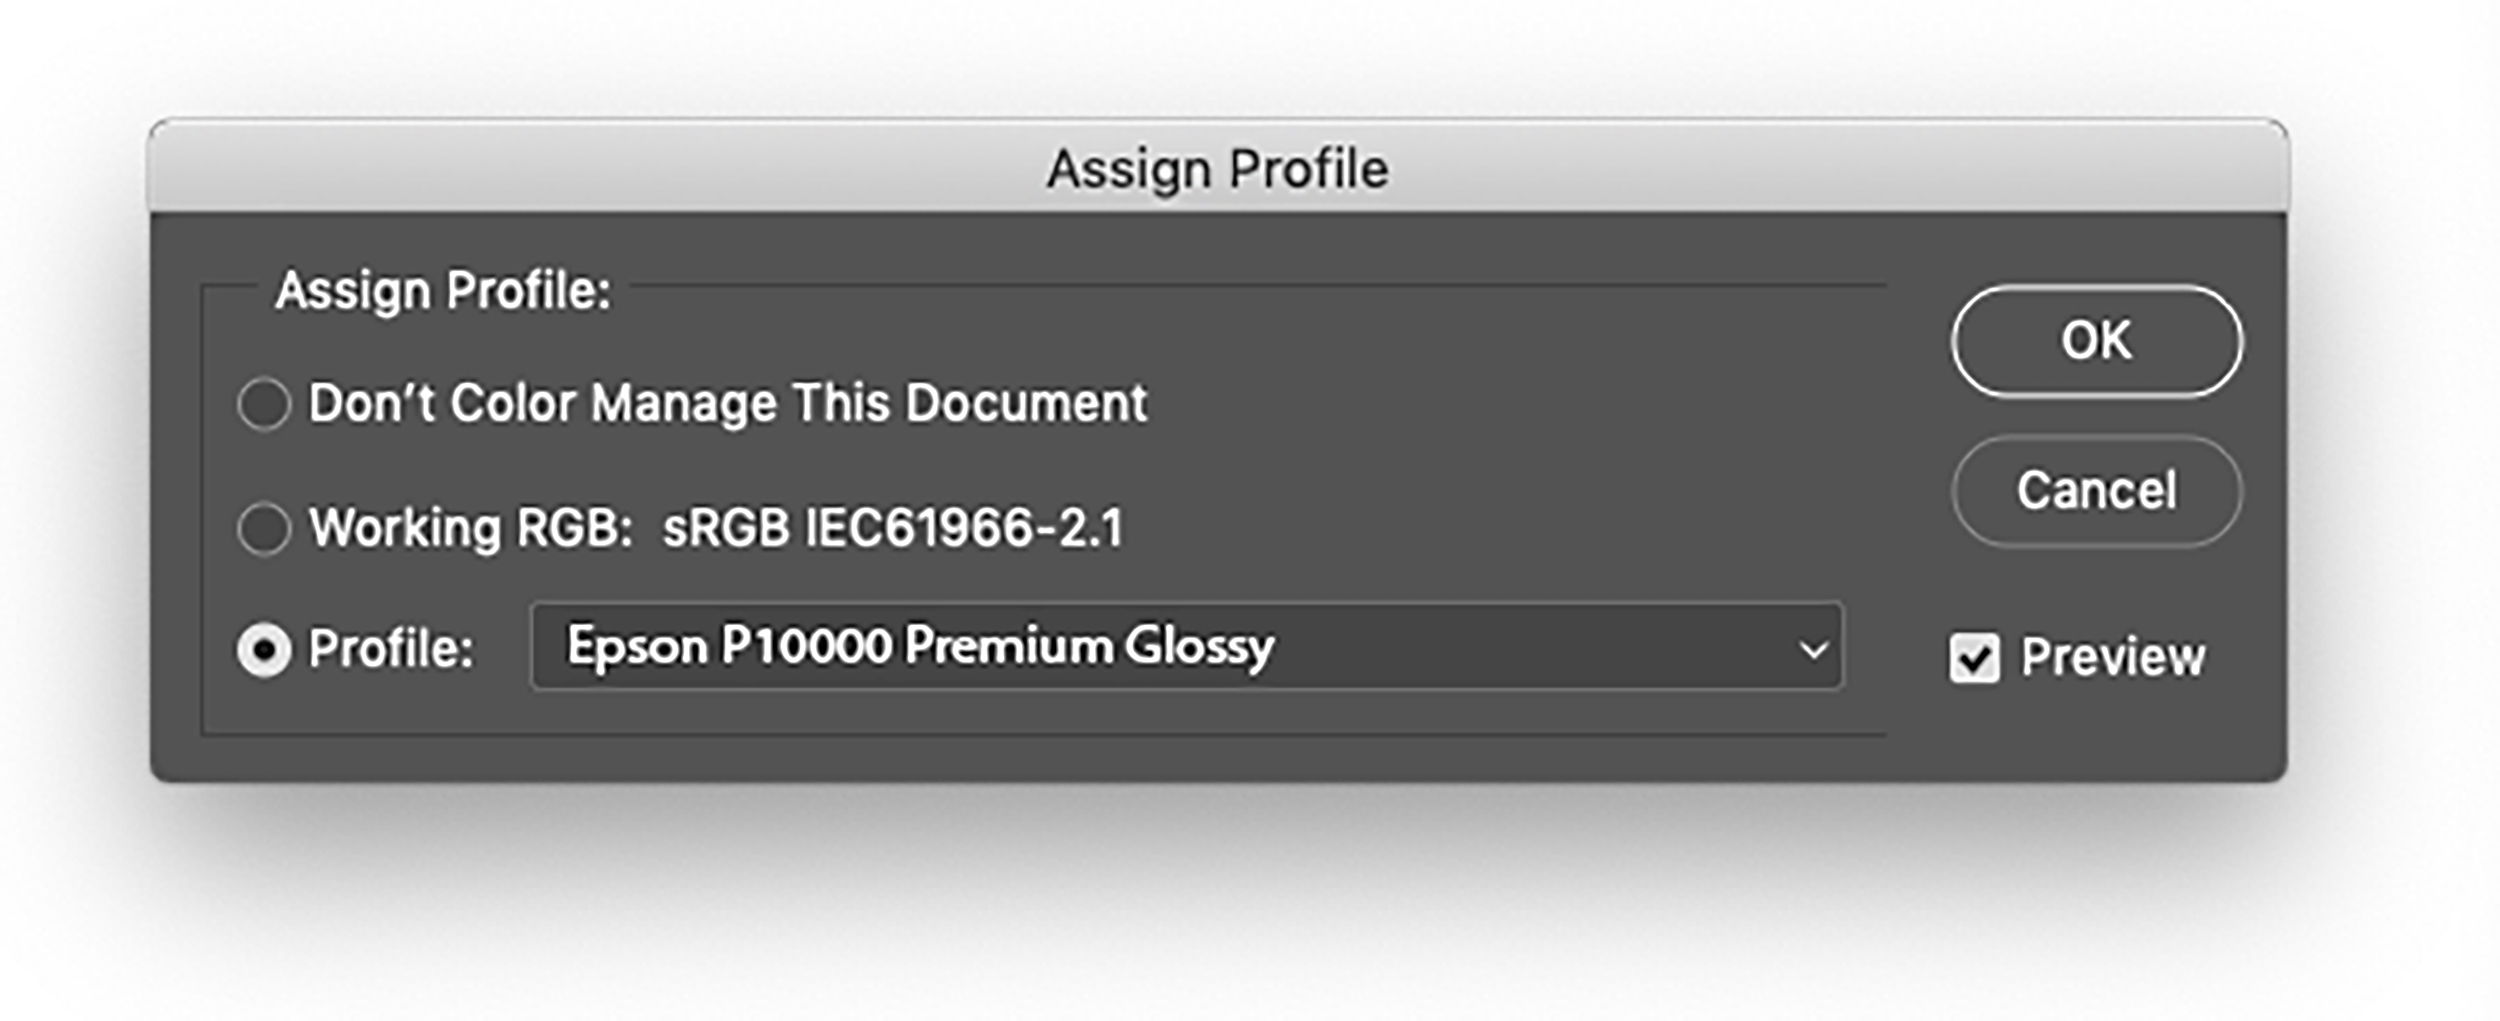
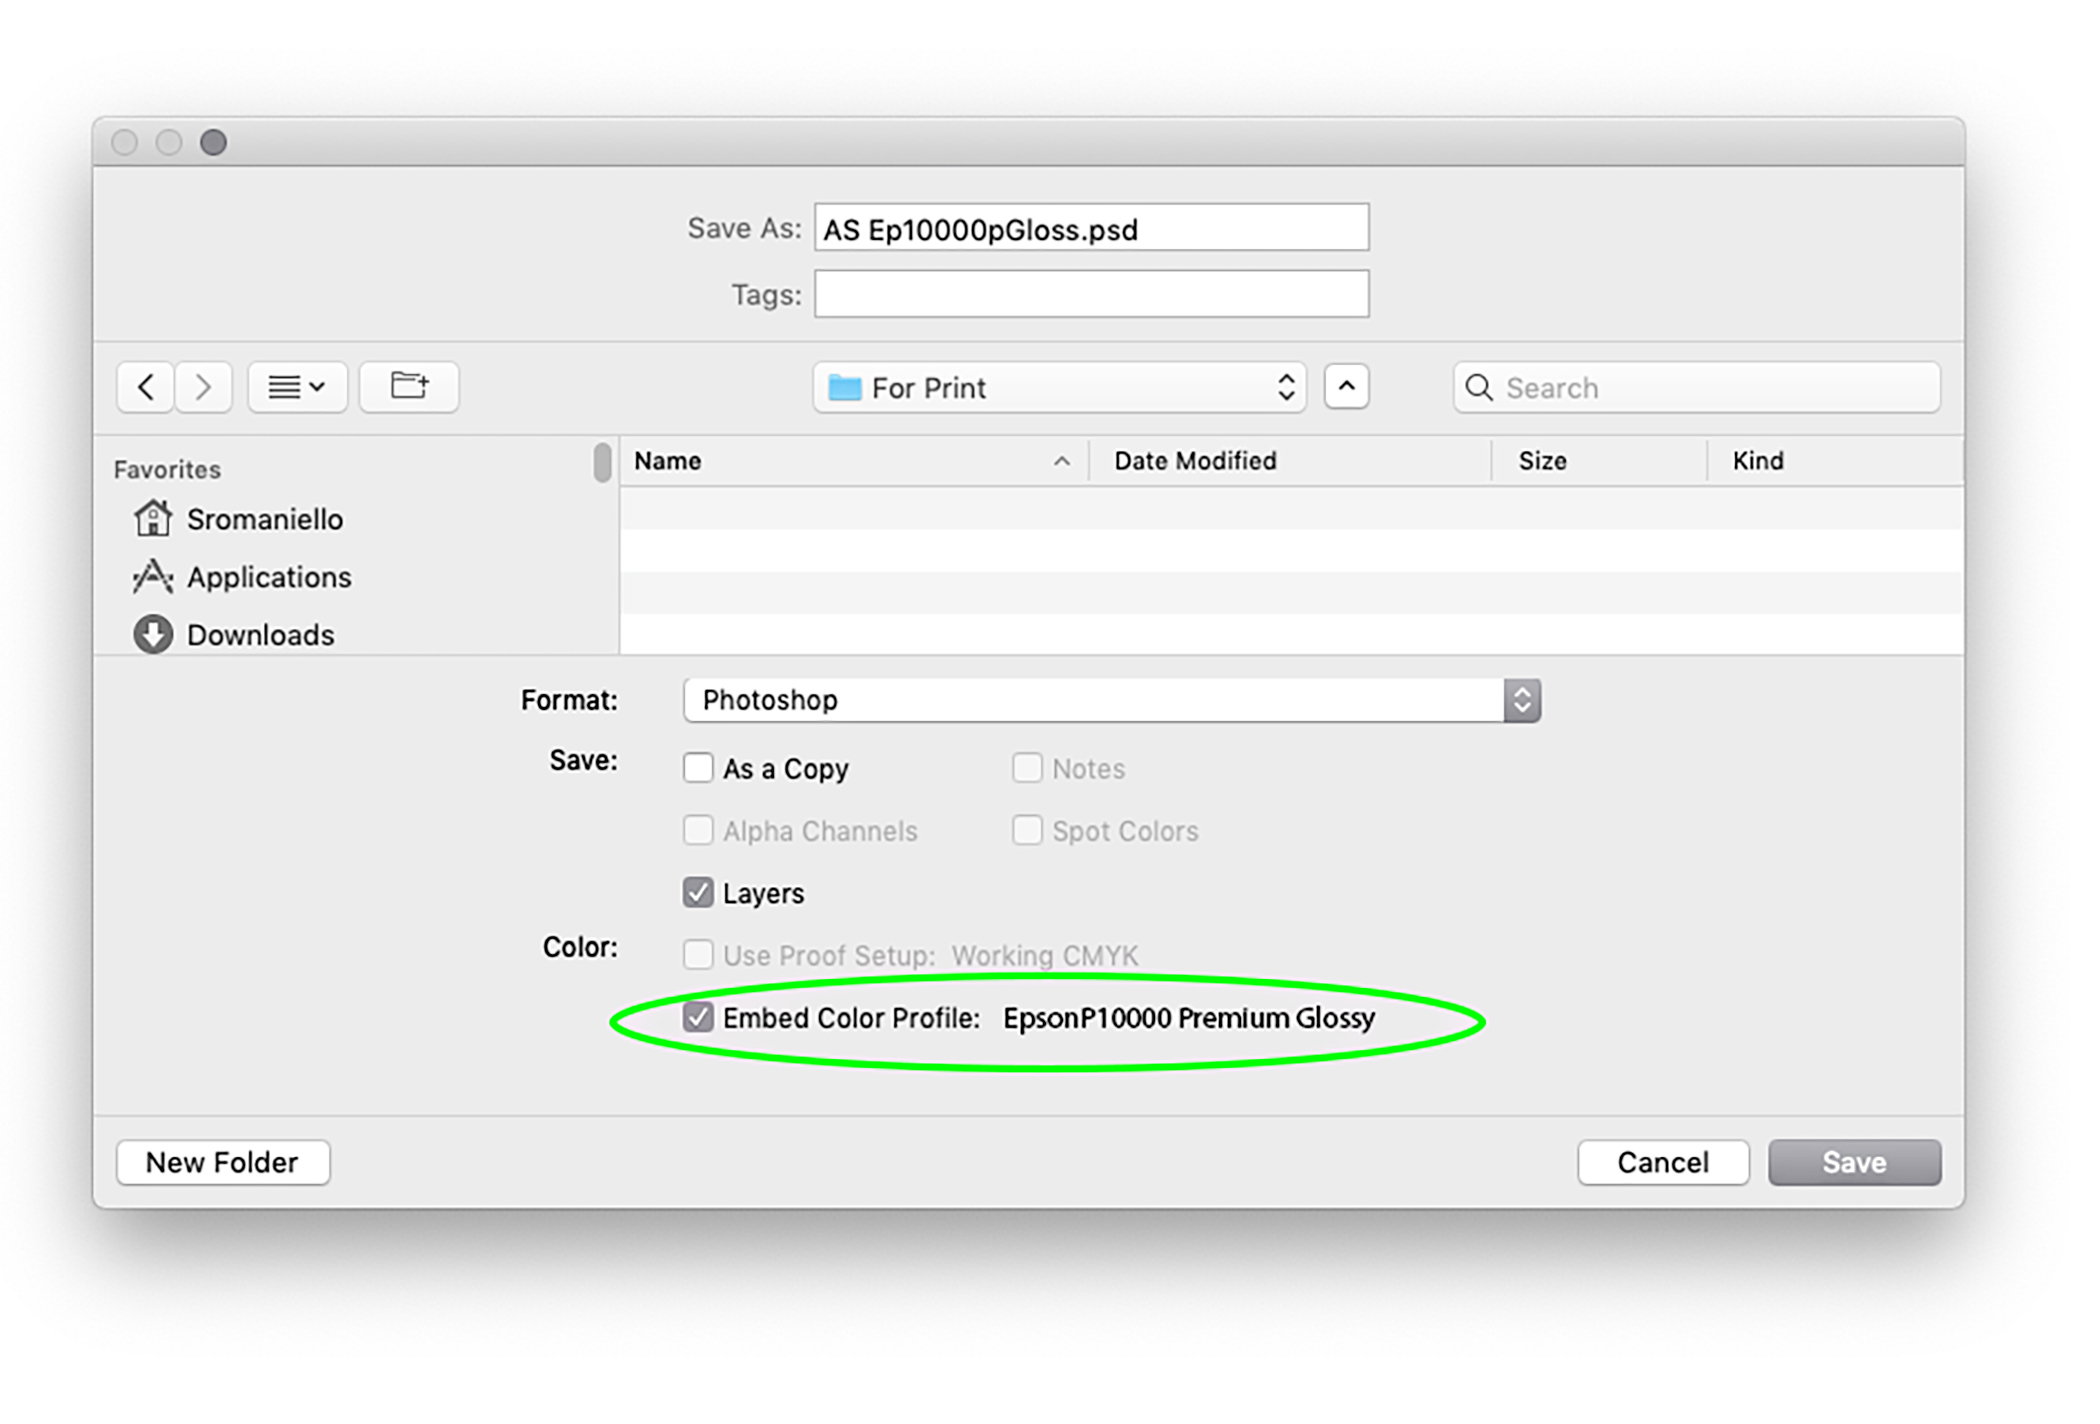
In the Color Settings dialog box, the Color Working Space determines the current color profile. You have to assign the profile in order to convert the image to the color space. In Photoshop, go to Edit > Assign Profile (Figure 7). Click the Working RGB radio button to assign the current working space or click the Profile radio button and choose a profile from the list. When you save the document check the Embed Profile box in the Save As dialog box. (Figure 8) Because you’ll make a specific image with a unique profile for each printer and substrate you use, be sure to label the file to identify its ICC profile.
Color Shifts
There is likely to be significant color variation when the ICC profile is assigned. Sometimes the image will become darker or contain a cyan or reddish cast or the contrast will change. With the image visible on the screen, you’ll make color modifications to improve its appearance. Use your color adjustment layers like Levels, Curves, Hue/Saturation and Vibrance, etc., to modify the image until it looks great. What you see on screen is as close to the print that can be displayed. As you adjust color, you are working within the printer’s color gamut. The embedded profile displays only colors that match the printer and the substrate’s capabilities.
‘Twas Ever Thus…
Calibration is essential to producing consistently predictable color from your printer. Since ink-sets are proprietary and substrates absorb ink and produce color differently, you should create a distinct profile for each printer and each paper that you use. Predictable color means less waste in time and materials. If consistent color is important to your workflow, the initial expense of a calibration system is well worth the money in that it eliminates the extra effort and materials required to reprint unsatisfactory images.
