You no doubt have experienced problems associated with scaling digital images. All too frequently a lack of understanding of the sizing process produces dubious results at the printer. There are several resizing methods, and the one you choose will depend on the intended output. An understanding of the properties and terminology associated with these methods will assure that the best quality reproductions will be achieved, and that time and materials are not wasted.
Pixels
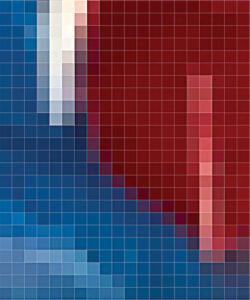
As I’m sure you know, a digital image is composed of a grid of tiny squares called pixels. Each pixel is a building block of a specific color (Fig. 1). The combination of all the pixels composes the image that you see on screen. The image resolution, the number of pixels in a linear inch, determines the quality of an image and how much detail can be displayed or printed. The file size is directly related to the number of pixels in an image. Simply stated, the more pixels there are, the bigger the file size.
Smaller is not necessarily better
Decreasing the height, width, or resolution of an image does not usually cause problems. Image quality remains consistent within certain limits. If the image is downsized too much, however, and the image resolution is too low, the image will appear pixelated with stair-stepped edges (Fig. 2). The importance of knowing the purpose and destination of your image before fiddling with its dimensions is crucial.
Bigger isn’t always better either
A matrix of 72 pixels per inch (PPI) at 100% of the height and width is required for images that are viewed online. A larger or smaller matrix appears enlarged or diminished on screen. Images destined for a high-quality printer require a resolution of 300 PPI at 100% of the print size. Resolutions significantly smaller than 300 PPI will appear pixelated or soft when printed. Resolutions higher than 300 PPI don’t improve the look of the printed image and have unnecessary large file sizes and slower printing times.
Nondestructive enlarging

The best method for enlarging an image’s total width and height begins at image capture, either at the scanner or digital camera. If taking a photograph, choose the highest resolution your camera can produce. If scanning an image, choose the appropriate optical resolution. For example, if you have a 2.5″ X 3.25″ photograph and you want to increase its width and height proportionally to 20″ X 26″, scan it at eight times the resolution of the final output requirement. Ultimately you will want to end up with a 300 PPI image to produce a quality print. Scan the image at 2400 PPI which is the maximum optical resolution of most flatbed scanners.
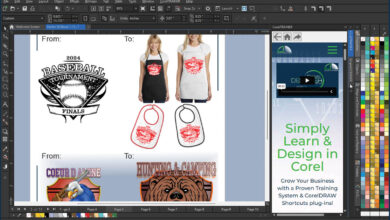
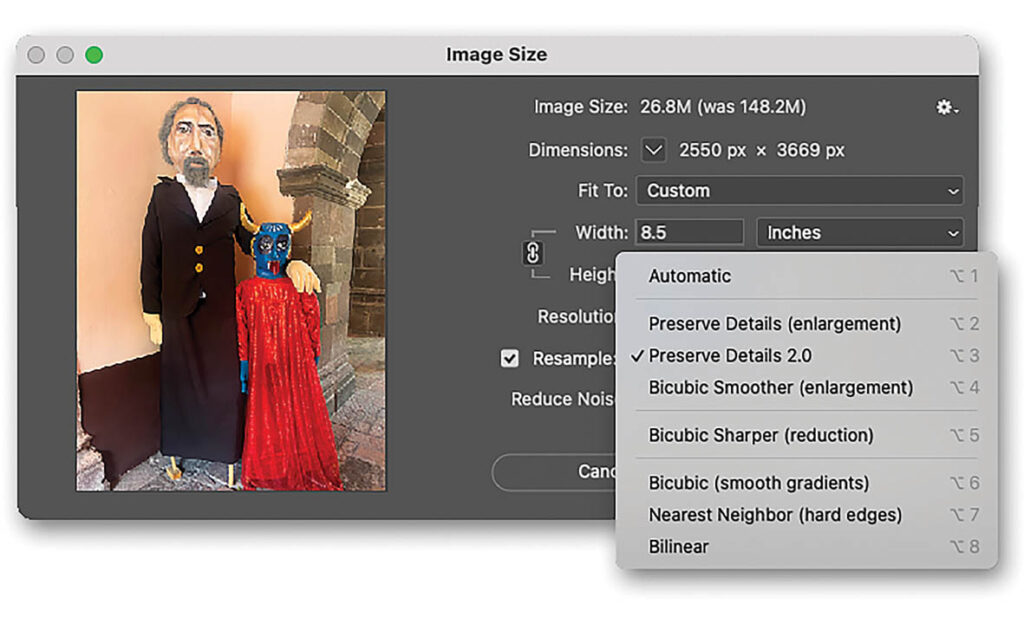
Once scanned, you can enlarge the image while reducing its resolution by a factor of eight. Choose the Image Size dialog box found in the Image menu. Uncheck the Resample button and type 20″ for the width. The height changes to 26″ and the resolution changes to 300 DPI (Fig. 3). The physical size of the image increases by eight times while resolution is reduced by a factor of eight. (8×2.5=20, 8×3.25=26, 2400/8=300). The file size remains the same with no addition of pixels.
Adding pixels
If you don’t have the choice to rescan or reshoot the image, you’ll need to apply the enlarging method that is least likely to compromise image quality. Resampling increases or decreases the height, width, or resolution and, ultimately, the file size, by adding or subtracting pixels. Interpolation algorithms are used to best determine what colors the new pixels will be assigned. There are eight methods to choose from in the Image Size dialog box.
The algorithms menu is displayed when the Resample box is checked (Fig. 4). Each algorithm determines the color of added pixels using a specific mathematical formula designed to produce the best overall results depending on the color characteristics of the image.
- Automatic: Photoshop automatically selects the resampling method based on the document type and whether it is being upsampled (enlarged) or downsampled (reduced).
- Preserve Details and Preserve Details 2.0 are both used for enlarging images. When either of the Preserve Details is selected, a noise reduction slider is displayed that eliminates noise as you drag the slider to the right. Preserve Details 2.0 is a later upgrade of the original algorithm.
- Bicubic Smoother is also recommended for enlarging images. The core algorithm is bicubic interpolation, but it smooths edge pixels and reduces softening by adding pixels of higher contrast to the inner areas.
- Bicubic Sharper is a good method for reducing the size of an image based on Bicubic interpolation with enhanced sharpening. This method maintains detail in a resampled image. If Bicubic Sharper over-sharpens some areas of an image, try using Bicubic.
- Bicubic (smoother gradients) is a slower but more-precise method based on an examination of the values of surrounding pixels. Using more complex calculations, bicubic produces smooth tonal gradations.
- Nearest Neighbor (hard edges) is a faster but less-precise method that replicates the pixels in an image. It is generally used for line art containing only black and white pixels. This method preserves hard edges and produces a smaller file size in illustrations containing edges that are not anti-aliased. Nearest Neighbor can potentially produce stair-stepped edges, which become apparent when you increase the size of an image.
- Bilinear adds pixels by averaging the color values of surrounding pixels. It’s fast but produces medium-quality results.

Six of the interpolation algorithms found in the Image Size dialog box are also found in the General Preferences (Fig. 5) to control interpolation when sizing or distorting image content with the transformation features and filters.
Best strategy
The best strategy to enlarge an image is to opt for the most control possible and observe the results as you work. Enter the size, width, and resolution; check the Resample box and scroll through the various resampling methods one at a time as you observe the results in the preview window. If you choose the Preserve Details methods, observe the result as you drag the Noise Reduction slider.
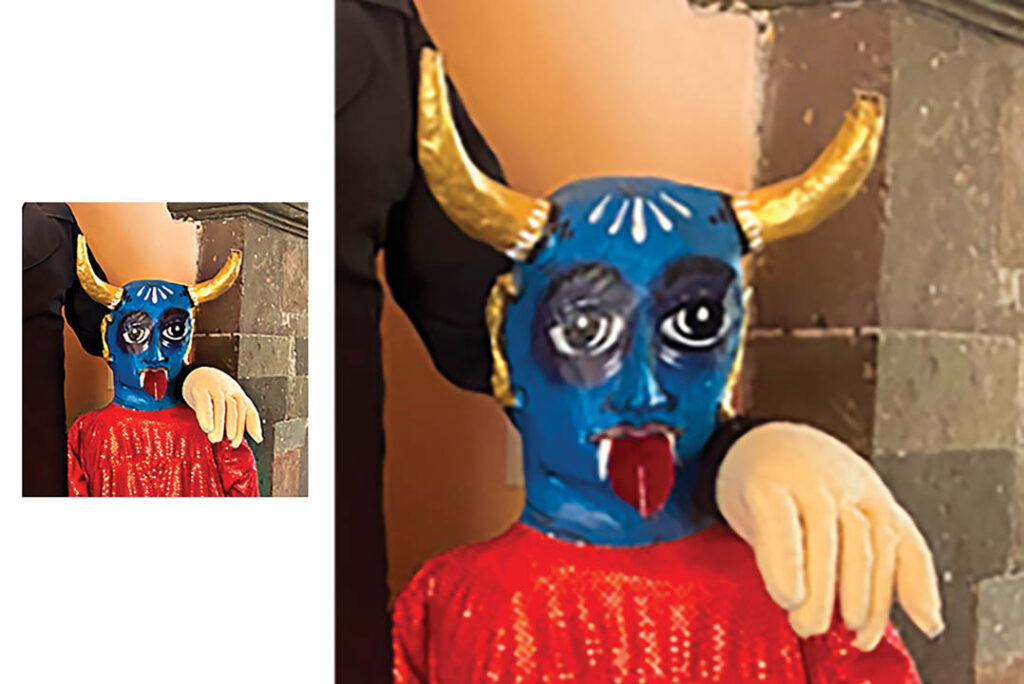
Image quality
When increasing the image size by moderate amounts (1-5%), a decrease in image quality will hardly be noticeable. Enlarging a by significant measures, however, can degrade the image and produce soft edges and flaccid regions of color (Fig. 6). Just how much you can get away with enlarging often depends on image content. In an image with content that is already soft, like big fluffy clouds for example, the damage won’t be as severe as an image where focus and contrast are more critical — like portraits or fashion shots.
The acceptable amount of degradation is also dependent on the image’s ultimate purpose. If it’s going to be seen at a distance in changing light, like a billboard for example, there is not too much to worry about. If it’s a fine art print that is going to scrutinized close up, then upsampling by too much can produce unsatisfactory results.
Sharpen
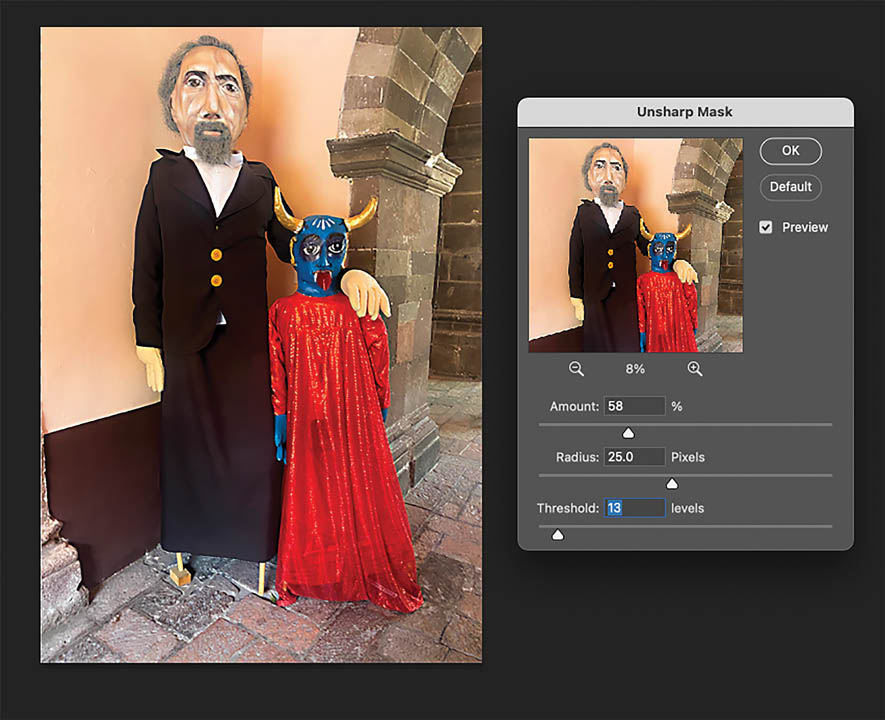
Resample up to the desired size using the Preserve Details feature to eliminate as much noise as you can with the Reduce Noise slider, but don’t compromise any important textures. Convert the layer to a Smart Object to assure that the filters you are about to apply are nondestructive. Apply the Unsharp Mask or Smart Sharpen filter in moderation to improve image quality (Fig. 7). Don’t over sharpen and avoid halos that are a result of an imbalance of Amount and Radius.
The sharpening filters are not cure-alls, but they will help in reducing the ravages of upsampling. Don’t expect to add detail where there is none in the original image.
Images destined for large-format printers should be sharpened to some degree.
AI enlargement
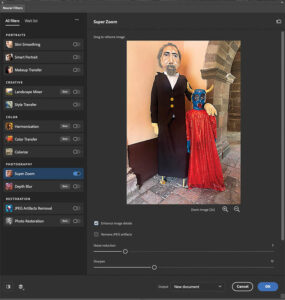
In the latest versions of Photoshop, you can employ artificial intelligence (AI) to the enlargement process. I hate to admit it, but this method produces really great results. The technique is found in the Neural Filters menu and is called Super Zoom (Fig. 8). First, drag the Super Zoom button to the right to activate the filter. Click the magnifying glass icon up to four times to increase magnification from 200-500%. From the menu, choose New Layer or New Document. Click the Enhance Details box to apply a general sharpening effect to the image’s details. Drag the manual sliders for noise reduction and additional sharpening.
Science & art
Resizing images is both a science and an art. The tools and techniques that perform the work are quite good but require your judgment. You’re not going to get perfect results every time because some images are just plain stubborn. Experimentation is always the key to produce the best results, and, fortunately, there are several methods to choose from.
Bear in mind that there are a multitude of transformation tools, techniques, and filters that can rescale specific areas within the image. They rely on the interpolation algorithms selected in the General Preferences window. I’ll have a look at those in a future article. Remember, above all, the higher the quality of image that you start with, the better the results will be.