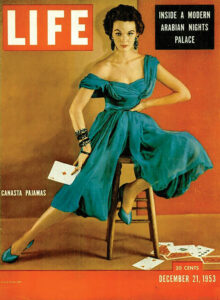
Pre-digital color images were quite different than what we expect to see today. It’s interesting to consider what was acceptable in the days before computer-based color enhancement. Many printed images displayed an overall flatness, a warmish colorcast and marginal contrast that would be unacceptable by today’s standards. Image enhancement was an optical process produced with cameras and colored filters. It was dependent on the manipulation of light exposed to negative film through halftone screens called color separations. Color enhancement techniques were limited by the analog technology available at that time (Fig.1).
Over the past three decades, image editing software has changed the dynamics of printed color images. Color enhancement techniques have evolved to such a degree that high-quality color is easily translated into virtually any printed medium, from short-run large-format printers that use six, eight, or more ink colors, to four color production web presses that produce millions of copies in a single run.
Color editing
Color editing is the standard practice of pre-press image preparation. Software such as Corel PaintShop Pro, Adobe Photoshop and Adobe Lightroom have features that build superior color relationships. Color adjustment controls such as Levels, Curves, Hue/Saturation and Vibrancy can potentially enhance the color of an image and are frequently employed to produce the super-charged color we see in today’s images. These are the basic techniques that are part of the everyday workflow of the design studio or print shop, but the techniques that produce the most dramatic over-the-top color effects are the ones that increase an image’s dynamic range.
Moxie
Moxie is an old-time term for attitude, grit, or gumption! Pictures with moxie have enhanced highlights that are incandescent and contain detail in even the lightest areas. The midtones are ultra-clean and smooth and the shadows penetrate their own darkness with detail. The contrast is superb in every region of the image. Photos can look as if, at the split second of the exposure, they saw and recorded the darkest and lightest areas. There are no blown out whites or filled in blacks. Images with this quality are attainable with effort, and, fortunately, there are features in the software that can help conjure the magic.
Dynamic range
Dynamic range describes the ratio between the maximum (white) and minimum (black) intensity of the light-capturing or displaying capabilities of a specific device. The higher the dynamic range of a device, the greater the range of tonality it can capture, display, or print.
High dynamic range images (HDR) are a type of digital image that contain a wider range of light and color information than standard images. They more accurately represent scenes with both very bright and very dark areas, similar to what the human eye can see. HDR software produces a superior range of color and contrast resulting in greater detail in the highlights and shadows and better contrast in the midtones. HDR captures a wider range of color in images that contain super-bright direct sunlight and the darkest shadows, and even faint smoky or foggy areas. Rich blacks, luminous highlights, color balanced mid-tones and grays are hallmarks of HDR technology.
An HDR image that is output to a high-resolution printer and carefully color managed can produce dramatic prints with a wide color gamut and deep color saturation. These effects can be printed to any media including fabric, paper, plastic, or metal.
Multiple exposures
HDR images can be directly captured using cameras with special image sensors, such as an oversampled binary image sensor. Cameras without these special sensors take photos with a limited exposure range, referred to as standard dynamic range (SDR), that may result in the loss of detail in the highlights or shadows. The intention of HDR is to combine exposures to accurately represent the wide range of intensity levels found in real life scenes ranging from direct sunlight to deep shadows.
Method
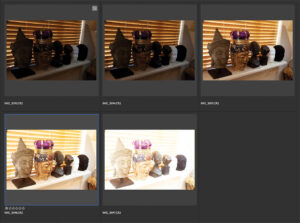
Simply put, the method behind HDR is that a camera takes several shots at different exposures (called bracketing) including dark (underexposed), normal, and bright (overexposed) images (Fig. 2). The underexposed images capture the most detail in the highlights. The overexposed images capture more detail in the shadows. The midtones maintain a consistent level of overall contrast. HDR software combines the exposures into one image to produce more detail throughout the entire tonal range.
The goal behind HDR is to combine multiple, bracketed exposures to improve the tonal range of pictures. The process of tonal mapping multiple SDR bracketed images of the same subject and perfectly aligning them can result in a high, sometimes even an exaggerated dynamic range.
HDR Pro
HDR Pro is an Adobe Photoshop automation but can also be performed in Adobe Bridge or Adobe Lightroom. HDR images are produced by combining a series of selected, bracketed source exposures by going to File> Automate > Merge to HDR Pro.
Image capture tips
Before looking at the software, let’s talk about the best way to capture the images that will be combined to produce HDR. A minimum of two exposures of the same scene is necessary but more will produce better results. When bracketing the exposures, mount the camera on a tripod and connect a cable release to assure stability. Images must be perfectly aligned for the software to combine them. Any number of bracketed images is acceptable but best results are achieved when areas of the highlight, midtones and shadows are emphasized separately on each of three of the bracketed images with additional images to function as in-between tonalities.
Vary the shutter speed when making the bracketed exposures. Do not vary the aperture because the depth of field will be affected and it will be difficult or impossible to align and blend the images. Maintain the same ISO setting for each exposure to reduce variations in shadow noise. Bracket with one or two exposure value step intervals. Smaller steps will produce more images than are necessary.
HDR Pro
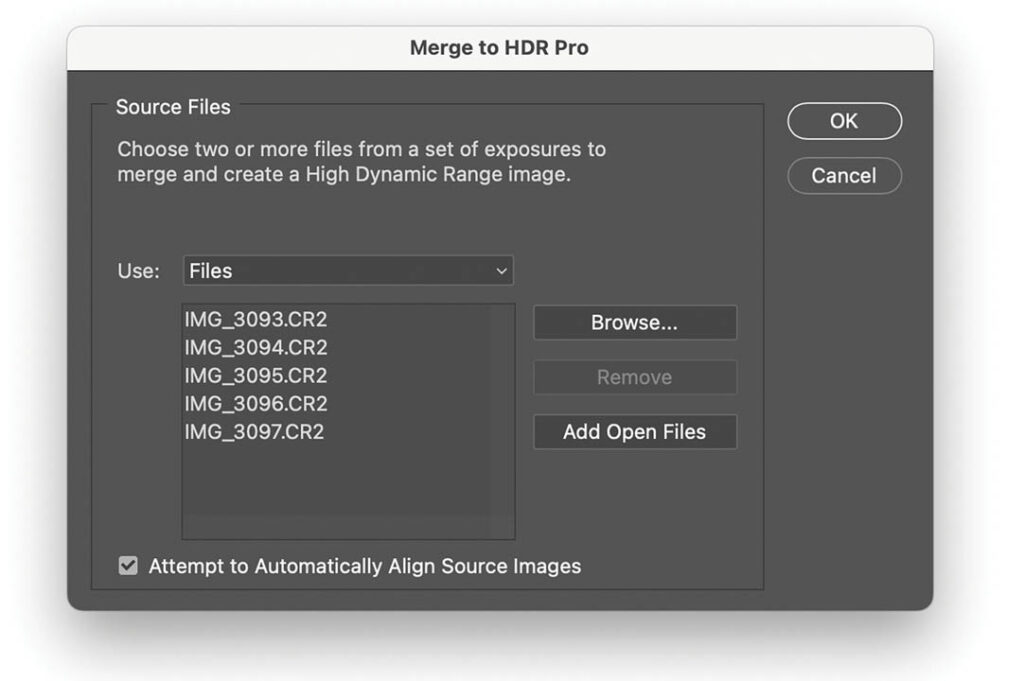
The primary HDR Pro dialog box (Fig. 3) presents a list of the source images to be combined. Once the list is compiled, click the OK button to display the toning controls.
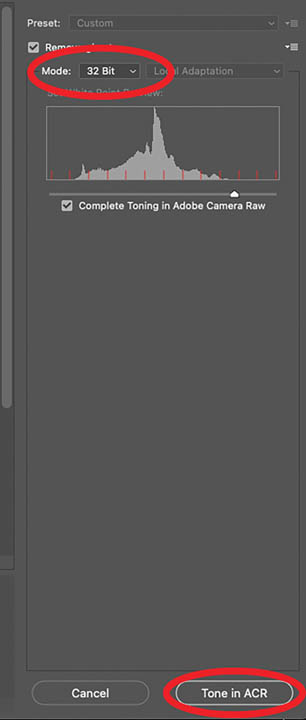
First, choose a bit depth of eight to produce millions, 16 to produce billions, or 32-bit color to produce trillions of colors. 32-bit images will need to be toned in the Adobe Camera Raw which is accessible at the bottom of the interface (Fig. 4). Eight bit and 16-bit images are toned with the HDR Pro sliders (Fig. 5).
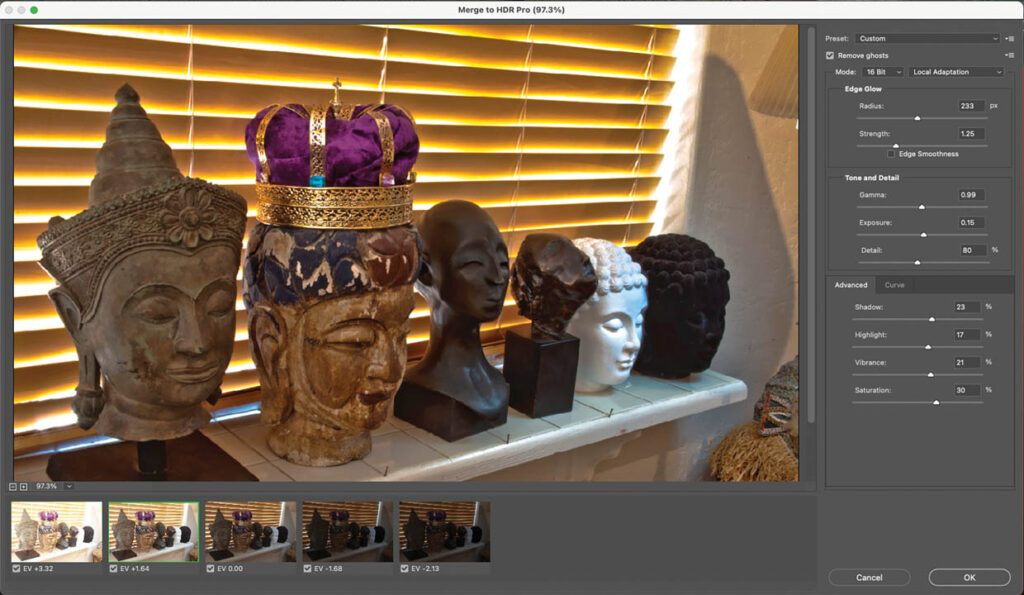
The interface displays the exposures and the composite image. As you adjust the sliders, the combined blended images preview in the image window in real time. When the image is at its best, click the OK button to implement the HDR process, which combines the best tonal ranges of all the images and generates a new image.
The higher the bit depth the more pixel information is combined and thus the larger the file. Collecting as much tonal information as possible may seem like a good idea but there are several adjustments, features, and filters in Photoshop that do not support high bit-depth images. Furthermore, due to the limitations of printing and displays, the extended luminosity range of an HDR image must be compressed to be made visible. The method of rendering an HDR image to a standard monitor or printing device is called tone mapping. This method somewhat reduces the overall contrast of an HDR image to facilitate the display on devices or printers with lower dynamic range capabilities.
What this means is that to print, you’ll have reduce the bit depth of the image to eight-bits. The tonality shift will be barely noticeable when you convert to a lower bit-depth because you’ve maximized the image at the higher bit depth. To change the bit-depth, go to Image> Mode> Eight Bit/Channel. A smaller, more manageable file will be generated.
HDR toning
The HDR Pro feature certainly delivers the goods when you have multiple images to work with. But suppose you only have a single image, and you want to maximize the tonal range. The feature that simulates HDR on single images is called HDR Toning and is found in Photoshop’s Adjustments Menu. HDR Toning offers similar controls as the HDR Pro Control panel.
It simulates the effect of combining multiple images by manipulating existing pixel data. Its control panel is identical to HDR Pro’s, but it’s not capable of producing new data. For example, if an area is blown out to white in the highlights, it cannot manufacture new pixels to simulate textures that are not there. It does, however, do a fine job of simulating the appearance of HDR (Fig. 6).

Better pictures
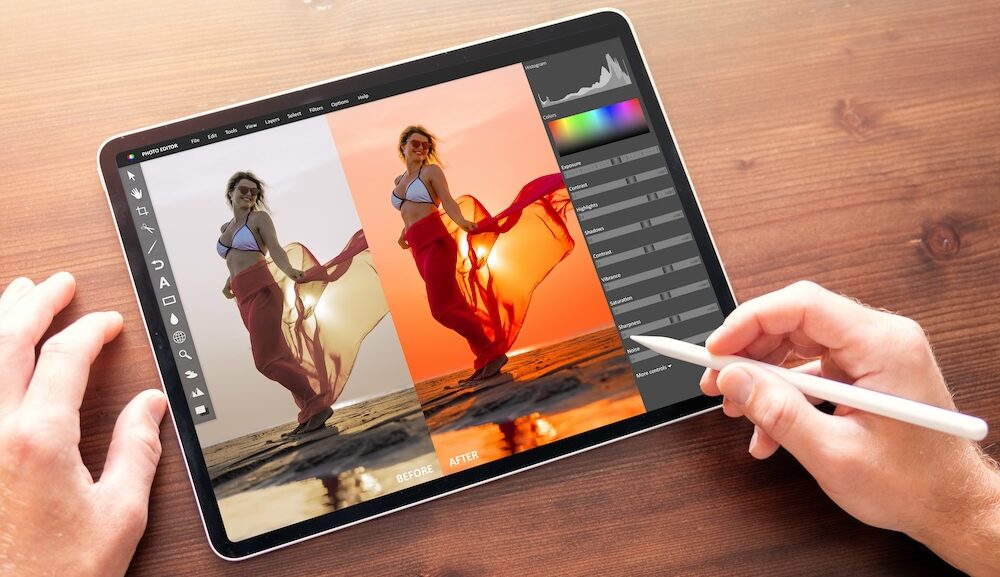
In photography, HDR is used to preserve details in both bright skies and dark shadows. In film and TV, HDR provides more vivid, lifelike images with deeper contrast. In gaming, HDR enhances realism by better simulating lighting. Even on your smartphone, HDR technology is used to automatically capture images with a broader range of brightness and detail. The result is a photo that retains details in both the darkest shadows and brightest highlights, closely resembling what the human eye perceives. This feature is particularly beneficial in challenging lighting conditions, such as backlit scenes or high-contrast environments.
Your decision to use these features will depend on the image itself. Does it need enhanced dynamic range to accentuate the contrast in the highlights and shadows? Can you shoot multiple bracketed exposures of the same scene? Do you want to generate hyper-real artistic effects?
The target printer is also a consideration. Is it capable of printing that extra detail? If the answer to any of these questions is yes, then consider incorporating HDR image technology into your workflow.