Type is a powerful visual element capable of expressing ideas. How type characters look on the page communicates as much, or more, than how they read. When used creatively, text effects can enhance a message and make it more interesting and compelling. Above all, text effects create impact that attracts a viewer’s attention.
In this month’s article, I’ll present three creative, fun techniques that will transform your ordinary text characters into interesting visual elements. A simple step-by-step sequence of commands can create believable images that enhance a layout. We’ll also be looking at the systematic workflow that is required to create these effects.
I’m using Photoshop for these demos, but any image editing software with similar features will work.
Creating a new document
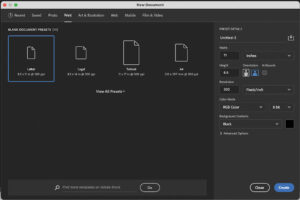
When you launch Photoshop, choose New File. In the New Document dialog box choose Print with dimensions of 8.5″ X 11″ and 300 PPI for the resolution. Choose RGB 8 Bit for the color mode and click the Landscape icon for a horizontal orientation. The background contents are black. (Fig. 1)
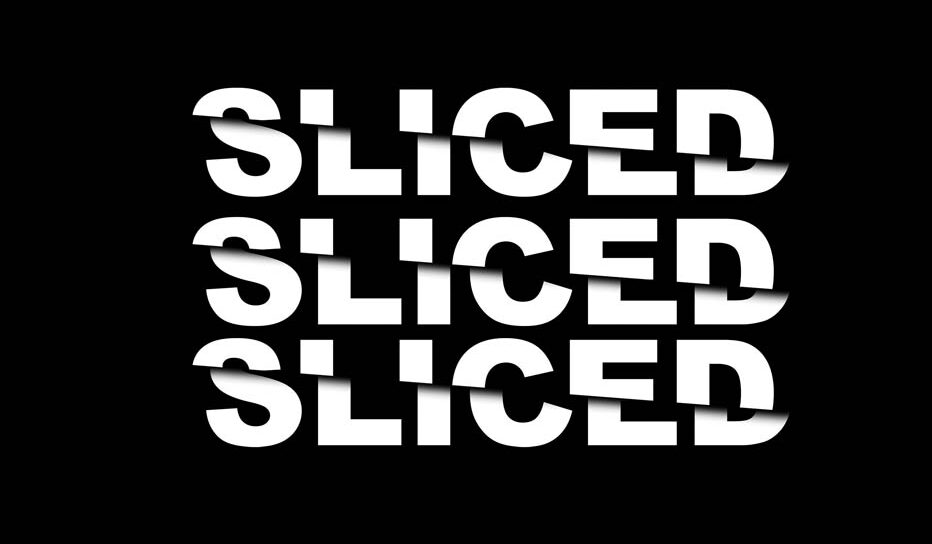
Sliced text
This technique is relatively simple involving just a few steps to produce a dramatic cut paper look.
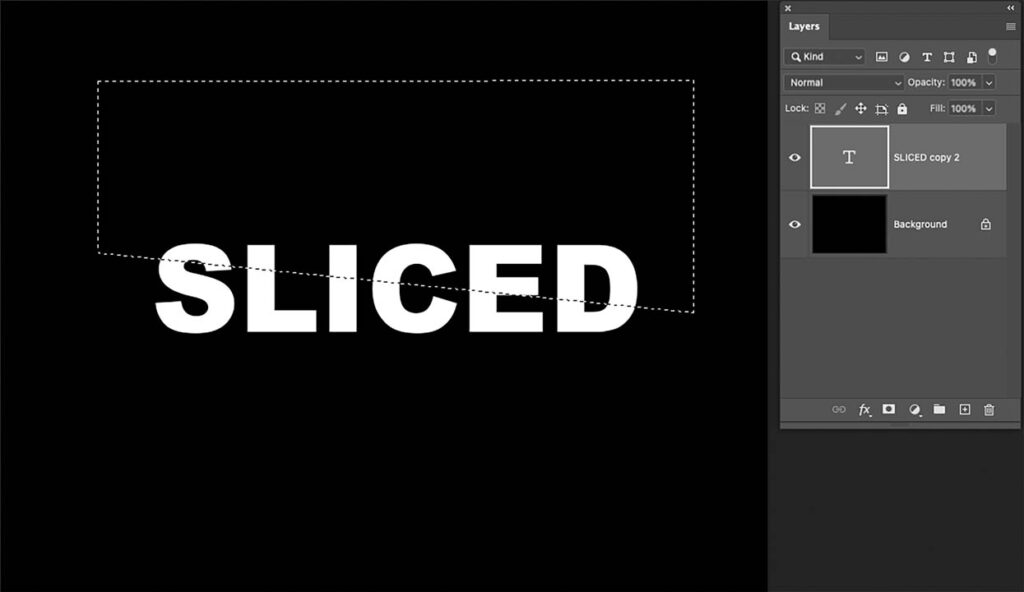
- In the center of the art board, type the word “SLICED” in Arial Black, all caps, 125 Point, White.
- With the Polygonal Lasso tool, draw a diagonal line horizontally through the center of the of the text and continue creating a four-sided polygon selection above the top part of the text. (Fig. 2)
- In the Layers Panel, click the Layer Mask icon. The black part of the layer mask represents the bottom area of the layer content that is concealed from view.
- Duplicate the layer. The layer is automatically named “Sliced (copy)”.
- Press the Command (Mac) Control (Windows) + I keys to invert the layer mask. The mask on this layer conceals the top part of the text. With the Move tool, drag the Sliced (copy) layer contents to the right. (Fig. 3)
- To create a shadow, you’ll need to rasterize the layer. Rasterizing converts the vector data on the type layer to pixels so that the layer can be manipulated with manual tools. From the Layers menu, choose Rasterize > Type. Then, with the Brush tool sized to 100 points, 0% hardness and 100% black as a foreground color, draw a diagonal line that follows the angle of the cut mark.
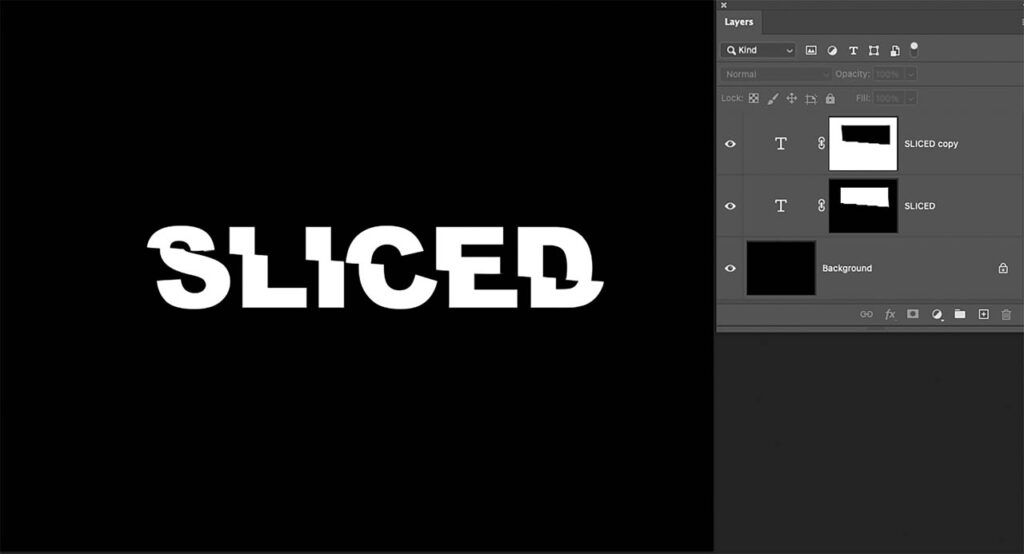
- To create a stack of slices, as in Fig. 4, merge the two layers, Sliced and Sliced (Copy), Duplicate the merged layers twice and drag them into position.
Layer style type
The sliced effect is very simple and requires only a few steps. This next one, is quite simple too and uses Layer Styles to produce a shiny, chrome text effect.
- Create a new document that has the same specifications as the “Sliced” document except for a white background.
- Choose the Type tool and enter your text. Assign specifications, in this case, Cooper Black, all caps, 126 point.
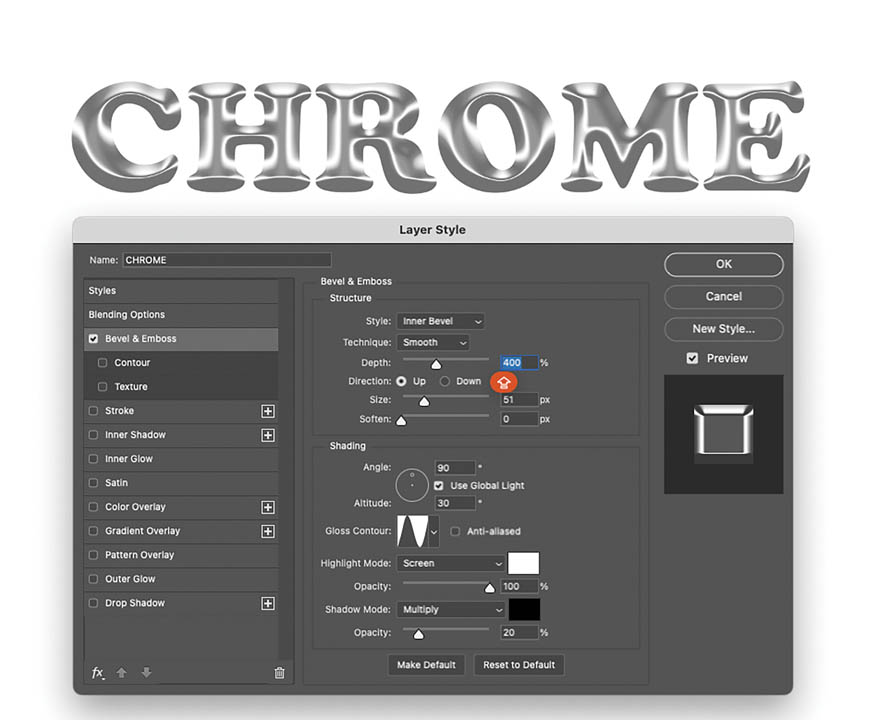
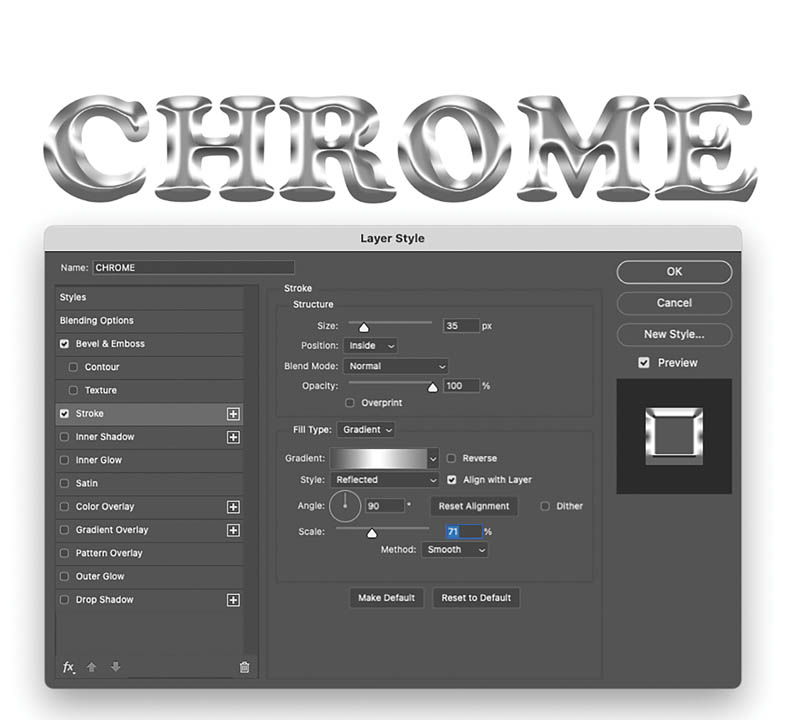
- In the Layers panel, double click the area to the right of the type layer thumbnail to display the Layer Styles dialog box. Click the Bevel and emboss box and adjust the specifications to resemble Fig. 5A.
- Choose Stroke and adjust the specifications to resemble Fig. 5B.
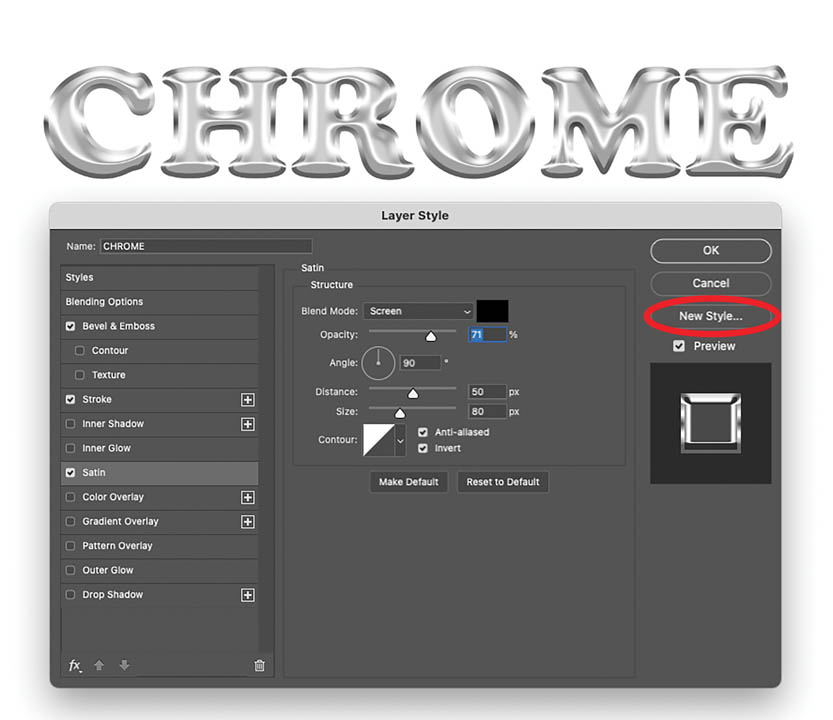
- Choose Satin and adjust the specifications to resemble Fig. 5C.
- Save the layer style by clicking the New Style button. The style is saved to the Styles panel.
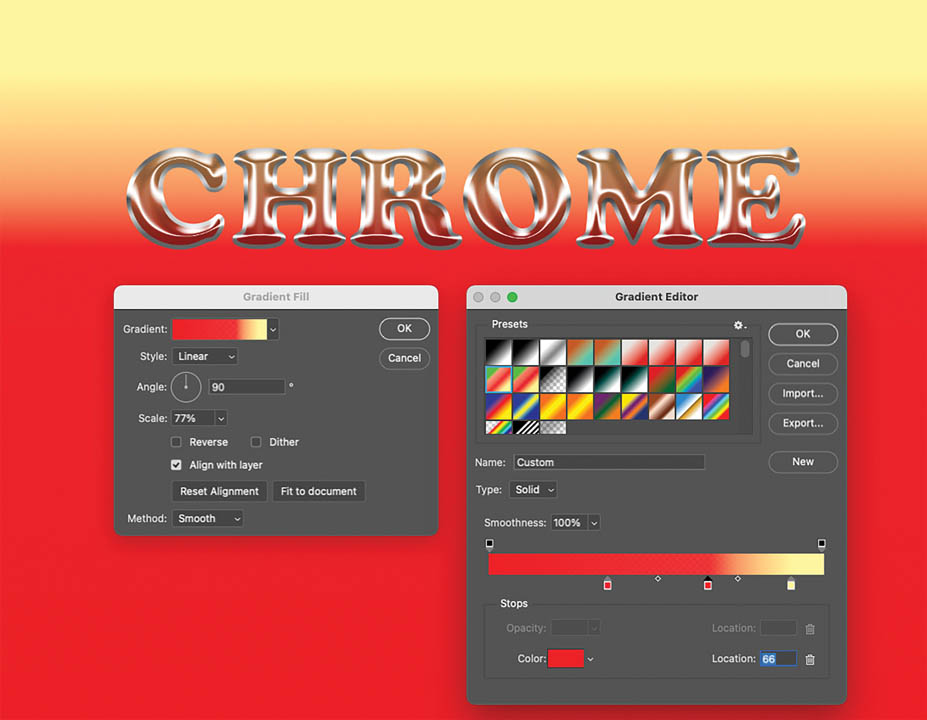
- For even more impact, change the background color. Click the Fill/Adjustment layer icon in the layers panel and choose Gradient. Choose a gradient from the list or make a custom gradient with the Gradient Editor. Because the type is partially transparent, it will pick up the colors of the background. (Fig. 6)
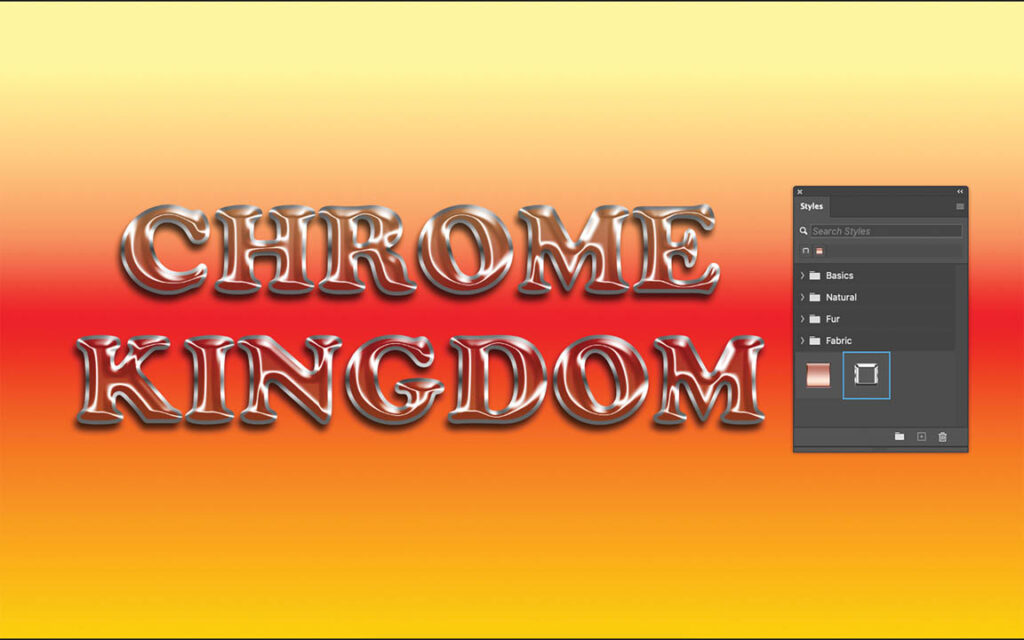
- Add additional text. Use the Styles panel (Window > Styles) to apply the saved style to the new text layer. (Fig. 7)
Burning hot text
This next effect is really hot and a little more complex. We’re going to apply the Flame filter to text to make it appear as if it’s surrounded by flame. Not only that but we’re going to record this process as an Action and then apply the effect to another text document.
New document
In this instance, the new document has the same specification as the Sliced text with dimensions of 8.5″ X 11″ and 300 PPI for the Resolution. Choose RGB 8 Bit for the color mode and click the Landscape icon for the orientation. The background contents are black.
Recording the action
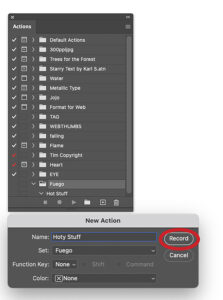
Open the Actions panel. (Window > Actions). From the Panel Options menu choose New Set and name the set “Fuego.” From Panel Options menu choose New Action. Name the Action “Hot Stuff” and then click the Record button. (Fig. 8)
Entering type
Choose the Type tool. Choose a font and a size. For this exercise I chose Hobo Std, all caps, 170 Points, white. Click the document and type the word “FUEGO.” The new text layer is automatically named “FUEGO. From the Layers menu choose Layer > Rasterize >Type to convert the new text layer into pixels.
Applying filters
Photoshop’s Flame filter is versatile and can save lots of time, but it requires a few preliminary steps to activate it. First, you’ll need to make a path from the text characters. (Fig. 9) Press Command (Mac) or Control (Windows) and click the copied layer’s thumbnail in the Layers panel to select it. Then go to Window > Paths to display the Paths panel. From panel options menu choose Make Work Path, then click OK. Duplicate the FUEGO layer. It is automatically named FUEGO (copy).
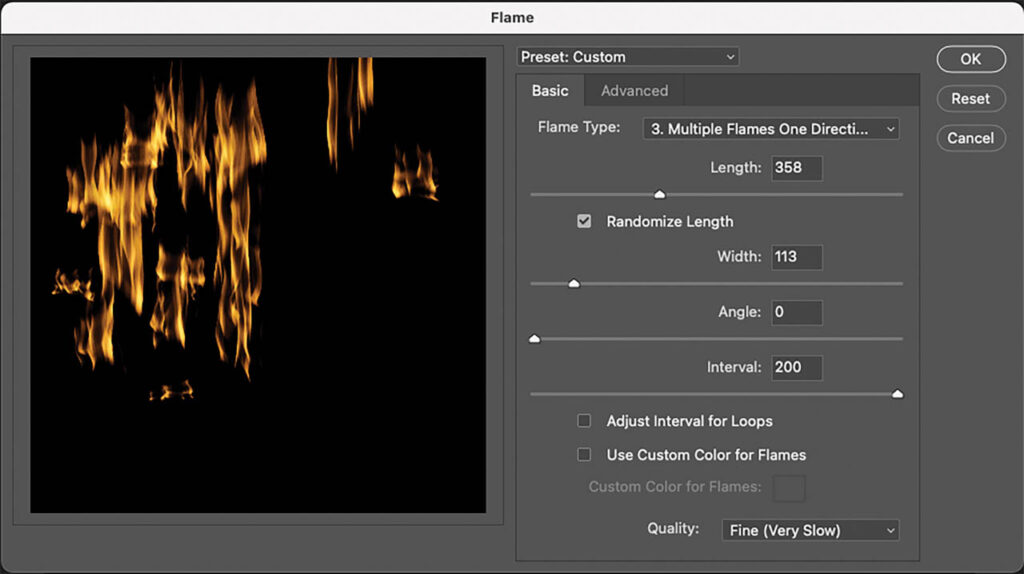
To open the Flame filter dialog box, go to Filter > Render > Flames. The Flames interface has a several controls and a very nice preview window. (Fig. 10) The controls specify the Flame type, (I choose Multiple Flames One Direction) length, width, angle and interval. You can even choose a custom color for the flame effect. Click OK to apply the flames.

Coloring the type
To better unify the type and the flames, apply a gradient to the text. Drag the Fuego Layer to the top of the stack. Click Layer Styles icon at the bottom of the Layers panel and choose Gradient Overlay from the list that appears. Click the gradient preview area in the center of the options to display the Gradient Editor.
At the bottom half of the Gradient Editor, click the horizontal ramp that displays a preview of the current gradient’s colors with house shaped color stops directly below the ramp on each end. Double-click the color stop on the left to display the Color Picker. I chose black for the left stop applied to the top of the letters, red for the middle stop and black on the right for the bottom of the letters, but of course, you can choose any colors you like. Click OK to exit out of the Gradient editor.
Add an outer glow Layer Style to give the text a soft halo effect. At this point, click the stop button on the Actions panel.
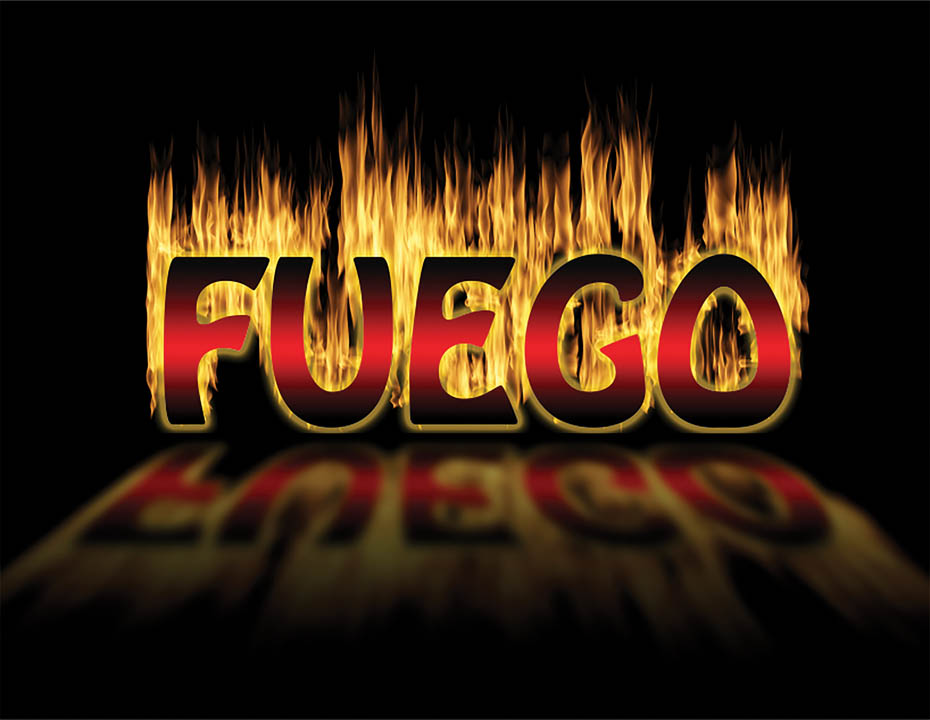
Fig. 11 shows the gradient applied to the letters, the outer glow layer style and a reflection made by copying the layers, flipping them vertically, dragging them below, and applying a Perspective transformation. A gaussian blur filter was applied, and the layer opacity was reduced to 50%.

Run the action on different text
Before you run the action on a new document with different text, click the Toggle On /Off dialog box (the little square) next to the Hot Stuff action. As the action runs it will stop so that you can enter different text and make necessary adjustments. (Fig. 12)
Warning! This is a relatively complex action. You may have to try this several times with intervals of manual manipulation before you get satisfactory results. Worry not! As the I-Ching says, “Perseverance furthers!”
Versatility
In this article, I’ve scratched the surface of a huge subject by presenting three distinct methods for jazzing up type: a simple five-step slice effect, shiny chrome letters using Layer Styles, and finally, a red-hot flame filter effect that was recorded as an Action to later be applied to additional text. I chose these examples to illustrate the versatility of the software and the fact that there are many approaches to creating amazing type effects.
In addition to text generation features, we’ve explored the intricacies of Photoshop’s workflow. In producing any graphic documents, its critical to know your tools and commands, where to find them and how best to apply them.
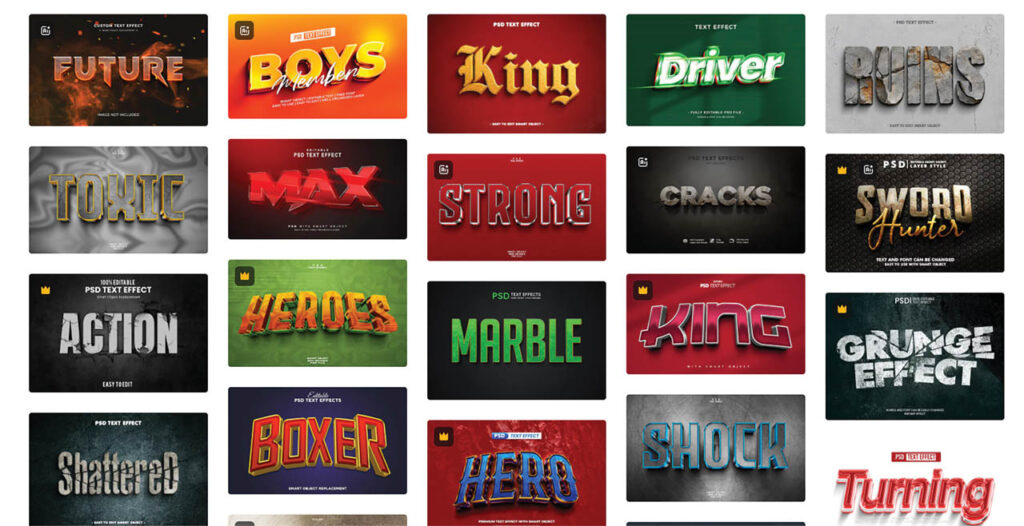
Obviously, with software as powerful as Photoshop, the potential to produce dazzling type effects is endless. FYI, there are a lot of designers who publish written step-by-step instructions of text effects online. There is also a plethora of type effect video tutorials on YouTube. Furthermore, if you like working with Actions, there are literally hundreds of type-effect actions on the internet. Just Google “Text Effect Actions” and you’ll find dozens of sights that offer them for sale or for free to download and apply to your text. (Fig. 13)