In the past, before graphics software was the mainstream method of manipulating images, photographs were considered an accurate representation of a moment in time. Photos conveyed a kind of indisputable truth.
They were usually taken at face value because credible changes to a photographic image required complex, labor-intensive camera and darkroom techniques, and a steady hand with an airbrush — skills that only a few creative professionals possessed. I remember, growing up in the 1950s, the term to describe altered photographs was trick photography.
Nowadays, of course, trick photography is much easier using sophisticated image editing software such as Adobe Photoshop or Corel PaintshopPro. The accessibility and ease of digital photo manipulation have challenged the credibility of the photographic image. What was once considered absolute visual proof is now often open to speculation and scrutiny.
As the software evolved, new techniques have appeared that can generate amazing, eye-popping effects. Over time, the techniques have become more and more automated, as if the software has a mind of its own! And, in fact, it does.
Intelligent robots?
What can I say? Artificial intelligence is on everyone’s lips nowadays. Will the world soon be overrun by intelligent robots? Well, let’s be realistic. The solution to content replacement to make photographic alterations undetectable is partially due to the intuitive nature of the software that makes seamless compositing possible.
But make no mistake, it isn’t a matter of simply pushing a button and, voila, mission accomplished! Content replacement continues to require a significant amount of skilled operator input and an adept knowledge of the intricacies of the software.
What I will present are a few techniques for seamlessly altering and replacing content. Some of the techniques I’m about to describe are applied manually. Some are semi-automatic and one is completely automatic. I’m using Adobe Photoshop CC2023 to demonstrate these techniques, aptly named Content Aware. Corel PaintshopPro has similar features called Magic Fill.
Basics
Before we get into the actual techniques, let’s focus on basic considerations for seamless editing. The three most important points to consider when adding or replacing picture content are:
- The edges of the new content blend perfectly with the adjacent regions where they are placed and are completely undetectable.
- The colors of the new content perfectly match the colors of the target image.
- The light source is consistent on both the source and destination content.
The first two considerations can be easily controlled. The light source, however, is a bit more of a challenge to manage. Light can shine from anywhere on the image: top, bottom, left, right, or center. There is also ambient light that illuminates everything.
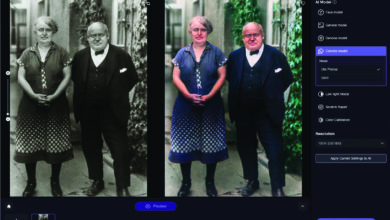
Depending on the origin of the light, shadows need to be cast in the opposite direction of the light source. Highlights and reflections should be located on the same sides of the content of both source and destination images. If possible, choose images whose light sources are similar. A more radical approach is to flip or rotate the source content, so the light source corresponds to the destination image (see Fig. 1).
Layers
Composites are layer-based. Separate content resides on individual layers. Layers ensure that content remains isolated and easily selectable. The ability to target and manipulate a component of the image is a crucial part of the workflow.
Since layers are flexible units, their content can be moved, scaled, rotated, or otherwise transformed and even repositioned forward or backward within the picture plane. Furthermore, many of Photoshop’s features are layer-dependent, guaranteeing flexibility throughout the workflow.
Collage
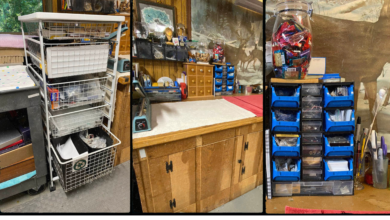
A composite is created with images from multiple sources. Another word for a composite is a collage. Artists have been making collages since the mid-19th century. Back in the day, collages were made from cutout pieces of paper pasted together to form an image (see Fig. 2). Nowadays, the digital collage workflow is faster and more versatile, providing a vast array of extraordinary features that enhance the credibility of the composite.
Cloning
The simplest and most manual method for replacing image content is to paint with one of the clone tools. The clone tools found in the Tools panel are designed to work on smaller regions of an image. They are applied with a brush; therefore, their performance is dependent on the brush’s size, shape, opacity, blend mode, and dynamics.
Three tools sample and deposit pixels: the Clone Stamp, which copies the sampled area and paints it to a destination area; the Healing Brush, which copies the sampled area and blends it into the destination area; and the Patch tool, which copies larger areas and pastes them seamlessly.
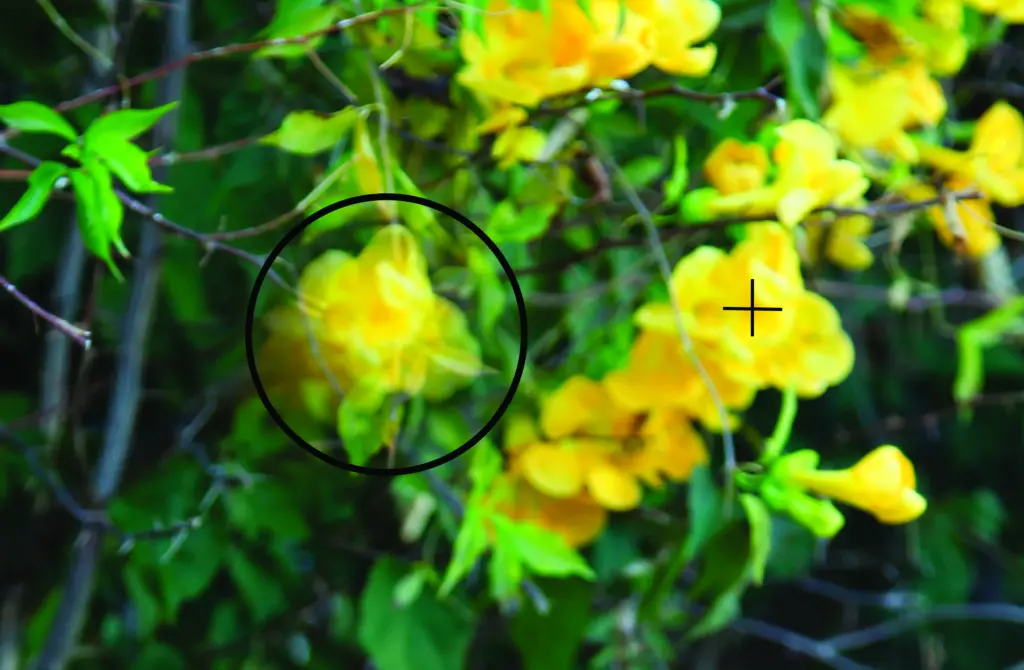
When cloning with the Clone tool or Healing Brush, use a soft, round brush. The feathered edge will blend into the new area more smoothly. Drag the cursor inside the selection. Hold the mouse button down and drag to paint with the pixels.
Notice that the area being copied displays a small cross to indicate the sample point. The area that is being painted displays a circle that indicates the brush size (see Fig. 2 above). Inside the circle is a preview of the content that is applied.
As you move the brush across the image, the cross follows the circle and maintains a constant distance. You’ll usually have to sample more than once if unwanted adjacent areas of the sample appear on the target region.
Clone Source
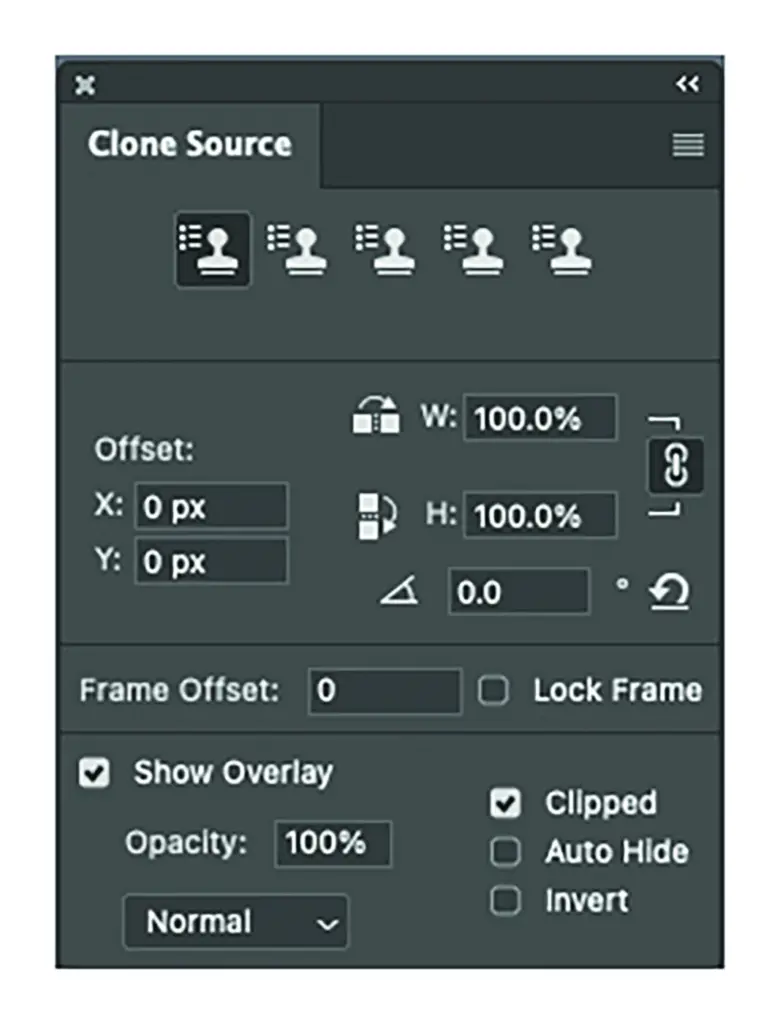
The Clone Stamp can be precisely configured using the Clone Source panel (see Fig. 3). This panel controls the offset of the sample point — the X and Y values determine the distance in pixels from the cursor that the sample will be taken. The height, width, and angle of the sample can also be controlled so you can increase or decrease the size of the sampled area or change its shape and angle. The opacity of the clone can also be varied, which can be a real asset when trying to blend edges.
Content Aware Fill
The Content Aware Fill (CAF) command provides an elegant method for replacing selected content. It is an intuitive feature that assesses the color values of the edges of a selection and replaces the interior with pixels it finds throughout the image. It usually creates a seamless blend.
Start by selecting the area on the image that is to be replaced. Slightly overlap the selection outline on the adjacent regions around the selection by just a few pixels to better determine the new fill content.
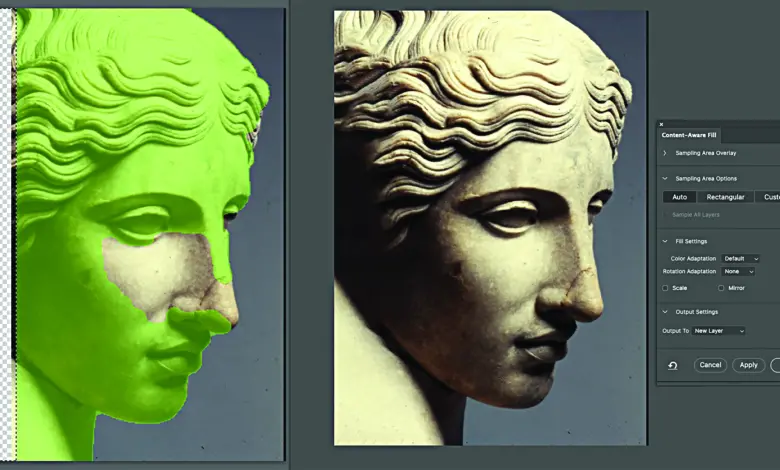
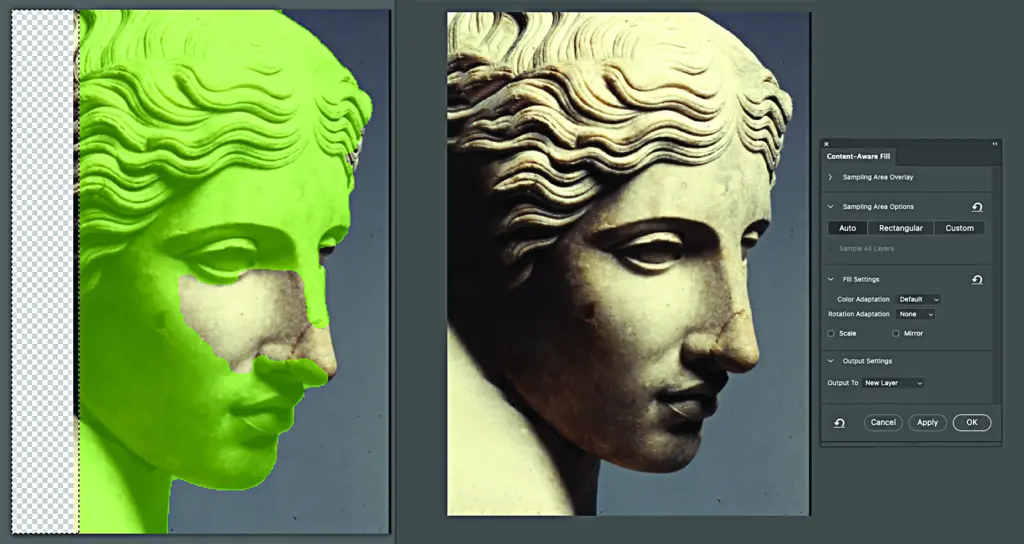
Choose Content Aware Fill (CAF) from the Edit menu. The CAF feature assesses the color values of the pixels on the outside edge of the target area. A new window appears that shows where the new content is being sampled, indicated by a green translucent mask (see Fig. 4). The mask can be erased or added to with a brush tool to refine the sampled area. A live preview window displays the results as the mask is manipulated.
Most of the time, CAF works well, providing that the target area is not too large. If the results aren’t perfect, you can always go back and tweak the filled areas with the Clone Stamp to manually retouch smaller areas that have unwanted content.
Content Aware Move
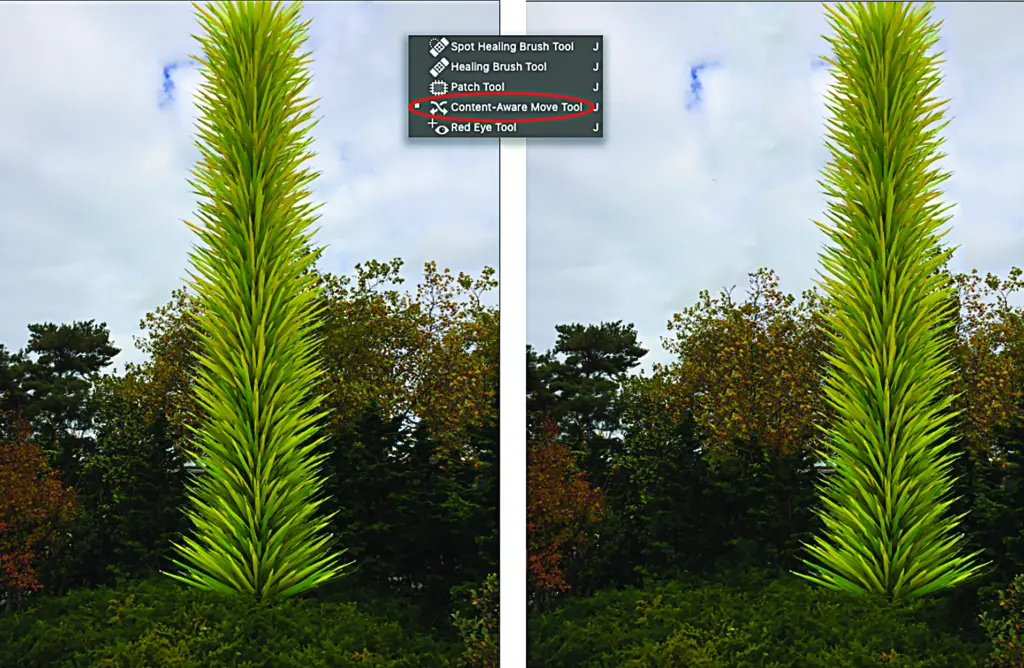
This is a relatively new tool that is found in the retouching tool cluster along with the Spot Healing brush, Healing brush, and Patch tool. Simply stated, it replaces content when a selected area is moved. It uses a similar algorithm as the CVA feature but doesn’t have the added control of the mask.
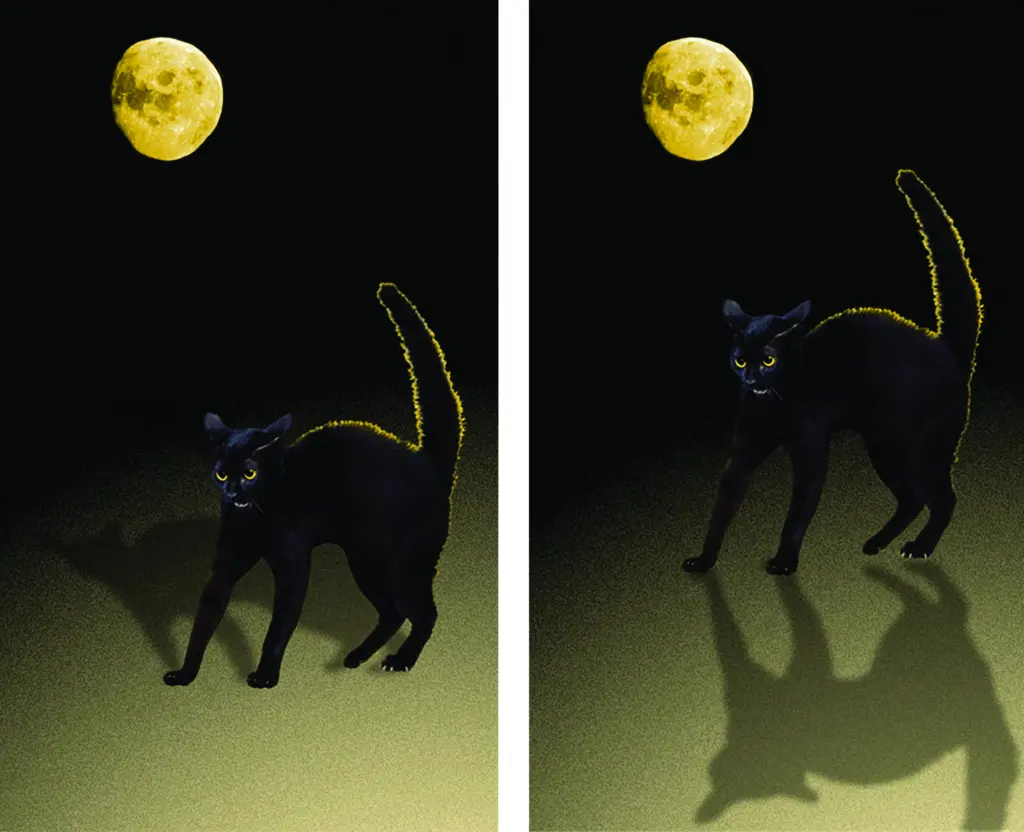
Choose the tool. Select an area by dragging around it. Drag the selection to a new location and click the commit icon. That’s it! The original selected area is filled with content selected from the image. The moved content is deposited in the new location (see Fig. 5).
Content Aware Scale
One more Content Aware feature that can cut work time is the Content Aware Scale (CAS) command. It resizes the exterior areas of the image and protects important details. The CAS feature examines the image area and accurately determines which areas are important and which are not. It then protects the important areas as the image is rescaled.
CAS works best with photos that contain large areas of less detail, such as vast blue skies, grassy fields, bushy landscapes, or open water. The software can add, subtract, or combine pixels together with fewer noticeable glitches (see Fig. 6).

Sky Replacement
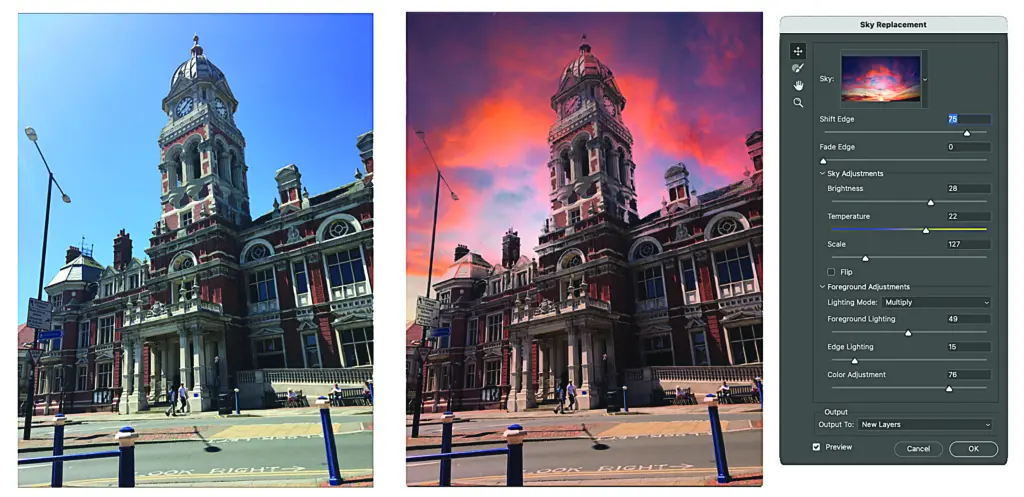
A new feature that automatically replaces boring, empty skies with dramatic, exploding sunsets and intense cloudscapes is the Sky Replacement command. It’s fully automatic. You don’t even have to select the sky! Open an image that has a lackluster sky and choose Sky Replacement from the Edit menu. In the control panel, choose a sky image from the menu.
There are three categories: Blue Skies, Dramatic Skies, and Sunsets. As you choose, the new sky appears in the image window in real time and is scaled to perfectly fill the area. Drag the sliders to modify the sky’s characteristics.
You can even modify the foreground areas to better enhance ambient light. Sky Replacement is one of those slick new features that regularly appear as the software evolves. It cuts labor time and encourages experimentation (see Fig. 7).
Transform reality
Replacing and modifying image content is a big part of the magic of image editing. Seamless editing, when done correctly, has the potential to transform the reality of an image.
These intuitive techniques are most often a source of creative fun as we employ our imaginations to invent or modify new fanciful realities. The ability to make these images look so realistic and natural should motivate you to experiment with them.