
Photoshop is a very powerful program with so many different functions. Knowing some shortcuts and tips and tricks can help speed up your workflow, and make your design time more efficient.
Make the keyboard your friend
One of the easiest ways to enhance your workflow is to learn key commands. As with many software programs, many functions in Photoshop have quick key commands assigned to them. You can simply hit the key or series of keys on the keyboard and instantly perform the action.
When it specifically comes to drawing or designing, there are two key command tips that you’ll find very helpful. The first is the use of the bracket keys. When using any tool that requires a brush tip like the brush tool, the eraser tool, or the clone tool, you can enlarge or reduce the size of the brush by hitting the left and right bracket keys. The left bracket reduces the brush size, and the right bracket enlarges it. This is extremely helpful allowing you to make adjustments on the fly and keep on working.
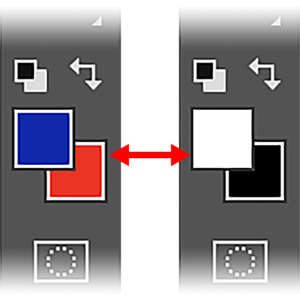
The next two key commands help you with the color swatches. At the bottom of the Tool Bar is the foreground and background colors. (Fig. 1)
If you hit the letter D key, it will automatically default to black as the foreground color and white as the background color. (Fig. 2)
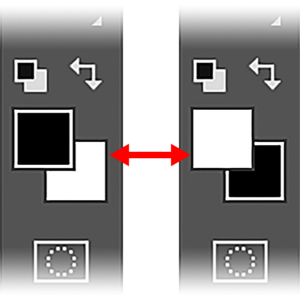
The other key is the letter X. This key allows you to toggle the foreground and background colors back and forth. Whether it’s the default black and white or any two colors that may be in the swatches, using the X key will allow you to flip-flop the colors as needed. (Fig. 3)
Bring on the (Photoshop) layers
Working with layers can be beneficial to your design process. Keeping things in their own separate layers allows you to make adjustments to your layout as you work, or make any changes that may come along once the layout is done.
Creating complete objects on each layer is helpful as well. (Fig 4 & 5) If you have one object on top of another, and the one underneath isn’t completed where it is overlapped, what happens if you need to move the top object? Now, you have to go back and finish or fix the bottom object.


Before you start painting or designing your layout, figure out a game plan for what objects to put together or keep in separate layers. Determine what objects will be on top of what. What objects should you paint first?
Mapping out your design process from the beginning and then painting all your elements completely will not only make for a better workflow now, but it will make things quicker and easier for you if you need to make any adjustments later.
Moving things around
In Photoshop, the Move Tool has an Auto-Select option that you can turn on or off depending on how you prefer to move objects around in your document. Try both options and see which one fits into your workflow best.
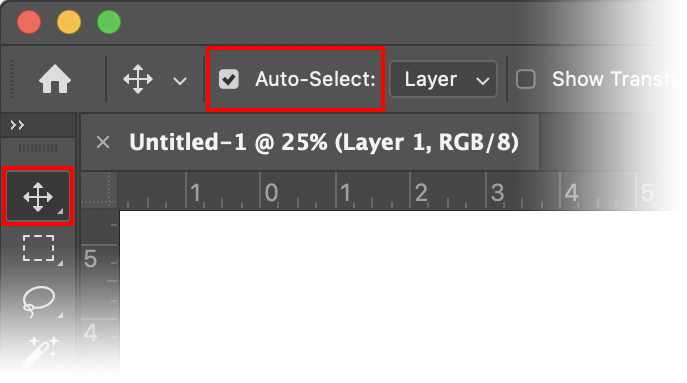
When the Move Tool is selected, the Auto-Select option will be found on the left side of the Options bar at the top of the Photoshop window. (Fig 6)
If it’s not visible go to Window Menu > Options. If the option is off or unchecked, to move an object in your document, you need to actually select the layer first in the layers panel (Windows Menu > Layers). You can click anywhere in the document window and only the object on the selected layer will move. (Fig. 7 & 8)
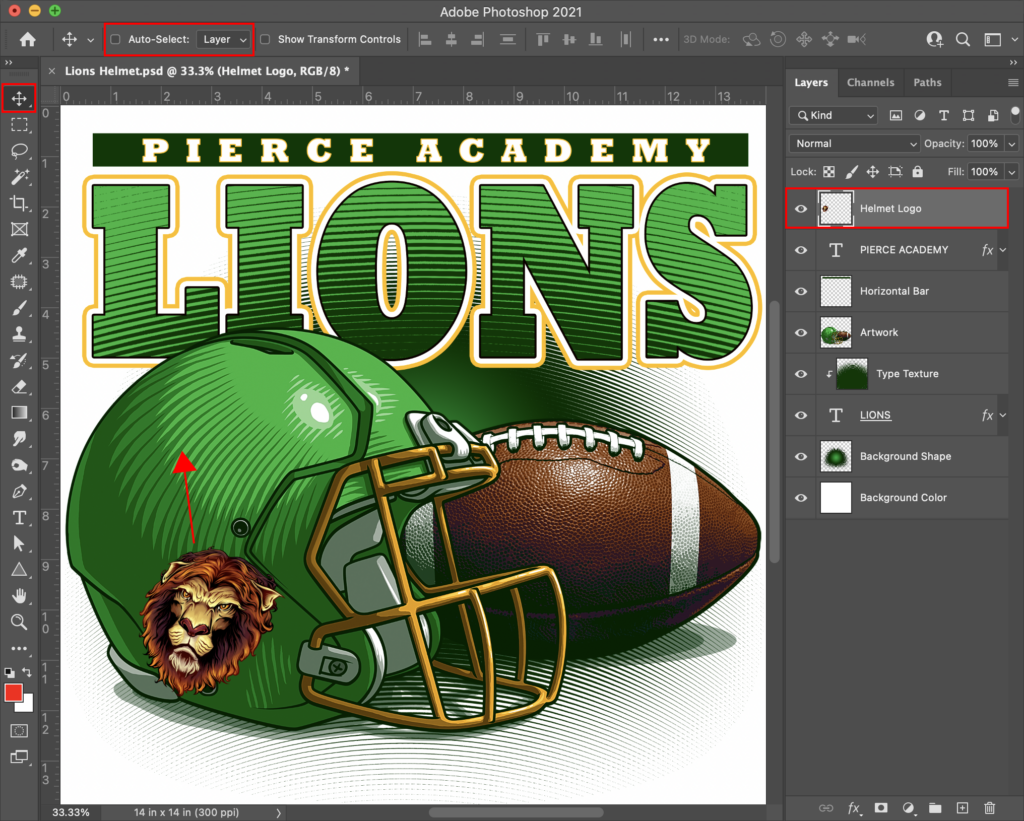

On the other hand, if Auto-Select is on or checked, regardless of what layer may be selected in the layers panel when you place your mouse on an object in your document, that is the object that will move. So instead of needing to select the layer first, you can simply click on the object in the document window and move it as needed.
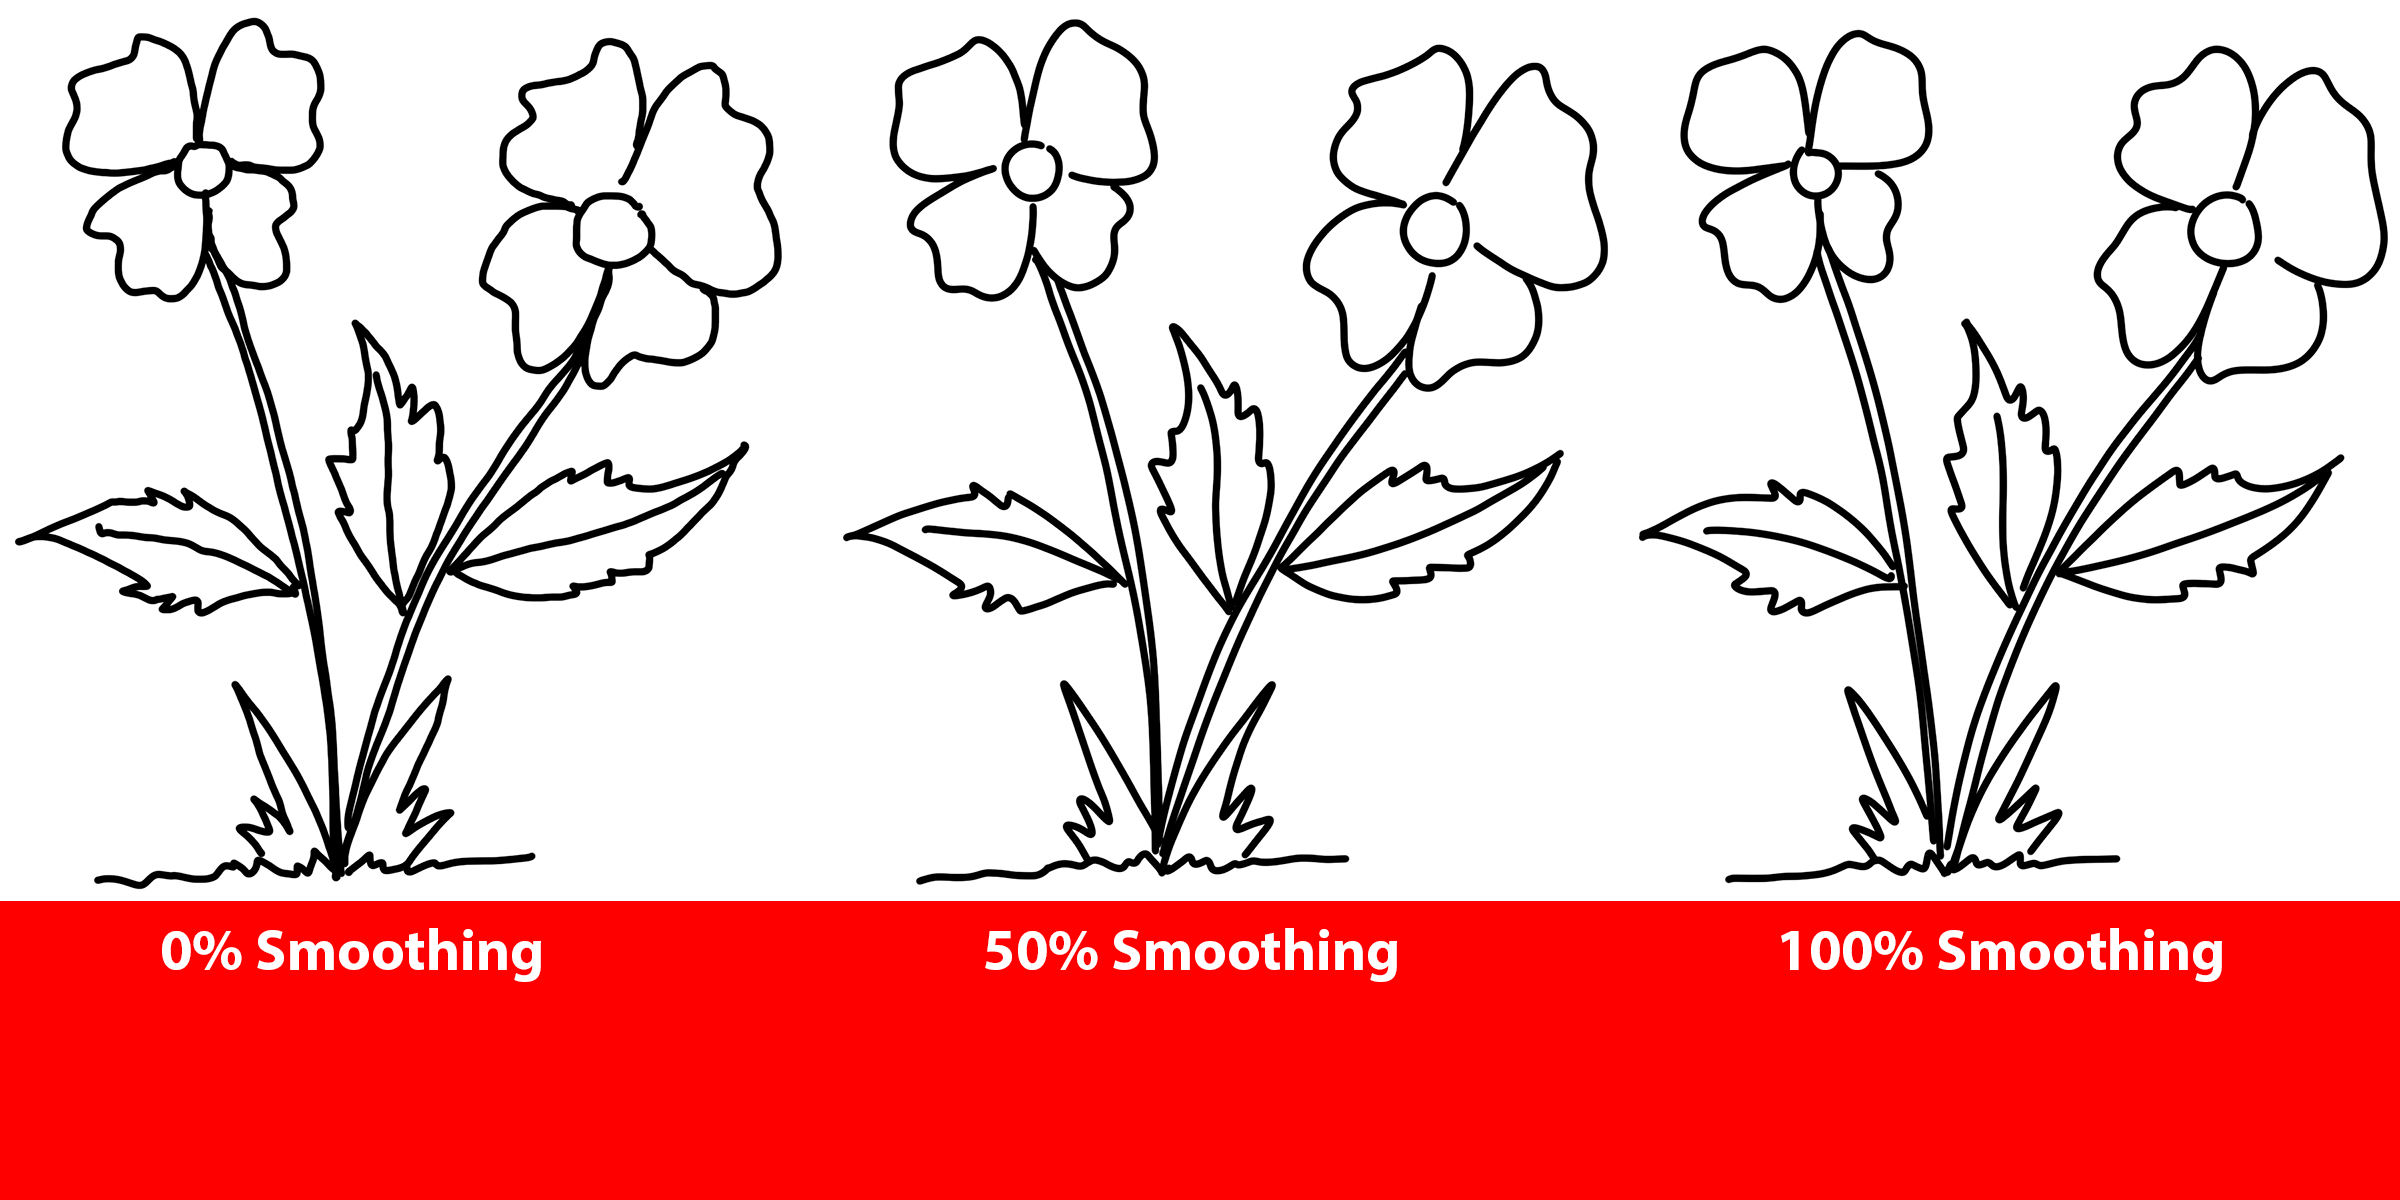
Nice and smooth
When using a digital tablet and pen, trying to draw clean, precise lines can be difficult.
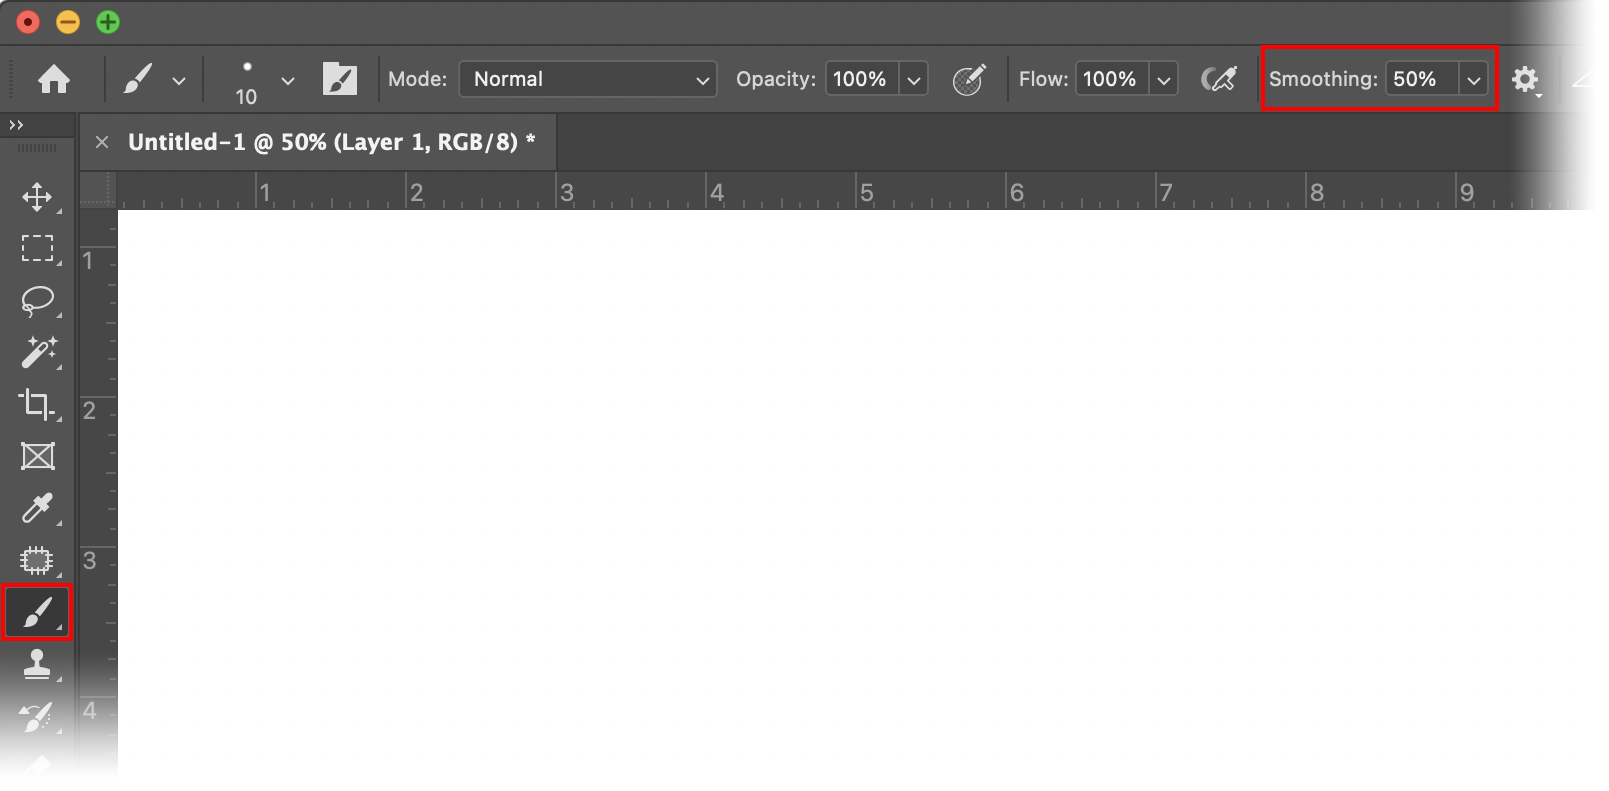
However, Photoshop has a function that can help you draw cleaner, smoother lines. It’s the Smoothing option, which can be found in the Options Bar of the Brush Tool. (Fig. 9)
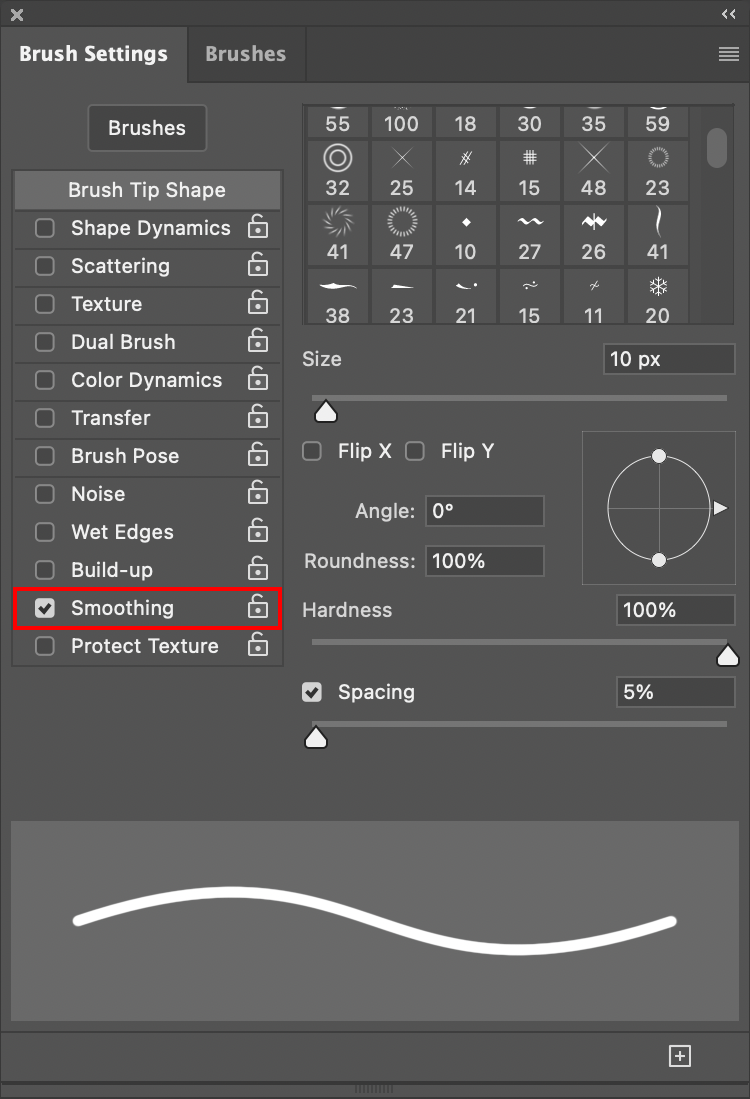
If it’s not active, open the Brush Settings panel (Windows > Brush Settings) and check the Smoothing option. (Fig. 10)
When Smoothing is off or set to 0%, drawing will be in real-time and will pick up any movements of the pen as you move along the tablet making it hard to create smooth lines. If you set it to 100%, the line will lag behind the pen so any sudden movements won’t be picked up creating a much smoother line.
However, because of the lag time, if you move too fast, any small curves that you want to have won’t be detected. This will force you to draw slower so the line keeps up with you and picks up the details you want.
Around 50% tends to be a happy medium. The line will keep up with the pen well, but it won’t move so fast that it will detect any unwanted jerky movements. Plus, you won’t have to move so slowly that you take more time to create your design (Fig. 11).
This will allow you to draw a better image initially, and you won’t need to waste time going back and doing any cleaning.