Tear some caps apart and place the brim on the curve of your cap gauge and check for gaps. The better the fit, the better the hooping.
If you have to use a cap that doesn’t fit snugly, shim with backing or waxed paper to get as tight of a fit as possible. Take the hassle out of caps by showing your customers a cap selection that will work for you. Happiness is stitching caps that fit your machine!
The machine
Aside from making sure your machine and bobbin area is clean, find the sewing speed that works for you. Many recommend slowing the machine down but sometimes a faster speed prevents drag. You also want to:
- Learn your cap sash. Some of the new frames just snap in but, if yours has screws, be sure all are tightened down. Recessed screws can be easy to miss.
- Switch to your special cap needle plate, if your machine has one. This allows the curved cap to reach the throat plate.
Cap frames
Cap frames are adjustable. Tighten or loosen to hold the cap firmly. Check the screws often to prevent loss of the screws and registration.
Preparing & finishing
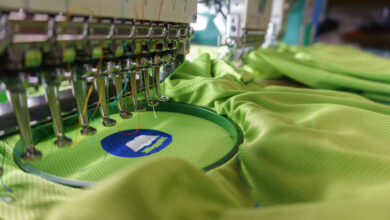
Use a cap press to soften the front panel so the fabric can accept the needle and stitching. This also helps flatten any center seam. Poplin has a tight weave that can deflect the needle, so, softer is better. To restore any lost luster, spray the cap with an after-market finish. Use these quick tips for a properly prepped and finished cap:
- Shape the bill with your hands to ease the fit on the frame and pull it taut on the framing device, securing it with the clips at the bottom of the stitching area. This prevents taller designs from being pulled during stitching.
- Magic Sizing fabric finish can make the cap malleable. Frame it for stitching while it is still damp, and warm with a heat press.
- Slip envelopes or plastic bags on the bill to prevent oil, dirt or abrasion from harming the fabric.
- Use a heat press and a moist cloth to remove topping.
Needles & thread
Using the correct needle and thread for a cap run is paramount.
- An 80/12 sharp is a good choice. Too large a needle may cause skipped stitches.
- A coated needle can help reduce the residue formed by the needle’s heat when stitching through heavy fabric.
- A reinforced needle can prevent the upper thread from rubbing against the center seam which can cause thread breaks.
- Polyester thread is impervious to the salt water-both from the sea and the brow.
- Start with a full bobbin. Cotton bobbin thread helps create crisp details and fine lettering. Cotton throws more lint, so clean the bobbin area often.
- Add backing under the cap. Stitches form better with backing added to the equation. A longer bobbin thread is needed to reach the slightly raised cap and form a good stitch.
- A heavier thread can provide better coverage.
- Slide wax paper under the cap to reduce thread breaks. This also lubricates the needle as the wax melts during the heat of stitching. It also prevents sticky build-up in the eye of the needle.
Design & digitizing
- Add underlay to “fill the ditch” on a cap with a center seam.
- Digitize from the inside out to push any extra fabric away from the design to prevent puckering and bubbles under the stitching. Designs that stitch from the bottom to the top will roll the fabric ahead of the needle and prevent a bulge between the stitching and brim.
- Consider alternate placements for design parts. The side of the cap, the back, even the top, are fair game. Websites and phone numbers look great on the back above the keyhole.
- Open the backs of the caps and scan them. Use the scan as a template and your stitching will follow the arch of the keyhole perfectly. Name the templates after the caps and you will be able to find them easily.
- The sides of the caps may not be straight and constructed at an angle. Plan your lettering or design accordingly. A tilt of 7 to 15 degrees will work well.
- Use a few small stitches at the beginning of your design to anchor the thread. These stitches can be used to mark the center.
- Study the fabrics of your caps. A corduroy cap will need flattening underlay to tame the ridges. A tight twill may require running edge underlay to prevent a sawtooth look.
Learn cap terms so you can dissect a cap, determine its style, decide on a digitizing and stitching strategy, and explain the advantages or drawbacks to your customer.
If you know a large-cap manufacturer that also does embroidery, and they use the same brand machines as you, don’t let the threat of “competition” scare you off. Their caps will fit your machines.
When you are adding the curve of a cap to the flat of the throat plate, the best fit will put you way ahead of the game when stitching caps.


