


RGB digital images are composed of three color channels. Repositioning the contents of a color channel up or down, or to the left or right, misregisters the channel to produce an alteration in color. Moving the red channel a few pixels to the right or left, up or down, produces interesting color configurations. Lately I’ve seen a lot of graphics that produce the faux 3D effect and it’s becoming a common graphic design idiom (see Figure 1 above).
If you are looking to create a piece of Avant Garde art, you might consider trying this approach, varying the degree of offset in each channel. If you’re more interested in producing real 3D images that have visual depth and leap off the page, you can do it using similar but more controlled techniques. By the precise offsetting of color channels, images with startling depth can be created.
3D Glasses
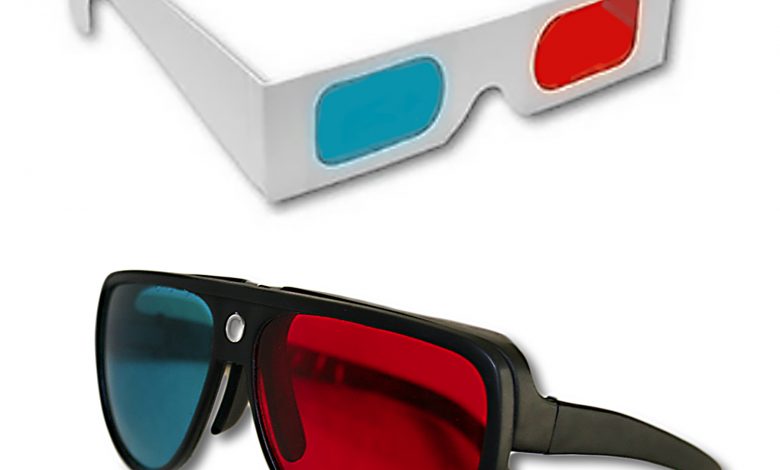
In order to see this particular 3D effect in its full glory, you’ll need red and blue 3D glasses like those shown in Figure 2. You can get a pair at the Rainbow Symphony website: www.rainbowsymphonystore.com/collections/3d-glasses.
Low cost paper or plastic-framed 3D glasses hold accurate color filters and lately there has been a significant improvement of the cyan filter, especially for viewing accurate skin tones.
Brief History
3D images have been around for quite some time. In 1833, the English scientist, Charles Wheatstone, discovered that because human eyes are not at exactly the same place, objects viewed through eyes are not the same, thus creating an illusion of depth. In 1846, Werner Rollman of Stargard, Germany, invented 3D anaglyphs, which are composed of two sets of superimposed identical line drawings, one in blue and the other in red. When viewed through red and blue glasses, the drawings merge and appear to be three-dimensional. This particular type of 3D is called anaglyphic. I personally became interested in anaglyphic 3D when I was a kid in the 1950s. I had several 3D Mighty Mouse comics that I would look at over and over again to try to understand how these red, blue and black line drawings magically displayed depth (see Figure 3).
Anaglyphic 3D 101
Anaglyphic 3D is a type of stereoscopic 3D produced by means of placing a differently colored filter in front of each eye. The filters are typically red and cyan. Anaglyphic 3D images contain two images, one red and the other cyan to correspond with the filters on the glasses. The color channels on images are offset with red being moved slightly to the left. There is usually a base image too, which can be black and white or full color.
When viewed through the anaglyphic glasses, each eye sees one of the two colored images. The left eye bearing the red filter sees the blue image that appears black. The red image is not visible because it is filtered out. Similarly the right eye sees the red image, appearing as black and the blue image is filtered out. The visual cortex of the brain integrates the two images into a single stereoscopic image and perceives it as a three-dimensional composition.
Applications
Anaglyphic images have seen a recent resurgence due to their use on the Web, Blu-ray Discs, CDs, and even more so in print. Video games, and films on DVD or Blue Ray can be shown in anaglyphic 3D. Anaglyphic 3D is used for scientific images for medical and anatomy books where depth perception is critical (see Figure 4). NASA images, including pictures from the Mars Rover, have been processed using anaglyphic 3D (see Figure 5). Other applications include geological illustrations by the United States Geological Survey and objects from various online museums … and let’s not forget comic books and the most fun application of all-3D underwear (see Figure 6).
RGB
The anaglyphic technique can be used on full-color RGB and grayscale images that have been converted to RGB color mode. It works best on images that do not contain areas of pure and solid red such as solid-colored type, for example, because when the red areas are offset, the absence of the green and blue in the color channels produces little or no effect.
Stereo Pair
The most accurate anaglyphs are made with two cameras set a short distance apart called a stereo pair. A stereo pair is two images of the same scene taken from slightly different perspectives at the same time. Objects closer to the cameras have greater differences in appearance and position within the image frames than objects further from the camera. The red channel from the left camera is combined with the green and blue channel of the right. Having been taken from a different angle, the red channel is naturally offset.
Many computer graphics programs provide features that manipulate and combine individual color channels to prepare anaglyphs from stereo pairs. In practice, the left eye image is filtered to remove blue and green. The right eye image is filtered to remove red. The two images are usually positioned in the compositing phase in close overlay registration. Dedicated anaglyphic 3D software is available that makes quick and simple work of combining channel information.
Creating Anaglyphs
A single image can also be made to look three-dimensional by moving the red channel to the left. The further it is moved, the stronger the 3D effect is. If this is done in stages, areas of the image will appear to recede into the distance to lesser or greater degrees.
I present here two single image methods that you can use to create your own anaglyphic pictures. Bear in mind that there are many variations to these techniques that produce similar results. I’ve chosen these two relatively simple techniques because they don’t require a great deal of knowledge of the software so that you can get started right away. In this demonstration I’m using Adobe Photoshop Creative Cloud, 2015.
Two-Level 3D images
This technique demonstrates the basics of advanced blending. Using this technique, you can create images with three, four or even more levels of depth. Choose an image with natural perspective to enhance the effect. In this first example you’ll create two levels of depth on a black and white image. In the second example I’ll demonstrate how you can create continuous depth on a full-color image. Of course you’ll need anaglyphic 3D glasses to see the results.
- Open an image that has natural perspective, and make any color, tonal, size, or content adjustments that are necessary (see Figure 7).
- If the image is a grayscale, convert it to RGB mode (Image > Mode > RGB).
- If the image is layered, choose Layer > Flatten Image.
- Duplicate the background layer name the layer “red,” as in Figure 8.
- Double click the red layer to display the Layer Styles dialog box. Uncheck the red channel box and click OK (see Figure 9).
- Choose the Move tool. Press the left arrow key eight times (for a 300ppi image). The red and blue channels are revealed (see Figure 10). Look though the 3D glasses (be sure the red filter covers your right eye). The image has receded into the picture plane. Press the arrow more and it will move further back, but not too much otherwise the image will double and the effect will be lost.
- Go to the Layers menu and choose Layer Mask > Reveal All. Choose black as a foreground color and carefully paint out the red and blue areas on the front-most regions of the image. The depth of those areas returns to the picture plane creating two levels of depth (see Figures 11A and 11B). This process can be repeated using multiple layers for multiple levels of depth as in Figure 12.
Continuous Depth
This effect creates a 3D image that deepens continuously as it recedes in the picture plane. It uses an alpha channel with a gradient to control the application of the Offset Filter to the red channel.
- Open an image. Follow steps 1 through 3 in the previous 3D numbered step list.
- In the Channels panel, click the Create New Channel icon. A new empty alpha channel appears in the stack named Alpha1. Click it to target it.
- Press the D key to set the foreground and background color, so they default to black and white.
- Choose the Gradient tool from the Tools panel. Drag the gradient in the direction of the depth to apply a black and white gradient to the alpha channel. The black should start on the part of the image that will be closest to the viewer (see Figure 13).
- Press the Cmnd/Cntrl key and click on the Alpha1 thumbnail to load the selection. A selection marquee now covers approximately half of the image (but the entire image is selected).
- Click the red channel in the channels panel. Choose Filter > Other > Offset to display the Offset dialog box (see Figure 14).
- Look through the 3D glasses as you drag the horizontal slider to the left to specify a negative value. (Make sure the red filter covers the left eye this time.) Click the Repeat Edge Pixels radio button, and click OK. The image now appears to gradually recede into the picture plane.
Magic Pictures
Anaglyphic 3D is a compelling technology. It’s not difficult to achieve some pretty eye-popping effects that compel the viewer. It feels like magic when your flat printed paper suddenly takes on another dimension with images that literally leap off the page. With a small amount of channel manipulation and a pair of red and blue 3D glasses, you can have a lot of creative fun. There a lot of anaglyphic 3D tutorials online that show additional and alternative techniques. So check ’em out and give it a try.