Once images have been heavily corrected, they are typically a breeze to separate. Creating all the selections in an image to color correct can shorten separation development. Those same selections can often plug right in and create the channels that will end up as the final separations. Additionally, with the colors defined as being part of the same source hues, most methods like using the color range or channel menu to create separations can work a lot easier with far less chance of having extra colors in the final channels. Thus, it is a good idea to save selections made during the color correction process to be used later for separation purposes.
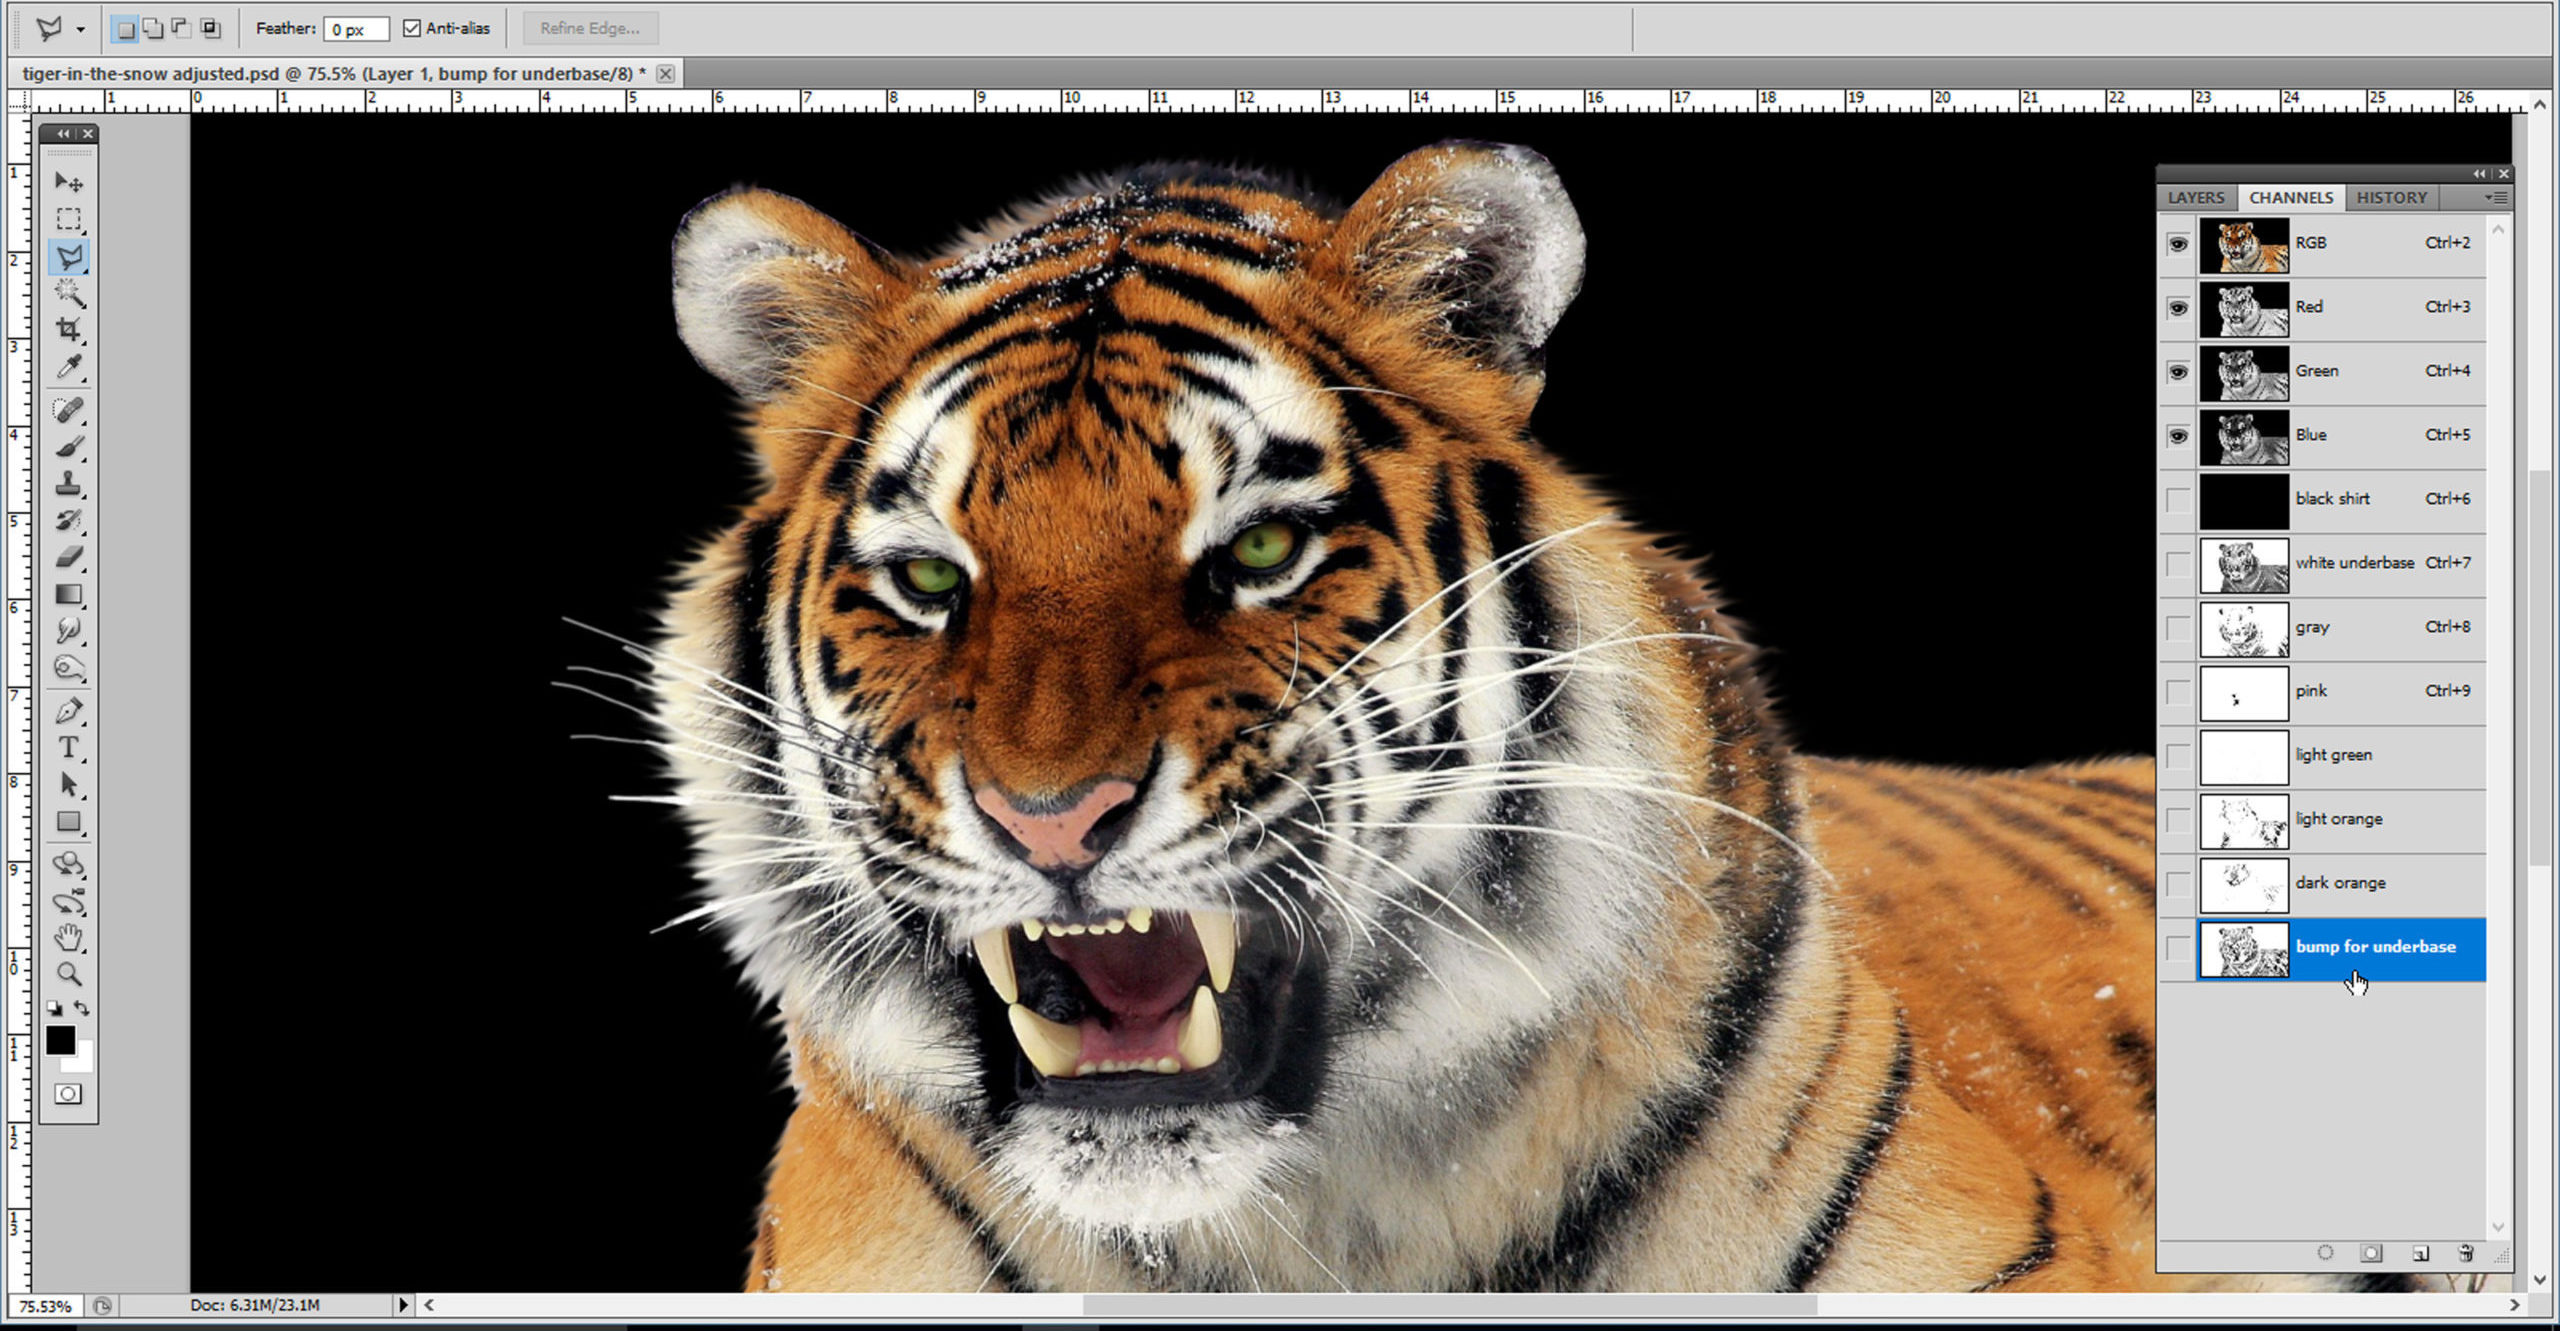
Once the color corrections were made for the tiger, it could be rapidly separated. The first step was to create a duplicate of the corrected file and change the background to black. The image was then converted to grayscale and then inverted. This file was then copied and pasted back into the corrected file as an alpha channel named “white underbase.” The file was then renamed as a separation file so it wouldn’t overwrite the corrected image.
The next step was to go into the image using the Color Range command and select pieces of the image, which were then saved into individual channels for each color in the image. Areas in each of these channels were added for selections where the image was fading into the black of the shirt. Once all the colors in the image were selected, the final step was to bump the underbase white underneath any colors that were more saturated. This was done by selecting these channels and then slightly reducing the selection using the curves menu (a duplicate channel is temporarily created and then deleted for this step). This “bump selection” was then added to the underbase to make sure the final print would be bright in the necessary colors.
Let customers know when an image needs color corrected, so they understand the time and costs associated with the process. Then, execute the necessary changes as quickly as possible and integrate the correcting with the separation process to benefit everyone. With the tools in Photoshop, making this process an efficient time-saver for the screen printer will give the client the best possible final print of their artwork.