Converting a postage stamp into a billboard can be a daunting task. Because how an image is enlarged affects the final output quality, several factors need to be considered when increasing the size of an image. All too frequently, a lack of understanding of the sizing process produces unsatisfactory results at the printer. You can resize images in several different ways, so learning the ins and outs of image sizing ensures the best quality reproductions and no time and materials wasted.
Format
An important consideration in producing large images is the pixel capacity of the PSD (Photoshop) formats. High-resolution images can have a width and height of up to 30,000 pixels. Therefore, documents with image resolutions of 300 PPI can produce a maximum image size of 100 inches. If the printed image needs to be larger, the file needs to be saved as a Large Document Format (PSB) with a width and height capacity of 300,000 X 300,000 pixels. PSB files can be exported as TIFF files for compatibility with other software.
Image resolution
Resolution determines the quality of an image and how much detail can be displayed or printed. There are three types of resolution relating to image size:
- Image Resolution: The number of pixels that occupy a linear inch of a digital image, usually measured in pixels per inch (PPI).
- Monitor Resolution: The number of pixels that occupy a linear inch of a monitor screen (72 PPI for most flat-screen RGB monitors).
- Printer Resolution: The number of ink dots that can be printed per linear inch, measured in dots per inch (DPI). These dots compose larger dots on a halftone screen or stochastic (random pattern) dots on an inkjet printer.
Smaller is better

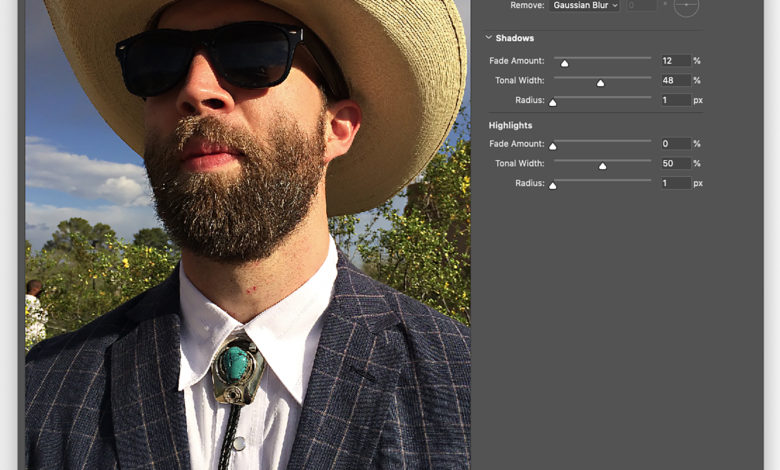
Decreasing the height, width, or resolution of an image does not usually cause problems. Image quality remains consistent within certain limits. If the image is downsized too much and the image resolution is too low, pixelation produces stair-stepped edges (Fig. 1). The importance of knowing the purpose and destination of your image before messing with its dimensions is crucial. Images that are destined to appear on screen, like web images, should have a width and height of 100% of the size displayed and a resolution of 72 PPI.
Making it bigger
Images destined for print most often have a resolution of 300 PPI at 100% of the print size. Resolutions significantly smaller than 300 PPI appear pixelated or soft when printed. Resolutions higher than 300 PPI don’t improve the look of the printed image and have unnecessarily large file sizes and slower printing times.
Canvas
One way to enlarge an image is to add new, colored pixels to expand its height and width. This can be helpful if the image has to conform to specific dimensions like a column or row width of text.
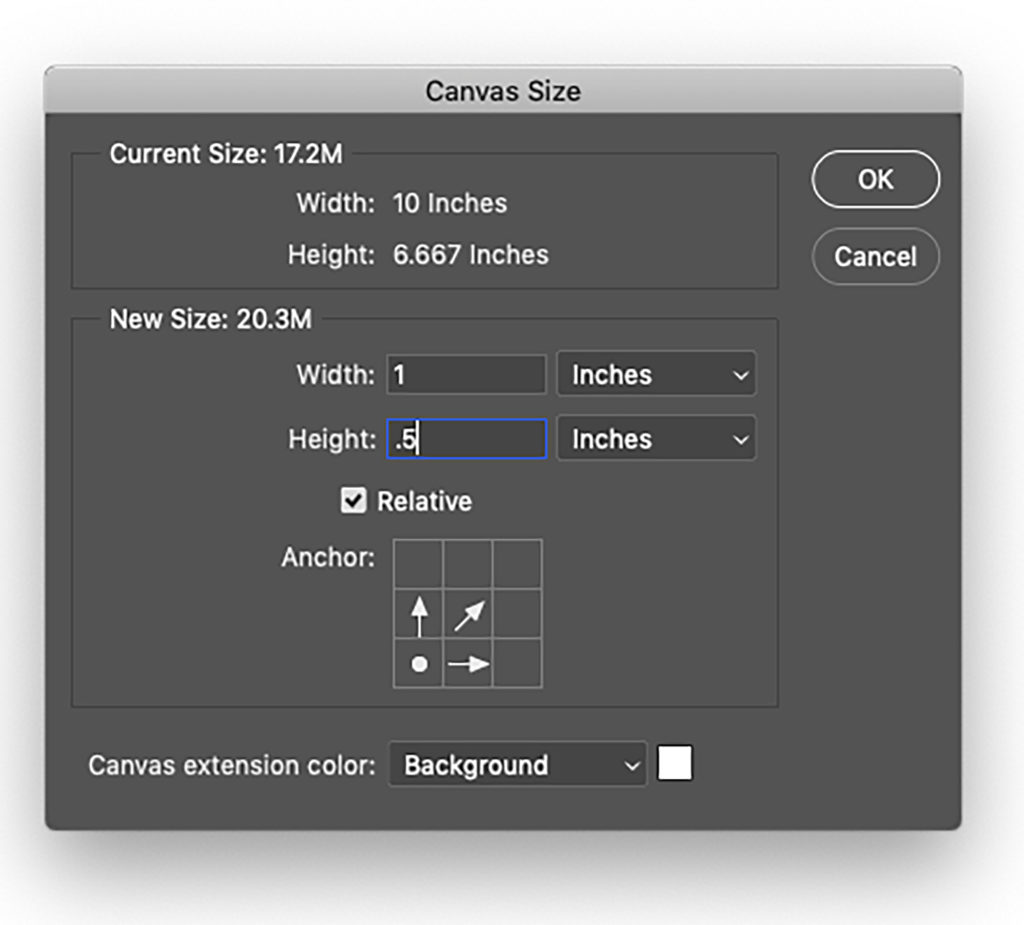
In Photoshop, the Canvas Size dialog box (Fig. 2a) in the Image menu is the feature that adds additional pixels to the edges of a picture. Click a cell on the grid to anchor the original image. If the Relative box is unchecked, enter an absolute value for the height and width. If Relative is checked, then type the amount you want to add to the image. If the image has a Background layer, click the Background Extension Color swatch and choose a color. If the image has no Background layer, the new canvas will be transparent. Click OK to make it happen. (Fig. 2b)
Add content
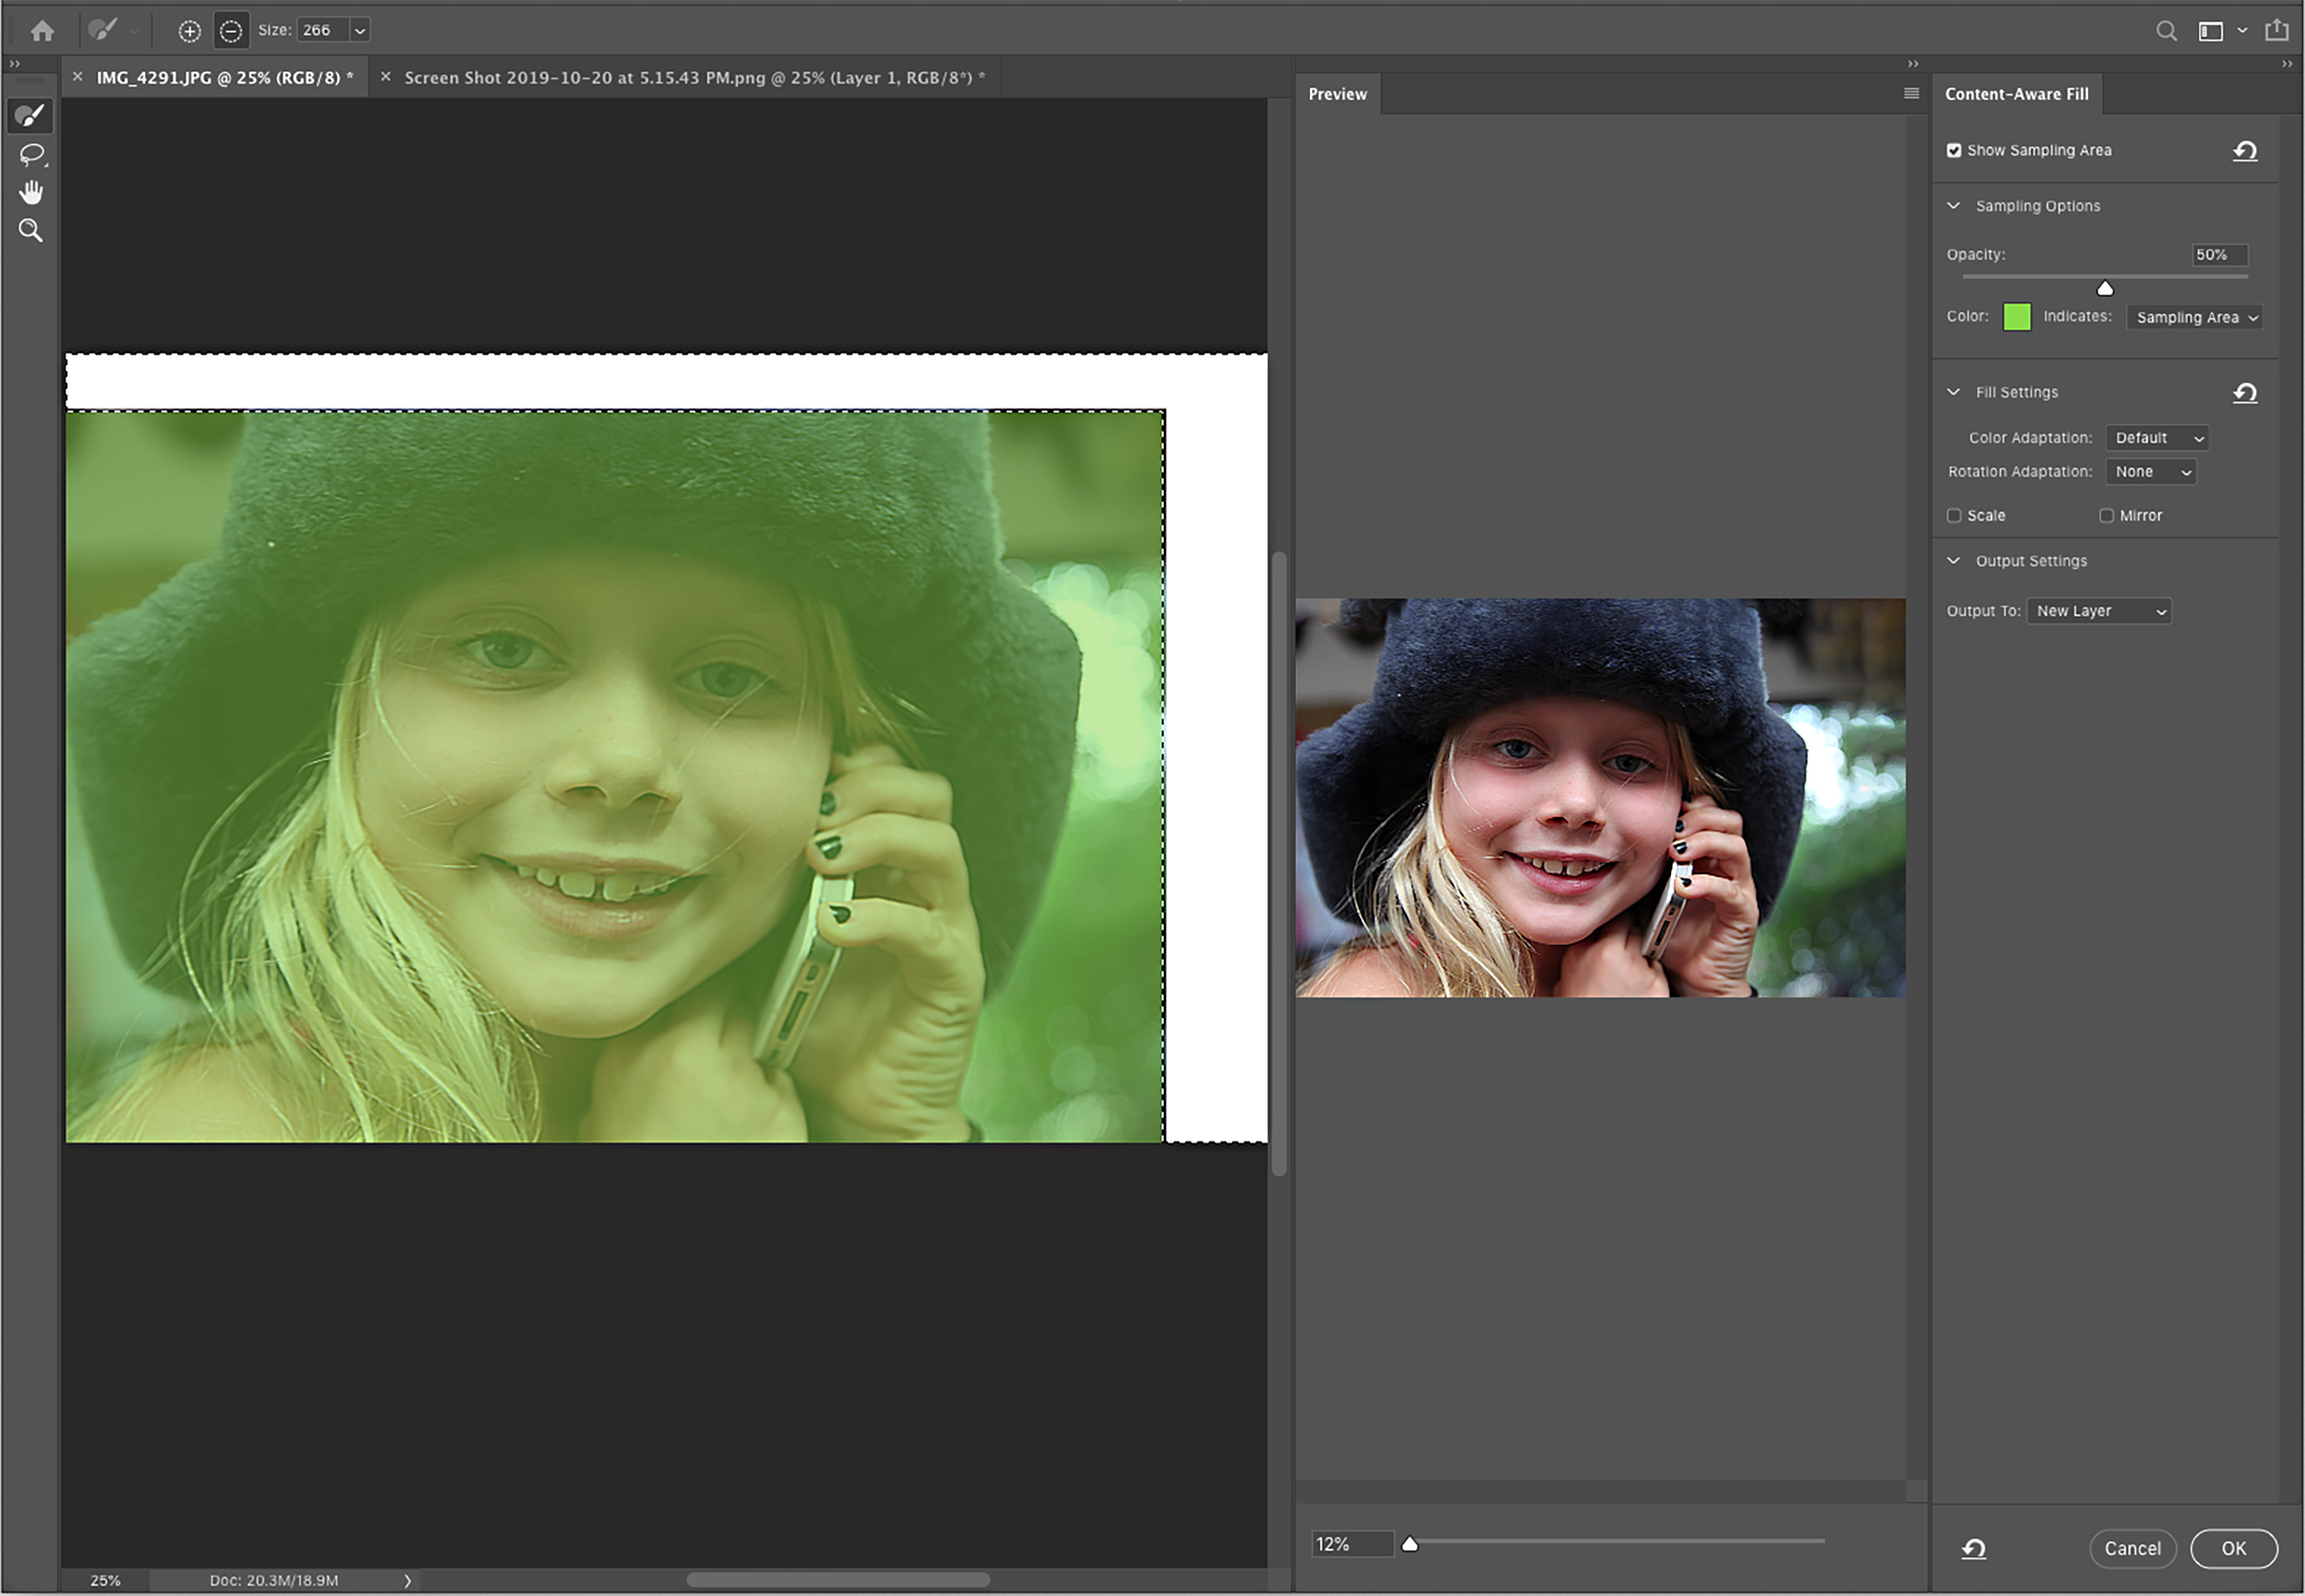
New content can now be added to the extension canvas. First, select the new canvas that has been added with the rectangular Marquee tool. Slightly overlap the original image with the selection. Next, choose Edit>Content Aware Fill. The dialog box appears and displays a tinted screen from where the content is sampled, a preview of the results, and a control panel (Fig. 3). Often, you’ll need to perform additional editing such as cloning or healing the new content. One way to avoid too much extra finagling is to select smaller areas and apply Content Aware Fill to smaller areas at a time.
Nondestructive enlarging
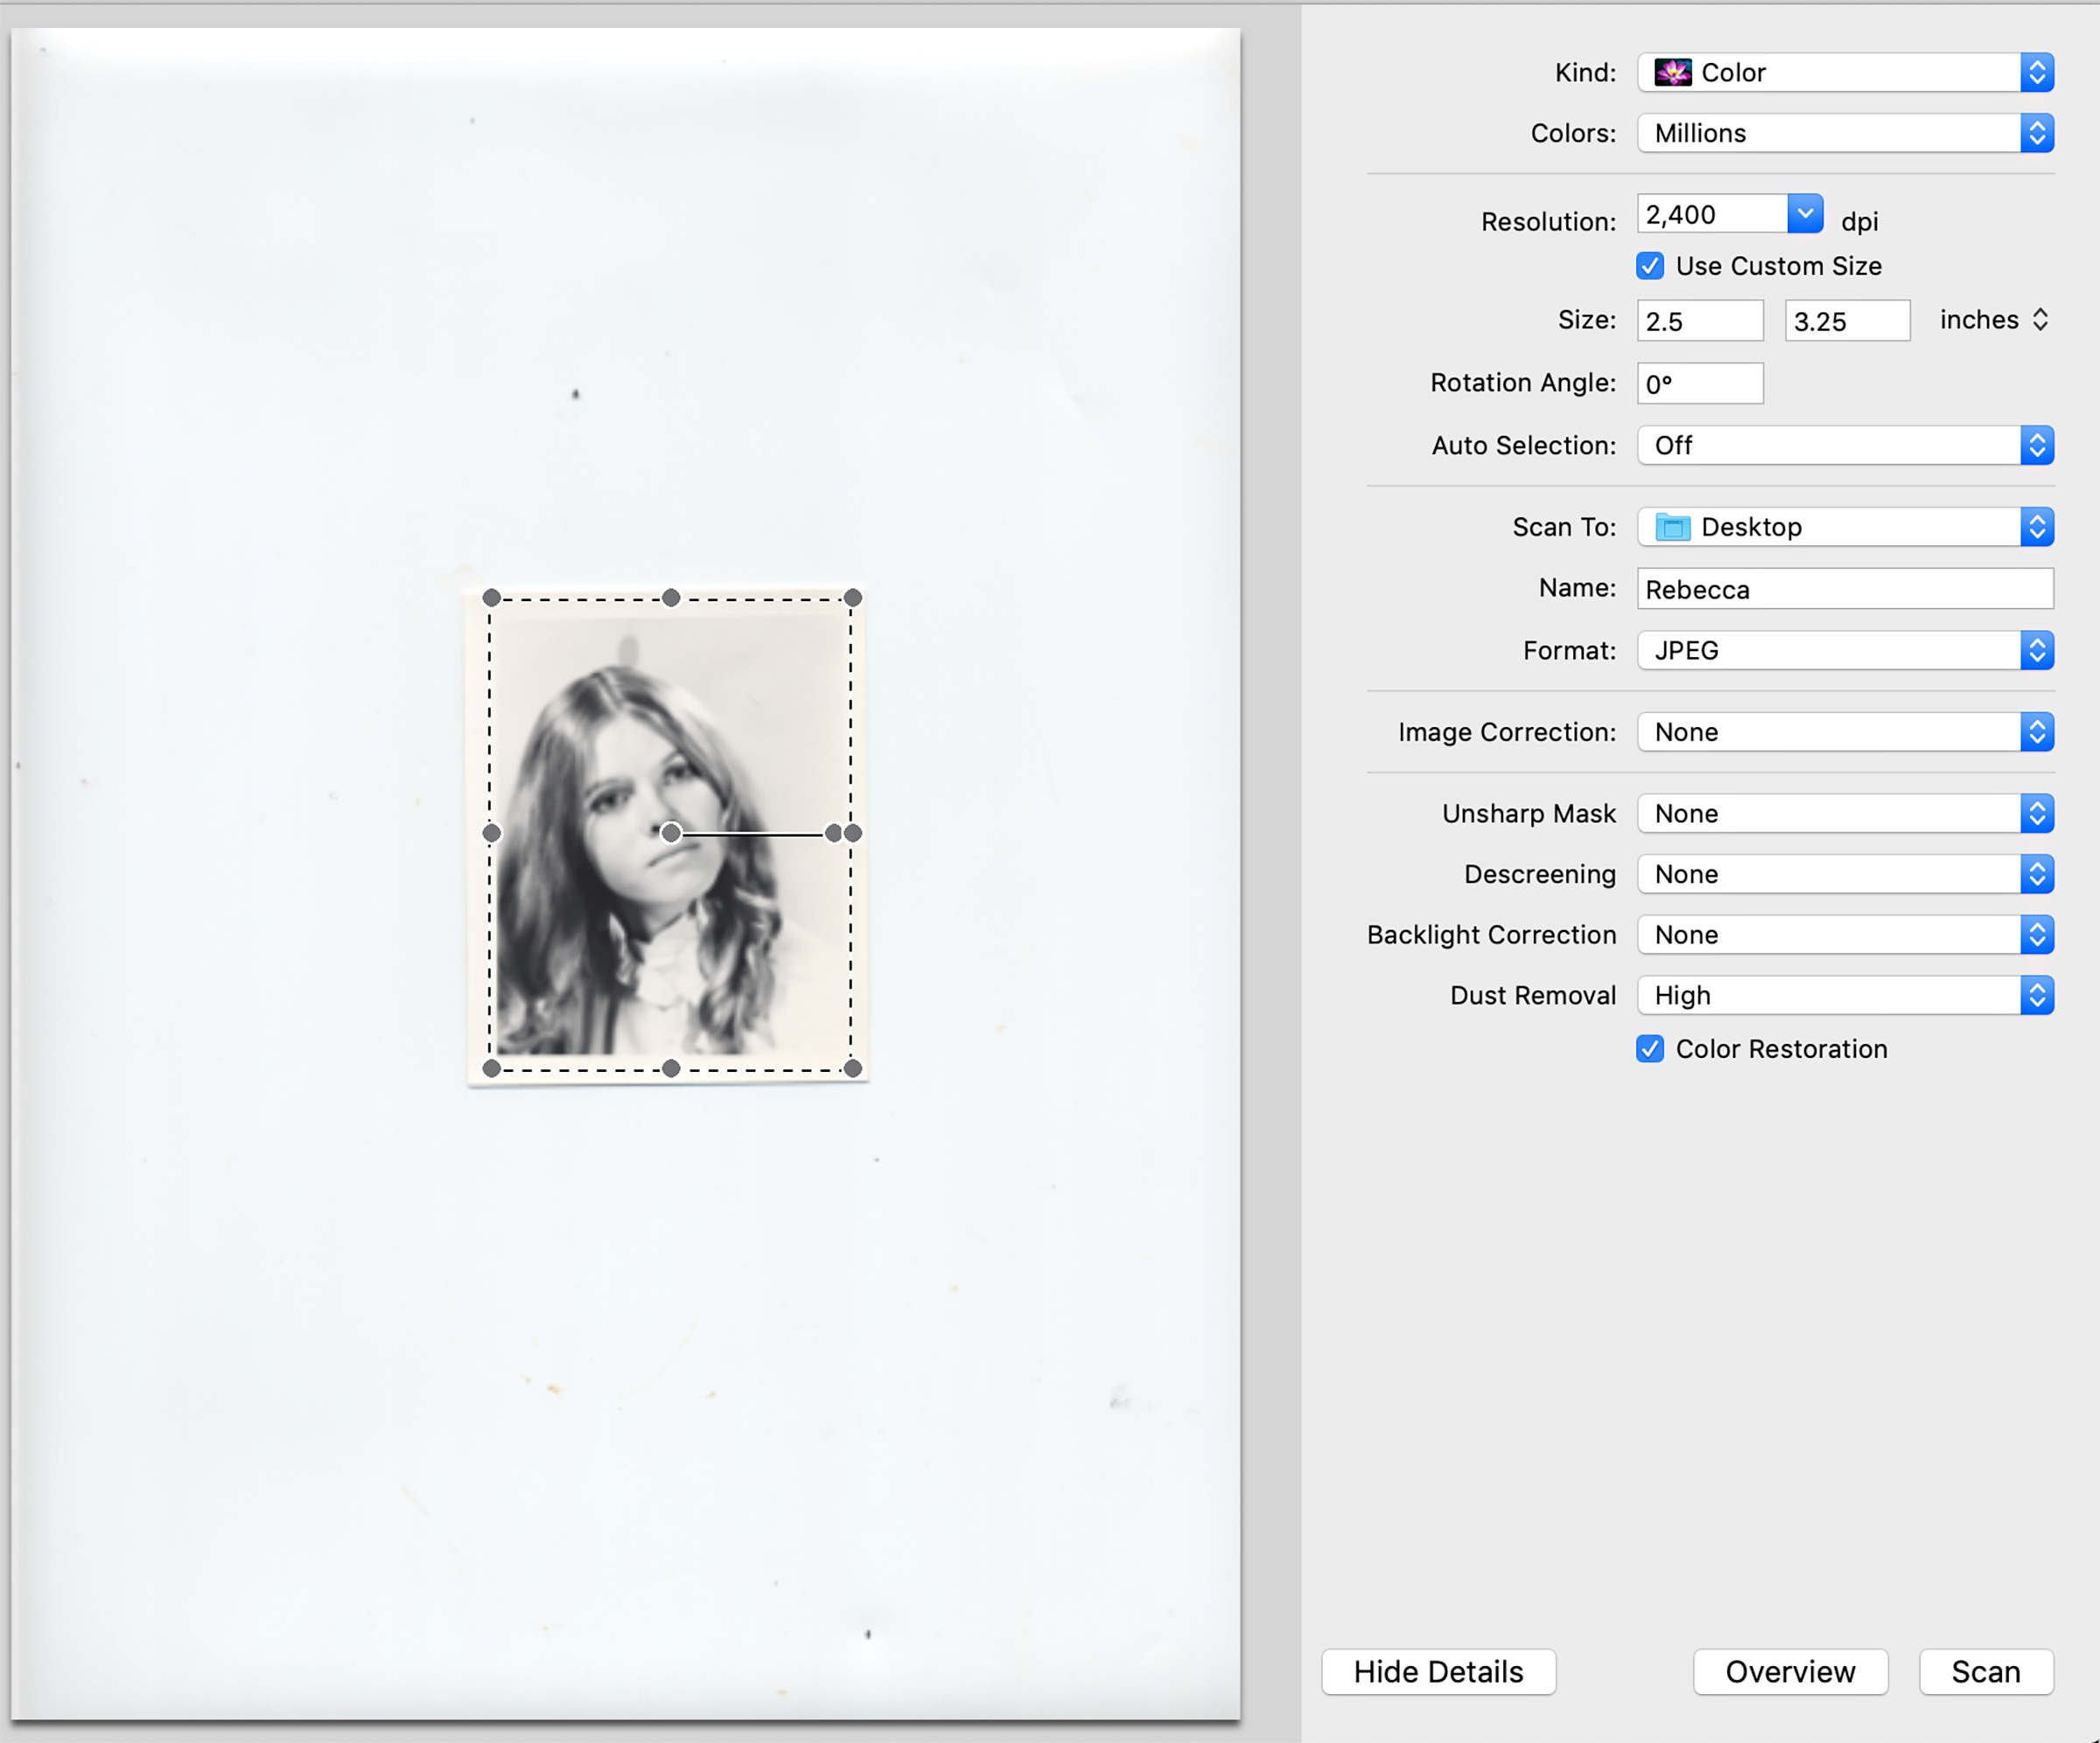
The best method for enlarging an image’s total width and height begins at image capture — at the scanner or digital camera. If taking a photograph, choose the highest resolution your camera can produce. If scanning an image, choose the scanner’s highest optical resolution. For example, if you have a 2.5″ X 3.25″ photograph like the one in Fig. 4, and you want to increase its width and height proportionally to 20″ X 26″, scan it at eight times the resolution of the final output requirement. Ultimately you will want to end up with a 300 PPI image to produce a quality print from your large-format printer. Scan the image at 2,400 PPI, which is the highest optical resolution of most desktop scanners.
Once scanned, you can enlarge the image while reducing its resolution by a factor of eight. Open the image in Photoshop and choose Image Size from the Image menu. Uncheck the Resample button in the dialogue box, and type 20″ for the width. The height changes to 26″, and the resolution changes to 300. The image’s physical size increases by eight times while the resolution is reduced by a factor of eight (8 x 2.5=20, 8 x 3.25=26, 2,400/8=300). The file size remains the same with no addition or subtraction of pixels, and the image appears identical on screen.
Adding pixels
If you can’t rescan or reshoot the image, you’ll need to apply the enlarging method that is most likely to compromise image quality. Upsampling increases the height, width, or resolution and ultimately the file size by adding pixels.
First, scan the image at the scanner’s maximum optical resolution. Do not scan it at resolutions higher than the optical resolution because that is the same as upsampling. The scanner software adds pixels but without the controls of Photoshop. If all you have is a digital file, then you have no choice but to enlarge it starting from its current size and resolution. This is where you may have to compromise quality.
Interpolation
There are eight interpolation algorithms found in the Image Size dialog box in Photoshop. These algorithms determine the color of the new pixels. A preview and some controls make it easy to predetermine the results of upsampling (Fig. 6).
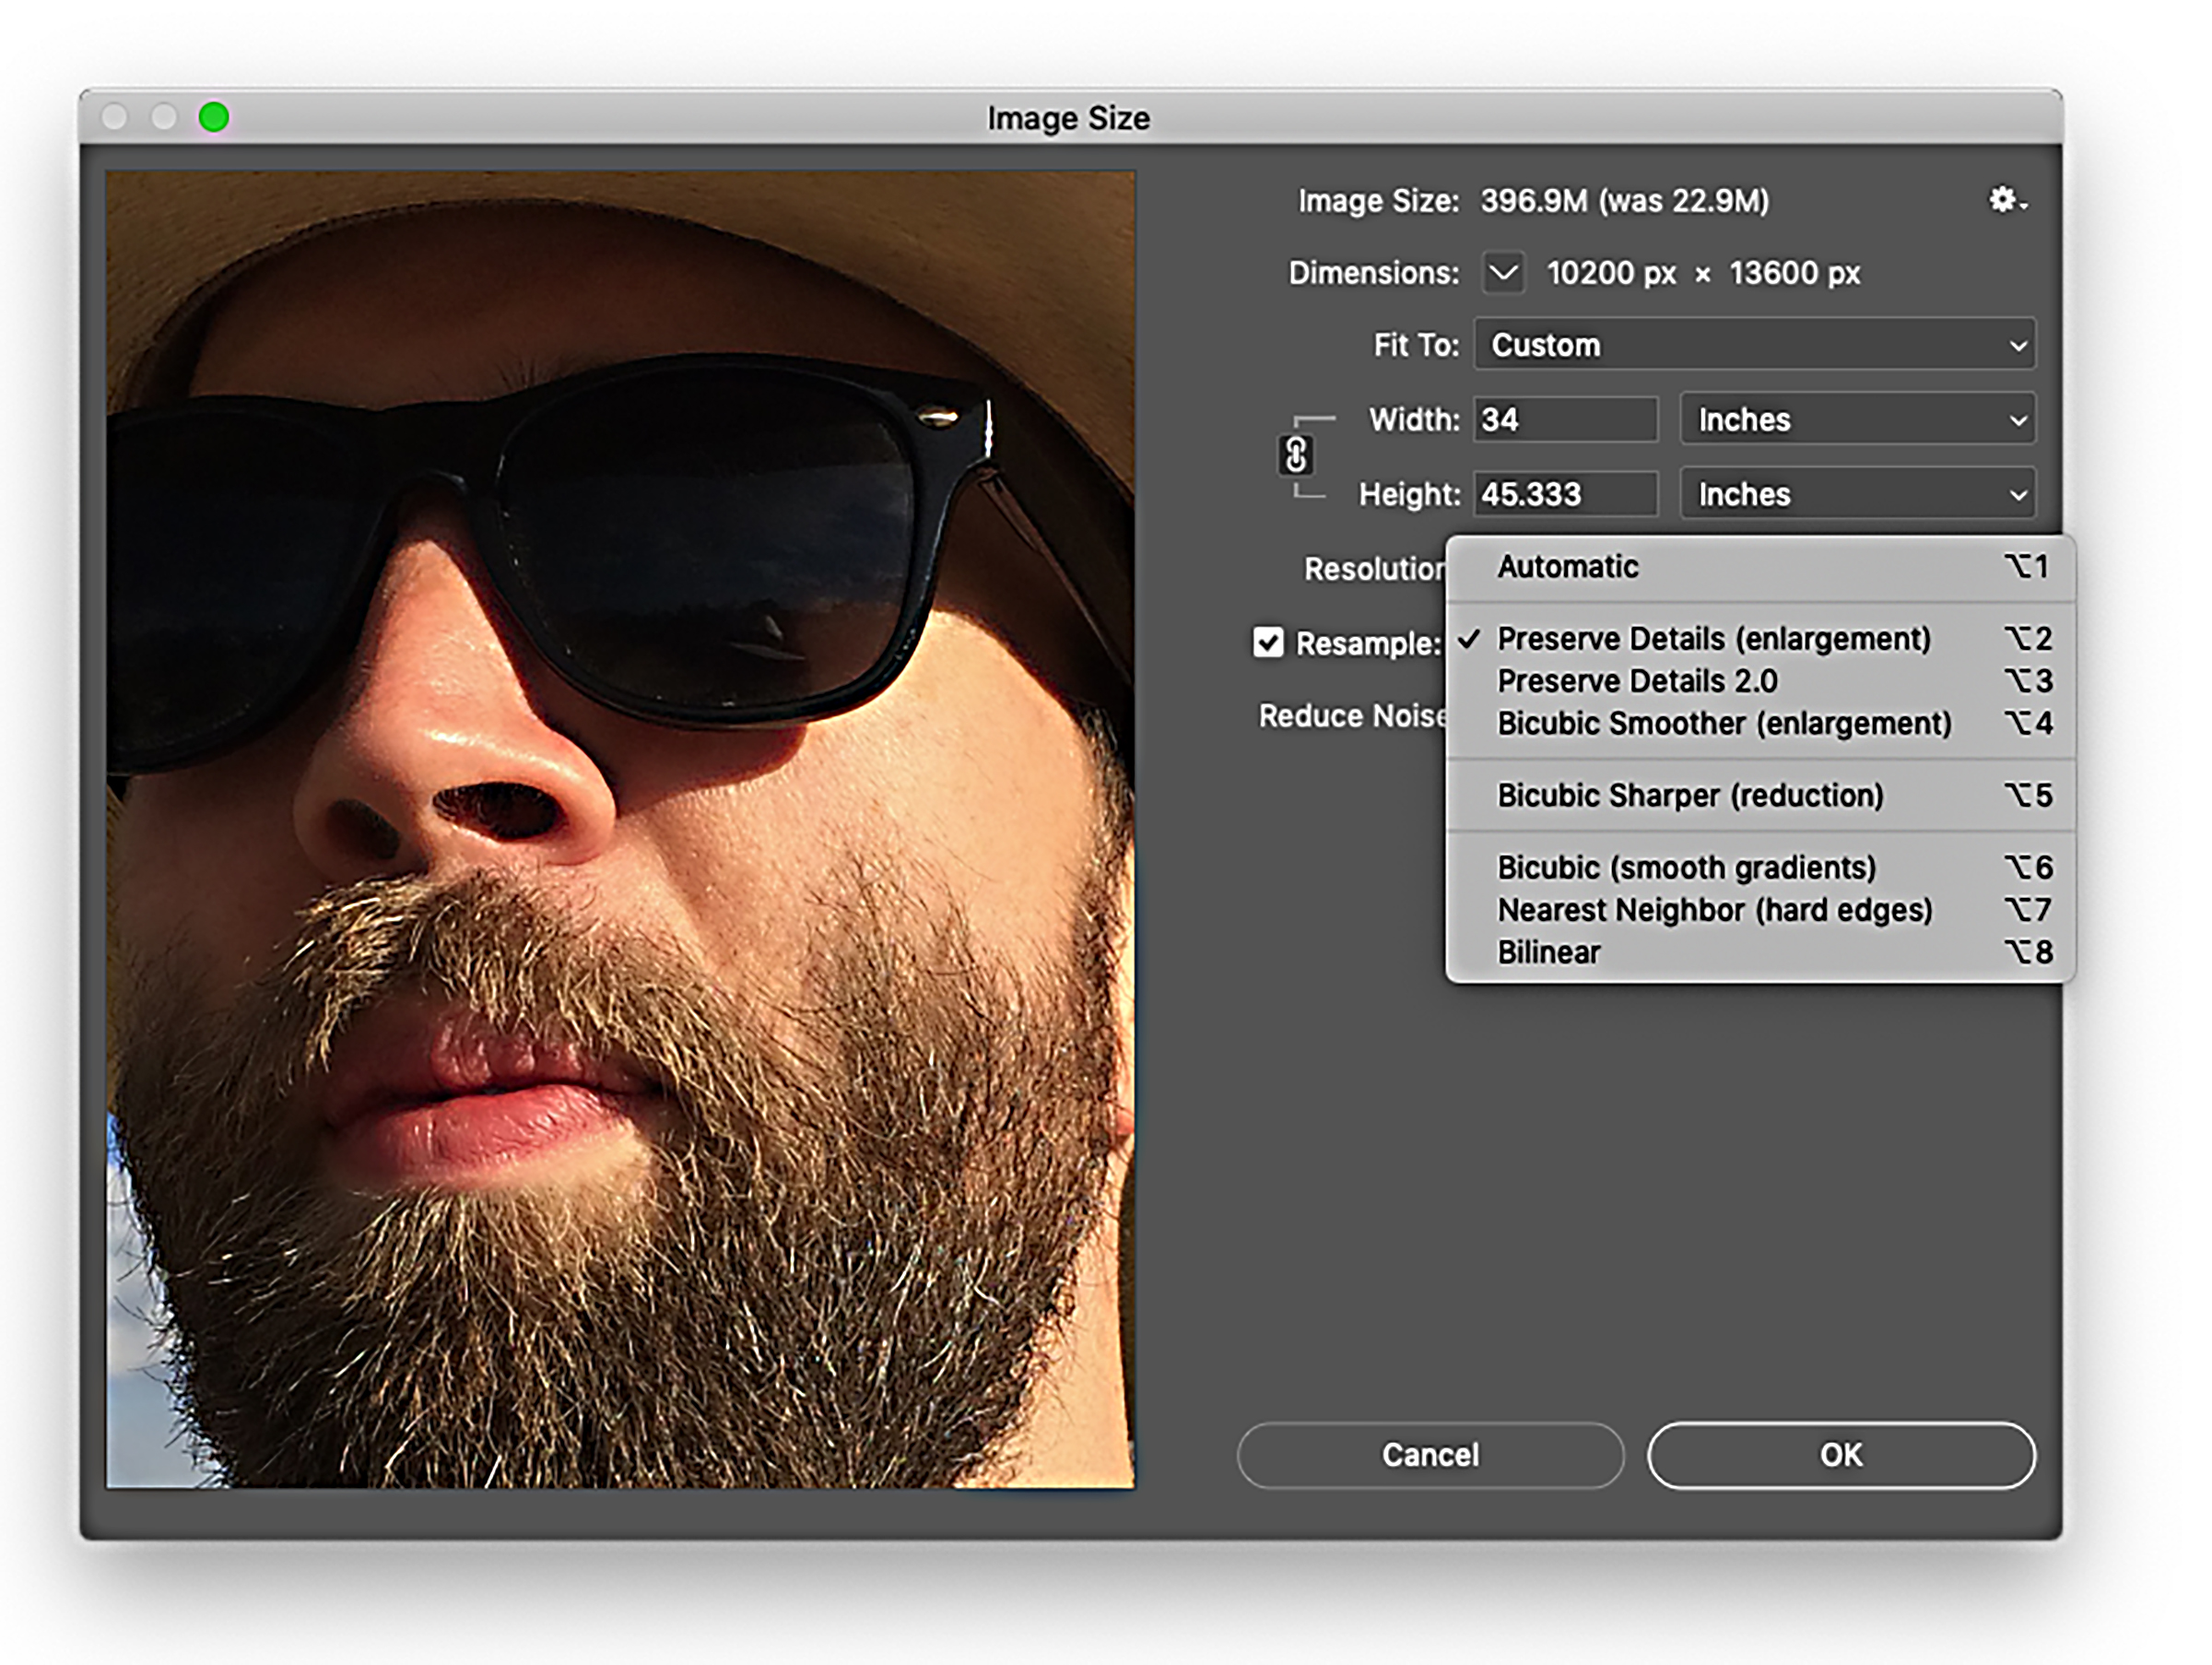
The interpolation algorithms menu is displayed when the Resample box is checked. Each algorithm determines the color of added pixels using a specific mathematical formula designed to produce the best overall results depending on the image’s color characteristics.
- Automatic: Photoshop automatically selects the resampling method based on the document type, whether it is being upsampled (enlarged) or downsampled (reduced).
- Preserve Details and Preserve Details 2.0: Both used for enlarging images. When either of the Preserve Details is selected, a noise reduction slider is displayed that smoothens noise as you drag the slider to the right. Preserve Details 2.0 is a later upgrade of the original algorithm.
- Bicubic Smoother: Also recommended for enlarging images. The core algorithm is a bicubic interpolation, but it smoothens edge pixels and reduces softening by adding pixels of higher contrast to the inner areas.
- Bicubic Sharper: A good method for reducing the size of an image based on bicubic interpolation with enhanced sharpening. This method maintains detail in a resampled image. If Bicubic Sharper oversharpens some areas of an image, try using Bicubic.
- Bicubic (smoother gradients): A slower but more precise method based on examining the values of surrounding pixels. Using more complex calculations, bicubic produces smooth tonal gradations.
- Nearest Neighbor (hard edges): A faster but less precise method that replicates the pixels in an image and is generally used for line art containing only black and white pixels. This method preserves hard edges and produces a smaller file size in illustrations containing edges that are not anti-aliased. Nearest Neighbor can potentially create stair-stepped edges, which become apparent when you scale an image.
- Bilinear: Adds pixels by averaging the color values of surrounding pixels. It produces medium-quality results.
Six of the interpolation algorithms found in the Image Size dialog box are also found in General Preferences to control interpolation when sizing or distorting image content with the transformation features and filters.
Preview
The best strategy to enlarge an image is to opt for the most control possible and observe the results as you work. Enter the size, width, and resolution; check the Resample box and scroll through the various resampling methods one at a time as you observe the results in the preview window. If you choose the Preserve Details methods, watch the result as you drag the Noise Reduction slider.
Image quality
When increasing the image size by moderate amounts, a decrease in image quality will hardly be noticeable. However, enlarging by significant amounts can degrade the image and produce soft edges and regions of color. Just how much you can get away with depends on image content. An image whose content is already soft (like big fluffy clouds) won’t show severe damage like an image whose focus and contrast are more critical like portraits or fashion shots.
The acceptable amount of degradation is also dependent on the image’s ultimate purpose. If it’s going to be seen at a distance, in changing light like a billboard, for example, there is not too much to worry about. However, if it’s a fine art print that is going to be scrutinized close up, then upsampling by too much can produce unsatisfactory results.
Sharpen
Resample up to the desired size using the Preserve Details feature to eliminate as much noise as possible with the Reduce Noise slider but don’t compromise any essential textures. To avoid severe color shifts, duplicate the Background layer and apply a Luminosity blend mode. Convert the layer to a Smart Object to assure that the filters you are about to apply are non-destructive. Apply the Unsharp Mask or Smart Sharpen filter in moderation to improve image quality. Don’t over sharpen and avoid halos that are a result of an imbalance of Amount and Radius.
The sharpening filters are not cure-alls, but they will help in reducing the ravages of upsampling. Don’t expect to add detail where there is none in the original image. All images destined for large-format printers should be sharpened to some degree.
Sizing images is both a science and an art. The tools that do the work are quite good but require your judgment. You’re not going to get perfect results every time because some images are just plain stubborn.
Remember: If you have a higher quality image to start with, you’ll see better final results.
