The simplest method for replacing image content is to paint with one of the Clone tools. In general, the Clone tools that are found in the Tools panel are designed to work on smaller regions of an image. They are applied with a brush; therefore, their performance is dependent on the brush’s size, shape, opacity, blend mode, and dynamics.
Two tools sample and deposit pixels: the Clone Stamp that copies the sampled area and paints it to a destination area, and the Healing Brush that copies the sampled area and blends it into the destination area.
The Clone Stamp samples pixels and deposits them to the location you choose. Before cloning, I recommend you make a rough selection around the destination area so as to avoid applying the pixels where you don’t want them. To sample an area, drag your cursor to the area where you want to copy pixels. Press Opt (Mac) or Alt (Windows). The cursor turns into a target. Click the mouse to sample.
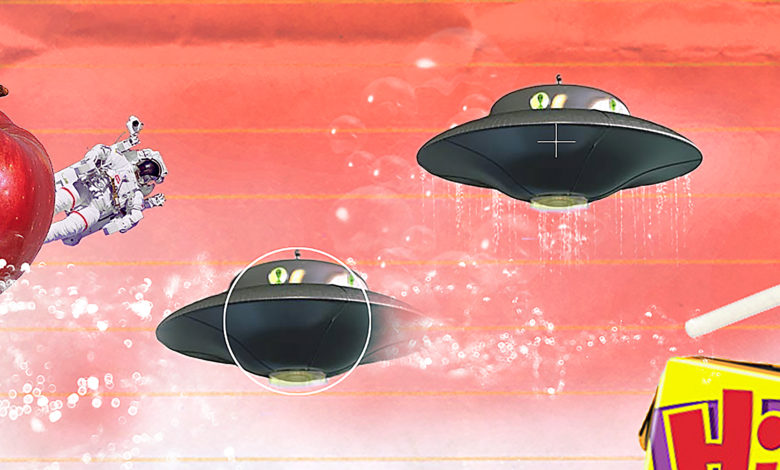
When cloning, it’s best to choose a soft round brush. The feathered edge will blend into the new area more smoothly. Drag the cursor inside the selection. Hold the mouse button down and drag to paint with the pixels. Notice that the area being copied displays a small cross to indicate the sample point. The area that is being painted displays a circle that indicates the brush size, as shown above.
Inside the circle is a preview of the content that is applied. As you move the brush across the image, the cross follows the circle and maintains a constant distance. You usually have to sample more than once if unwanted adjacent areas of the sample appear on the target region.
When the Clone Stamp is selected, the Options bar displays three distinct options for sampling and cloning.
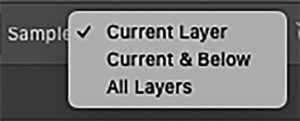
Current Layer samples only from the currently active layer. Current and Below samples from the currently selected layer and all layers below it. Finally, All Layers samples the entire document. All of these options clone only to the currently active layer.
After you’re finished cloning within the selection marquee, deselect the area. With a small soft brush, smooth any ragged edges that might have resulted. Carefully blend the edges of the region with the areas surrounding it.
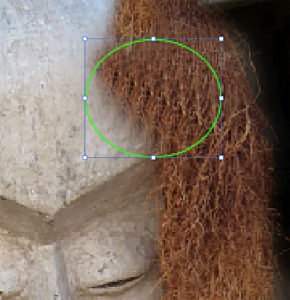
Try not to sample areas too close to the destination. The repetition will be detectable, as seen below. Instead, sample areas farther away if possible.
Aligned/unaligned
I should clarify that there are actually two types of clones. The Aligned Clone check box in the Options bar is the default. It assures that when you release the mouse button, move the cursor, and resume cloning that the cursor maintains the same distance from the sample point.
An Unaligned Clone happens when the box is unchecked. After you’ve cloned an area and released the mouse, depress it to resume cloning. The cursor samples the original point and will replicate the area that has already been sourced.
Clone source
The Clone Stamp can be precisely configured using the Clone Source panel. This panel controls the offset of the sample point—the X and Y values determine the distance in pixels from the cursor that the sample will be taken. The height, width, and angle of the sample can also be controlled so that you can increase or decrease the size of the sampled area, or change its shape and angle.
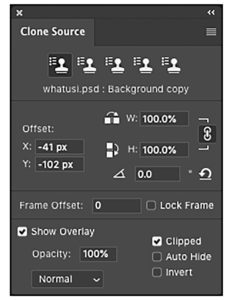
The opacity of the clone can be varied, which can be a real asset when trying to blend edges. Furthermore, clone settings can be saved for use on other layers or documents. You can establish up to five clone sources on a single document.


