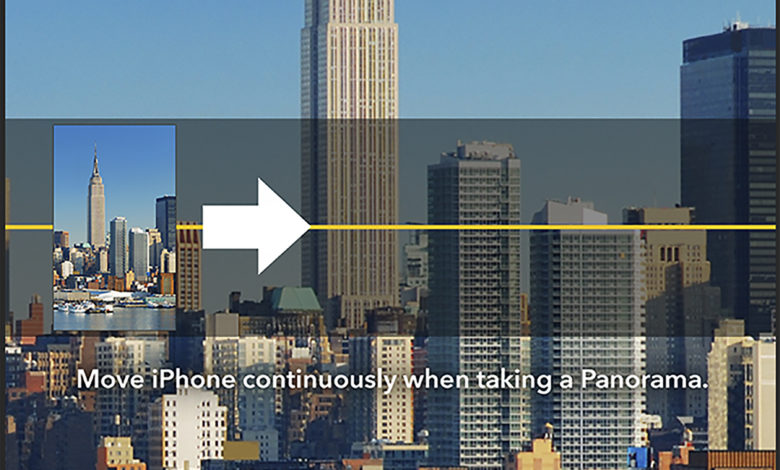
Here are eight tips to help in the capturing and printing of panoramic photographs.
- Plan your shots. Level your tripod and look through the camera lens to determine where the best breaks will be. Perform a dry run sweep before taking the pictures. Overlap your images by at least 20%.
- Shoot with a normal or slightly telephoto lens if possible. Wide-angle lenses exhibit too much distortion, which stitching programs remove by adding barrel distortion to compensate and make the adjacent images fit.
- Shoot at the highest resolution possible with your digital camera in “camera raw” format and in 16-bit mode, if possible, to enable you to collect the maximum amount of information for each image.
- Prior to opening your images choose the Enable Large Format (PSB) option from the Photoshop file handling preferences to enable you to produce documents up to 300,000 X 300,000 pixels.
- Open each image and make general color corrections and color matching prior to stitching the images.
- Use adjustment layers to make your final color corrections to keep color editing dynamic.
- After color correcting and stitching, inspect the image very carefully zooming in to observe misalignments and small seams. Use the retouching tools to correct small flaws.
- Flatten your image and convert it to 8 Bit (Image > Mode > 8 bits/channel) to reduce the file size before saving it to PSB format. Then output the image to your large-format printer.
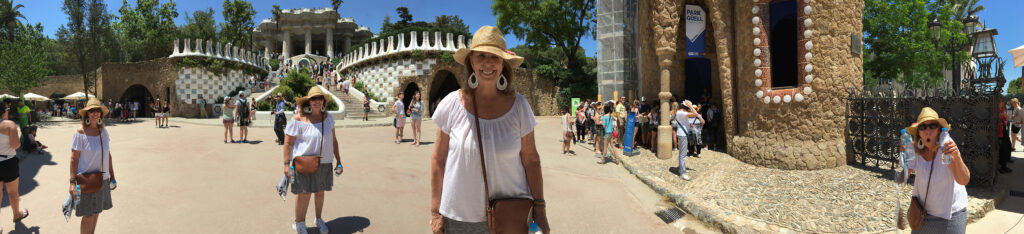
Fun stuff
It’s fun to use these sophisticated features to create a scene that verges on the unreal. I was in Barcelona at Antonio Gaudi’s Park Güell. I set my tripod on the plaza. My partner, Karen volunteered to pose for this seamless panorama where she appears four times in four different locations. I took four exposures with her moving from place to place and then, back in the studio, stitched them together using Photomerge. Because there was very little time between each exposure, color correction was unnecessary and the stitched images appear pretty much as is, right out of the camera.
Some photographers prefer to stitch images manually using the layers functions in Photoshop and then selectively erase parts of the overlapping images. This works well but when several images are made with a moderately long focal length lens it can be quite difficult to overlap the pixels perfectly. Photomerge automates this process, organizes, and stitches images together and that can save quite a bit of labor-intensive retouching.
To learn more about panoramic photography and its history, check out Merging Photos.