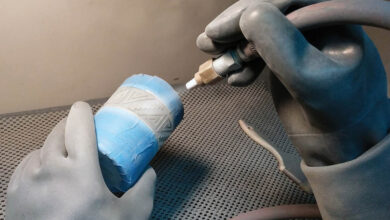
Throughout the 12 years that I have been in business, I have taught many employees how to sandcarve. As I tell everyone I teach, your prep work greatly affects your final piece’s quality. Work on a clean surface when dealing with your resist. If you have dust on your design and expose it in the Letralite unit, you will get pinholes in your resist that ruin your item when blasting. The Letralite unit is a compact unit used to expose photoresist films
Step No. 1: Before placing your design, clean the glass with denatured alcohol to remove any grease or debris. Take your time placing your design—remove as many air bubbles as possible with your squeegee. Once your design is placed, use your wire wheel brush to pop the membrane on the resist. After popping the membrane, make sure to press the resist onto the glass and force out any remaining trapped air.
Step No. 2: Now that the design has been placed, it is time to mask off the glass. Start by surrounding your design with masking tape; press it down onto the resist to create a seal. Then work your way out from the resist and cover the exposed glass with overlapping layers of tape. I like to hold the piece to the light to see if there are any missed areas that still have exposed glass showing.
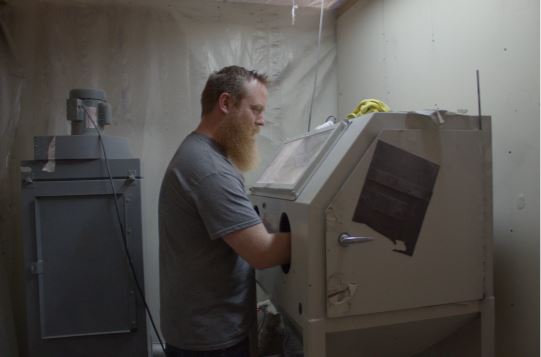
Step No. 3: Once the item has been masked off, it is time to go to the blast cabinet. Before placing the piece in your blast cabinet, make sure that no resist has lifted off and press it down one last time. When starting to blast, your sand and airflow need to regulate to a steady stream.
Aim your nozzle away from your piece. Once the stream has stabilized, you are ready to begin blasting.
I like to start further back and move my nozzle into my piece; generally, I end up roughly four inches away from my piece when blasting. Your design, air pressure, and nozzle determine the exact distance needed. Too close and you can dig ruts into your design; too far and you will not efficiently blast the glass and have higher risks for a blow-off.
When blasting, it is crucial for your nozzle to remain 90 degrees to the surface of your piece. If you blast at an angle, your blast will show it, and you will have issues with your resist lifting off and the piece being ruined. The other critical step is to make sure you have small overlapping circles. This ensures you have a smooth, level sandblasted surface. Note that if you are carving into glass, you use a different approach to show the depth and shapes.
When you first start to blast the glass, you will see the resist membrane blow off and the glass will turn a frosted white. The more you blast, the deeper the engraving becomes; I judge my depth based on the amount of shadow that is created at the edge of the engraving.
Step No. 4: Once your image is fully blasted, you are ready to clean up. I like to rinse off any extra sand with water, then using warm water, allow the resist and tape to become pliable until they simply slide off. Use caution to not scrub the glass. If there is sand on the resist or tape, it can scratch your glass. Rinse before, during, and after while cleaning the tape and resist off the glass.
I like to use a lint-free microfiber cloth and denatured alcohol for the final cleaning process. This removes any leftover resist and tape residue, as well as fingerprints, making the glass ready for your customer.
Here are some other key points you need to know before you start sandcarving.