For those just beginning, let’s go over the basic steps and techniques it takes to sandcarve a work of art.
To begin sandcarving, you need some tools and space to work in. I have always tried to keep my dust contained, but that’s easier said than done. I highly recommend a designated blast room. To get started, you also need the following items:
Sandblast cabinet: This is where you blast the glass and other items. You can go cheap or expensive, but the basic and important thing to watch for is how much room you’ll have for this process. As the quality goes up, so do features like built-in dust collection and the ability to pass larger panes of glass through the cabinet.
For the first nine years, I used a cabinet from Harbor Freight, and it served me quite well, but then I found a cabinet from Rayzist and IKONICS Imaging and got really spoiled. The feature I enjoyed most from both blast cabinets is that the pressure pot is connected to the cabinet and allows for automatic media recycling. Automatic media recycling saves a lot of time and allows for less dust creation.
Pressure pot: From my experience, using a pressure pot allows for a better blasting experience, and if you plan on doing a lot of sandcarving, this is the best way to go. Yes, a siphon system works, but I recommend a pressure pot.
When I first started, I used a pressure pot from Harbor Freight. Although cheap, it served me well and was a great way to enter the sandcarving world on a tight budget. In fact, I still have my original pot around as a backup and for doing items that do not fit in my blast cabinet.
Air compressor: This is essentially the heart of the operation, so get the best one possible. One brand I have come to trust is Quincy. They are durable and have high CFM ratings that help with long blasting needs. To get started, I used a 60-gallon upright air compressor from Home Depot. It did need to run a lot, but it lasted long enough to afford upgrading to the Quincy models.
Blasting media: Aluminum oxide or silicon carbide are the most popular options. I personally have always used aluminum oxide 180 grit; it is cheaper than silicon carbide and has always served me well. Silicon carbide may cost more, but it is also supposed to last longer than aluminum oxide.
Printer: I originally started out using a laser printer and vellum for my designs. This process did work well, but when doing small detailed designs, I had some trouble when washing out my patterns.
To get better results, I switched to an Epson 1430 inkjet printer using clear inkjet transparencies. Using the inkjet printer and transparencies has allowed for more detailed designs and less waste from our resist not washing out properly. If possible, I recommend going the inkjet route.
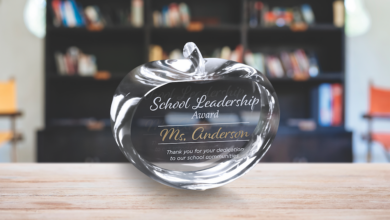
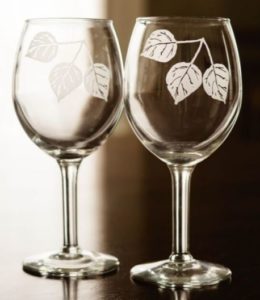
Resist/vinyl: This is what you’ll use to make your designs with. If you want a lot of detail or small text, washout resist can’t be beat. In my experience, washout resist is best for pint glasses, awards, light carving, and even some stone blasting.
The deeper you want to carve and the hardness of the substrate determine how thick of resist you should use. Generally, lighter use or objects that are curved do better with a 3-mil resist, and the heavier blasting is better with a 5-mil resist. The thicker the resist, the better it holds up to the sand and heat produced from blasting. When first starting out, it is a good idea to buy a starter kit so you can test various resist thicknesses and ensure you get all the needed exposure items.
If you want to do heavy carving into the glass, sandcarving vinyl is made for this. You can get thick, high-tack vinyl that allows you to carve the most aggressive designs out there. Generally, my go-to vinyl supplier is the Hartco 300 series; this has worked well for glass and some stone blasting.
Squeegee: This tool helps you place your resist or vinyl onto glass with minimal air bubbles. To use effectively, place your design onto the glass and press the resist/vinyl down from the top to the bottom in one straight line.
Next, use the squeegee to work from the middle of your design to the closest edge. This forces the air out of the design and to the closest edge. By working from the middle to the edge, you avoid trapping the air while trying to remove it.
Bubble popper (aka wire wheel brush): This little gem is a lifesaver. When I first started out, I did not know about the wire wheel brush and constantly had issues with centers of letters blowing off when blasting. It turns out that there was a trapped air bubble that lifted the resist off the glass and allowed the centers of letters to not adhere to the glass.
The wire wheel brush pops the membrane of the resist, removing the trapped air, and allows you to press the resist onto the glass and avoid costly ruined pieces.
Masking Tape (2” wide): This is the one supply that drives me crazy, and I can’t seem to live without it. I like to use the two-inch-wide tape because it quickly covers the glass I do not want blasted. The tan-colored masking tape from Home Depot works well and isn’t too expensive. The reason the tape drives me crazy is that you only use it for a short time, and then it goes straight to the garbage.
Sandcarving steps
Throughout the 12 years that I have been in business, I have taught many employees how to sandcarve. As I tell everyone I teach, your prep work greatly affects your final piece’s quality. Work on a clean surface when dealing with your resist. If you have dust on your design and expose it in the Letralite, you will get pinholes in your resist that ruin your item when blasting.
Step 1: Before placing your design, clean the glass with denatured alcohol to remove any grease or debris. Take your time placing your design — remove as many air bubbles as possible with your squeegee. Once your design is placed, use your wire wheel brush to pop the membrane on the resist. After popping the membrane, make sure to press the resist onto the glass and force out any remaining trapped air.
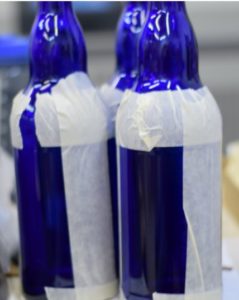
Step 2: Now that the design has been placed, it is time to mask off the glass. Start by surrounding your design with masking tape; press it down onto the resist to create a seal. Then work your way out from the resist and cover the exposed glass with overlapping layers of tape. I like to hold the piece to the light to see if there are any missed areas that still have exposed glass showing.
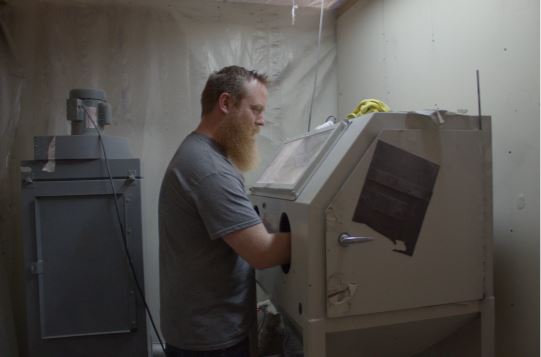
Step 3: Once the item has been masked off, it is time to go to the blast cabinet. Before placing the piece in your blast cabinet, make sure that no resist has lifted off and press it down one last time. When starting to blast, your sand and airflow need to regulate to a steady stream.
Aim your nozzle away from your piece. Once the stream has stabilized, you are ready to begin blasting.
I like to start further back and move my nozzle into my piece; generally, I end up roughly four inches away from my piece when blasting. Your design, air pressure, and nozzle determine the exact distance needed. Too close and you can dig ruts into your design; too far, and you will not efficiently blast the glass and have higher risks for a blow-off.

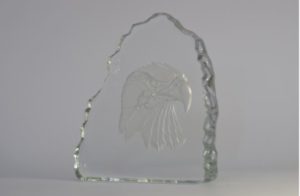
When blasting, it is crucial for your nozzle to remain 90 degrees to the surface of your piece. If you blast at an angle, your blast will show it, and you will have issues with your resist lifting off and the piece being ruined. The other critical step is to make sure you have small overlapping circles. This ensures you have a smooth, level sandblasted surface. Note that if you are carving into glass, you use a different approach to show the depth and shapes.
When you first start to blast the glass, you will see the resist membrane blow off, and the glass will turn a frosted white. The more you blast, the deeper the engraving becomes; I judge my depth based on the amount of shadow that is created at the edge of the engraving.
Step 4: Once your image is fully blasted, you are ready for cleanup. I like to rinse off any extra sand with water, then using warm water, allow the resist and tape to become pliable until they simply slide off. Use caution to not scrub the glass. If there is sand on the resist or tape, it can scratch your glass. Rinse before, during, and after while cleaning the tape and resist off the glass.
I like to use a lint-free microfiber cloth and denatured alcohol for the final cleaning process. This removes any leftover resist and tape residue, as well as fingerprints, making the glass ready for your customer.