The methods used for modifying digital pictures certainly have evolved over the past few years. Color manipulation, tonal adjusting, and filtering have seen the introduction of new innovations that make these processes more user-friendly and more comprehensive. When you think about it, there are many ways to alter images to tell a specific story: whether to recolor an image to create a certain mood, or to apply a filter to turn a photo into a painting or, most commonly, to alter the actual physical content of a picture. So ubiquitous are these processes nowadays that a new adjective has been added to the English language. When an image has been manipulated, it is commonly said that it has been “Photoshopped.”
Among the many image-altering techniques that can “Photoshop” a picture, filtering, color and tonal enhancement, and content replacement are at the top of the list. Several methods have been introduced over the past few years that dramatically alter the image modification workflow. A few of these techniques analyze the existing content of an image and reapply portions of the data within a selected area. Other, even more automated techniques generate new content using artificial intelligence (AI) and the vast archive of image content in the cloud.
Fundamentals
Before we get into the techniques, there are a couple of basic rules that need to be observed when compositing images so that the union of two or more images appears seamless. First, feathered edges of the selected area produce a smooth transition zone. A feather is a group of edge pixels that range from opaque on the inside and gradually become more transparent as they radiate outward over a specific distance. Feathering the edge of a selection softens it so that source content seamlessly blends into the destination background.
Next, consistent lighting is essential to produce credible results. Shadows should be cast in similar directions depending on the position of the light source and highlights and reflections should be located on the same sides of objects of both source and destination images. If possible, choose images whose light sources are similar. A more radical choice is to flip or rotate the source content so that the light source corresponds to the destination image.
Collage

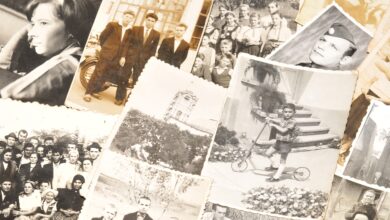
A composite image is created with content from multiple sources. Another word for a composite is a collage. Artists have been making collages since the mid-nineteenth century. Back in the day, collages were made from cut-out pieces of paper pasted together to form an image (Fig.1). Nowadays, the digital collage workflow is faster and more versatile, providing a vast array of extraordinary features that enhance the credibility of the composite.
Content awareness
When Content Aware features were first introduced to Photoshop, end-users were amazed and delighted. Finally, we no longer had to rely on the cumbersome Clone Stamp tool and it’s tedious select and paint method to composite large areas. The Content Aware Fill feature is not a tool, but an interface that fills areas with pixels that are automatically sampled from the image. It’s quite intuitive as it measures the outside edges of the target area and finds areas within the image that will seamlessly blend into them. Most of the time it works well providing that your target area is not too large. Content Aware Fill has nifty controls that determine where the new content is sampled.
Here’s how it works: First, use one of the selection tools with a one- or two-pixel feather to encircle the destination area. I find that slightly overlapping an adjacent texture by just a few pixels with the selection outline makes for a more seamless blend and determines the fill content. Then choose Edit > Content Aware Fill.
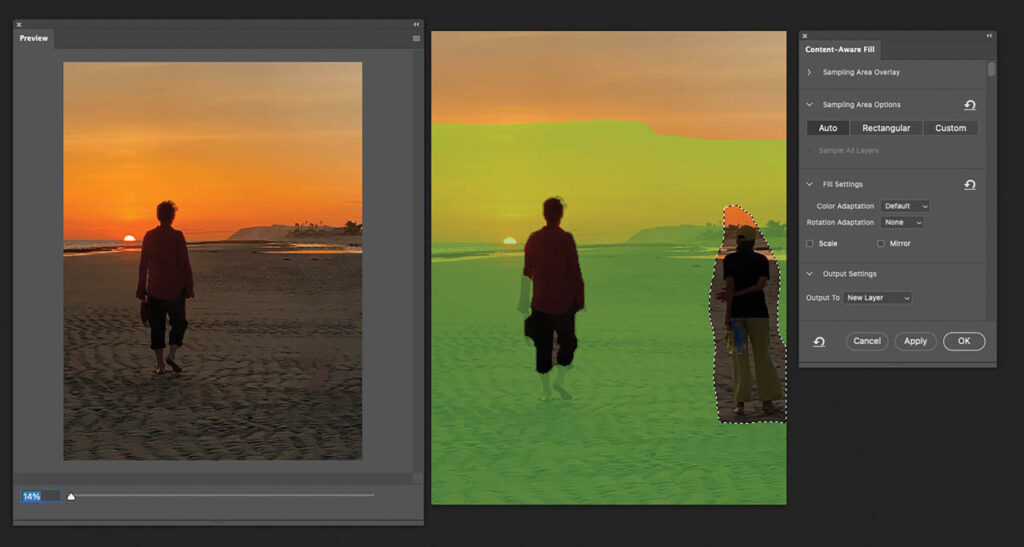
The interface (Fig. 2) displays a green overlay that indicates the area where the new pixels will be sampled. The green overlay can be modified
with a brush to add or subtract potential sample content. A nice preview window displays how the image will look with the new content. The window refreshes automatically when you modify the overlay. When the composite looks acceptable, click OK. By default, the new content is generated on a new layer.
The Content Aware Fill feature can be a real time saver. If the results aren’t perfect, you can always go back and tweak the filled areas with one of the retouching tools like the Healing Brush or the Clone Stamp to manually retouch tiny areas where you have unwanted content.
Content Aware Scale
Speaking of content awareness, let me mention the Content Aware Scale feature. Content Aware scale resizes images intelligently, preserving important visual content such as people, buildings, or objects while reducing or expanding less important areas, sky, background, or grass.
Instead of stretching or squishing the entire image uniformly as standard scaling does, Content-Aware Scale analyzes the image and protects key visual elements from distortion. It also stretches or compresses areas with less detail or importance such as solid backgrounds or textures.
It’s simple to use:
- Add canvas to the image to accommodate the new larger size.
- Select the content of the layer you want to scale.
- Choose to Edit > Content-Aware Scale.
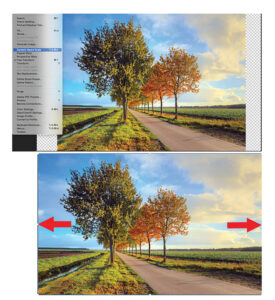
- Drag the handles on the image to scale it horizontally or vertically (Fig. 3).
- Press Shift or Alt depending on the platform to scale more freely.
- Click the checkmark in the Options bar to apply the change.
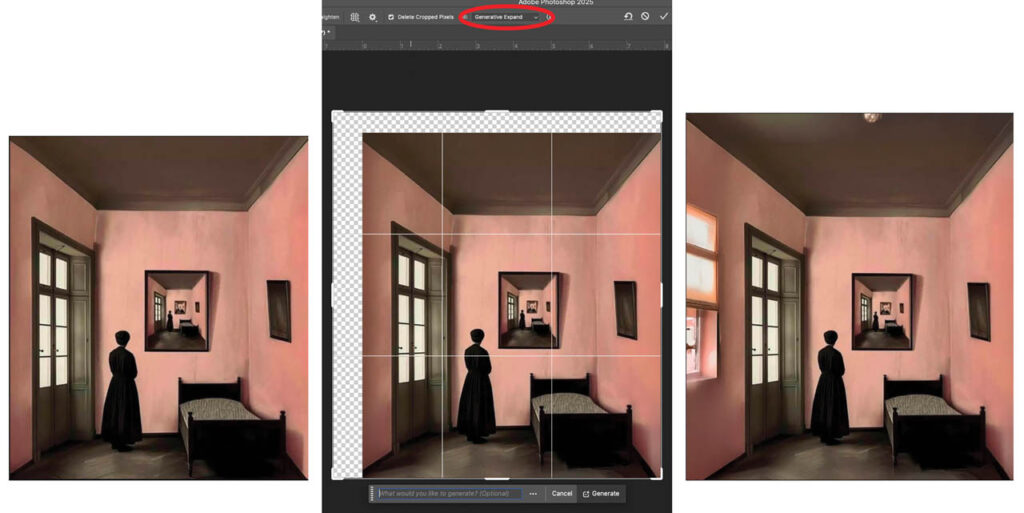
Generative Expand
An alternative to Content Aware Scale is the AI-driven Generative Expand feature. It enables users to extend or expand the edges of an image seamlessly using AI-generated content that matches the original scene.
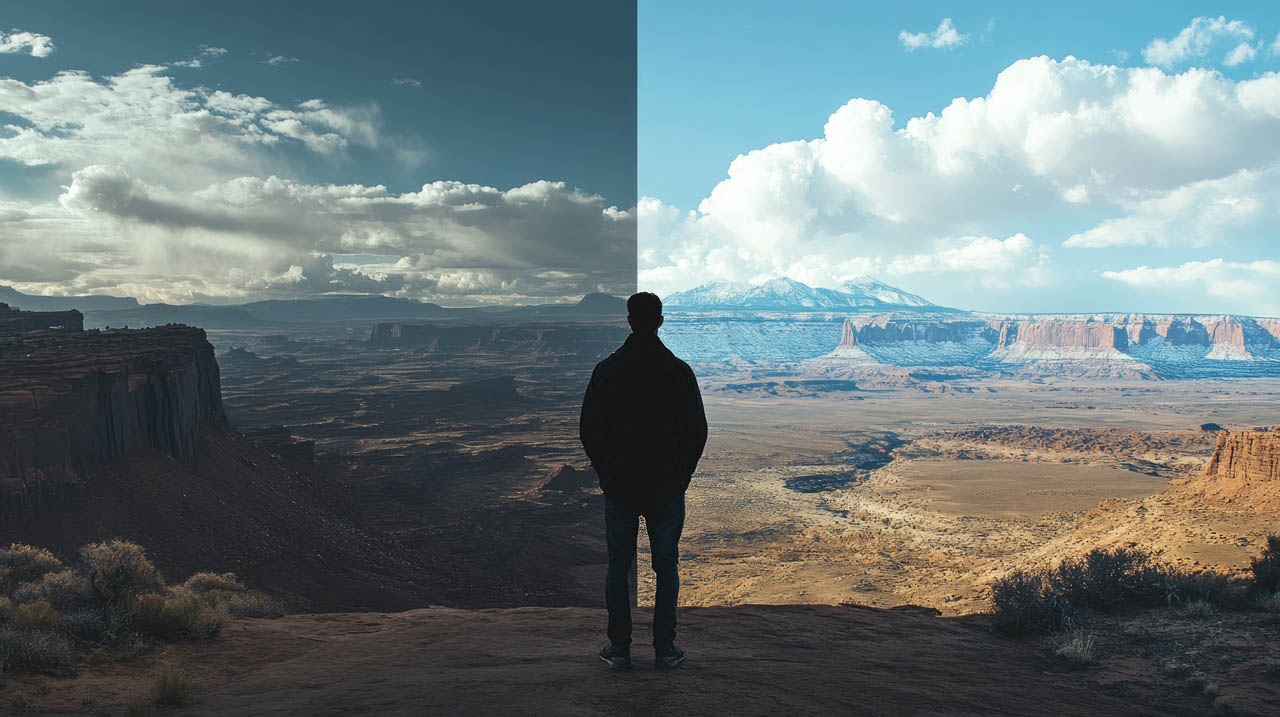
It produces context-aware expansion that fills newly added canvas areas with realistic, stylistically consistent content that is based on the existing image (Fig. 4).
You can guide the expansion by typing a prompt, for example “add mountains in the background,” or you can leave the prompt blank and let AI generate pixels based on the existing content. The content is generated on a new layer, preserving your original image. It can change the aspect ratio without cropping or add background for design flexibility. Here’s how:
- Select the Crop tool and enable the Generative Expand option in the Options bar.
- Drag the Crop tool marquee outside the edges of the canvas to add additional space
- Type a prompt or just click Generate. The canvas expands with new content.
- Photoshop generates three options to choose from in the Properties panel. Pick the best one.
Neural Filters
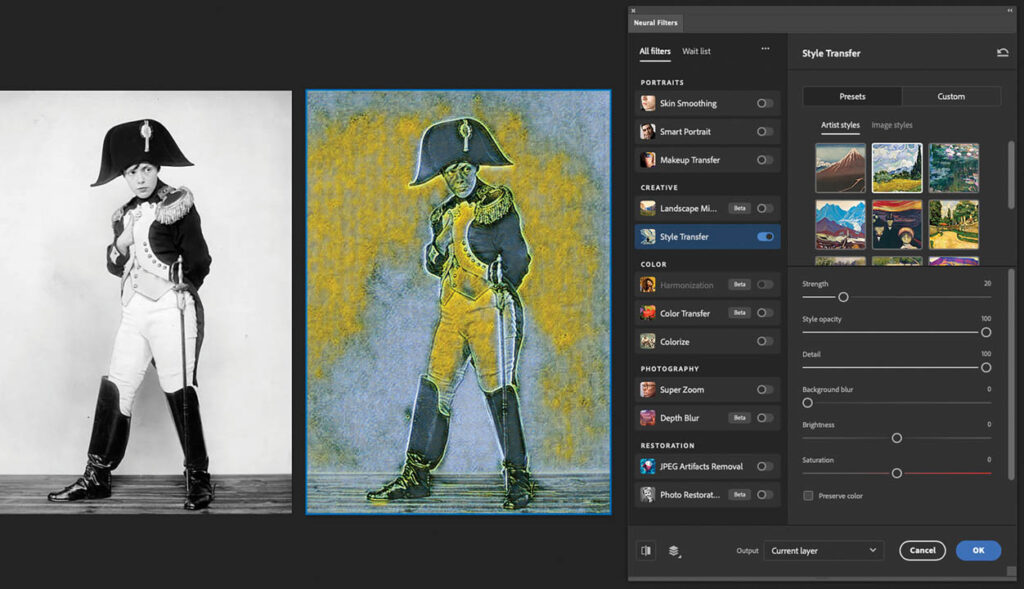
Neural Filters are a set of AI-powered routines that apply complex image edits quickly and easily. Neural Filters use machine learning, a branch of AI that enable computers to learn from sampled data without being specifically programmed. Simply stated, machine learning allows computers to identify patterns in data and make decisions based on those patterns. Neural filters are designed to simplify traditionally time-consuming or technically difficult tasks, such as retouching, colorizing, or changing facial expressions. Neural Filters require a compatible GPU and sufficient RAM. Some of the filters are cloud-based, so internet access is essential.
The Key Features of Neural Filters include AI-Powered Adjustments. Using Adobe Sensei, Adobe’s AI/ML platform, these filters use neural networks to analyze and modify images intelligently. Most Neural Filters are applied on new layers or with smart filters so that the edits are nondestructive and can be applied without compromising the original image. Sliders and checkboxes in the interface of each filter make it easy to apply effects (Fig. 5).
These are the types of current Neural Filters:
- Skin Smoothing: Automatically smooths skin while preserving detail.
- Colorize: Adds color to black-and-white photos intelligently.
- Style Transfer: Applies the style of one image (e.g., painting) to another.
- Super Zoom: Enhances and enlarges parts of an image.
- Smart Portrait: Adjust facial features, expressions, gaze direction, lighting, and more.
- Depth Blur: Simulates depth of field and background blur.
- Neural Filters: These are available in the interface but are still being beta tested:
- Photo Restoration: Revives old, damaged, or faded photographs.
- Harmonization: Matches the color and tone of two different layers.
- Landscape Mixer: Blends elements of one landscape into another.
- Color Transfer: Matches the color palette of another image.
- Face Cleanup: Enhances and cleans facial features in a stylized way.
Uses for Neural Filters include quickly retouching portraits, restoring old photos, experimenting with creative styles, and easily changing facial expressions.
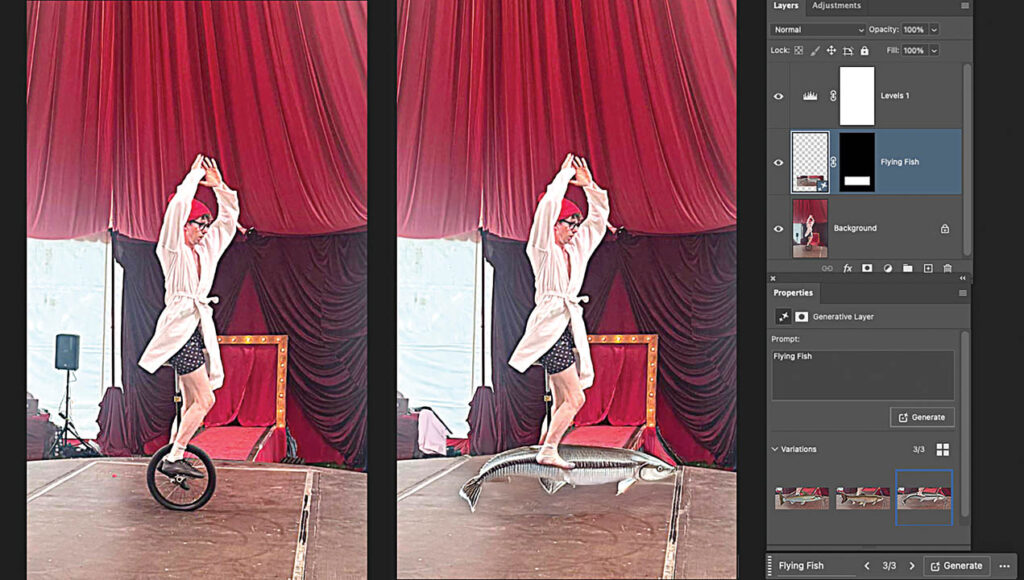
Generative Fill
The Generative Fill is an AI feature that adds, removes, or modifies elements in an image using text prompts. It is powered by Adobe Firefly, Adobe’s generative AI model.
With Generative Fill, objects can be added to an image based on a text description (Fig. 6). It’s also used to remove unwanted elements by selecting and pressing the “Generative Fill” button and replacing elements or backgrounds with realistic, context aware images. Changes appear as a new Generative Layer that you can revert or tweak without compromising the original. The AI model automatically attempts to match lighting, perspective, shadows, and texture on the new content. Three variations are generated in the properties panel. Choose the best one or apply Generative Fill again with a more precise text prompt. Try it!
- Open a RGB, 8-bit image.
- Select an area with any selection tool The new content will usually fill the selection.
- On the Contextual Task Bar enter a text prompt, or leave it blank to remove content.
- Click Generate.
- In the Properties panel, choose from the three generated results. Each one appears on a new generative layer.
New realities
Compositing is a powerful way to invent new realities or change existing ones. These techniques are most often a source of creative fun as we stretch our imaginations to invent fanciful images that tell a story. The new AI powered Generative Fill, Generative Expand, and Neural Filters are a welcome addition to further stimulate your creative impulses.
Content replacement plays a big part of the image editing process. Seamless editing is a skill that is dependent not only the ease and functionality of the software, but your ability to conceive and experiment. Of course, all the methods require a close examination with your critical eye to assure that the results are perfect. While the techniques can be used to deceive, they are most often a source of creative fun as we stretch our imaginations to invent new realities. The fact that images can look so convincing after they’ve been altered and are so easy to generate should be motivation for you experiment with content replacement.