I think many people have the idea that making a quality print is simply a matter of displaying an image on screen and then pushing a button. Like magic, a brilliant image is automatically transferred to paper.
Anyone who has operated a high-quality inkjet printer would certainly balk at the misconception that achieving print perfection is easy. The high-quality print is the final representation of a lot of work. From concept to composition to color correction to output, each step in the workflow requires skill, time, and effort to produce the best results. In the final analysis the output represents the input.
I use Adobe Photoshop for file preparation because of its versatility and accessibility to important features. If you prefer, Corel PaintShop Pro has similar features for file preparation.
Failure is expensive
As you probably know, producing quality prints is an expensive proposition. The cost of the printer, calibration equipment and software, and the labor for maintenance and repairs can be substantial. Basic materials, such as ink sets and substrates, are quite pricey, too. It is therefore critical to establish a workflow where waste is reduced to a minimum.
Manage display
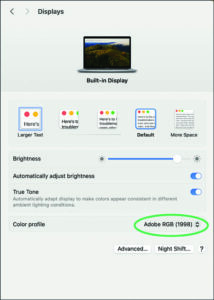
Before you begin to work on any image, manage your screen’s colors by choosing a monitor profile from your system’s display settings (Fig. 1) or even better, measure your display with a colorimeter. Calibration will provide the best possible on-screen image that the monitor can display. Assigning Adobe RGB (1998), a wide-gamut display profile, to your monitor settings can potentially display the maximum gamut of RGB colors.
Resolution
Ensure that the resolution of your design is appropriate for high-quality printing. Typically, resolutions of 150-300 pixels per inch (PPI) are suitable for large-format prints depending on the size of the print and viewing distance. Resolutions lower than this range can produce blurry or pixelated images and higher resolutions produce excessive file sizes. Work on images for print that are 300PPI. If you need to reduce their resolution you can do so without loss of quality. Up-sampling an image from a smaller resolution or size to a larger one can compromise the image quality.
Proof it
If possible, print the image on color laser printer at tabloid size 11” X 17” (Fig. 2). Choose either the Portrait or Landscape option depending on the image’s proportions.
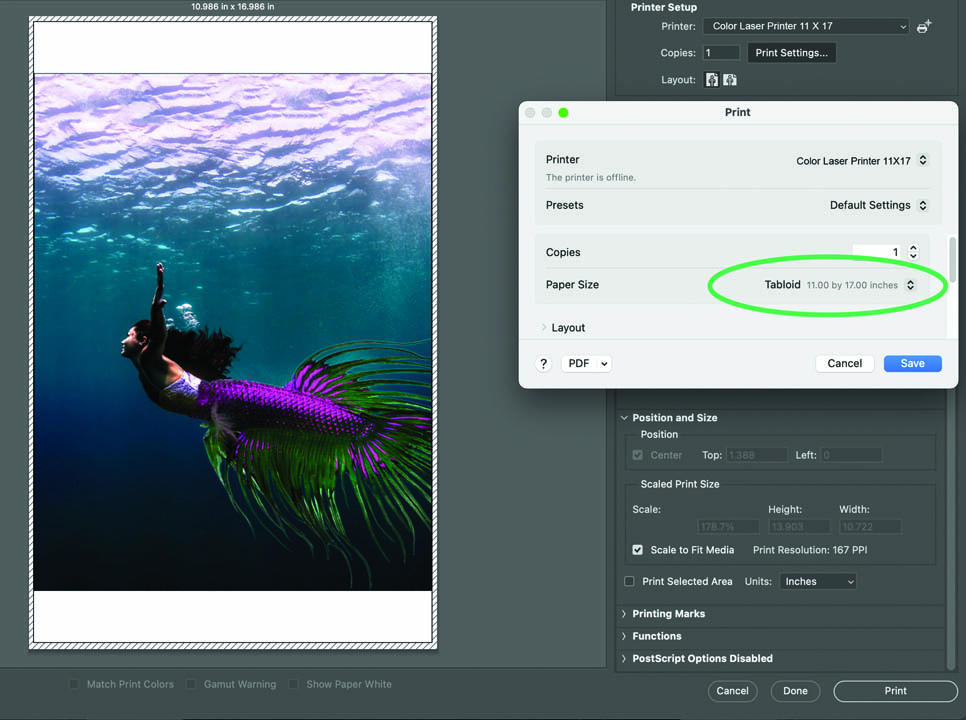
Seeing the image on paper will give you additional perspective than just seeing it on screen, and you may observe minor errors in composition or detect typos. Don’t be concerned with color at this stage. The laser print will no doubt distort the colors that are displayed on your screen. It’s simply a proof to examine the physical aspects of the picture. Make any physical changes that are necessary and save the image in PSD format.
Assign printer profile
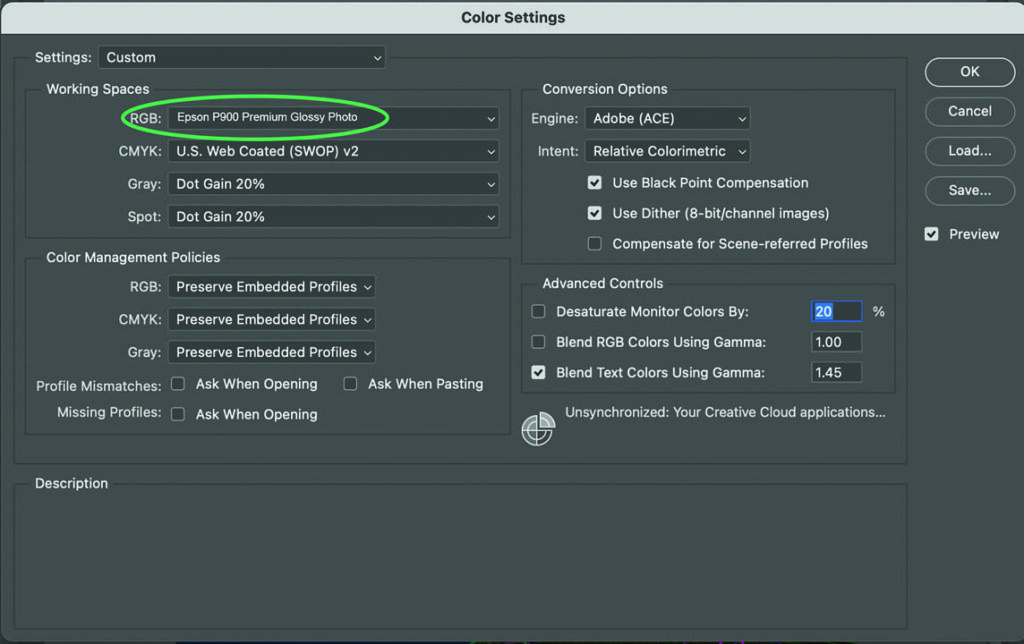
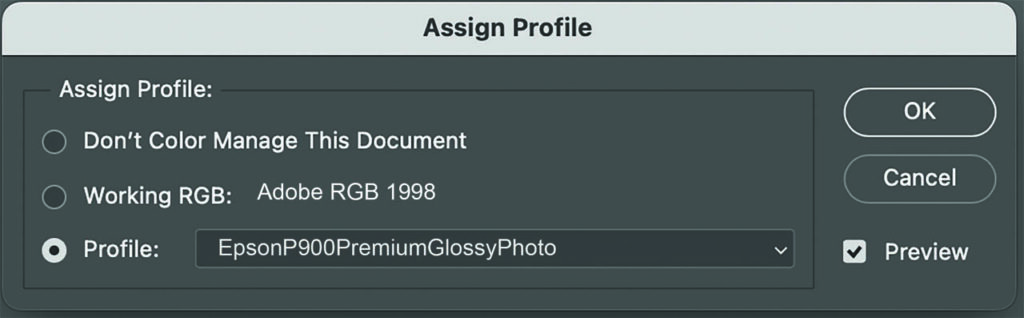
Open the image and duplicate it. Assign a printer profile to the image. You’ll find a list of printer settings in the Color Settings dialog box if you loaded the print driver for your specific printer (Fig. 3).
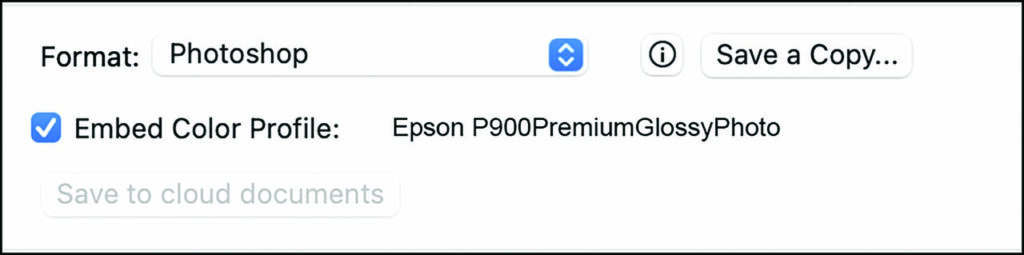
Save the image in PSD format and embed the printer profile. In this case, I’ve assigned the EpsonP900PremiumGlossyPhoto profile (Fig. 4).
Color shift
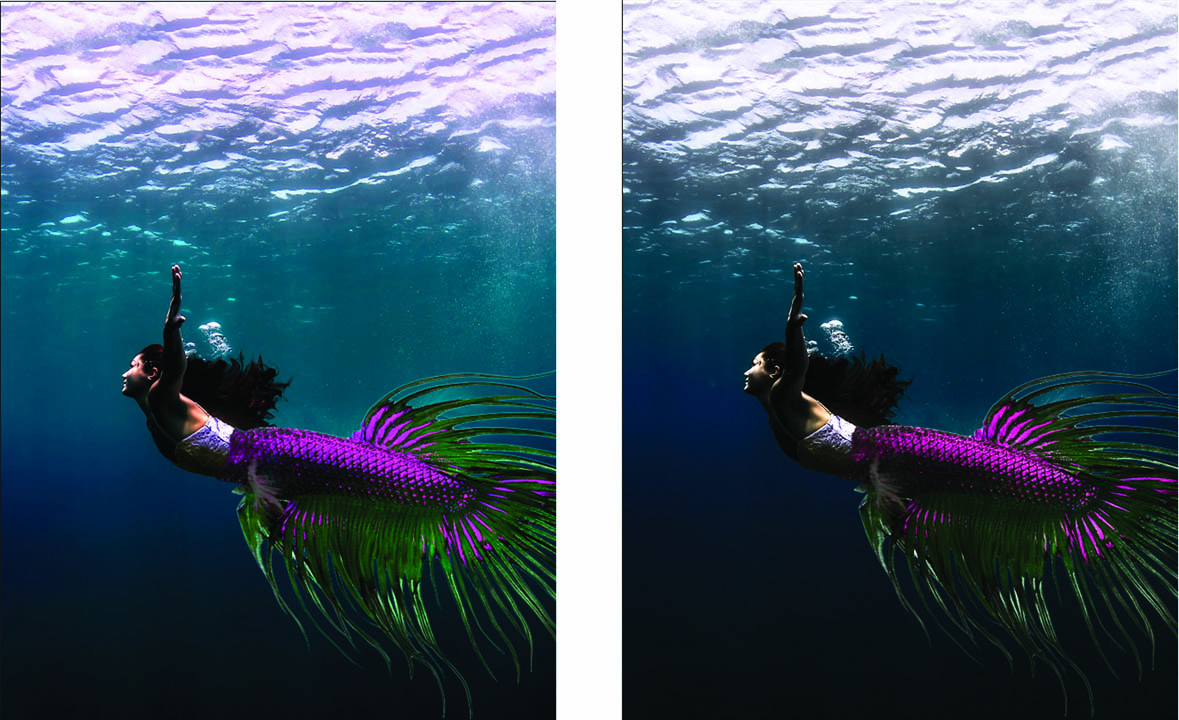
You might observe some dramatic changes to the image’s color when you assign the printer profile in (Fig. 5). Inevitably, you’ll need to make further adjustments to improve the image. It’s a good idea to compare the image with the printer’s profile to the Adobe RGB 1998 profile image. With both images visible on screen, adjust printer profile image using a Hue/Saturation adjustment layer until it looks more like the original.
Apply other adjustments like Levels, Curves, and Color Balance until the image looks as close to the Adobe RGB 1998 image as possible. You can experiment with various adjustments. The printer profile image will rarely look precisely like the wide-gamut Adobe RGB image. There will be a few areas that don’t quite match, especially in the blues and magentas because of the limited gamut of the printer’s profile.
Flatten
Duplicate the image again and flatten it. A flattened image will produce a smaller file size and make image processing much simpler and faster. Save the file in PSD, TIF, PDF, or JPG format with the profile embedded.
About ICC profiles
An International Color Consortium (ICC) profile is a set of data that characterizes a color input or output device, or a color space according to standards defined by the ICC. Profiles describe the color attributes of a particular device or viewing requirement.
Every device that captures or displays color can be profiled. Some manufacturers provide profiles for their products that usually work well.
They are loaded into a folder when you load the print driver and are accessible from the Color Settings dialog box or the Assign Profile command in the Edit menu (Fig. 6). They are made for the specific brand of a printer’s ink set and the substrate surface.
If you don’t find the profile or you are using a substrate that is not listed, you can make a profile for a specific printer and substrate using calibration equipment – a spectrophotometer and a printed color target. (In a future DigitalEye, I’ll present an article describing the complete color management process.)
Printing
Turn the printer on and follow the prompts. Usually this can take some time as most inkjet printers go through a cleaning cycle when you start them. Wait for the auto nozzle check to complete. On the printer, choose either roll paper or sheet paper. Printers usually signal when another cleaning cycle or head alignment is necessary. They will also indicate the status levels of the ink reservoirs. If one reservoir is empty, the icon of that specific color will blink or display an exclamation point and the printer will not operate.
Also, open the paper tray and make sure that the paper is the correct size and is loaded correctly. Expand any trays that support the final print when it is output by the printer so that it doesn’t fall on the floor. On your workstation choose File > Print to display the print dialog box and choose the specific printer from the Printer menu.
More color management
The default print mode is Printer Manages Color which usually produces an unmanaged print and relinquishes color control to the print driver. To apply the profile you selected, specify that Photoshop Manages color (Fig. 7). Click menu and choose the printer’s profile.
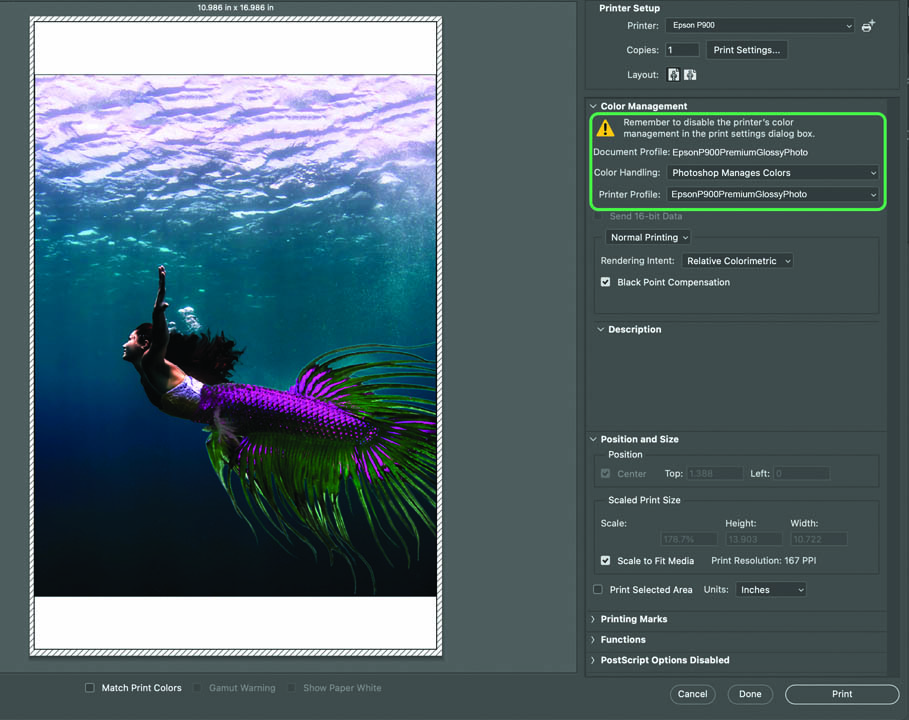
Then, click Print Settings and choose the target paper size. Letter Sheet for 8.5” X 11”, Super A3 for 13” X 19” sheet paper or roll paper for anything larger.
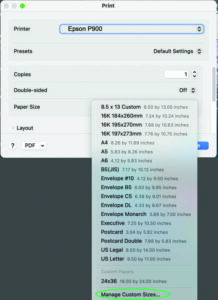
Create custom sizes by clicking on the Manage Custom size option (Fig. 8). This is helpful for printing to roll paper but be sure not to exceed the roll paper’s maximum width when you create a custom size.
Print status
Click the Print button. Check the status of the print by clicking the Print monitor icon on your desktop. The printer will start making odd noises like buzzes and snaps as it processes the image, but don’t worry — it’s gearing up to deliver a perfect print.
A heads-up
A controlled environment that produces the best quality print requires a little extra work. It’s quite easy to let the printer mange color, for example, and get perfectly fine results, but working with the ICC profiles that the printer manufacturer provides or using custom profiles that you create with your spectrophotometer, provides a greater level of control.
Troubleshoot
A lot can go wrong that requires extra time on your part when printing a large-format print. For example, if you haven’t used the printer for a while, you’ll no doubt have to run several cleaning cycles to get the printer to function properly. Your printer’s manual has a troubleshooting section that helps you iron out the various difficulties that you may encounter. By following the steps in this article though, you can help ensure that your large-format printing job turns out as intended — trouble free and with the highest quality results.