Zero in on Crisp, Clear Sublimation Images

Can you get crisp, clear images on your sublimation products? I have heard from people throughout the years that sublimation is not as good as other technologies. Many times, that comes from people that sell other technologies, or people that are not completely familiar with sublimation.
Certainly, you do have dot gain with sublimation (we will discuss that later) and you have to be aware of it and work with it. However, if you really understand the basics of how sublimation works, and the variables that affect the image clarity, you can dial in your sublimation processes and get clear images that rival any other technology available for custom decoration.
Variables that affect sublimation image clarity
There are a few basic variables that directly affect your image quality when you sublimate your products. Let’s list out the variables, then talk further about each of them:
- Quality of your digital image
- Calibrating your sublimation printer
- Quality of your sublimation paper
- Quality of your sublimation products
- Calibrating your times and temps
- Rapidly cooling your products
If you understand how these variables affect your sublimation process, you will be able to zero in your process and create high-quality finished products.
Quality of your digital image
When you talk about the quality of the image you start with, it is important to know that the better its quality, the better quality of your finished product. If you start with a bad image, there is really no way that you can achieve a better quality one on your finished product.
A good rule of thumb for a starting image quality is, for a hard substrate, at least a 300 DPI (dots per inch) image at size, and for a fabric substrate, at least a 150 DPI image. Rigid substrates support a higher finished DPI image because of the smooth surface while fabrics, due to the weave, won’t support a finished DPI image higher than 150.
The other thing to be aware of is the term “at size.” That means the DPI should be as suggested when you size it to your finished product. If you start with a 300 DPI image, but it is only one-inch square, by the time you enlarge it to an 8-by-10-inch product, it will be a much lower DPI. The larger size you make it, the smaller the final DPI will be.
Calibrating your sublimation printer
Sublimators use inkjet printers to print their images onto sublimation paper. Inkjet printers create images by jetting small droplets of CMYK ink onto the paper, creating tiny dots, and mix CMYK dots to create the colors of the rainbow. Further, the print head is moving back and forth across the paper and uses precise timing to jet the droplets at the correct time.
Printers also advance the paper slightly after each pass of the print head across the paper. If that timing of jetting the droplets of ink or the advancement of the paper is off slightly, your image will not be the best possible quality.
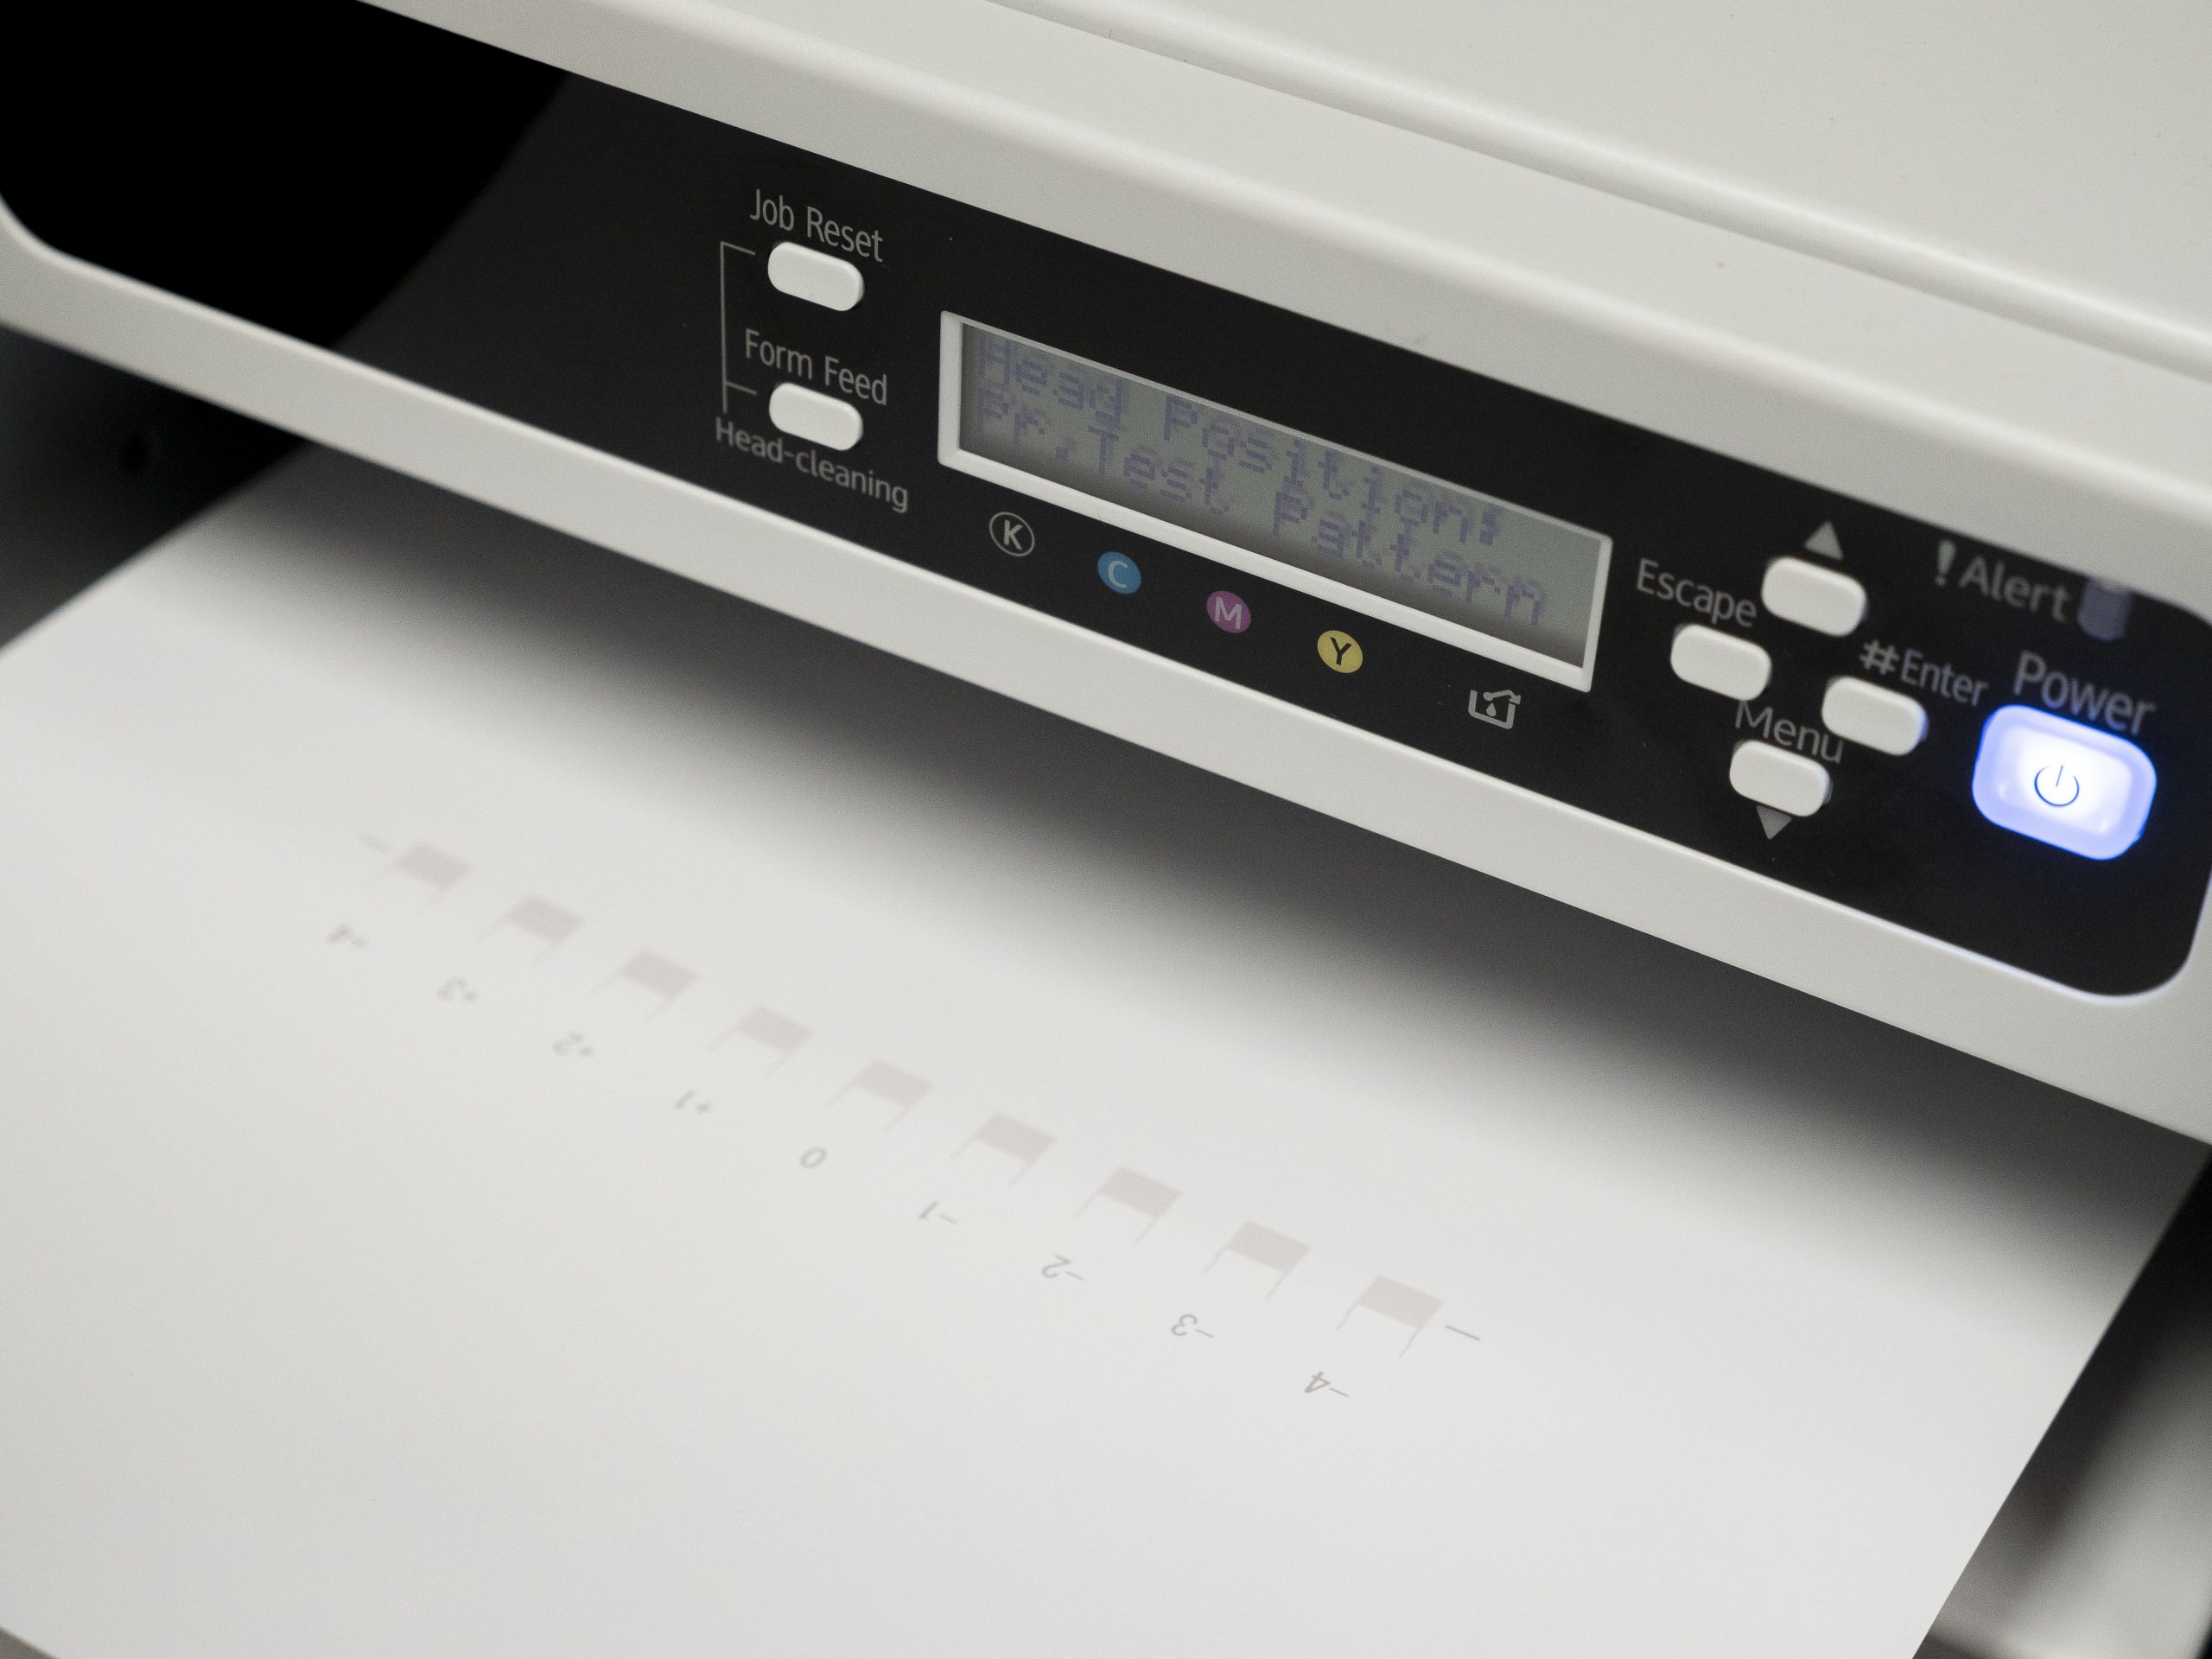
This is what the Sawgrass printer Print Head Adjustment looks like.
Luckily for sublimators, printers have a maintenance procedure to calibrate those settings. On the Sawgrass printers, these calibrations are located where you would do a head cleaning and nozzle check. The Print Head Alignment calibrates the side-to-side calibration of when the ink droplets are jetted. The Paper Feed Adjustment is pretty self-explanatory. You should perform these calibrations periodically to maintain the best print quality, and they only take a few minutes to complete.
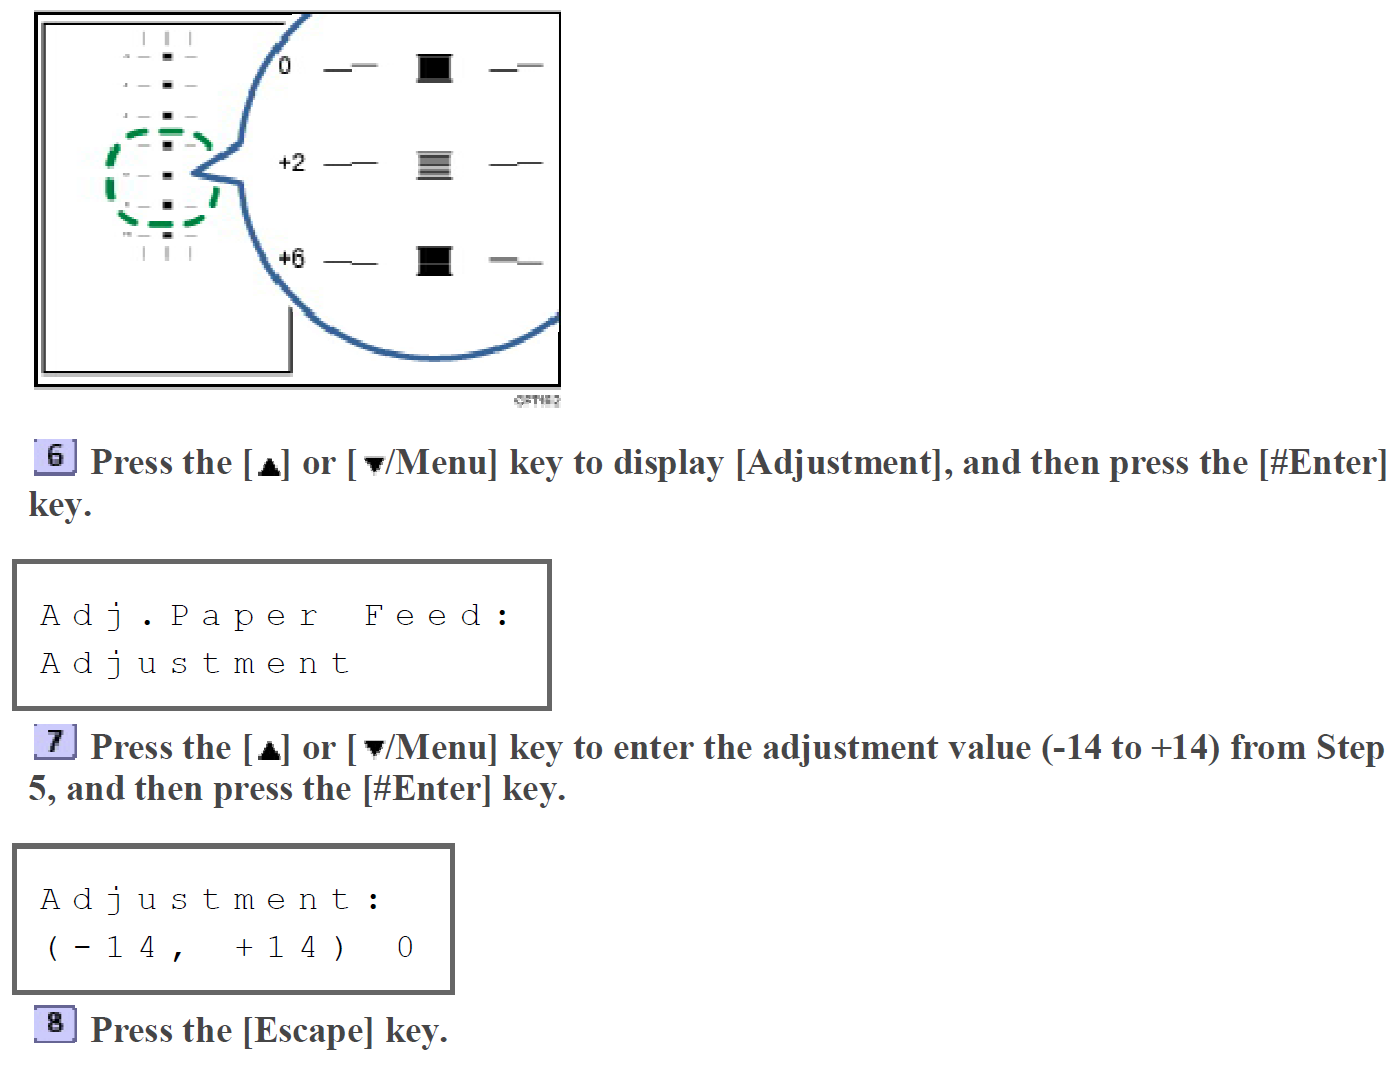
The Sawgrass printer Paper Feed Adjustment; you should perform printer calibrations periodically to maintain the best print quality.
Quality of your sublimation paper and products
Using a high-quality sublimation paper helps create high-quality images on the finished products. Sublimation paper has a surface coating that holds the sublimation dyes on the surface. This stops the dyes from moving outward. If the sublimation dyes moved outward, your image becomes blurry on the paper, and therefore ends up being blurry on the finished product.
There is a big difference in the quality of sublimation coatings that are on sublimatable products. Just like the quality of sublimation paper affects the quality of your finished image, high-quality coated sublimatable products help you render higher quality images on the finished products.
Calibrating your time and temps
To understand how this works, we need to quickly review how sublimation works. After you print your image onto the sublimation paper, you place it against your blank product and place it in a heat press. When the poly coating on your product is heated up, pores in the poly coating open up. At the same time, the solid sublimation dye particles that have been printed onto the sublimation paper heat up and turn from a solid state on the paper into a gas. The dye gas goes into the open poly pores.
At the correct time, you remove the product from the heat press. As the product cools, the pores in the poly coating close back up, and the sublimation dyes turn back into a solid form and are sealed into the pores. That gives you your finished image.
This process happens at a specific time based on the temperature of the product in the heat press, so the better you have your times and temperatures dialed in, the more accurate your finished image will be. If you keep your product in the heat press too long, those dyes that are in a gas state continue to migrate through the pores sideways, which blurs your image.
Rapidly cooling your projects
Rapidly cooling your products is an extension of the prior section. When you open your heat press after sublimating a product, your product will maintain its high temperature for a period of time that is dependent on the mass of the product.
While fabrics cool off quickly, ceramics such as mugs or tiles stay hot for a long time after they are removed from the heat press. During this time, the pores on the poly coating stay open, and the sublimation dyes remain in their gas state. This means that the dye gasses continue to migrate sideways, and some gases can come back out of the pores of the poly coating.

You can see that the sublimation dyes have migrated upwards from the text. This happens when the mug is not cooled down quickly.
I have seen ceramic mugs that have been taken out of the heat press and placed directly on a table without quickly cooling. Some of the sublimation dyes had outgassed while the mug was hot, and since hot gases rise, once the mug was eventually cool, the image has a blur running upwards where the sublimation dyes floated upwards and reentered pores to the top of where the actual image was supposed to be. This ruined the finished product. When the sublimation process is done, you need to cool your products as quickly as possible.
This step can be crucial if you are trying to achieve fine text on your image. One of the hardest fine texts to achieve is a white text on a black background because the black dyes encroach on the white text area if not cooled quickly. It is difficult, but not impossible. I have achieved this on an aluminum name badge by zeroing in on the time by seconds, and then quickly removing from the heat press and dipping into warm water. The water quickly cools the aluminum out of the sublimation heat zone to stop the dyes from continuing to move.
Proper process
Like most things in life, if you do them correctly, you generally get good results. Sublimation definitely works that way. If you are aware of the variables that affect your finished results, and use the proper procedures, you will get great results that impress your customers.