The Lens effects tool may possibly be one of the least understood and least used features included with CorelDRAW. I hope to explore some of the magic of the Lens effects in giving a whole new dimension to some creative endeavors.
So, first, open the docker by going to Window > Dockers > Effects > Lens or, on the task bar Effects > Lens or the keyboard shortcut Alt + F3, whichever way you prefer to open it. (Many of the Lens effects can be applied with other kinds of processes, so it is important to determine if this effect is the best choice for your project.)
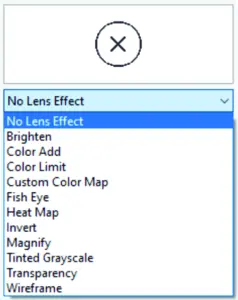
With the docker open, there are several options available as seen in Figure 1. I will go through some of these effects, beginning with the transparency choice.
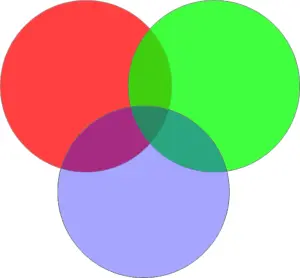
In Figure 2, there are three objects: Red, Green and Blue. Each has a transparency applied where they overlap, and several other colors are apparent. All this is done using the Transparency Lens effect.
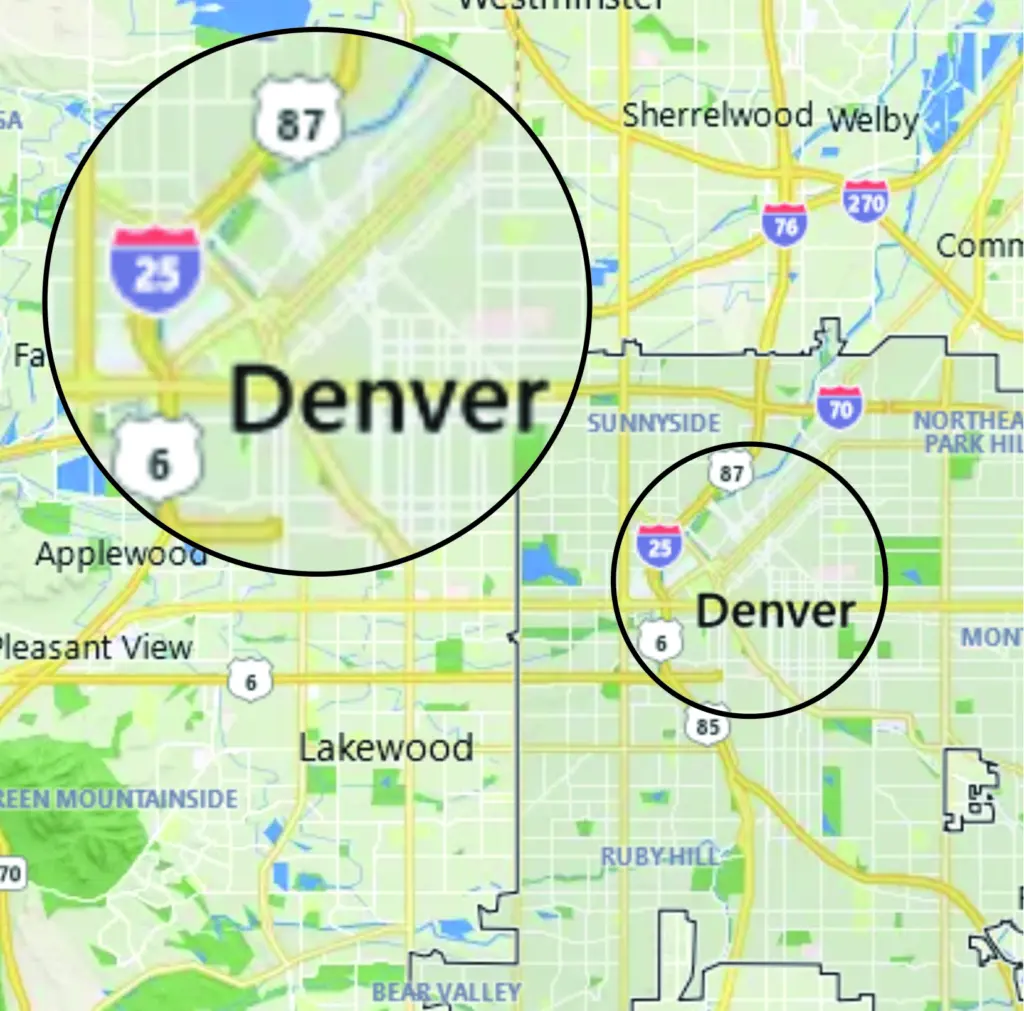
The next effect is the Magnify choice in the docker. In this example is a road map of the Denver area. I wanted to magnify a particular part of this map, so I first drew a circle over the area to magnify, then applied a magnifying lens. Figure 3 shows the magnification.
The problem is that my magnified object covers the original area, and when I move it, it magnifies a different area of the map. So, in the docker, I checked the “Viewpoint” box, then “Edit” and a small “x” appeared in the circle. I dragged it to the word “Denver,” and the magnified area appeared in the circle. Checking the “Frozen” box allows the circle to be moved anywhere on the page, and the magnified area is retained. (Note: The “Apply” button may be locked, so it will have to be unlocked by selecting the padlock icon. Also, in the 2020 and later versions, there is no “Apply” button… instead, the effect is automatically applied when selected). In this example, I drew a smaller circle to indicate the magnified area. One could possibly draw an arrow to show this. The “Amount” of magnification is 2, by default, but it can be changed as needed.

The next effect I want to explore is the Brighten effect. In Figure 4 is an image of a seascape, and I wanted to add a description of the image. So, I typed the word “HOLIDAY” and chose an appropriate font. With the Brighten effect applied to the text, I was able to create a subdued or faded rendition of the text. Note that a negative value in the “Rate” box will tend to darken rather than brighten the image.
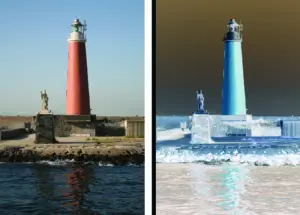
The Invert lens is the next one I want to talk about. Figure 5 shows a photo of a lighthouse on the left side and the Invert lens applied to the image on the right side. A rectangle was drawn over the image to apply the lens. Note that colors are changed appropriately to indicate the changes. This may be an effect that is seldom used but may be exactly what you need for a particular project.
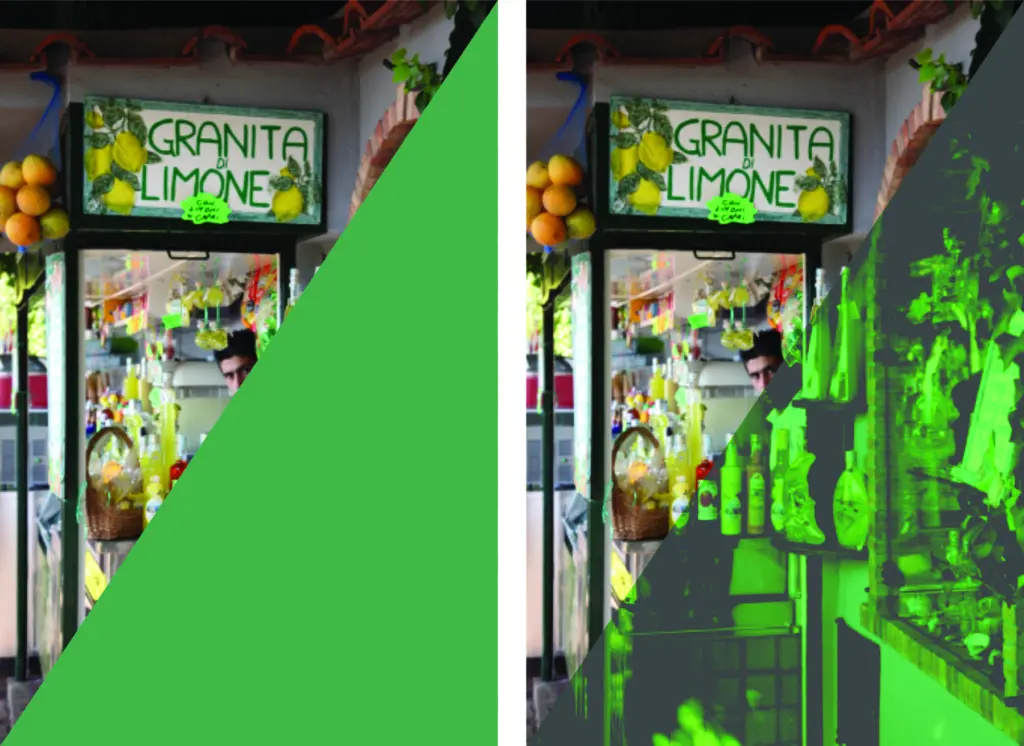
The Color Limit lens effect is next to be considered. Figure 6 has two images. On the left, a bitmap image with a green triangle, and on the right side is the same image with the Color Limit lens effect applied to the triangle at a rate of 55. A negative number yields different results.
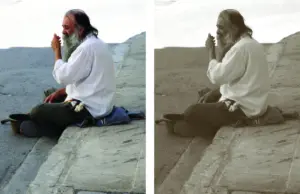
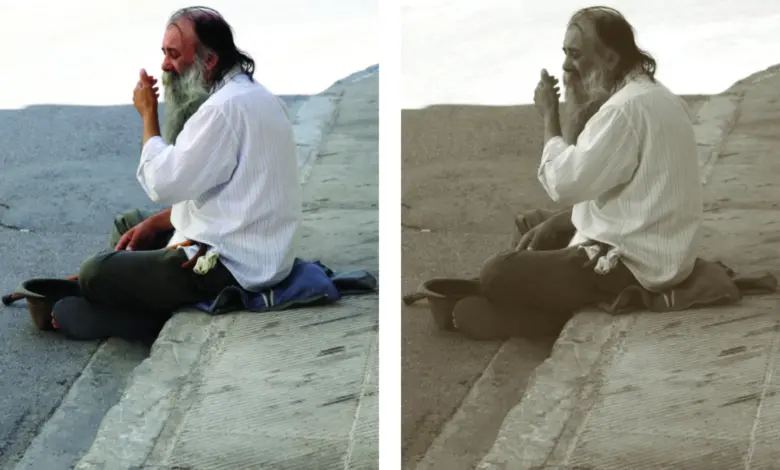
The Color Add effect could be quite useful in some instances. Opposite to the Color Limit feature, Color Add allows one to add colors and should be somewhat self-explanatory. Tinted Grayscale could easily be one of the most useful lens effects available. Figure 7 depicts an image of a man on the left and the result on the right, so I want to change the image color to a Sepia look. I drew a rectangle over the image and chose a dark brown fill color, then applied it to the rectangle. The result is a Sepia color.
Sometimes, a warning appears, indicating that it uses a Spot Color. Just choose OK, and the color or its equivalent is automatically used and applied to the lens effect. Of course, one could use any color to get a unique tint in the lens. A similar lens effect is the Custom Color Map.
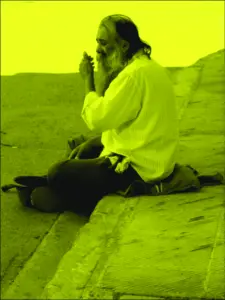
Using the same image and the Custom Color Map effect, in the docker, you can choose a beginning color and an ending color. I chose From: Black and To: Yellow, as in Figure 8. Other choices in the docker include Direct Palette, Forward Rainbow, and Reverse Rainbow. Each of these will yield a different look, and I urge one to try them all to see the difference of each.
Using the same photo as in the Color Limit example, I now want to apply a Heat Map lens to a rectangle drawn over the photo, with a Palette rotation of 25, as seen in Figure 9.
Changing the Palette rotation value will give a different look to the colors. Try 50 or 75 to the differences it depends on the look you want.
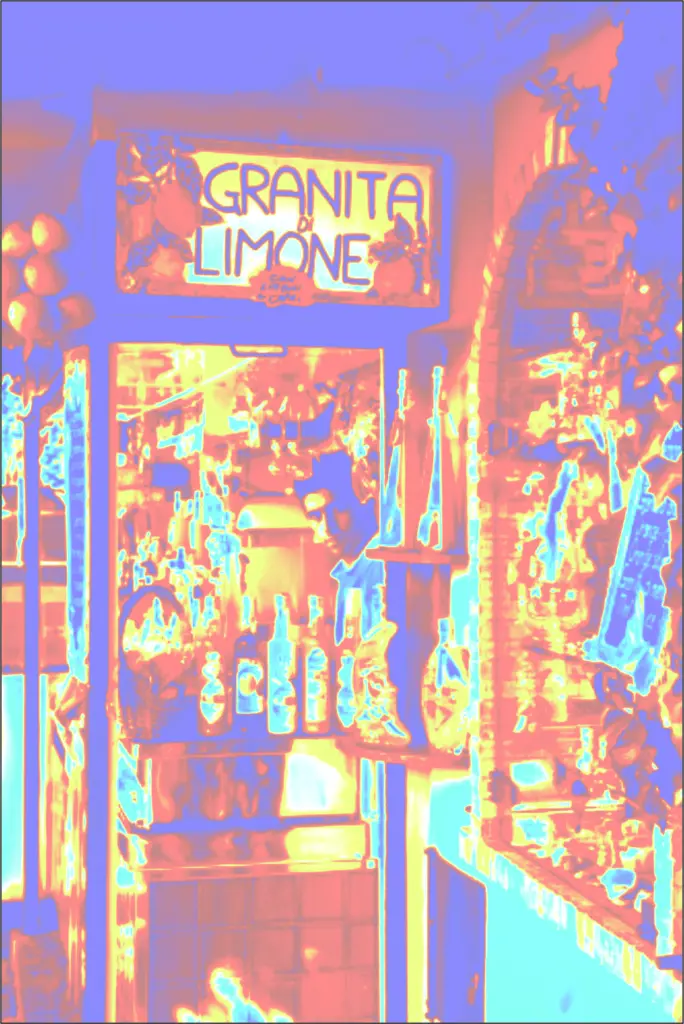
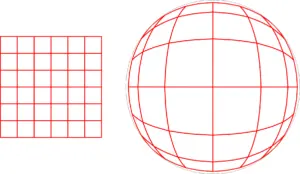
Figure 10 is a rectangle drawn with the Graph Paper tool on the left, and on the right is a circle with the Fish Eye lens applied at a rate of 250. It kind of looks like a globe. A different value in the Rate selection will give a different look. It could easily be used over headline text to give a unique look. Or maybe over a photo of a person’s face to give it a cartoon or caricature look. Just a thought.
The last lens effect is the Wireframe effect. Figure 11 shows a vector logo design at the top, and below it a rectangle about halfway over the image with the Wireframe lens applied. In the docker, the Outline is red, and the Fill is 20% black. This could be handy in some instances. You can change Outline and Fill colors as needed or turn either off by clicking the check box.
We have looked briefly at all the lens effects available. Some of these may be better achieved with other tools and processes in CorelDRAW, but they do offer another option to creative design. One caution to consider is that some of these effects may prove difficult to output. In that case, it may be good to save a copy and convert it to a bitmap for output. If you want to remove a lens, select No Lens Effect, apply it, and you are back to where you started.
All the effects have several choices in the docker, and it is best to try them all to learn their unique function and purpose.
I will answer questions as soon as possible at dezender1@gmail.com. I always like to hear about the differing uses of CorelDRAW from other users of the program.