The Making of a Wood and Metal Hybrid Sign
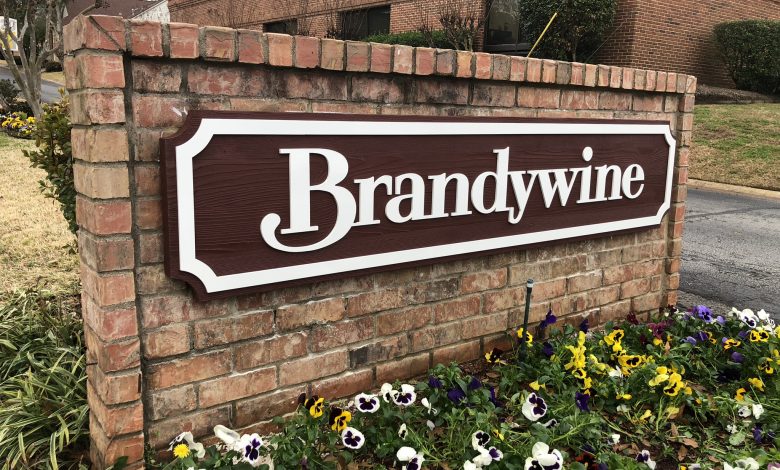
The result: A long-lasting sign that fits the customer’s needs
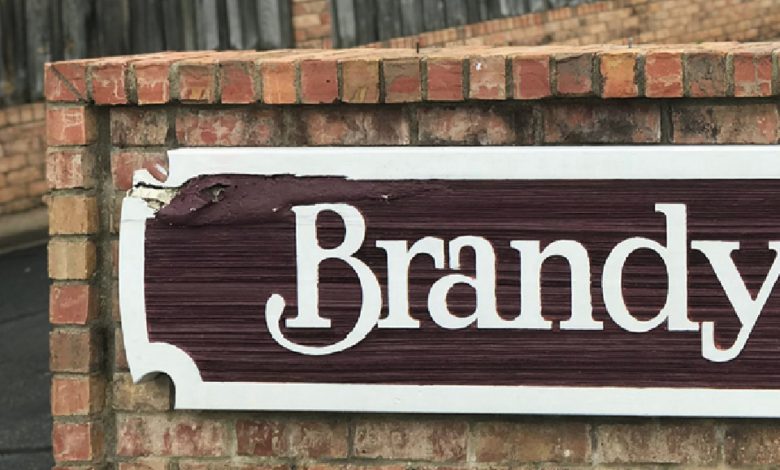


A client came into the shop from Tyler, Texas, a city about 45 minutes away from the shop, and told me that I was recommended as the sign maker to see about making a replacement sign for the entry to the housing addition where he lived. I was a bit puzzled by that, since I know there are plenty of sign companies in Tyler, any of which would be closer to him than us.
But, he was encouraged to see me about making a new sandblasted sign to replace the original sign, which was now about 25 years old and in bad shape. Actually, our sign company has never done many sandblasted signs, and I had not made one in years. Even getting good lumber locally is tough.
We talked for a while, and I was thinking about a way to make a similar sign, a very long-lasting sign, using the equipment and materials we most often work with.
What I suggested was to construct a cedar sign of 2” thick lumber, and mate it with a set of powder coated aluminum letters and border, which would be raised because they would be ¼” thick. We would blast the wood to bring out the grain, and provide him a new “hybrid” sign that should look great, last longer than either one of us would need to worry about, and still look similar to the sign we were replacing.
It didn’t take long for him or his homeowner’s board to get back with me. They decided to give that a try, and I had a project to make. After designing the sign, more or less like the original, the next step was to go to my local lumber yard and get some lumber.
There really wasn’t much to choose from. There were no #1 cedar boards with any type of consistent grain, only typical construction grade boards to choose from. But I selected four fairly decent ones, extra long, and headed to the shop.
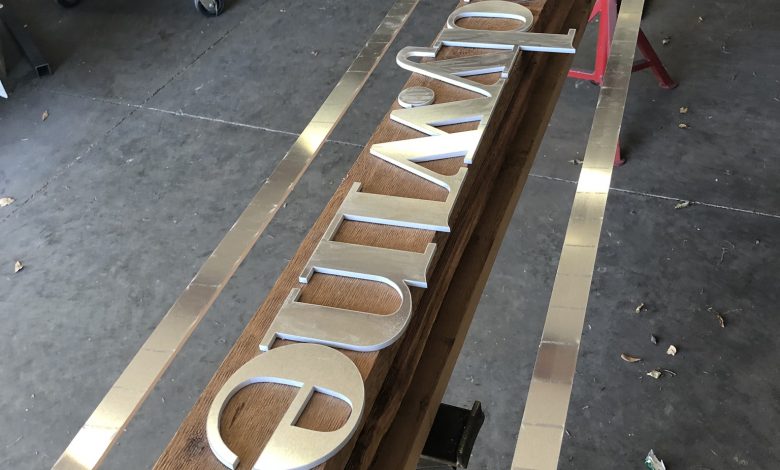
Actually, I merely delivered the lumber to the sign shop, then set up the cut file for the metal parts, and went to the shop across the street where I could get my hands on a waterjet. Using a sheet of ¼” thick 5052 aluminum plate, 4’ x 8’ in size, I cut the decorative border in one piece and all the lettering as well. Some of the letters I had digitized to be closer to the original, since no font I had seemed to match the original lettering.
After waterjet cutting, these aluminum components were drilled on the back side on a drill press, without going all the way through, and tapped with a 3/16” bottom-out tap using our “Flexarm” tapping tool. This special tool holds an air powered reversable drill motor perfectly vertical, and can be controlled carefully so taps are not broken by regulating the amount of air pressure provided to the machine.
Back at the sign shop, the boards, or sections of them, were selected and rough cut a bit oversize. The final width of the sign would require trimming down four boards 6” wide, each to a width a little over 4½” to get a dimension of 18½” in width, and the length of the board was to be approximately seven and a half feet long.
I dusted off the old table saw and made sure the saw blade was perfectly perpendicular at 90 degrees, then very carefully pushed the four boards through, trimming a little off both sides so their edges would fit together tightly. After having the boards the correct width and length, they were clamped together temporarily. Later these sign boards would be permanently secured together with three pieces of ½” x 1” channel-iron (steel), but those metal pieces would need to placed to avoid being in the way of any studs that would come through the sign to hold the letters and border in place. This meant I needed to position the text and border and drill holes for them before locating where the steel braces would go and securing them in place.
After carefully placing the border on the sign and marking its stud holes, a pattern, made from plotted out IP vinyl was thumb tacked on the face of the sign. Short, pointed studs were threaded into the backs of each letter, placed over the pattern accurately, and then pushed down hard enough to pierce the pattern and put puncture marks into the wood itself.
These tiny holes marked through the pattern were improved by hammering a nail into each hole about ¼” deep so they would be clearly seen once the pattern was removed. Then, using the “FlexArm” with a drill chuck in it, all the holes were drilled perfectly perpendicular without having to work too hard at it.
After all holes were drilled through, the sign was flipped on its face and the channel iron parts were located, using a router to make recessed grooves for this metal to fit into so they would be almost flush with the back of the sign.
Those three structural parts secured the boards together and the clamps were then removed. At this point the border and text were bolted in place after counter sinking each hole on the back of the sign for the nuts and washers to recess into.
The metal parts were uncoated, and really placed there as a sandblast mask, as blasting was the next step. We were a bit careful not to overdo it, because the actual grain was so different from board to board, but the blasting step did accentuate the grain and highlight that this really was a was a wooden sign.
Four more steps remained: taking off the metal parts and powder coating them white, painting the background with a high-quality acrylic latex paint, installing the metal parts, and then heading to Tyler to install the sign. Paint was used instead of any type of stain because the client had said they did not want to have to maintain the sign and a sign with just stain and sealer would have to be redone every a few years.
Actually, before we could get over there and install the sign, there was one extra step that had to be dealt with, and that was securing the required permit so we could do the install legally. At that point everything stopped. The staff at the city, especially through the holidays, admitted they were understaffed and over worked. And though this unlighted sign, a simple replacement of an existing one should have been a rubber stamp job, most sign guys know that seldom happens. It didn’t happen in this case either.
In fact it took longer to get the permit secured than it took to produce the sign itself. Multiple emails, phone calls, online application filing, not quite right so try again, wait some more, try again, call again, email for help… etc., etc., etc.
I guess this gave me time to come up with a simple way to conceal the install hardware, which is shown in these photos, and this was done by making a couple of special “hook” brackets to mount to the brick, and routing out sockets for the hooks to fit in on the top-rear of the sign. Flat steel brackets would hang on the hooks. On the jobsite, the “hook brackets” were secured in the exact right places on the brick monument; the sign was merely set in place.
With the sign hanging in place, the location of the exact bottom edge of the sign was marked on the brick. A strip of prefinished aluminum had been bent on a brake to make piece of light angle four feet long, and once the bottom of the sign was marked, the sign was temporarily set aside and this angle piece was screwed to the bricks with anchors and screws. The sign was set back on the hooks, and a couple of wood screws were screwed into the bottom of the sign through the aluminum angle to secure the bottom edge of the sign. This was totally invisible but would keep anyone from being able to just lift the sign off the hooks and carry it off.
The installation was the easiest part, and witnessed by several members of the homeowner’s board, all commenting on how lovely their new sign was, and how glad they were to see it going up. They didn’t care if it was solid sandblasted cedar or the raised letter version I came up with; they were glad to see the thing look new again and not have to worry about it.
For me, it was a fun job and a little different than most signs we do. It is rare that with just one sign we could make multiple clients happy at the same time, but we met several of them and they were all very pleased. Making people glad they hired you is one of the real rewards of the sign business, and it’s certainly one that I never get tired of.