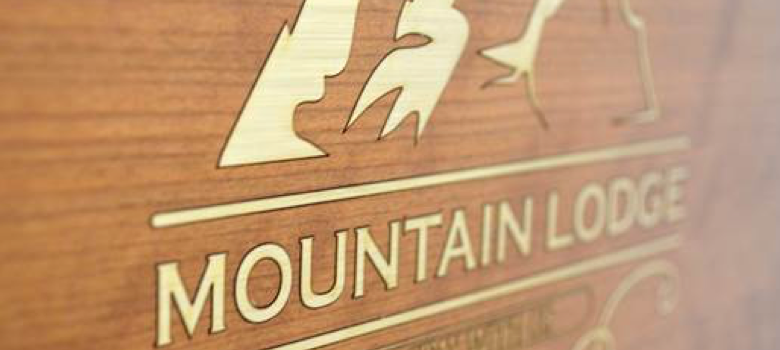
From rustic to high-end, wood has so many finishes and applications: awards, signage, packaging, gifts, and so on. Step up your woodgrain game by adding metallic accents to your work without using actual metal, which can cost big in time and resources. In this example, we’ll focus on a small signage project.
All you need is a CO2 laser and a sheet of laser foil. We used a solid-colored, 2-mm thick mylar tape with permanent acrylic adhesive. It is ideal for precise laser cutout projects, particularly on wood.
You may use laser foil on any other surface or engraving material to add extra color. I also recommend marble, plastic, and anything laser-friendly that is non-porous.
Materials Needed:
- Metallic laser foil (Used here: brushed gold)
- Wood sign
- Laser system (Used here: 25-watt Gravograph LS100 Energy CO2 laser)
Settings Used:
- Power: 25 percent
- Speed: 20 percent
- Vector cutting
Step One: Cut foil
Start by measuring the engraving area and cutting a piece of a laser foil accordingly. Carefully apply it to a wood plank; however, just like with any sticker, make sure your engraving surface is clean, as trapped particles become visible under the foil or cause it to produce bubbles.
Step Two: Engrave
Next, send your design to your laser and start engraving.
Step Three: Finishing touches
Once the engraving is completed, peel off any extra foil to reveal your design. The more intricate your design, the more finishing clean-up you may have to do.
Once you’ve lifted the edges of excess foil and scraped them away, you can clear any debris by using a microfiber cloth to wipe off the surface.
-Elena Iogha, Gravotech


