Powder-coated stainless-steel tumblers are a popular commodity. One way to add a custom twist is with a double etched image. You can create a new look using an image overlay technique and sandcarving with photoresist film. Follow the steps below to learn how…
Materials Needed:
- Powder-coated stainless-steel tumbler
- SR3000 Self-Stick film or SR2000 and apply adhesive, or similar products (Note: In this project, SR3000 Self-Stick 5Mil film is used because the design is wrapped around the tumbler and allows repositioning if necessary. Since the surface has a slight texture, the SR3000 Self-Stick film may not adhere well at first. Applying the Self-Stick photomask to a damp shammy towel prior to application provides enough tack to adhere to the texture surface.)
- Photoresist film
- Image
- Vinyl tape
- Wire wheel
- Sandcarving system
- Silicon carbide (Note: Aluminum oxide or silicon carbide media can also be used)
- Two colors of paint (Used here: Hardcore glossy black and Belton Molotow opaque spray paint in pink. Both of these paints can be purchased at www.artprimo.com. These paints are mural artist paints and have interchangeable caps for control of the spray pattern, which make it easy to paint.)
- Squeegee
- Glass cleaner
Settings Used:
- Grit: 150
- PSI: 40
- Nozzle size: 3/32-inch
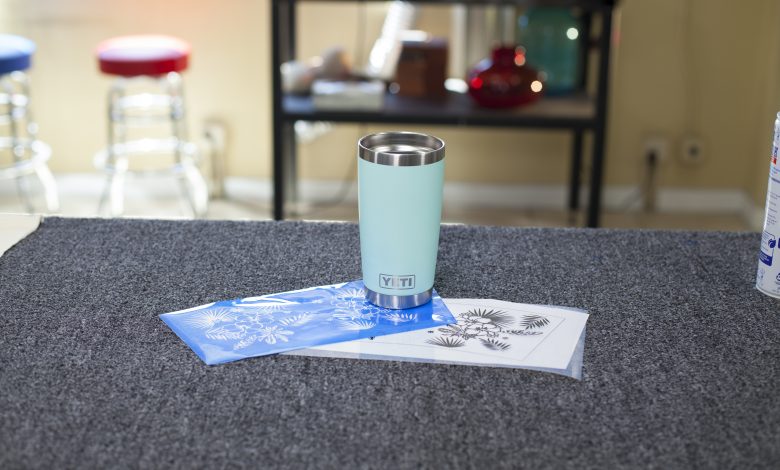
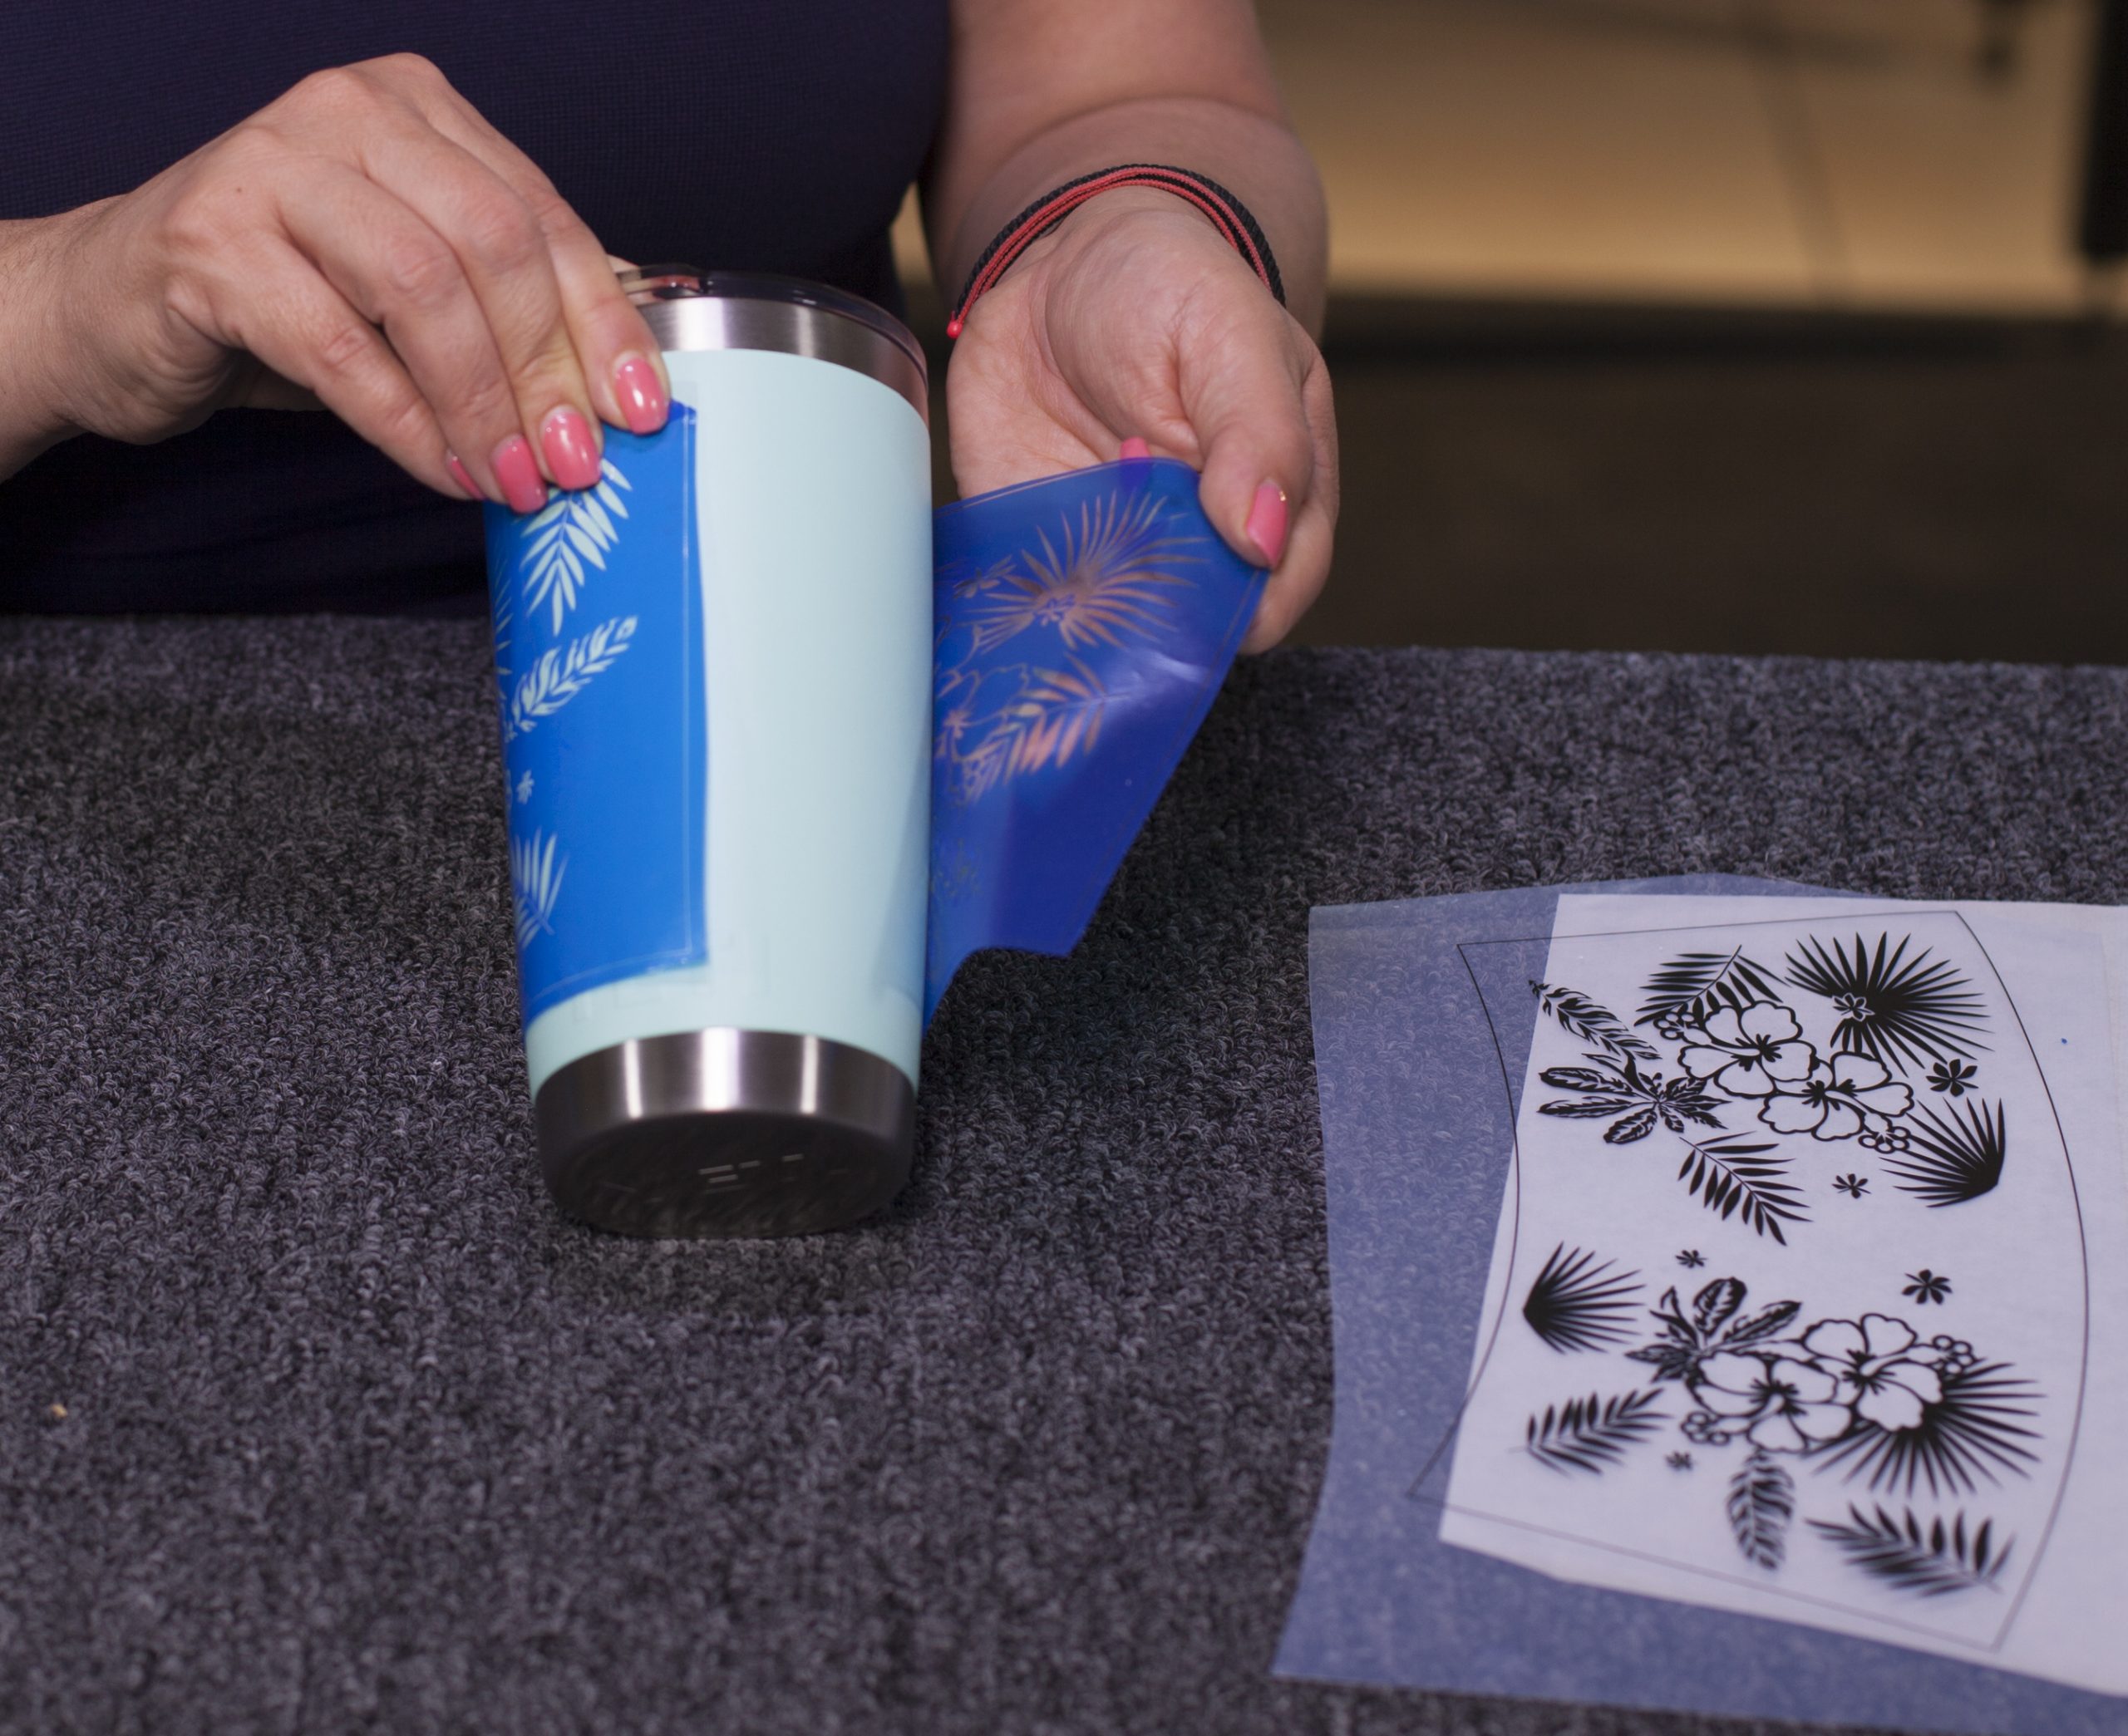
Step One: Prepping first image for sandcarving
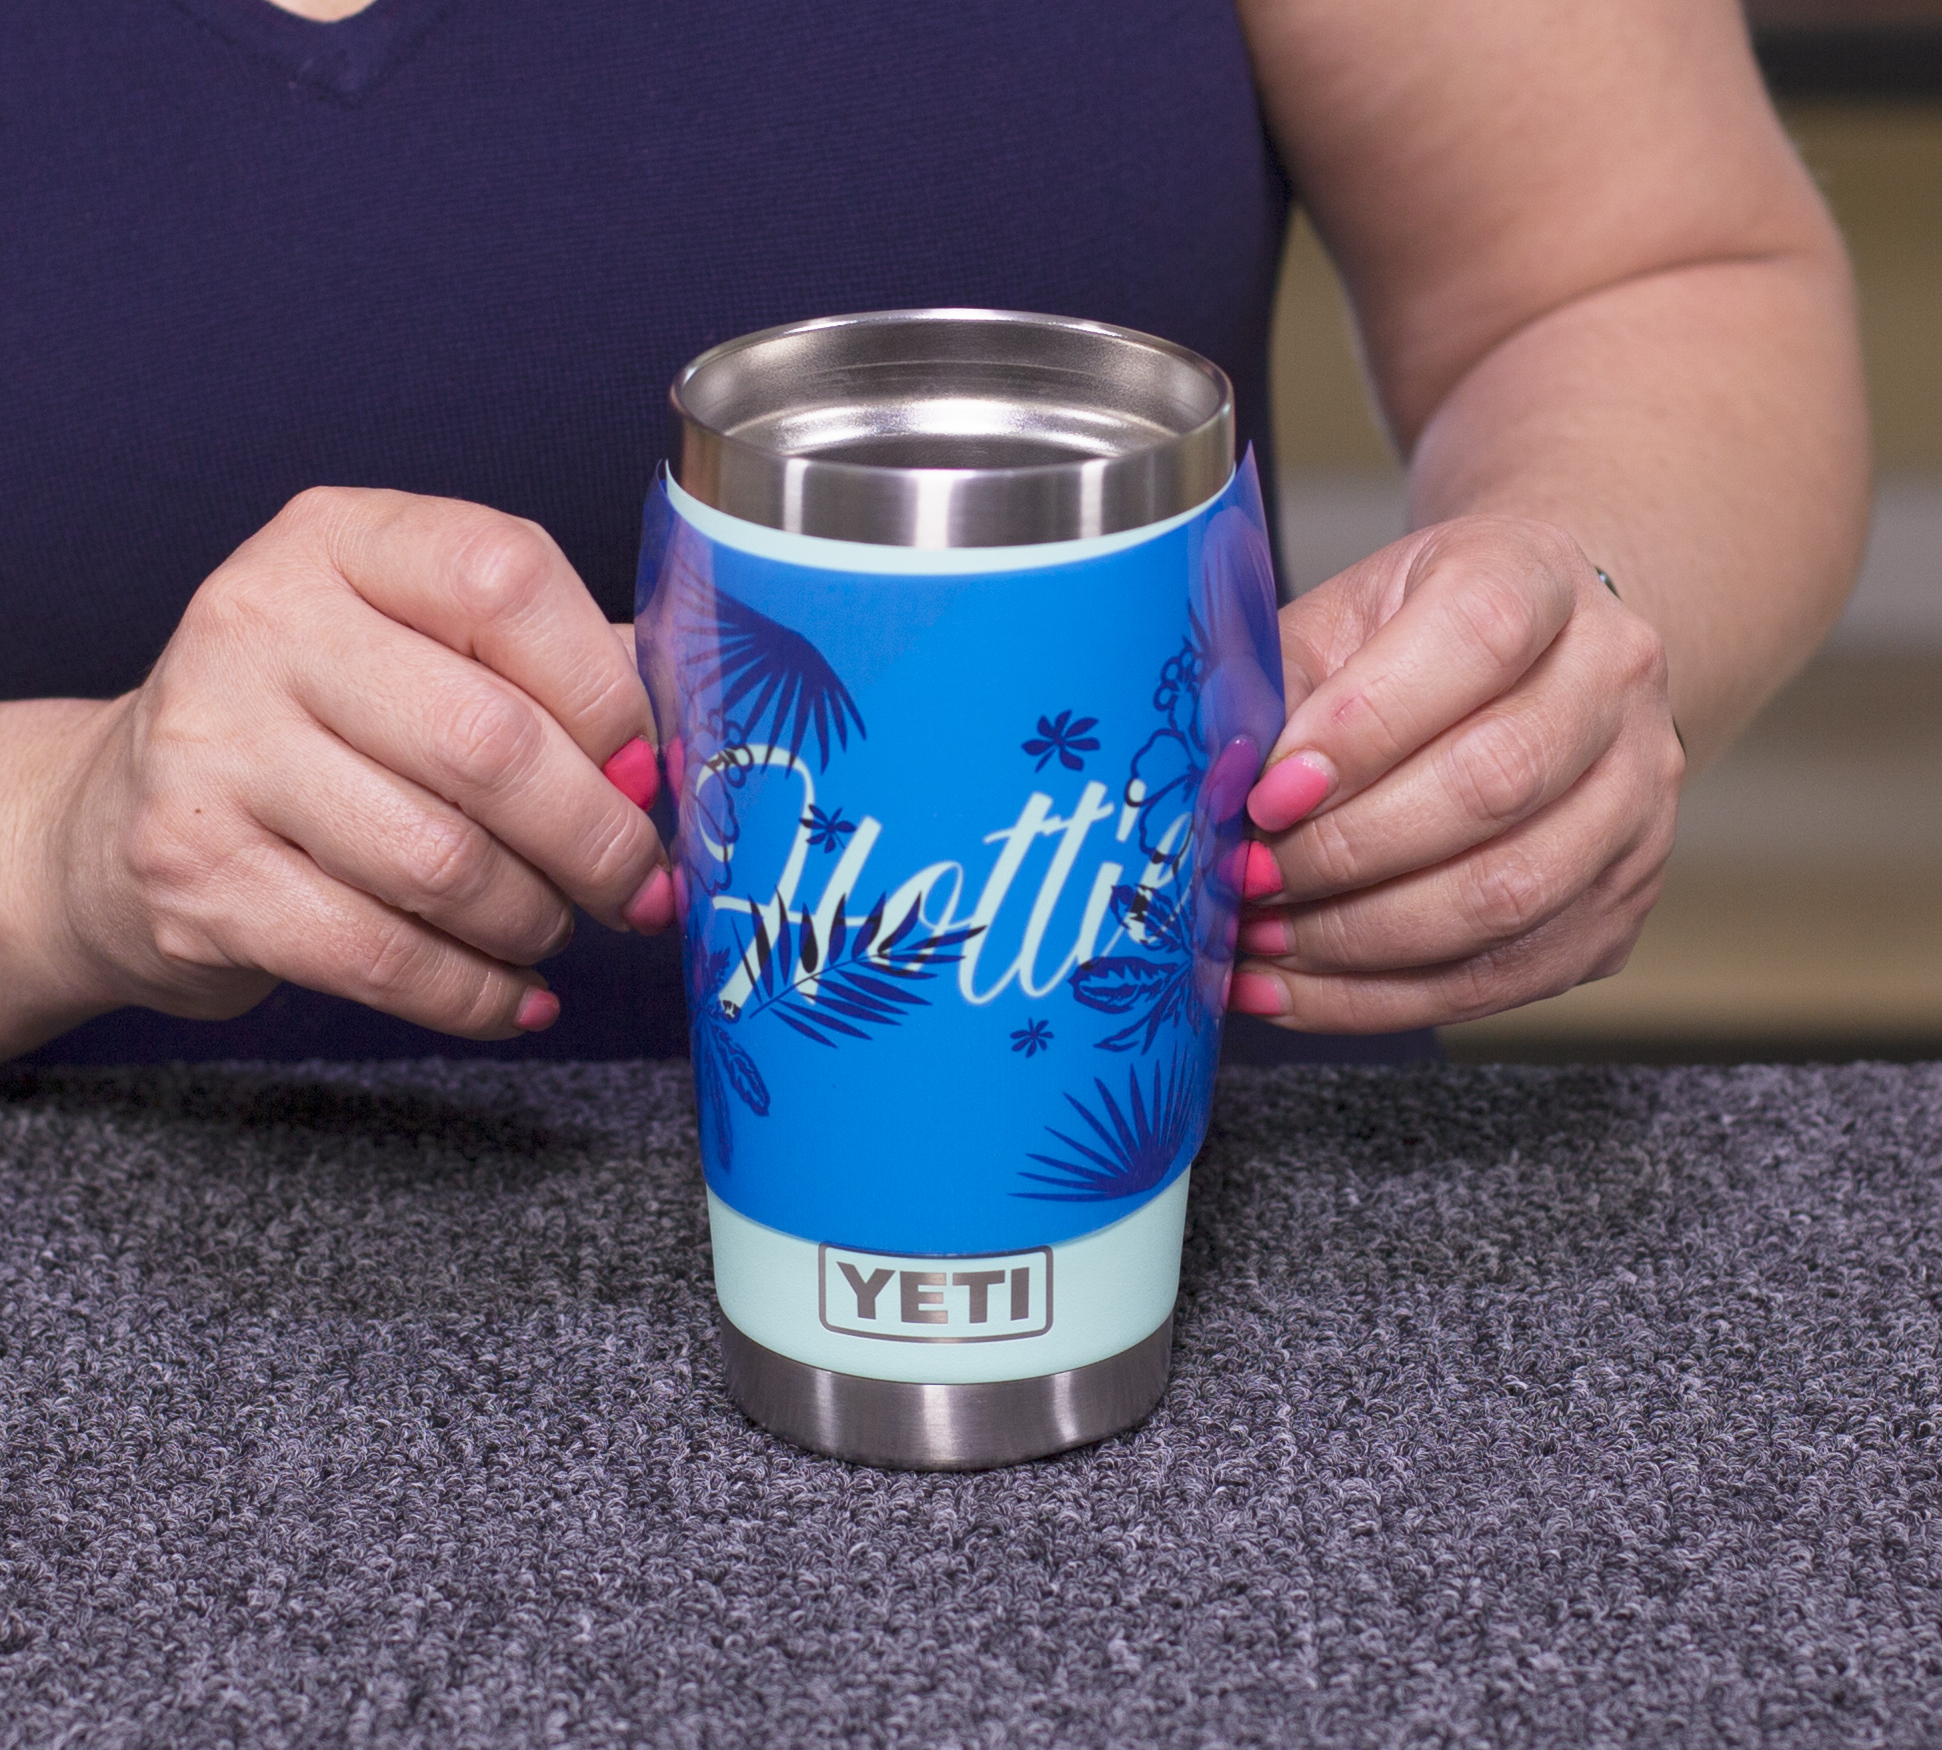
I chose to wrap a flower leaf pattern over the entire surface and will later add text over the top of the pattern. This particular tumbler tapered slightly at the bottom, therefore, my artwork was placed on a curve to compensate for the tapered style.
Apply the photomask to the tumbler and squeegee with pressure. Then, apply vinyl tape to exposed area, and use a wire wheel brush over entire surface.
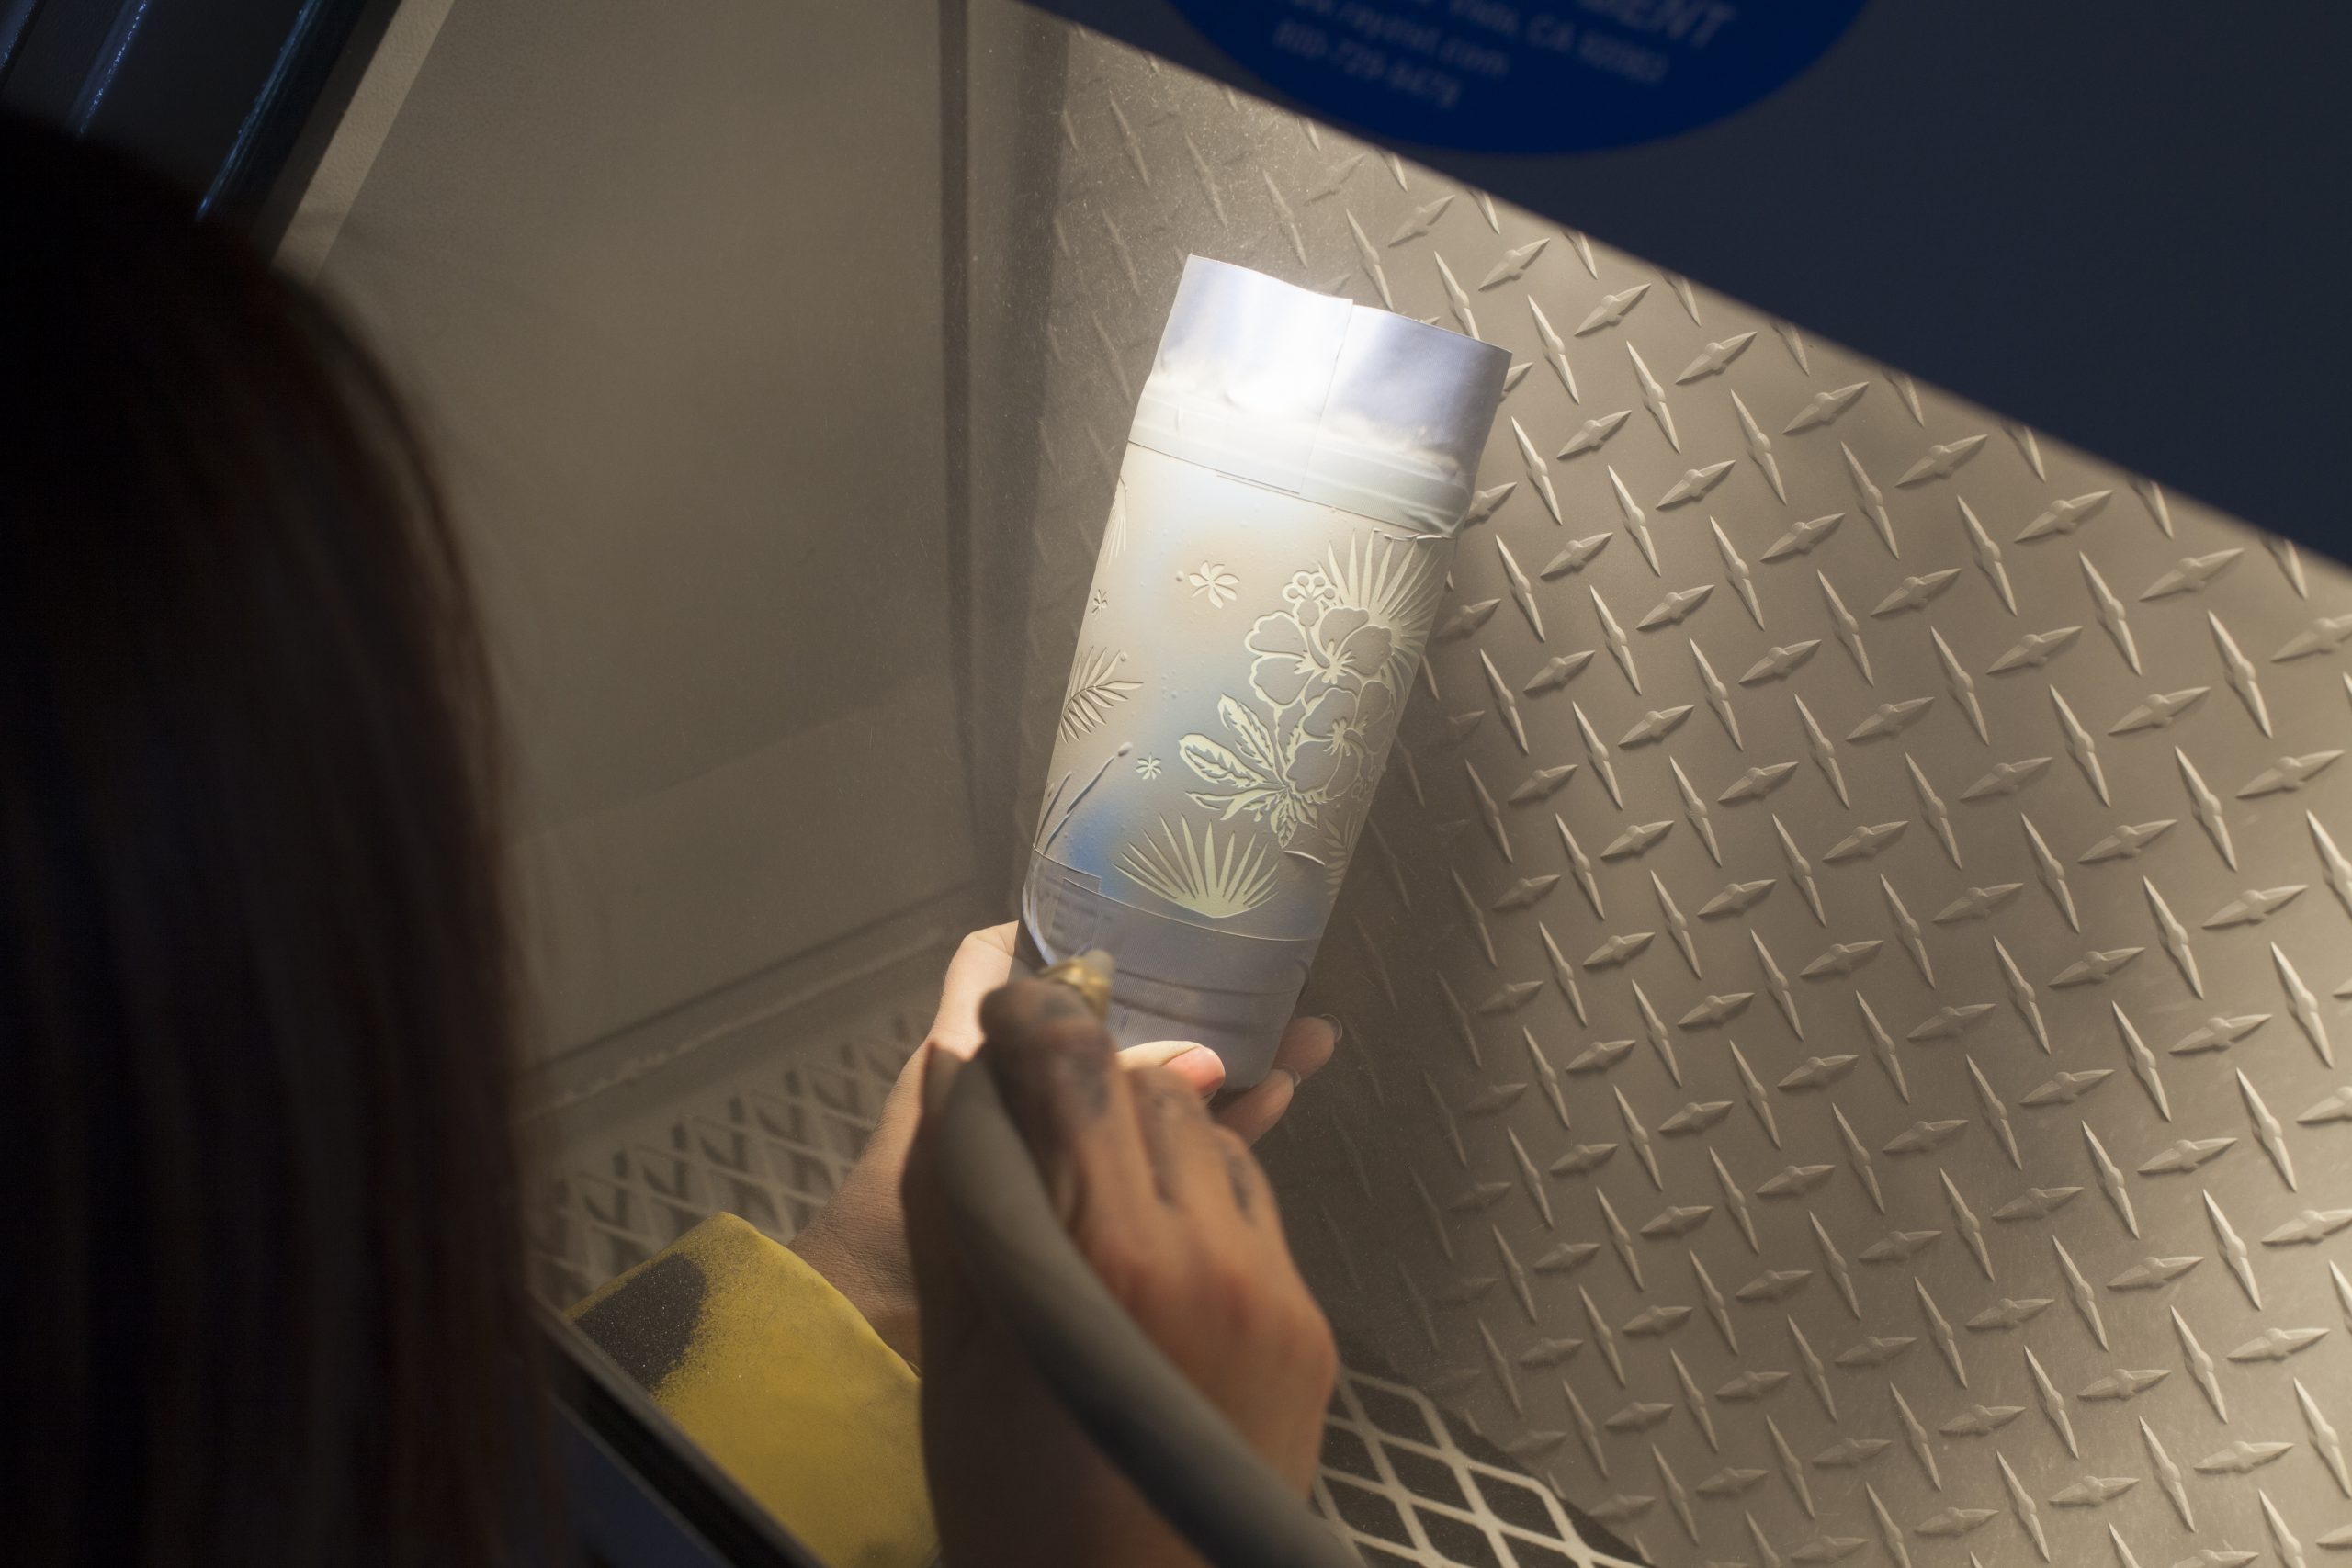
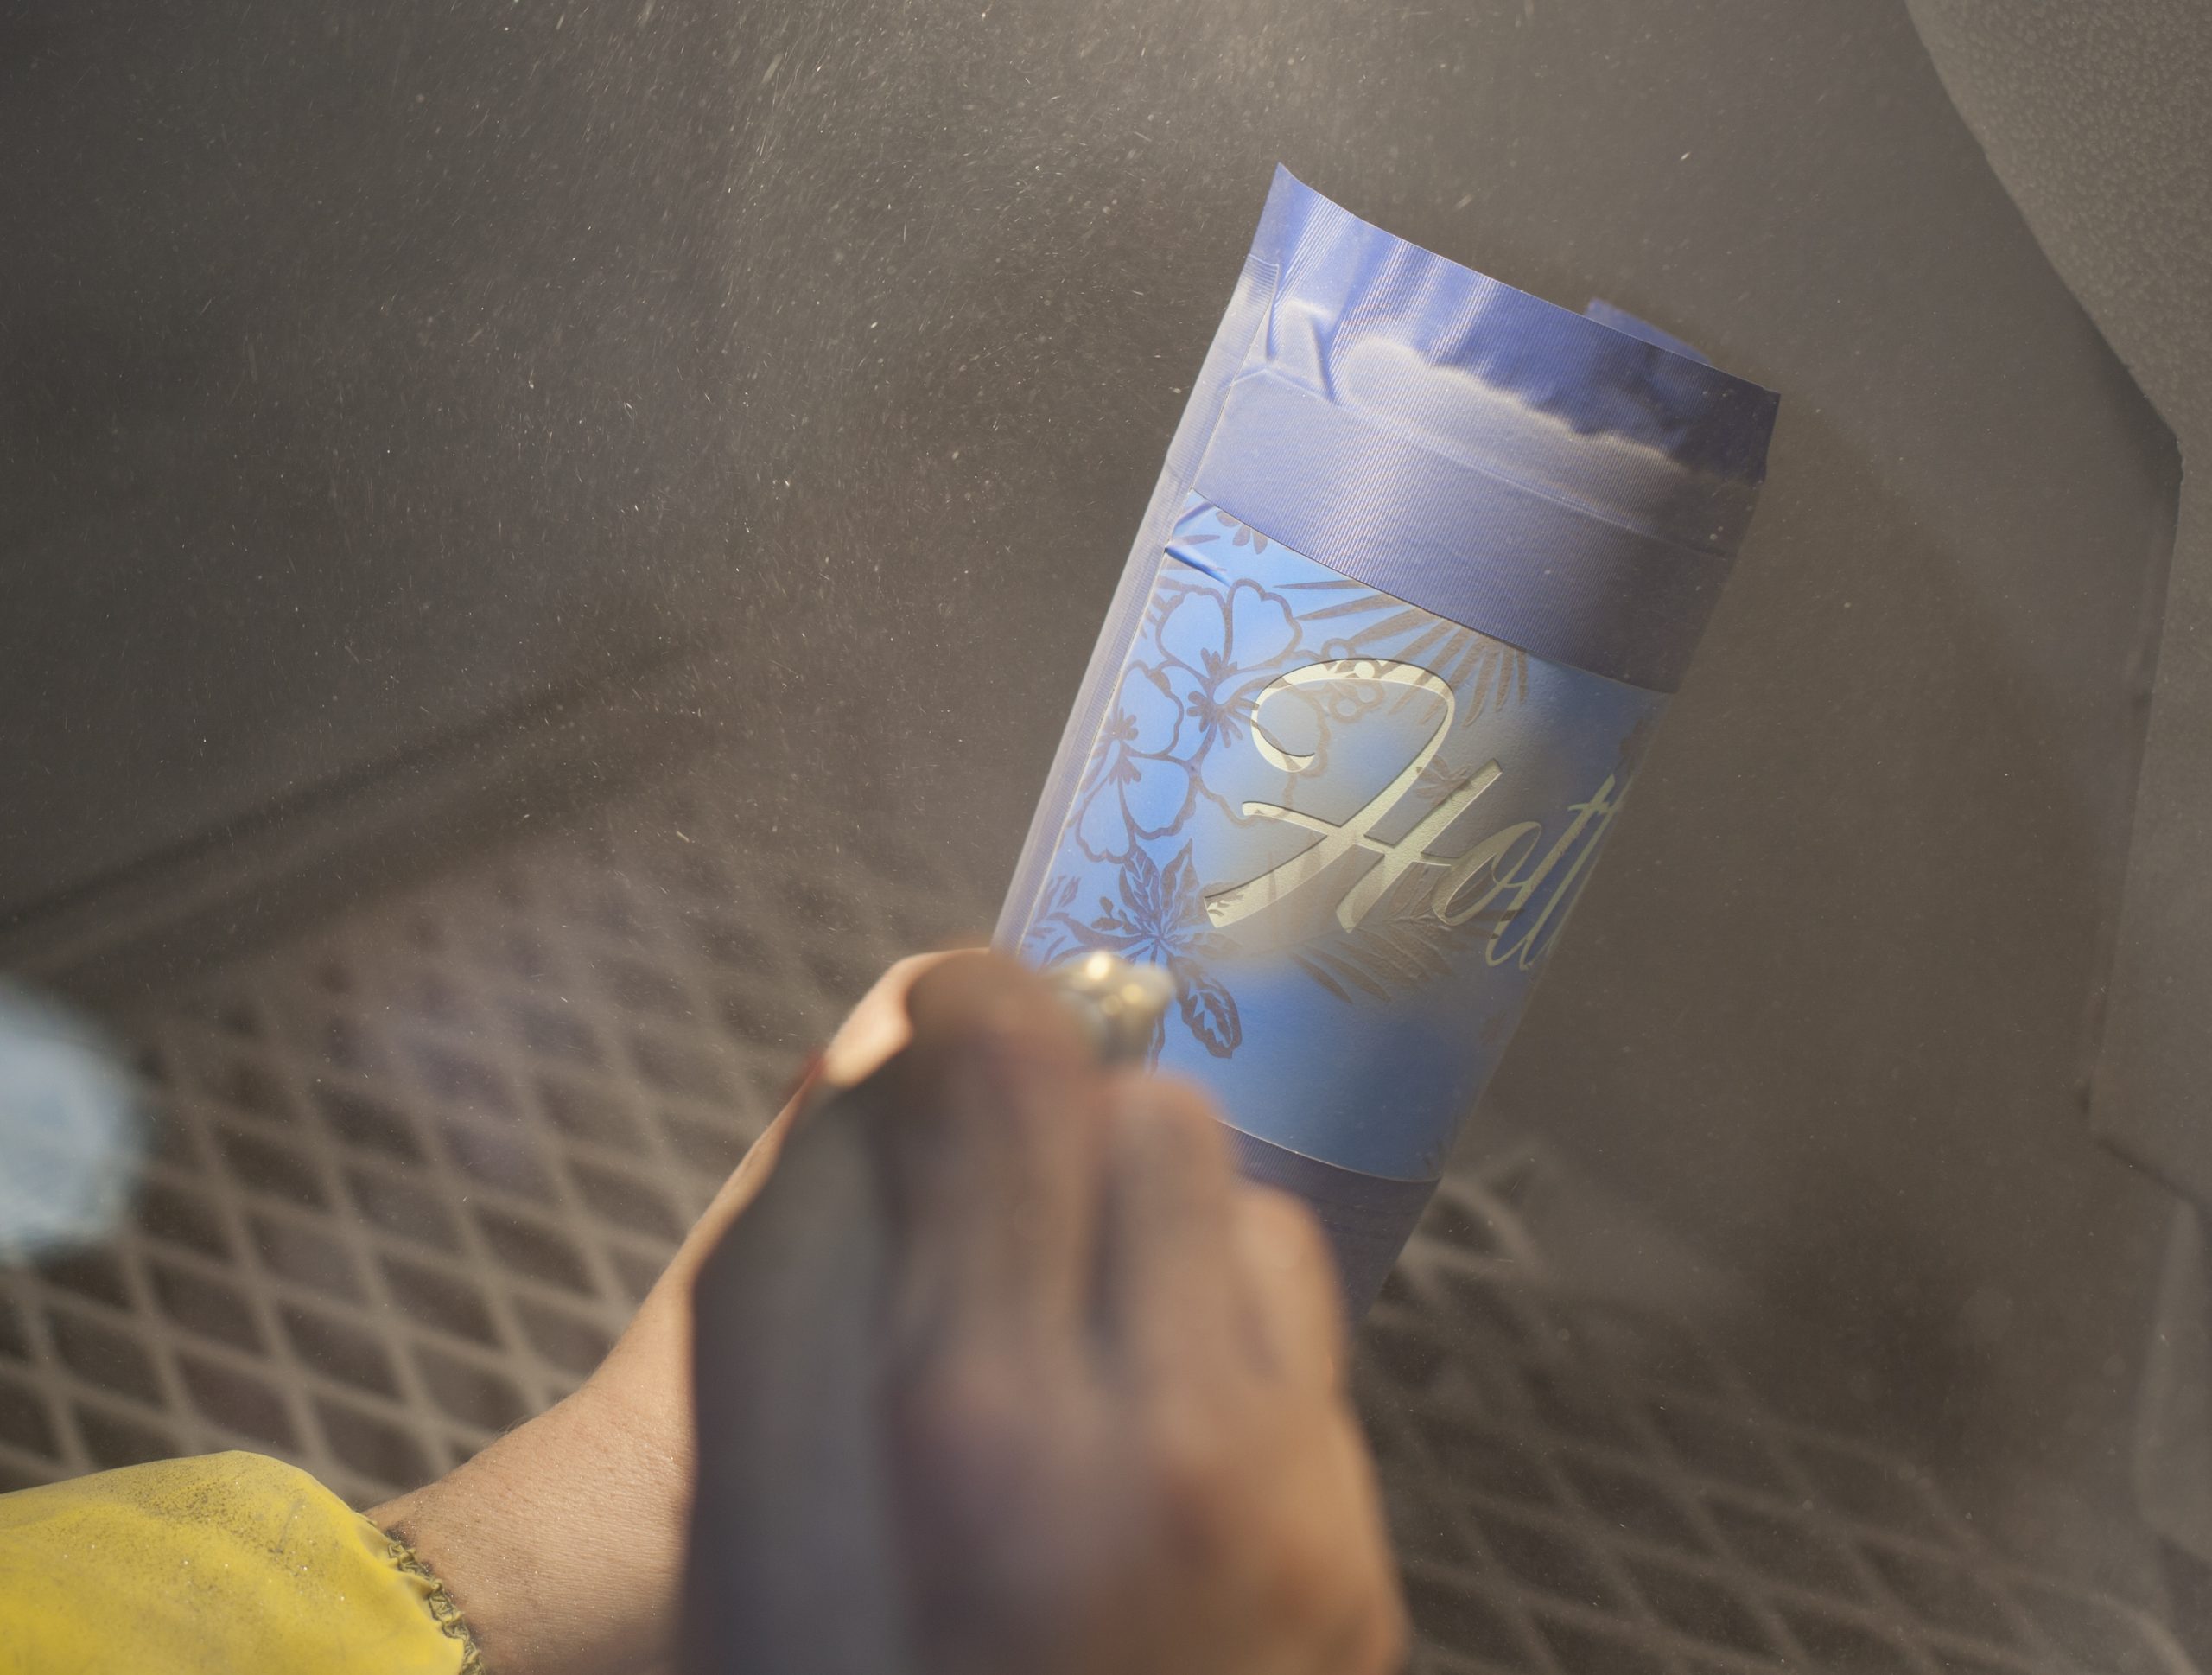
Step Two: Sandcarve
Blast using the settings listed above until the powder-coated surface is removed, revealing the silver color.
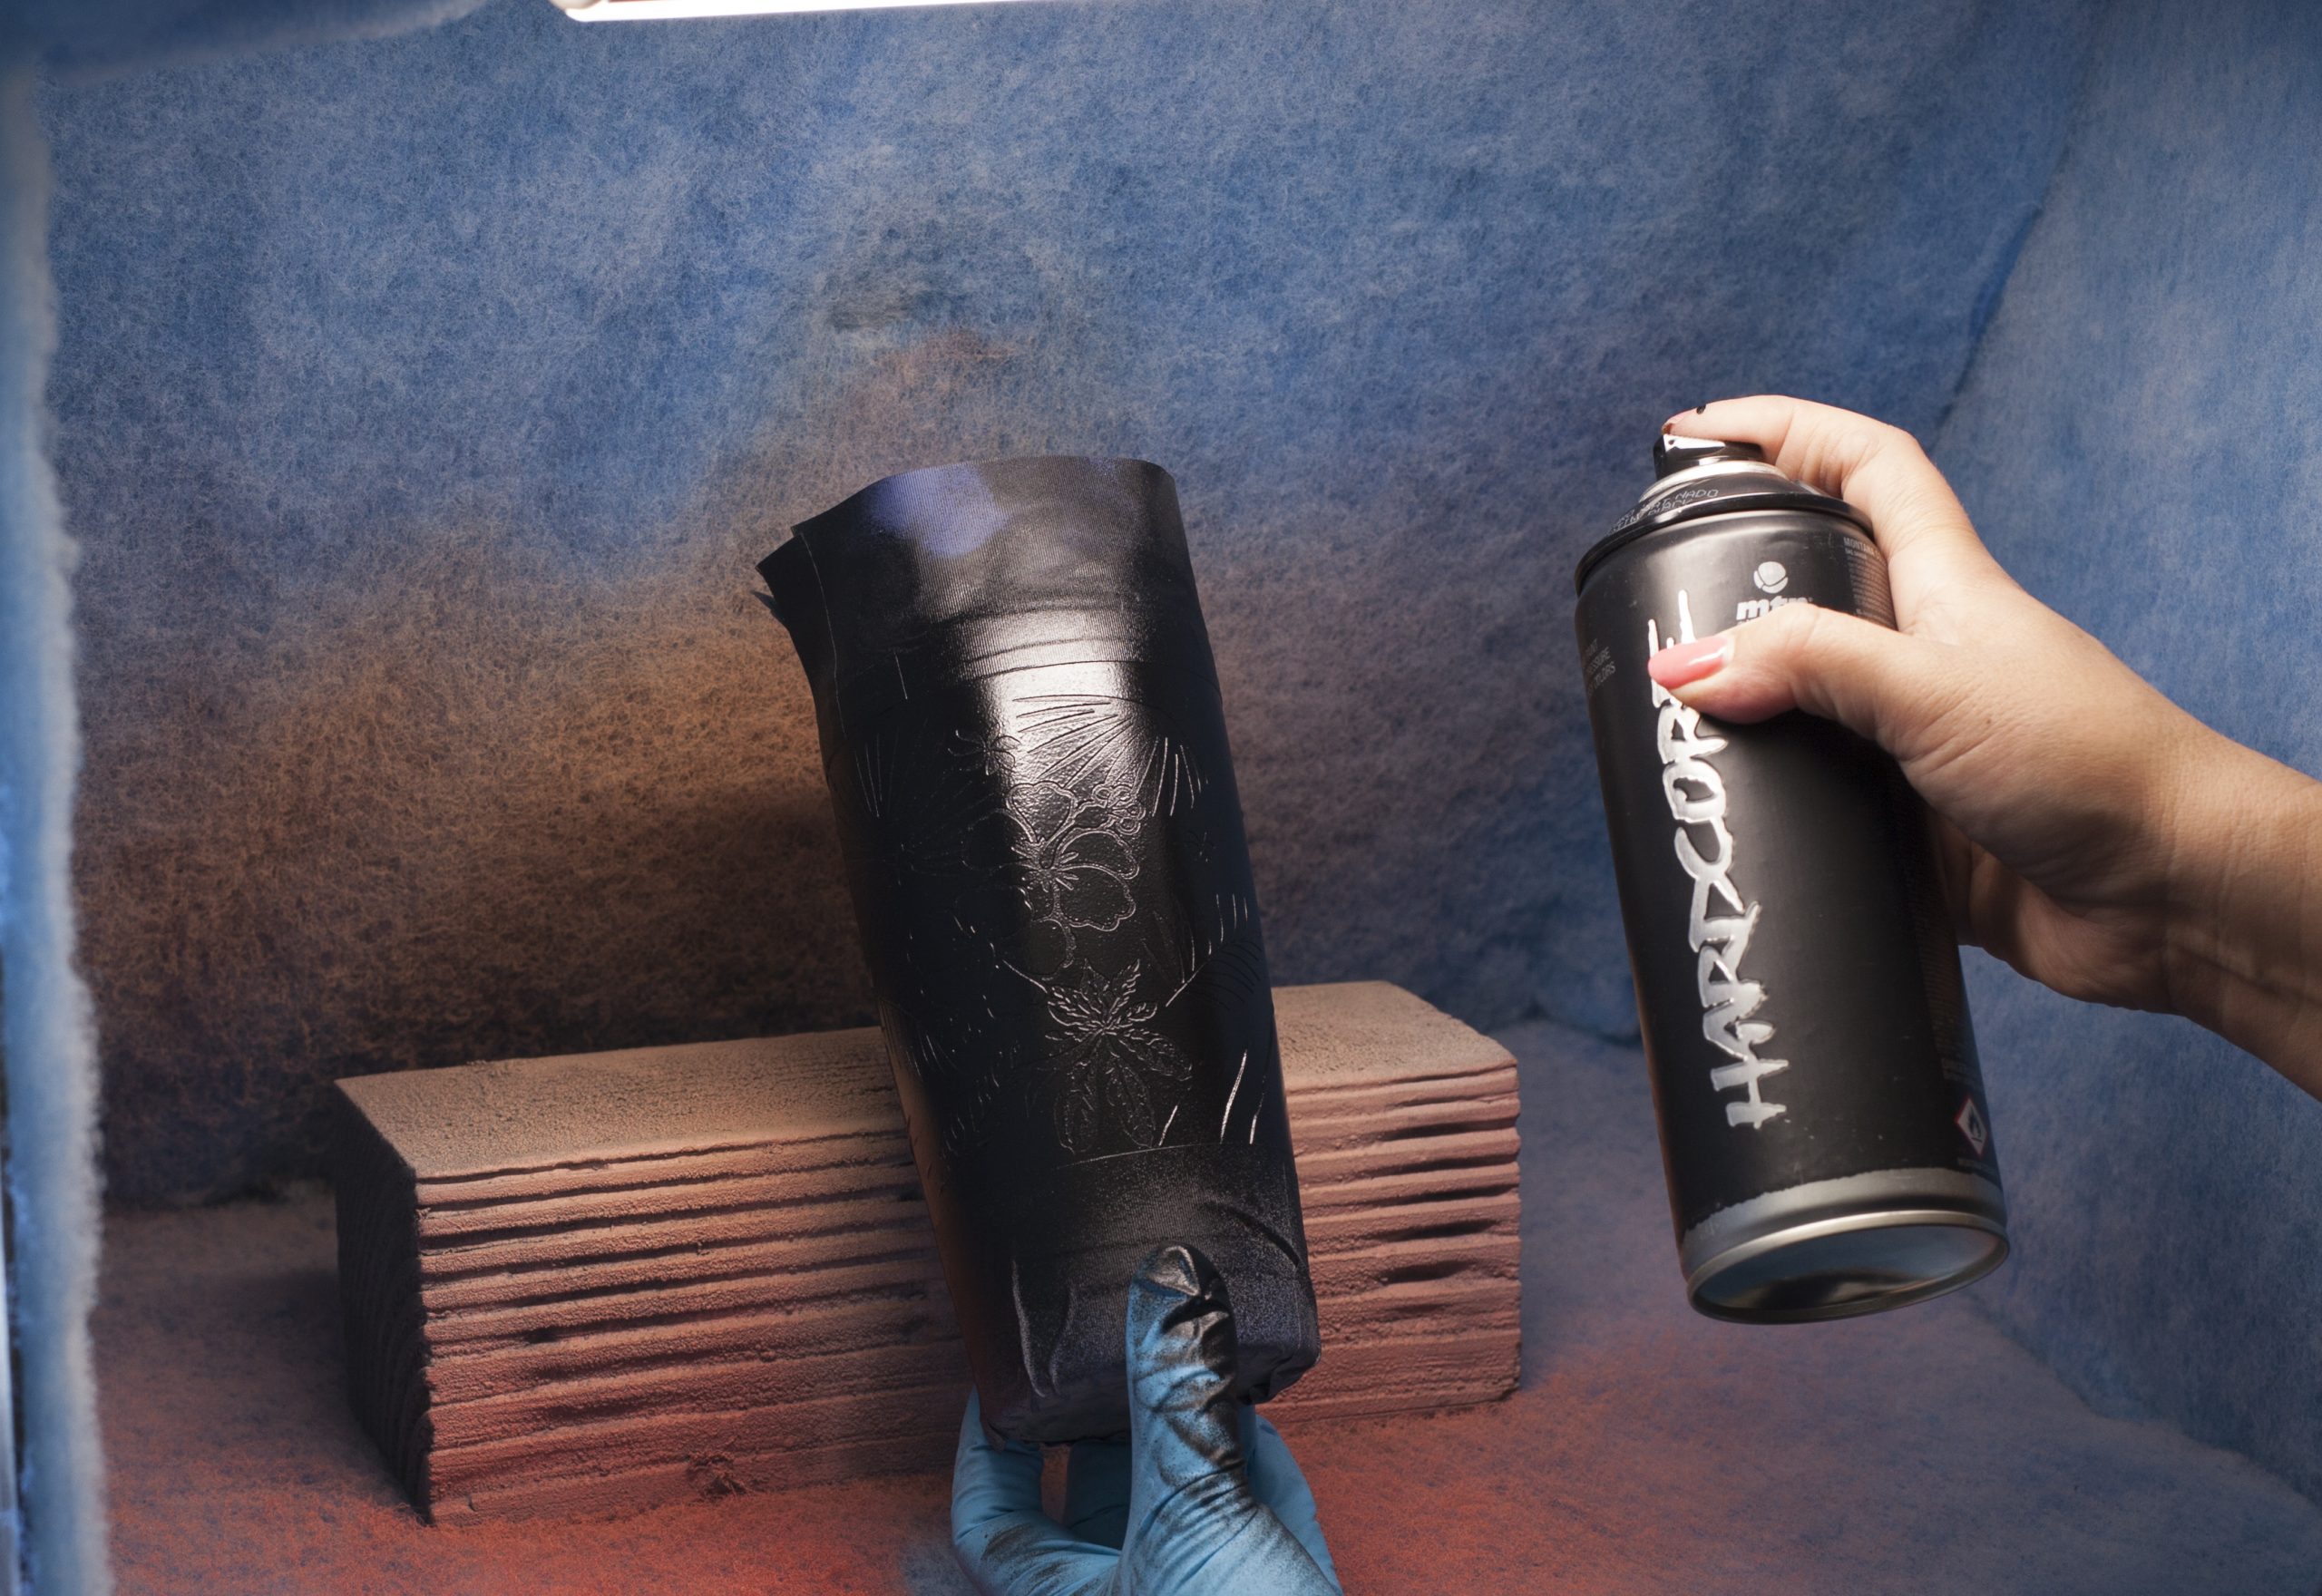
Step Three: Paint
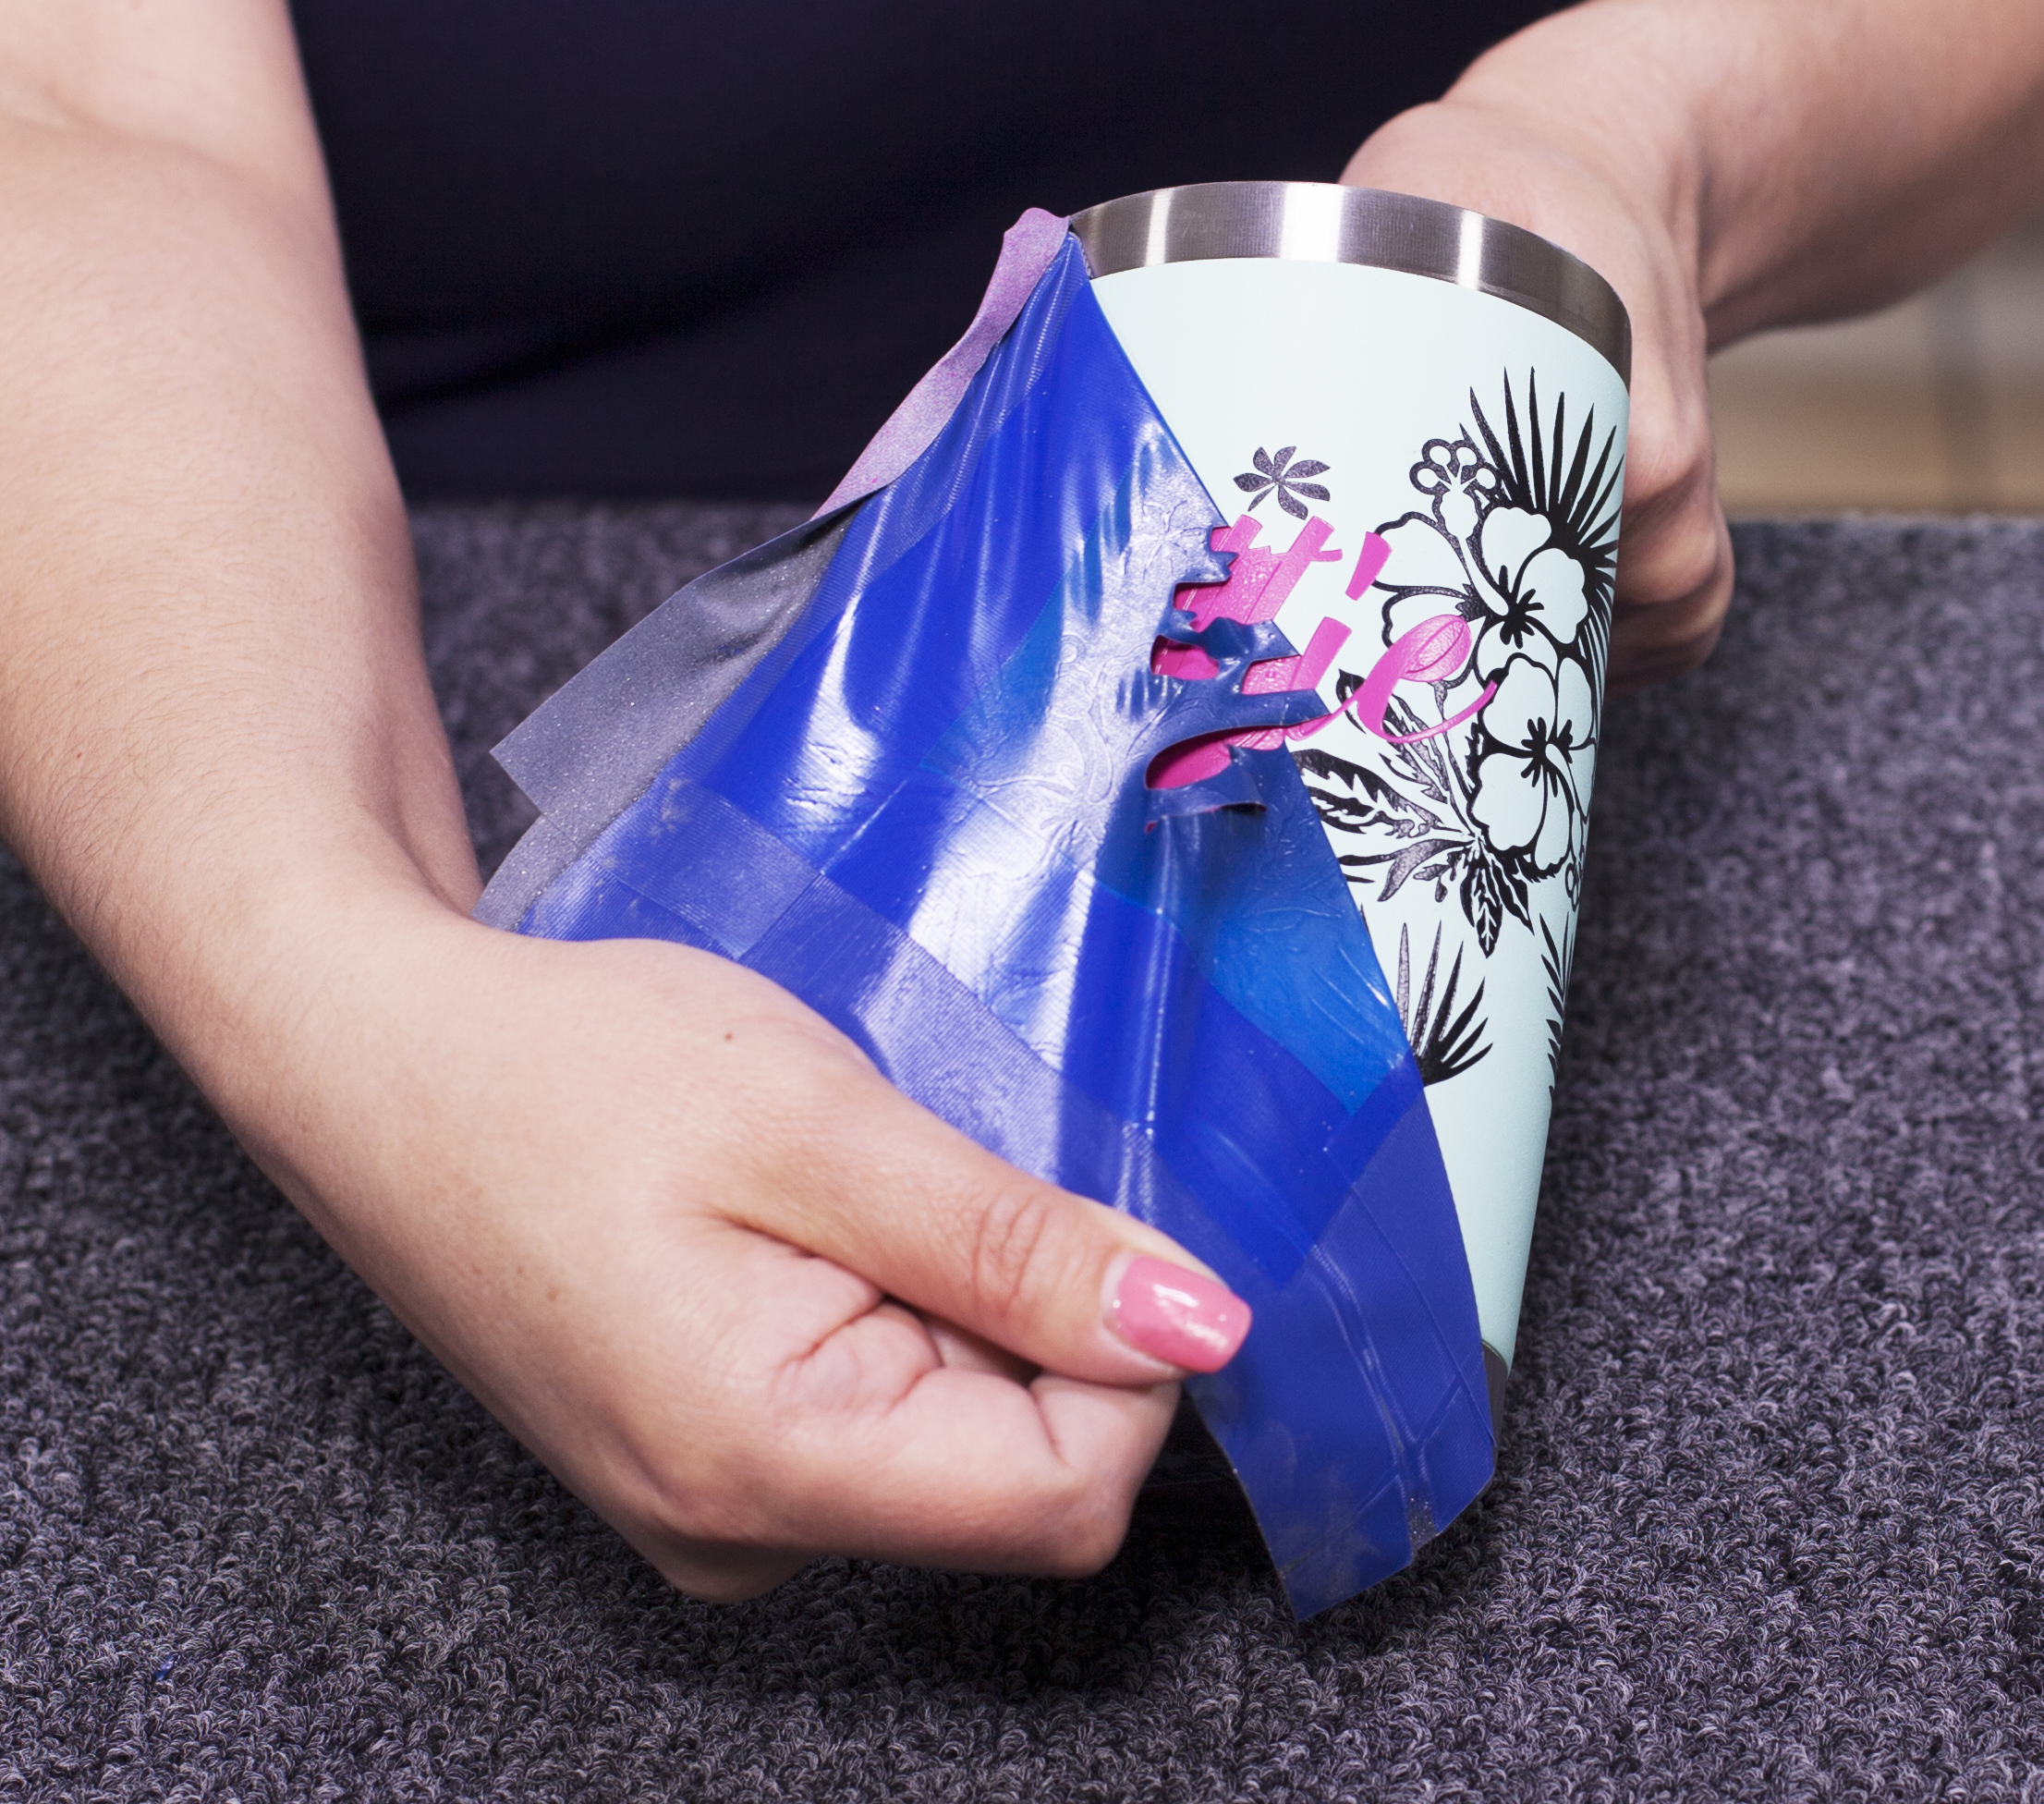
I wanted a glossy finish for the black paint, so I used hardcore black paint for the first color. Once the paint is dry, remove the photomask and clean with glass cleaner.
Note: Glossy paints tend to take longer to dry.
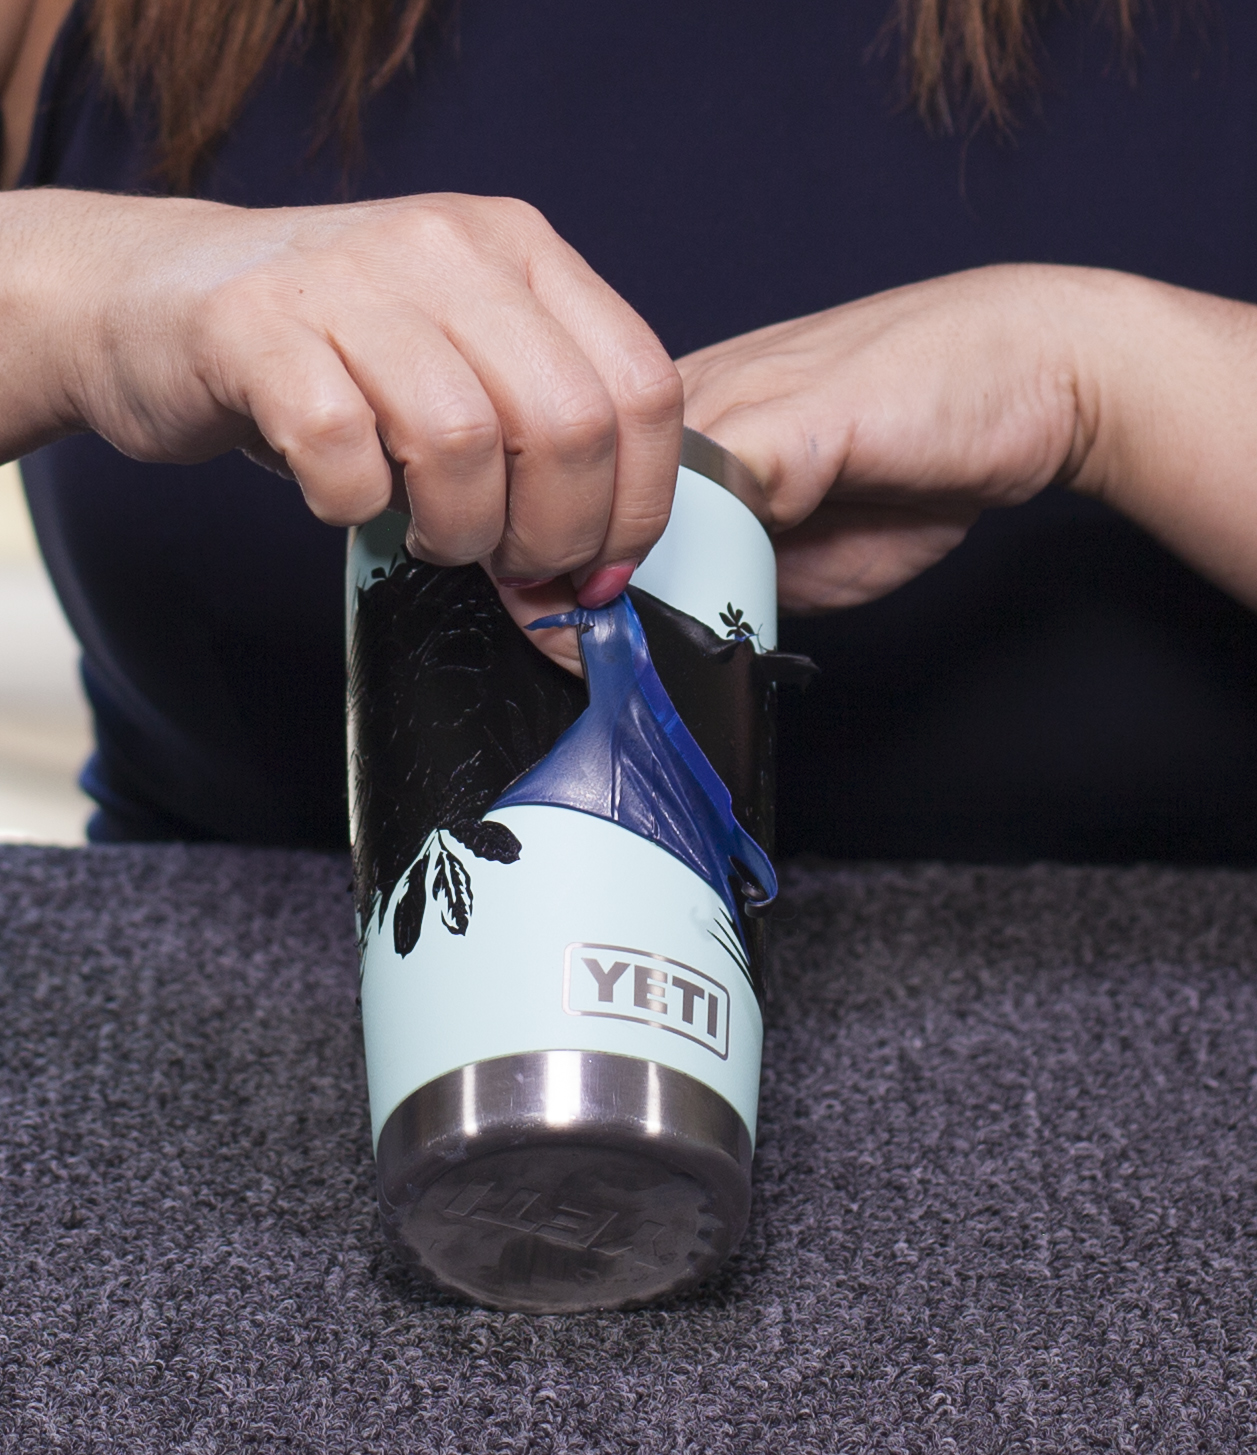
Step Four: Prepping second image for sandcarving
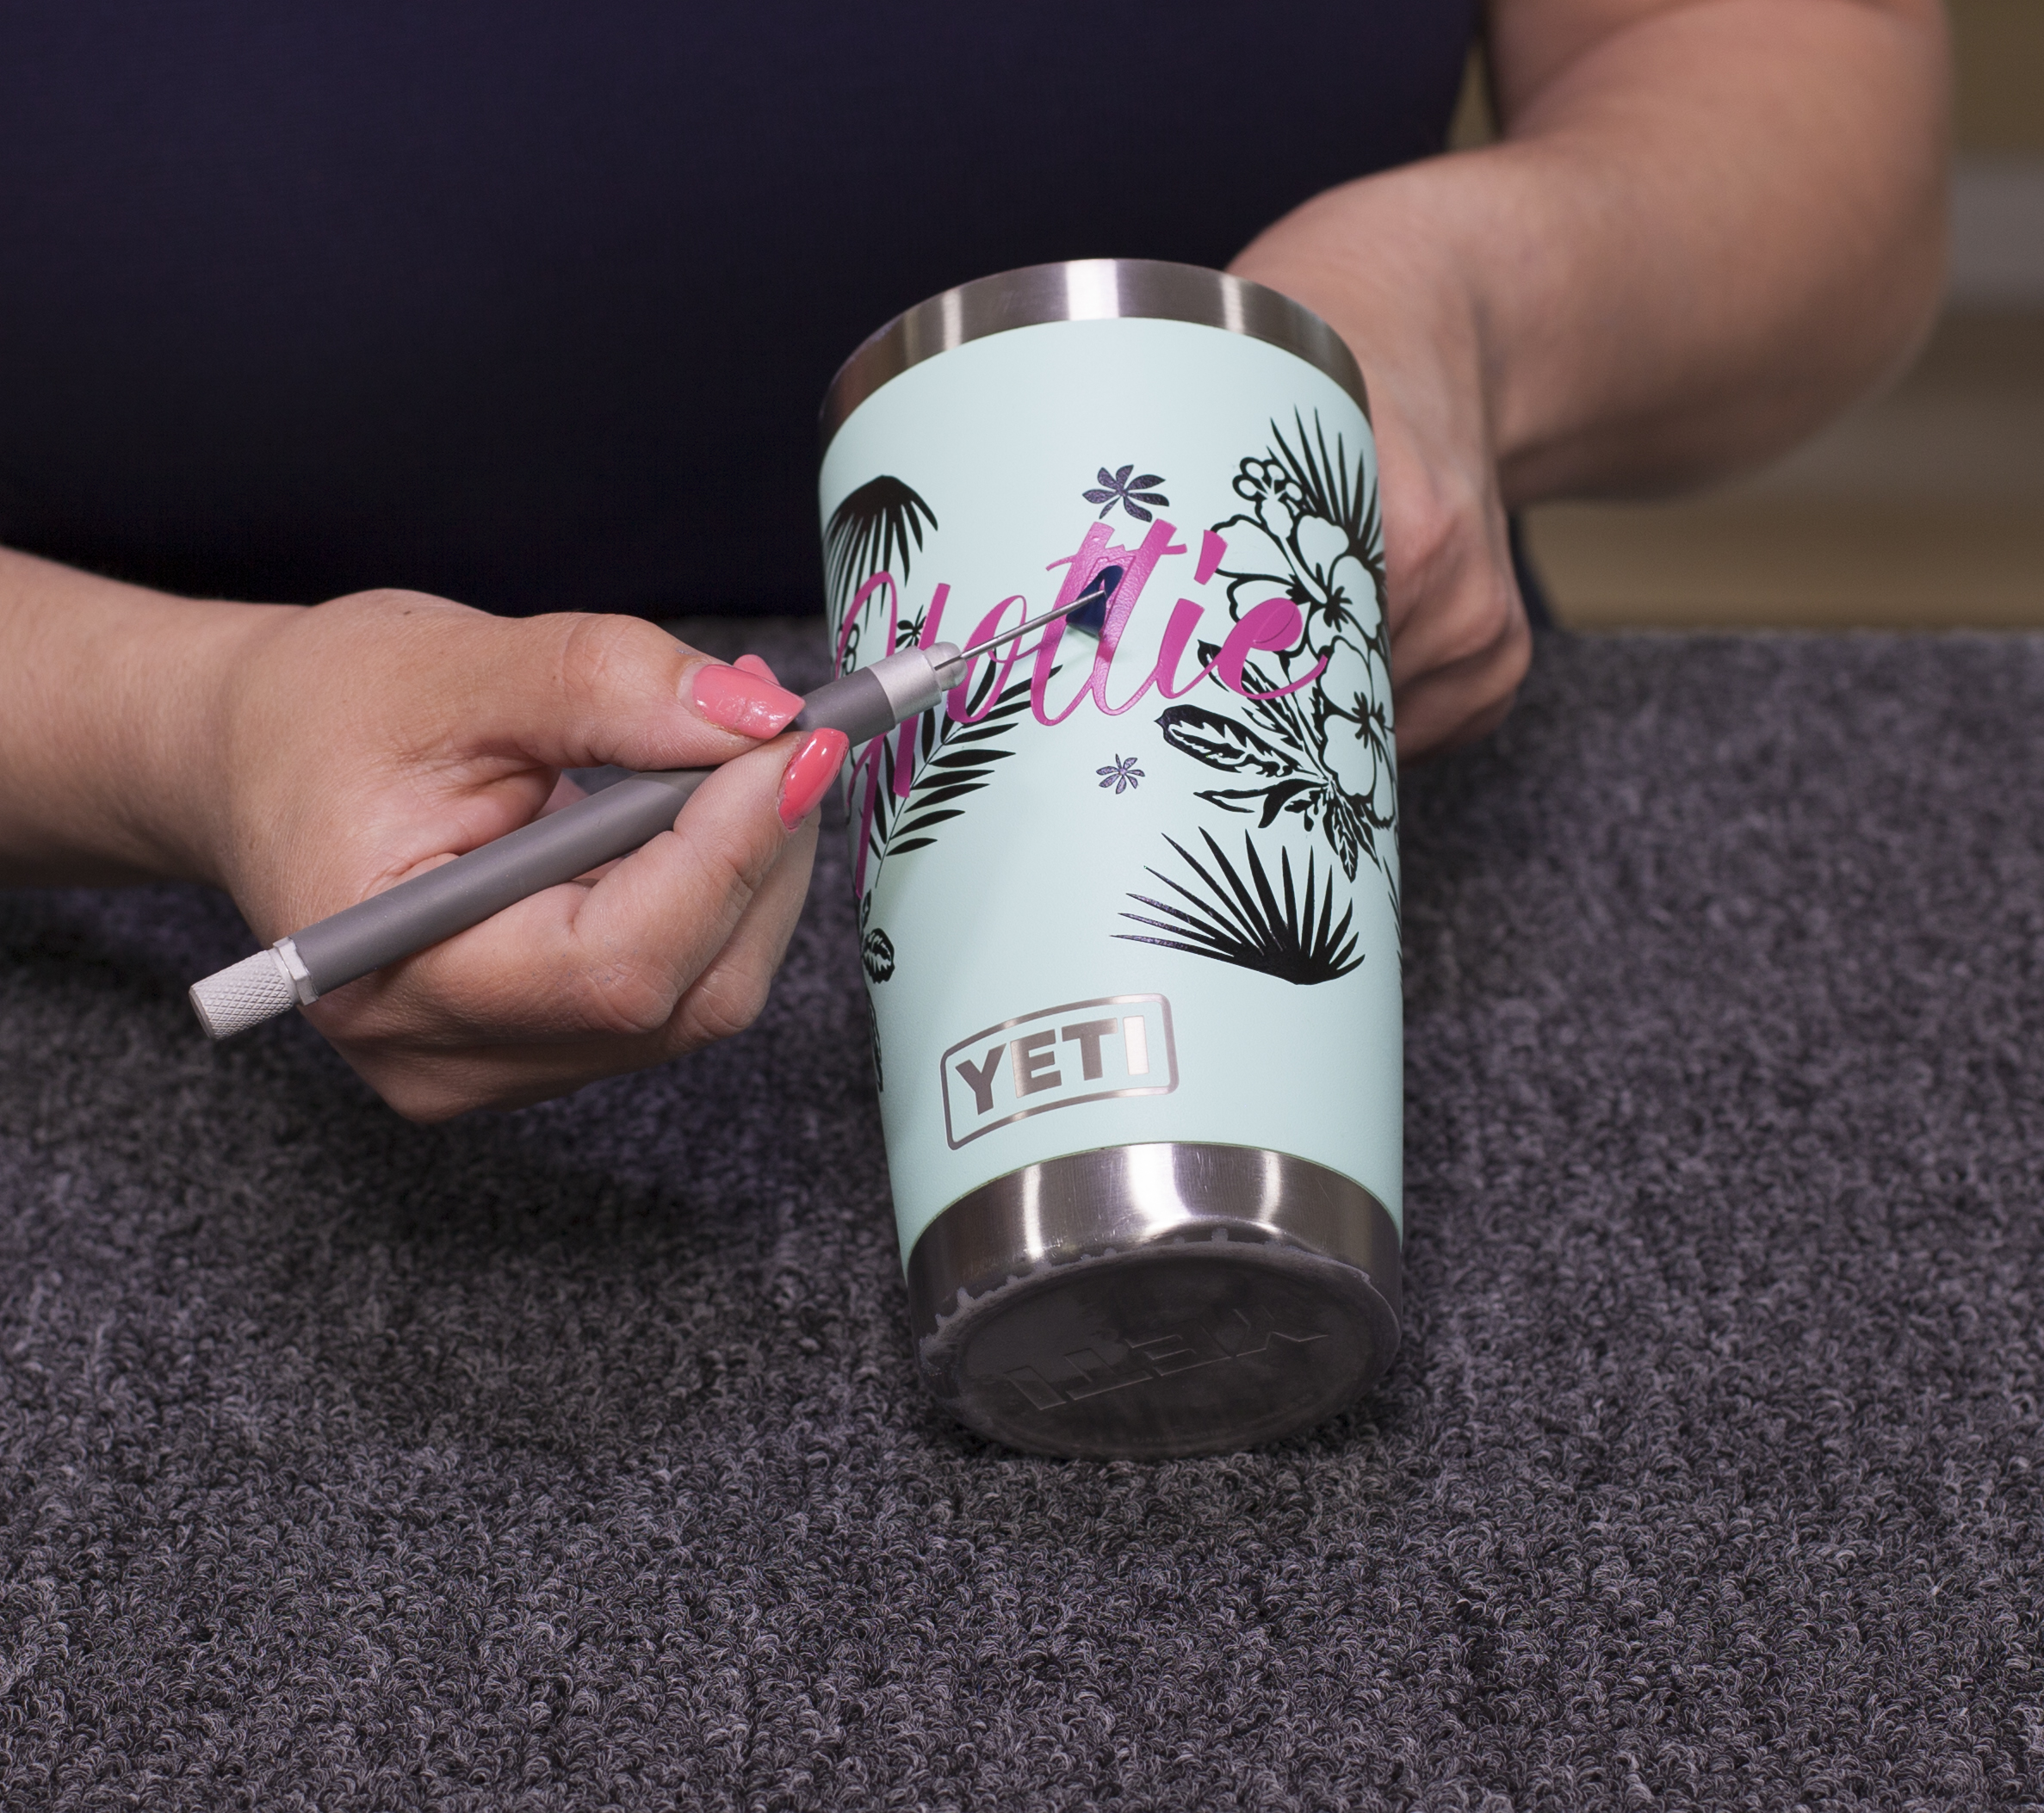
Apply the second photomask onto the tumbler and squeegee with pressure. This second image will be an overlay on the first image.
Tip: Ensure that the first layer of paint is dry before applying the overlay photomask.
Apply sandblast vinyl tape to cover the exposed area on the front of the tumbler and use a wire wheel brush over photomask.
Step Five: Sandcarve
Blast until the powder-coated surface and first layer is removed, revealing the silver color. The second image should look smooth, showing no trace of the first image.
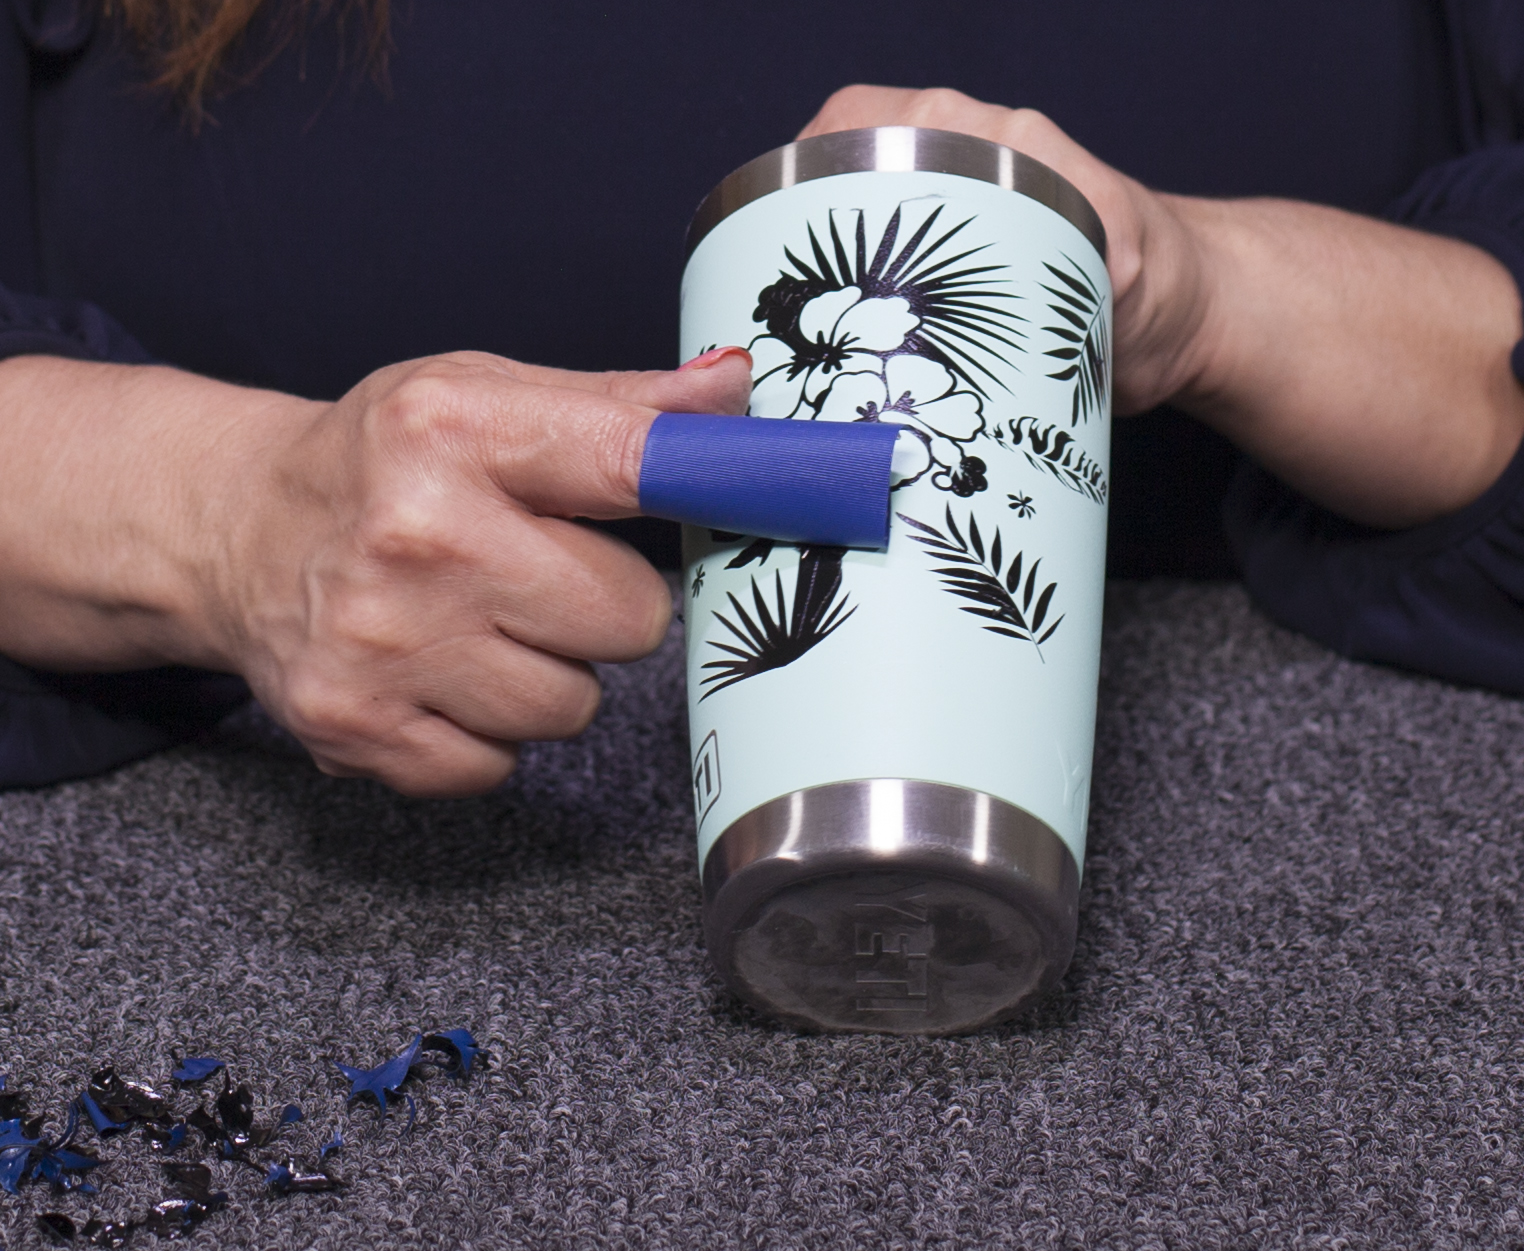
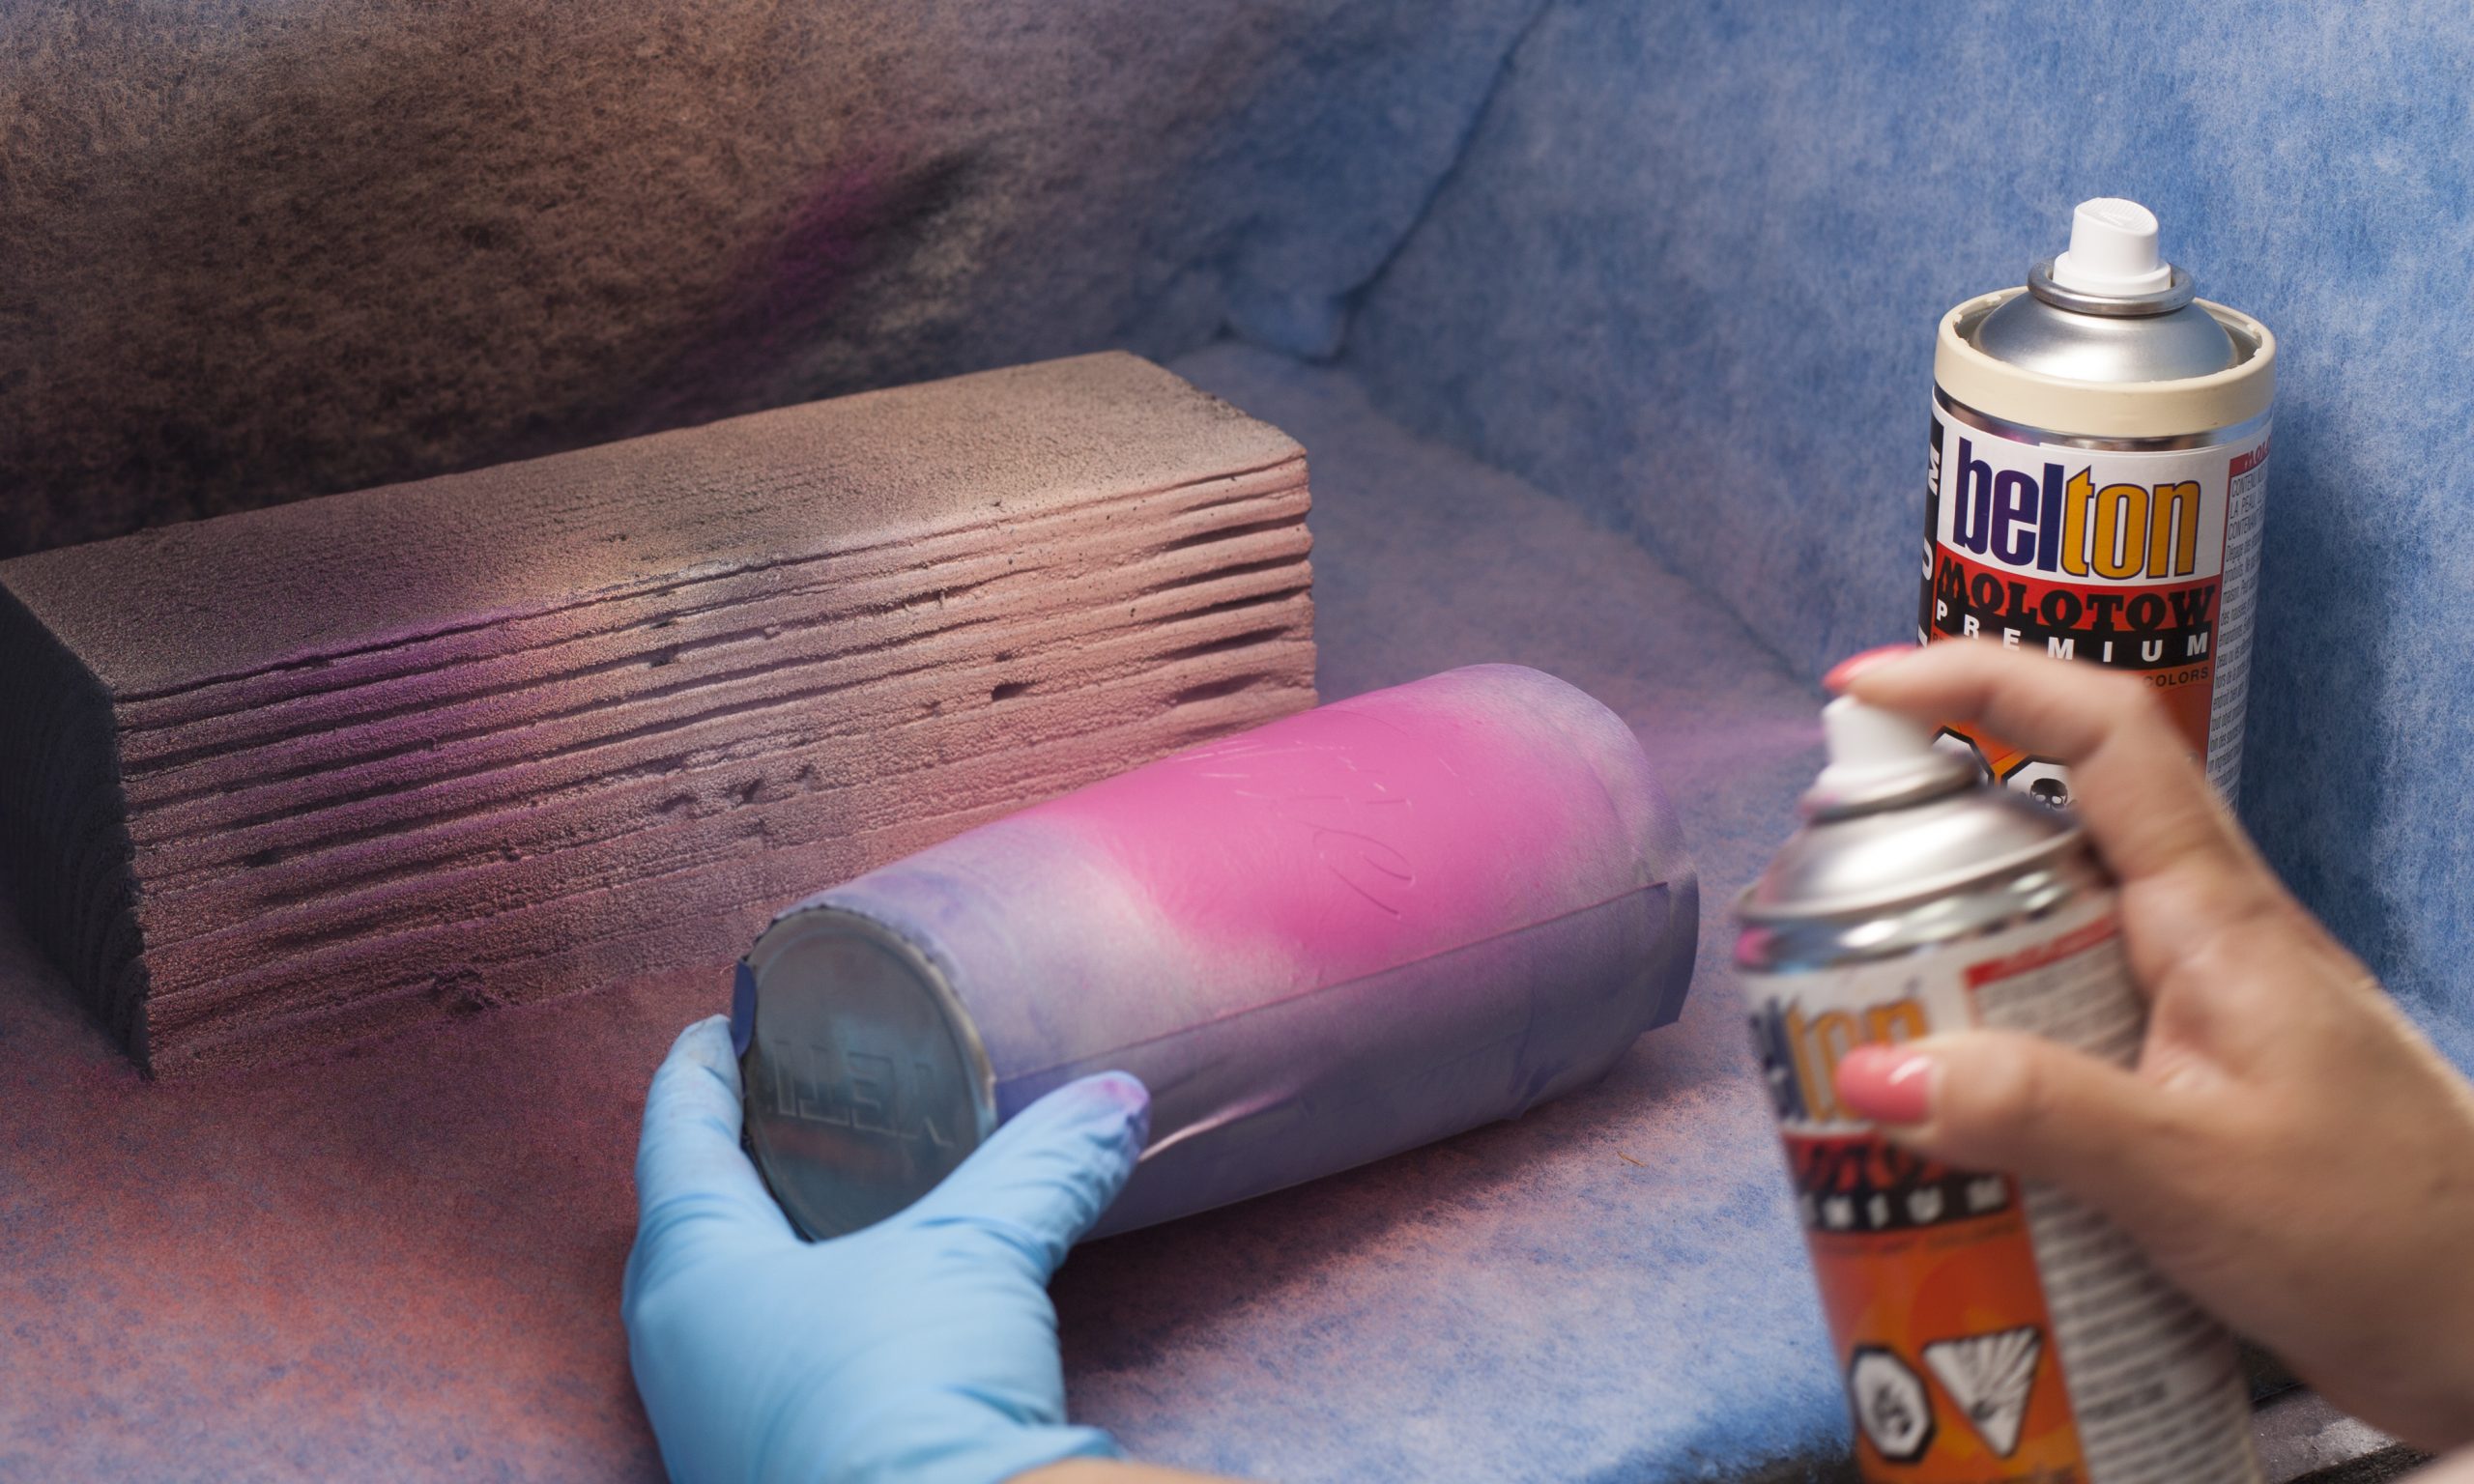
Step Six: Paint
Leave the photomask on after sandcarving and prep for painting. I used a white paint as a first coat to lighten my pink color. After the white paint dried, I applied my pink paint.
Note: white base paint is optional.
Tip: Apply light coats from different angles to reduce over painting.
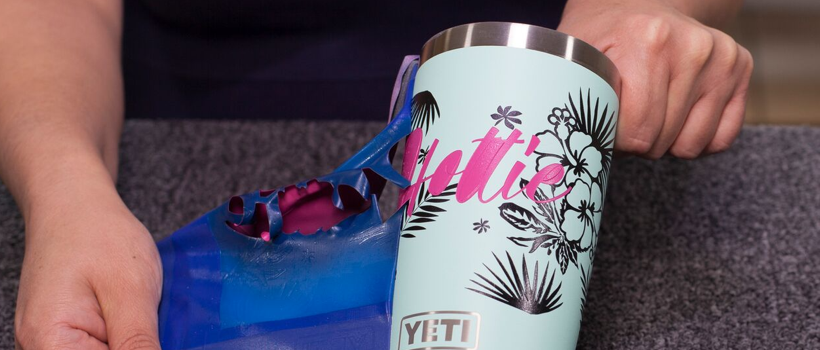
Once paint is dried remove photomask, clean, and enjoy your decorative creation.
-Liz Haas, Rayzist
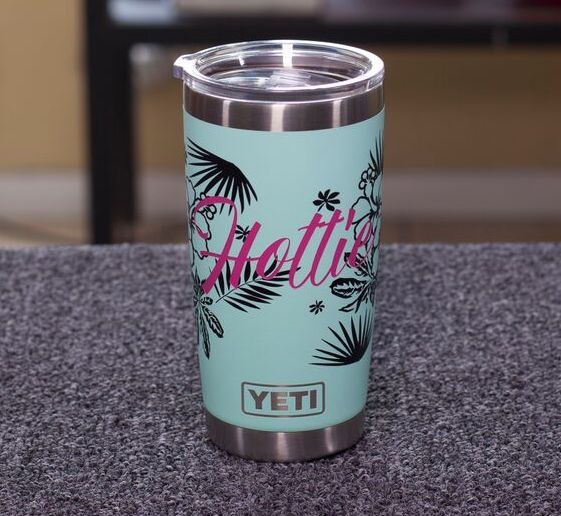
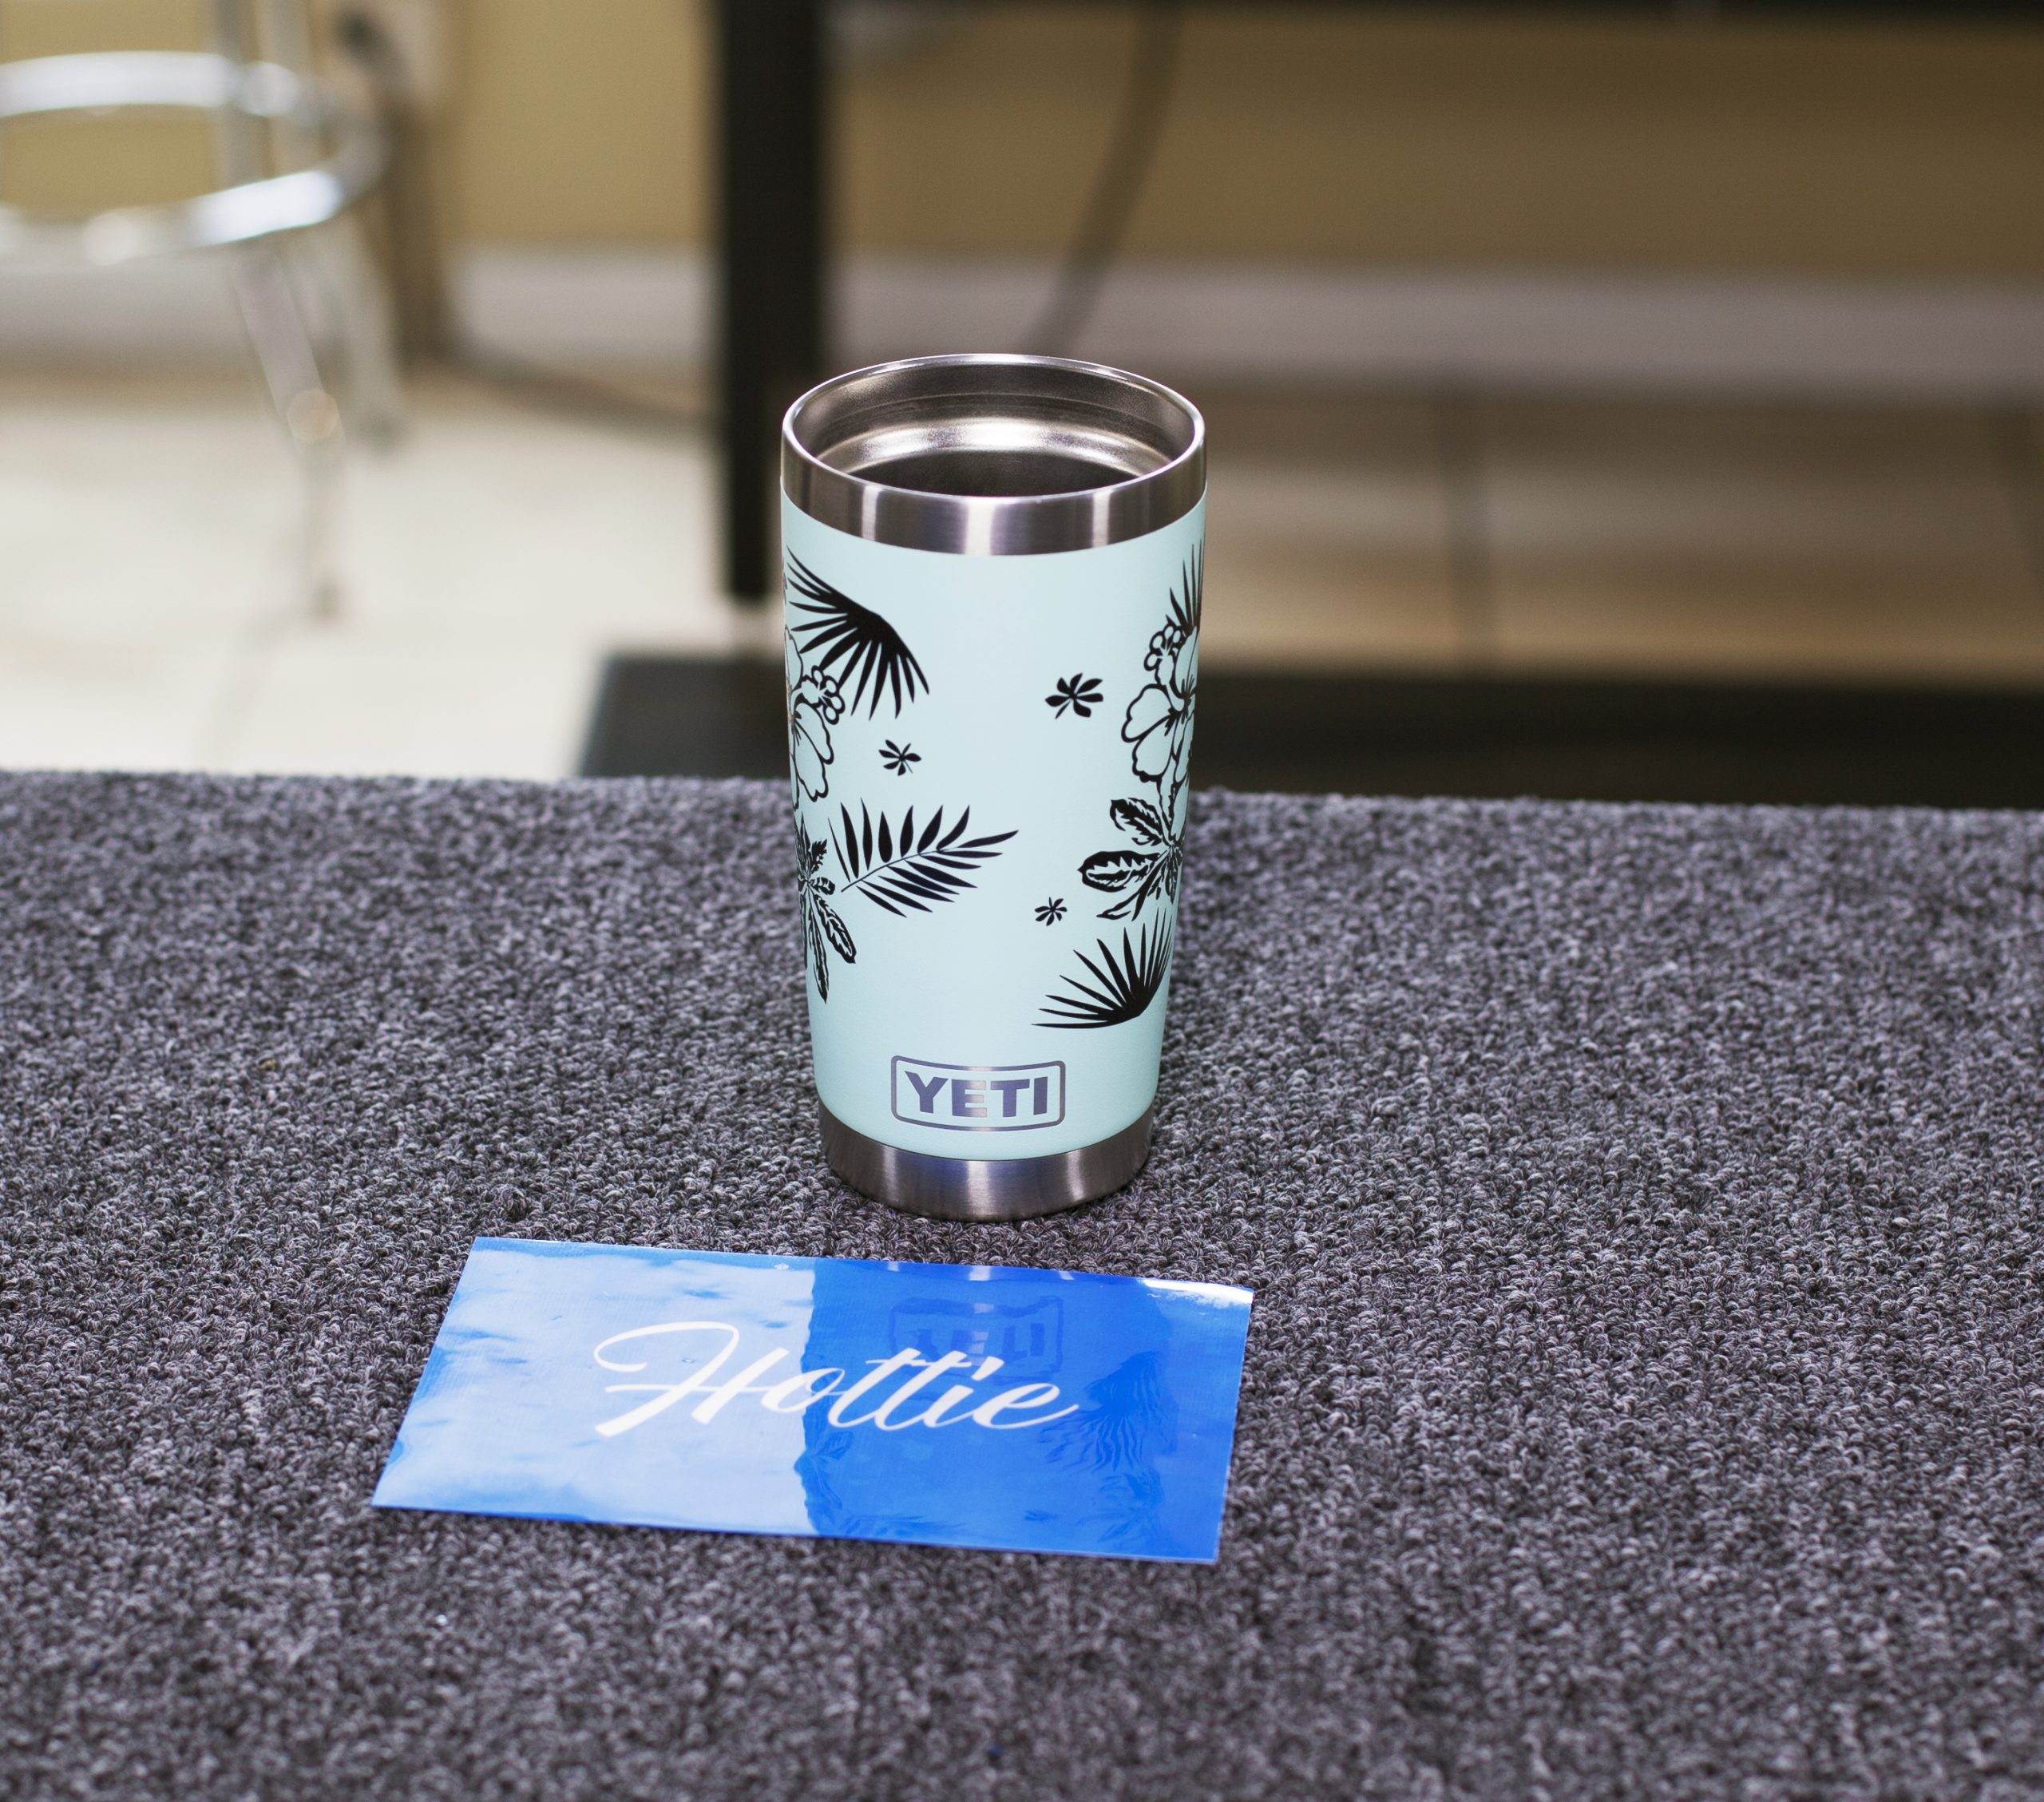
The final product: a flower leaf pattern with a text overlay. (See additional images in the gallery below; courtesy of Rayzist)