Try This: Sublimate Back-to-School Custom Socks
The process to create custom socks may be easier than you think
The ability to create custom products is especially useful during the back-to-school season, when students need new custom uniforms and school pride clothing for sports teams, cheer squads, and clubs.
Materials needed:
- Sublimation printer with RIP software
- Flatbed heat press
- Adobe Photoshop or another design software
- Polyester-based sock blanks
- Heat-transfer spray adhesive
- Heat-resistant tape
- Heat-resistant paper
For this sample, we use the Ergosoft Roland Edition Software and the Texart XT-640 dye-sublimation printer (research your individual settings when using equivalent products from another manufacturer).
Step One: Printing your digital design
After downloading a sock template as a design guide or creating one based on the size of the socks, open the template in Photoshop (PSD) and create a design with school colors and personalized text. Save the Photoshop file as a PDF and upload it to the ErgoSoft RIP software and print to the Texart XT-640 dye-sublimation printer.
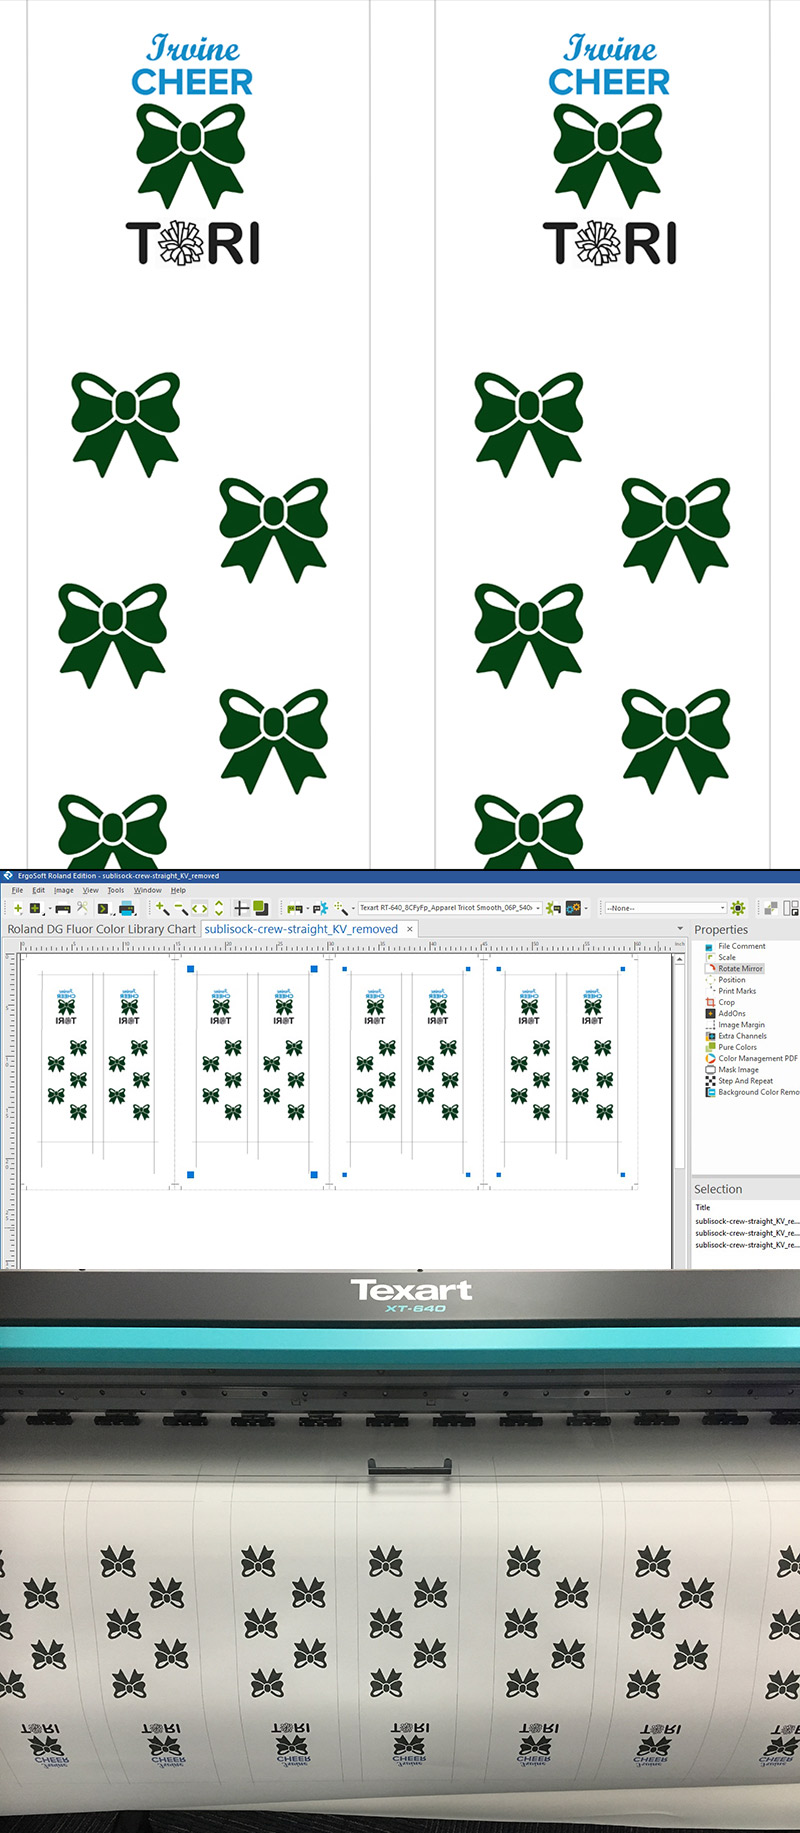
(Top) Close-up of custom digital design that was saved as a PDF for RIP and print with Ergosoft Roland Edition RIP software and the XT-640 dye-sublimation printer. (Center) The design file in Ergosoft – step and repeated and mirrored for dye-sublimation production. (Bottom) The design being printed on the XT-640. (Images courtesy Roland)
After uploading the design to the software, mirror (flip) the design* and add a step-and-repeat function to maximize the print area and print a short run of the sock design – you need four designs in total for the front and back of the socks. Finally, trim the print sheet into individual sock designs to prep them for the heat-transfer process.
*It’s important to flip the design during dye-sublimation – designs are heat pressed “face-onto” the fabric.
Step Two: Prepping for transfer
The socks I used for the project are polyester-based sock blanks. These can be purchased from many online suppliers that specialize in dye-sublimation blank products. To correctly prep the socks, do the following:
- Stretch the socks over special fixtures to give them a surface area to print onto.
- Lightly tack the face of the sock prints with heat-transfer spray adhesive.
- Put them face-down on the socks, taping the edges with heat-resistant tape.
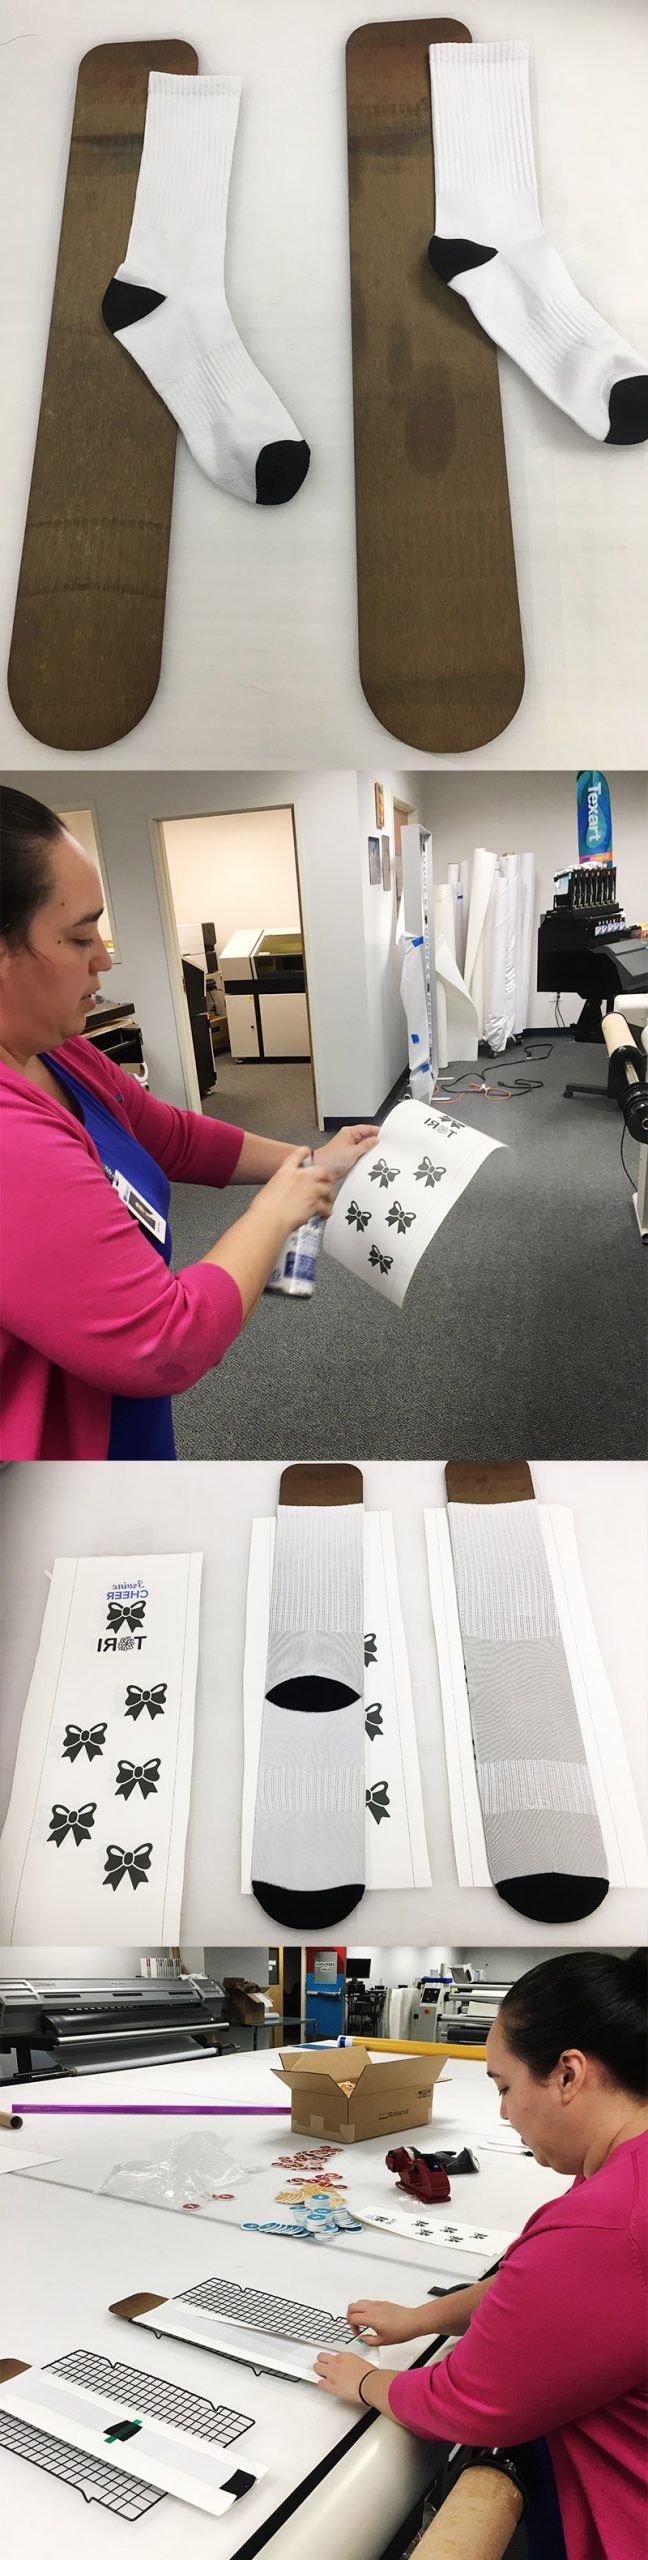
A step-by-step view of the dye-sublimation prep process in which I added the socks to fixtures before tacking and taping the transfer designs onto the socks, ready for heat transfer.
Step Three: Transferring the design onto socks
While prepping the socks, heat the press until it reaches 370 F. The next stage in the process is adding the socks to the heat press to transfer the design onto the fabric. Use the following heat press procedure to transfer the design:
- Place the socks “paper-down” on the flatbed and cover with heat-resistant paper.
- Close the flatbed for about 30 seconds until it beeps and automatically opens.
- Allow the socks to cool before moving them to the desk and carefully removing the transfer paper from the socks.
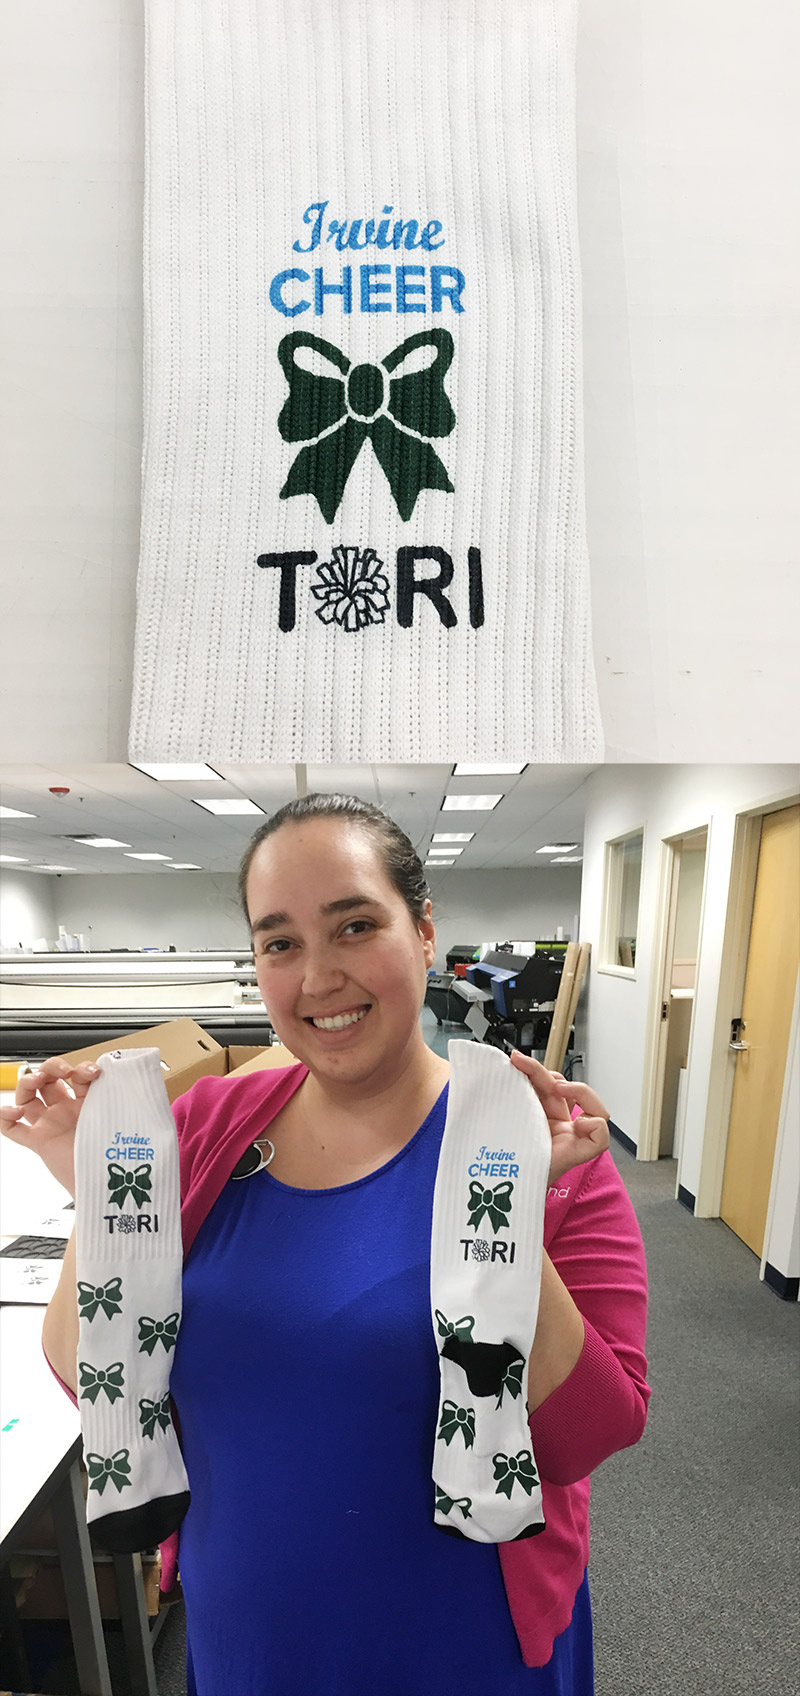
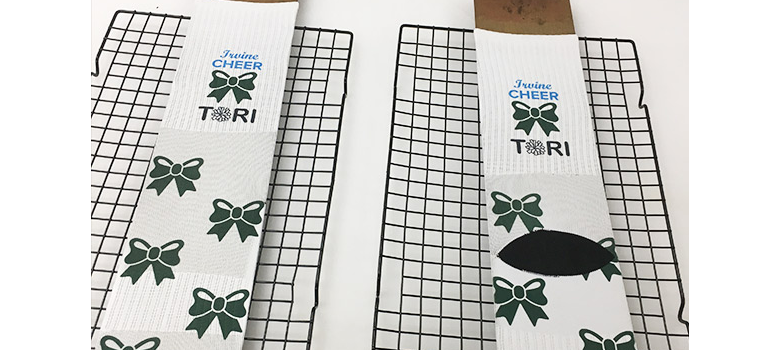
The finished sock design was perfect for a high school cheer student, complete with personalized name, cute bows, and school pride colors.