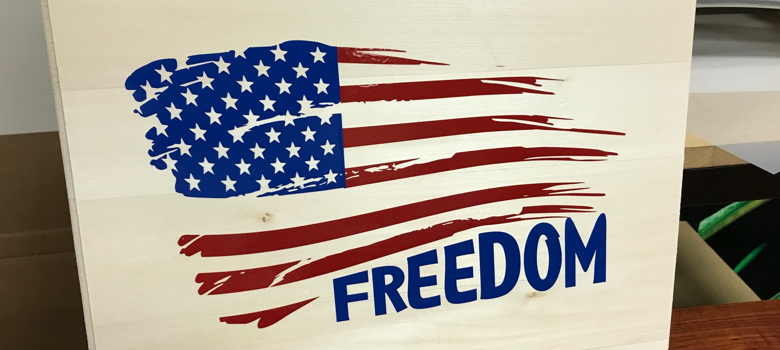
Creating personalized signs is as fun as it is easy with sign vinyl. Apply sign vinyl to wooden panels and plaques to make perfect gifts that hang on the recipient’s wall for years to come. In the spirit of Memorial Day, here is how you can make a patriotic-themed sign…
Materials Needed:
- Red and blue sign vinyl (Used here: 4200 Series Intermediate Sign Vinyl by FDC Films)
- Wood panel/plaque
- Application tape
- Vinyl cutter
- Weeding tool
- Squeegee
Step One: Choose your design
You can create your own design, or there are plenty of free designs on the internet that are available for personal and commercial use.
After you’ve decided on your design, open the file in your preferred cutting software. Choose the trace option and trace the entire image. Once the lines are created, you can remove the actual clipart, leaving just the outlines.
Step Two: Preparing to cut
When cutting multiple colors of vinyl, it’s best to assign colors to your lines within your software and cut by line color. This action allows you to cut all sections that are blue at the same time, then all sections that are red, and so forth. This also saves you time when transferring the vinyl to the wood panel, as you can simply adhere all blue sections at once, then all red, etc. In this design, the stars and the word “freedom” are colored blue, and the stripes are colored red.
Choose the appropriate cut setting. The cutting standard depends on your cutter and condition of your blade. You can use the same cut force settings as standard heat transfer vinyl.
Note: Before you send your vinyl to the cutter, double-check that you have not mirrored your image. Unlike heat transfer vinyl, the image that you cut is how it will look as a finished product.
Step Three: Cut and weed
Load your vinyl into the cutter with the glossy, colored side up and begin cutting. After you’ve cut your vinyl, weed/remove the excess vinyl (seen below). A weeding tool is highly recommended for this, especially for intricate designs.

All images courtesy Coastal Business Supplies.
Step Four: Transfer to application tape
Place your application tape on top of the sign vinyl and burnish with your squeegee. Then, pull the application tape away, transferring the vinyl from its paper liner to the application tape itself, thereby exposing the sticky adhesive of the sign vinyl.

Step Five: Apply to wood
Place the application tape carrying the vinyl onto the wood panel and burnish with your squeegee. Pull the application tape away – your vinyl will have adhered nicely to the wood panel, leaving you with a complete and finished sign.

-Maradith Schwandner, Coastal Business Supplies


