You can find lots of cool effects that can be created in Photoshop, many through a long series of steps, especially when it comes to creating a style that mimics a movie poster. Those steps can seem quite daunting, so how do you offer your customers something a little different without breaking the bank on production time? Here’s one way that may help your product sales.
Visual samples are shown to give you an idea of the different ways you can manipulate these steps to fit your customer’s needs. The final design is up to you (and your customer)!
Materials Needed:
- Photoshop
- 8 X 10 inch, 300dpi file
Step One: Open image in Photoshop and prep
Open Photoshop and either start with a new file or open an image file to get going. Reset the foreground and background color to black and white, or if you want to experiment with a color, keep the foreground color as is. Create a new layer in your layers palette to draw on. By creating the effect on another layer instead of on the image layer, you avoid damaging your image and allow more flexibility in the design.
Step Two: Manipulate layer
The rectangle can be filled in with a color or with a percentage of gray.
Changing the Fill amount to zero makes the shape become clear, only allowing the layer style to come through.
By keeping your columns on separate layers, you’ll have further flexibility with creating your final design.
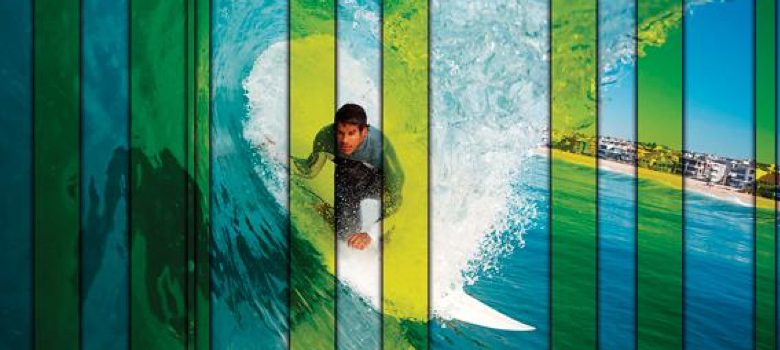
In Photoshop, you can change the color of the glow to play off the customer’s image.
This Photoshop style has an array of options and can make a great ChromaLuxe Photo Panel.
Step Three: Color columns
With the new layer selected in the layer palette, choose the Rectangle Marquee tool. Check the top menu bar and verify that the Feather pixel is set to a 0 amount. This gives a straight, crisp edge. Using the Marquee tool, draw a vertical column from the top to the bottom of the image file; the thickness of the column does not matter. You now have an active selection in the shape of a rectangle on its own layer.
With the selection still active, fill in the column with a color. There are two options to fill the shape: the Paint Bucket tool (shown in the main tool bar), or from the top menu bar by selecting Edit > Fill. Be sure to save your working file as a PSD layered file throughout this process.
Step Four: Stylize
Deselect the column; this can be done by using the short key command of Shift+d (deselect can also be found under the top menu option Select). The example shown in this article has a column that was given an Outer Glow effect under the Layers Styles, but another option would be to add a Stroke instead of a glow. Either way, you want the Layer Style to surround the entire column shape for this style.
Change the Blend Mode to Normal and the color to Black (or as you can see in another example shown, you can use a color instead of black). I set the Spread amount to 10, the Size to 28, and the Opacity was set to 75% for the Outer Glow. These are not exact measurements, and you should visually decide what you find appealing for the amounts of the Size, Spread, and Opacity levels.
Step Five: Alter fill amount
The Fill amount is shown at the top of the Layers Palette underneath the Opacity box. Set the Fill amount to 0, and your column (no matter if it’s a gray or a filled-in color) should become clear.
Step Six: Add columns
Duplicate the layer by either right-clicking in the layer and choosing Duplicate or from the drop-down menu on the Layers Palette. Choose the Move tool (the black arrow at the top of your tool bar) and move the second layer over to the side. Duplicate the layers a few times and randomly move the columns around from side to side, even overlapping some of the columns. You will notice that the width of one or two of my columns changed in addition to moving them around.
I used the Transform tool to change the width of the column. The Transform tool can be under the top menu bar option of Image, then Transform. I used the Scaling tool under the Free Transform tool, or you can press Ctrl (Apple)+T for this tool to pop up.
Step Seven: Organize layers
I suggest selecting all of the column layers and placing them into a Group. Hold down the Shift key to select multiple layers, and from the top Layers Palette menu, choose New Group from Layers. I do suggest keeping a copy of the columns in layers. This gives you the flexibility to easily change the glow color or fill in a color into the colors to create a stained-glass effect in the design.
Step Eight: Merge layers
If you want to apply the columns quickly to another image, you can merge the layers; under the Layers Palette menu, select Merge Layers with the column group or the column layers selected. Next, to apply this design to the other file, Select All (Ctrl+A), copy (Ctrl+C), and paste (Ctrl+V) onto the new file.
When doing this, the columns will transfer over as one rasterized layer item. You can move this layer around, but further editing is limited.
-Jennifer Foy, Unisub