Try This: Laser Engrave and Cut a Solid Wood Flower Swing
Using only a few steps, you can create this flower swing with your laser engraver.
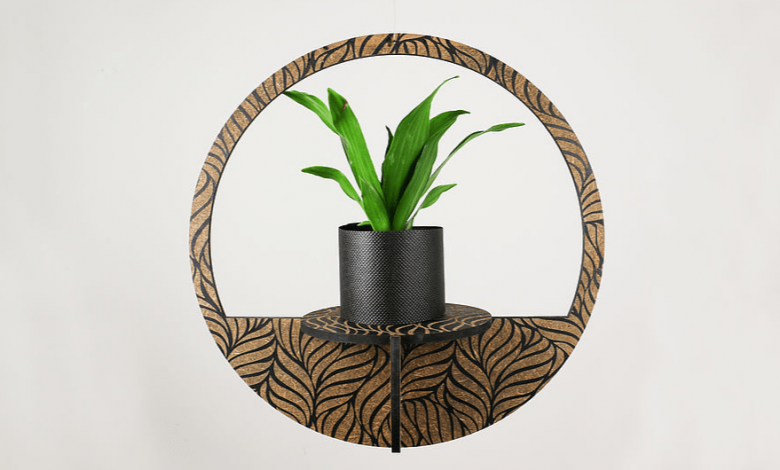
In only a few steps and minimal materials, you can make this flower swing from solid wood with your laser engraver.
Required material:
- 1 sheet solid wood alder, 5mm
- Covering material
Machine used:
- Speedy 360, 80 watts
- 2″ lens
- Aluminum cutting grid table
For this sample, you can use any laser machine from the Speedy laser engraver series, or an equivalent from another manufacturer.
Due to the arrangement and resizing of the design to fit the material, you can cut two flower swings from a 600 X 300mm plate.
Step One: Import design to print and laser
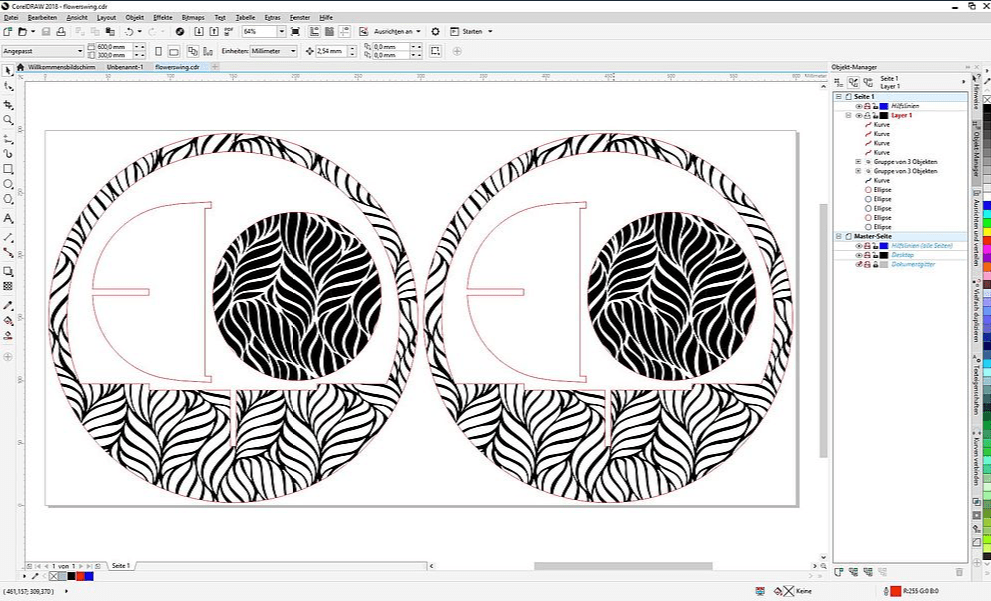
All images courtesy Trotec
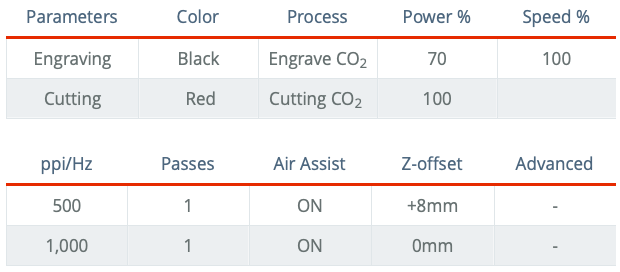
Import our graphics and adapt it to your requirements. Our file is designed for 5mm thick material. For materials of other thickness, make sure to adjust elements accordingly. Send the file to your laser with the following settings:
Print settings:
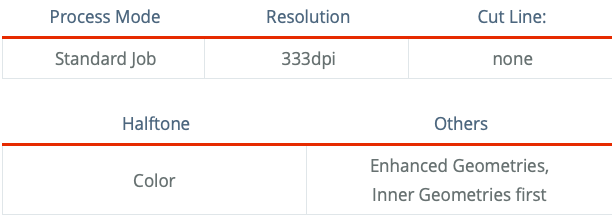
We used only 333 DPI resolution because we needed less time for engraving.
Step Two: Laser process solid wood alder
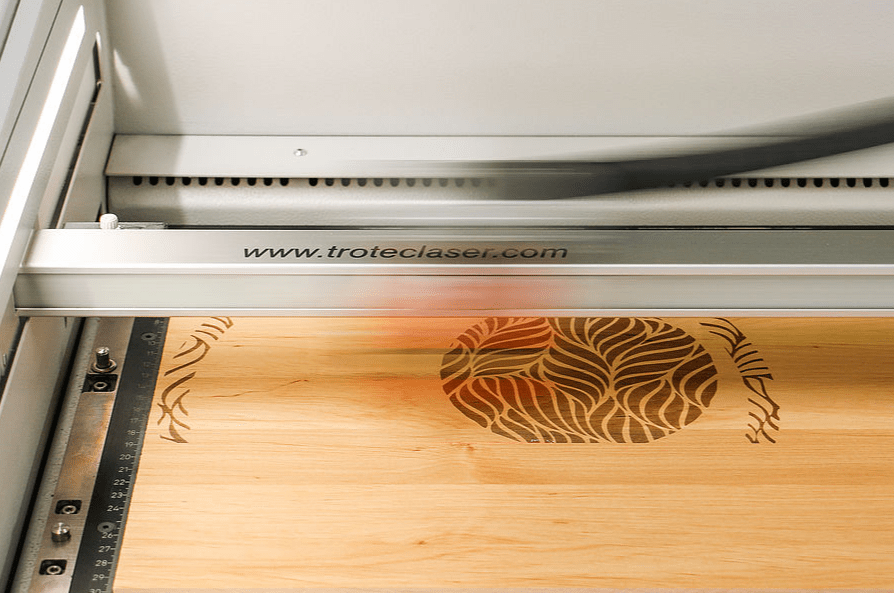
Laser engrave the alder wood plate for the flower swing.
Insert the solid wood plate into your laser, cover the remaining working surface to create vacuum, and engrave and cut out the job. For a uniform look, you can also engrave the back of the plate. To do this, remove the cut shapes and place them back in the same position, back side facing up. Now you can repeat the engraving job. Please note: the parameters may vary depending on the laser machine used and available laser power:
Laser parameters:
Step Three: Assembly
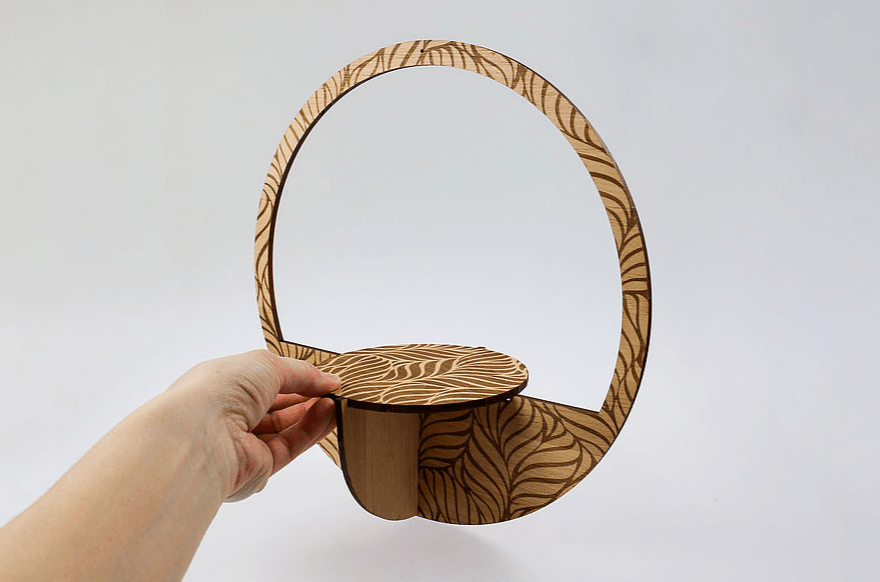
Insert the two parts of the flower swing into one another and then place the circular support plate on it. Hang the flower swing from the ceiling with silk or cord and include your desired floral decoration. You’ve now finished this lovely decoration for any occasion.
For a special look, paint the cut parts on both sides before engraving. This will give the design a unique appearance. MDF is the right material choice for this.