Try This: How to Multi-Stage Carve on Clear Glass
These simple steps demonstrate what goes into a multi-stage carving on clear glass.

With the right tools and equipment, sandcarving is a quick, clean, and simple process that can diversify any business. Sandcarving not only allows for deep etching capabilities with sharp, clean lines, it also offers a handful of unique techniques that help increase the value of any project. These techniques include halftone or photographic etching, frosting capabilities, complex curves, and multi-stage carving capabilities.
The simple steps below demonstrate what goes into a multi-stage carving on clear glass (demo outlines five stages). It can be something as easy as two levels or as difficult as five to 10 levels. Learn tips and tricks along the way to make this advanced process go smoothly.
Step One: Creating Artwork
When it comes to any sandcarving process, optimum end results stem from accurate artwork. When working with peelable, photoresist film and sandcarving, there are a handful of important steps that must be addressed when creating artwork for multi-stage carving: (keep in mind it is important to mention that in this project, we are only using one mask to create all five stages).
- Know the size of your substrate and set up your artboard accordingly in your artwork program of choice.
- Determine if the artwork needs to be set up as a back-blast, meaning the substrate is being sandcarved from the back side. If it is a back-blast, you’ll have to mirror the image. In this project, we sandcarved the backside of the clear glass for the best 3-D effect.
- Ensure artwork is set up for a multi-stage carve. There should be distinct or enclosed “islands” within the artwork. Lines might have to be added or removed to help ensure an easy stage carve or film removal process. Outlines with no fills is the optimal image. I used 2-point thick lines in this project.
Tip: Feel free to number each layer within the artwork program; this helps distinguish all the layers and helps determine if adjustments are needed to the artwork. Keep in mind, stage one is going to be the deepest carve – it’s going to be the item “closest” to you once the sandcarving is complete.
Make sure the black areas are 100% black or K in the CMYK spectrum and the white areas are 100% white. This information is valuable as ensuring proper color levels eliminates bad artwork prints and prevents the film from being exposed improperly. This must be addressed and 100% accurate before printing any artwork.

All images courtesy IKONICS Imaging
Step Two: Printing Artwork
As mentioned earlier, it is a good idea to print your design onto a plain piece of paper first, then mark with pen which is stage one (item closest to you), stage two (next item closest to you), and so on. Print artwork on any laser or inkjet printer onto the appropriate media. Printing artwork from an inkjet printer onto inkjet media is optimum and the most popular film in the industry. Inkjet films provide the greatest quality and most consistent results. If using laser printer film, utilizing a toner enhancement spray can make the world of difference.

Step Three: Exposing Artwork onto Photoresist Film
After the artwork is printed onto inkjet or laser media, it’s time for exposure. We’re using a 5 mil easy peel-able photoresist film for a deeper etch. When exposing the artwork, make sure the artwork media film and photoresist film are placed emulsion-to-emulsion. The UV light passes through the artwork first, exposing the image onto the photoresist film. We are using UltraPeel 5 mil for this project. Those of you that use dry-processing film, use the High Tack 4 mil film if the first stage (deepest carve) is 1/4-inch deep or less for your multi-stage project.

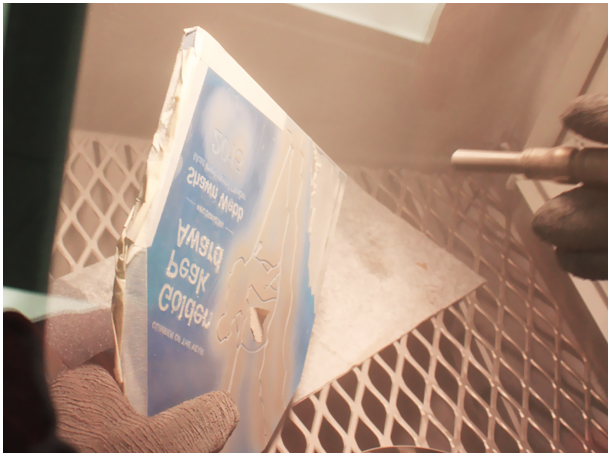
Step Four: Wash, Dry, and Apply
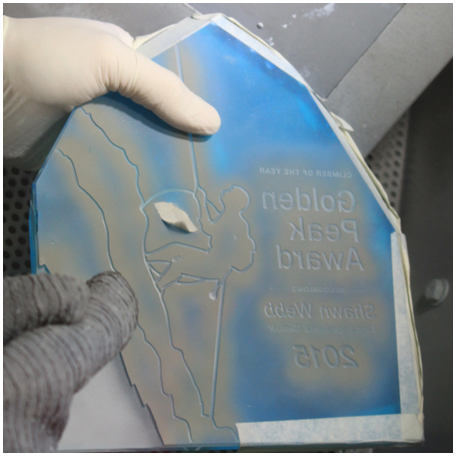
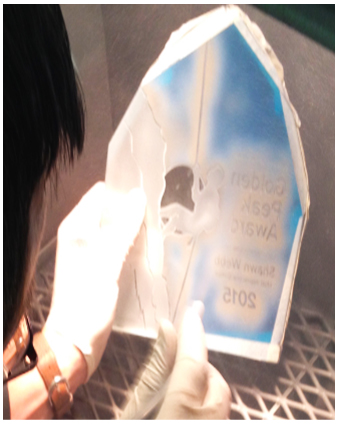
After the artwork is properly exposed onto the photoresist film, it’s time for washout. Utilize the optimum washout method for the job at hand. Once the image is completely washed out, simply place the film into a film dryer, or let air-dry. Once the film is dry, apply the film to your clear glass substrate, tape-off any areas that need to be protected, and get ready to multi-stage carve.
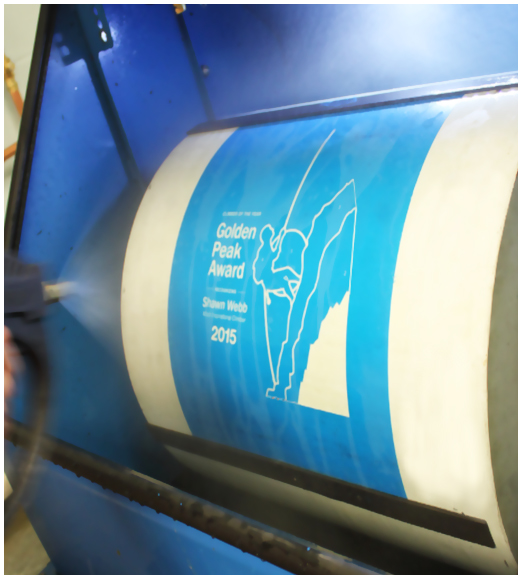

Step Five: Multi-Stage Carve Process
Once the film is applied to the substrate and you have your stage carve plan of attack ready, it’s time to blast. Turn on your sandcarving system, make sure the machine is loaded with 150 silicon carbide abrasive, adjust the pressure to 60 psi, load the substrate into the cabinet, and you’re ready to multi-stage carve.
- Stage One. This is the deepest stage to carve. It’s important to note that this stage is seen as the closest item to the viewer once the piece is finished. The substrate in the photo is 3/4-inch-thick clear glass. Stage one should roughly be 3/8-inch deep carved. While keeping the pressure at 60 psi, and the nozzle 4-6 inches away from the glass, start blasting; go deep! No need for measuring tools for accurate depths. Instead, simply use your own eye by turning the glass and looking from the side. You can visually see when you are halfway through the glass thickness. Tip: You do not want to blast deeper than half the thickness of the glass. Example – 1/2-inch thick glass = 1/4-inch deepest carve.
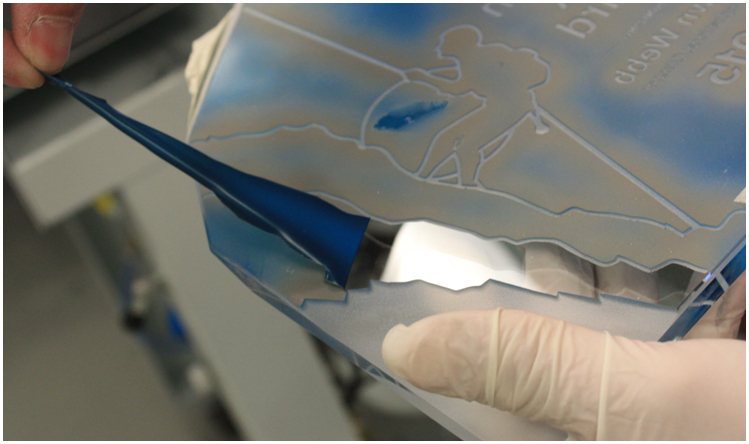
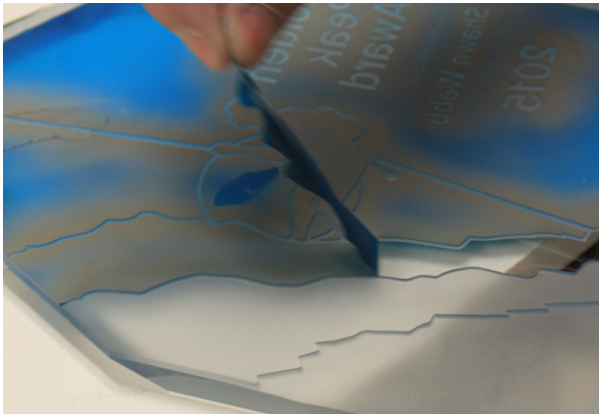
- Stage Two. This is the next deepest stage, the depth of the carve should roughly be 1/4-inch deep. Before blasting anything, find the #2 stage on your substrate and peel off that section of film. A picking tool is helpful for peeling the film off the glass. Keep the pressure at 60 psi and the nozzle 4-6 inches away; start blasting your second stage. Tip: Put some marks (with a Sharpe) on your picking tool at each level depth so you can easily know your depth.
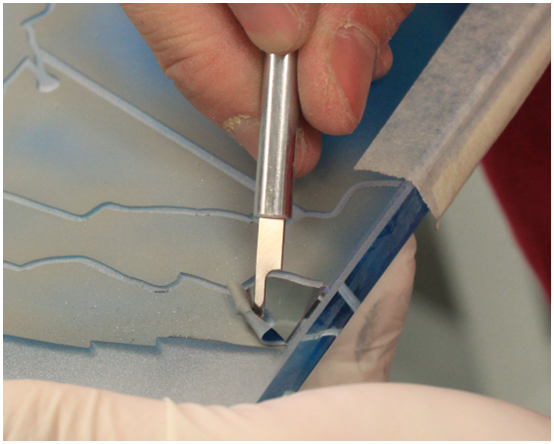
- Stage Three. This is the third and next deepest stage; the depth of the carve should roughly be 1/8-inch deep. Find the #3 stage on your substrate and peel off that section of film with a picking tool or your fingernail. Pressure should be set to 60 psi and nozzle held 4-6 inches away from the substrate. Start blasting.
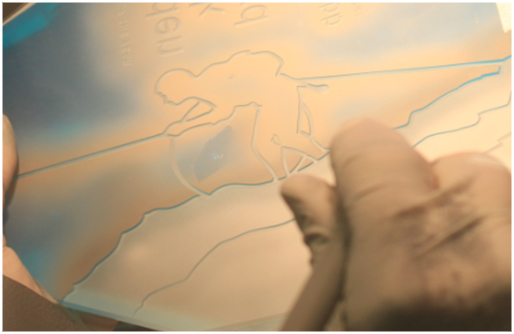
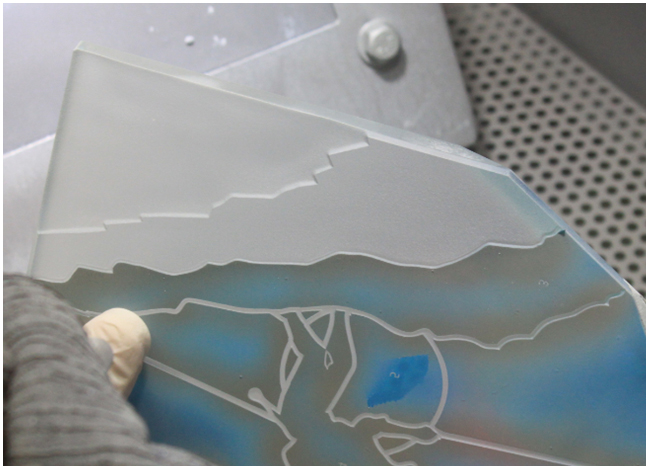
- Stage Four. This stage can be considered a surface etch – not very deep. Find the #4 stage on your substrate, peel off the film, and start blasting. Pressure is at 60 psi and nozzle is 4-6 inches away from the substrate. Tip: At this point you should see four different levels, or stages, of sandcarving. Thus, when viewed from the front, the rock climber will have climbed up three steps and he is on top of the mountain.

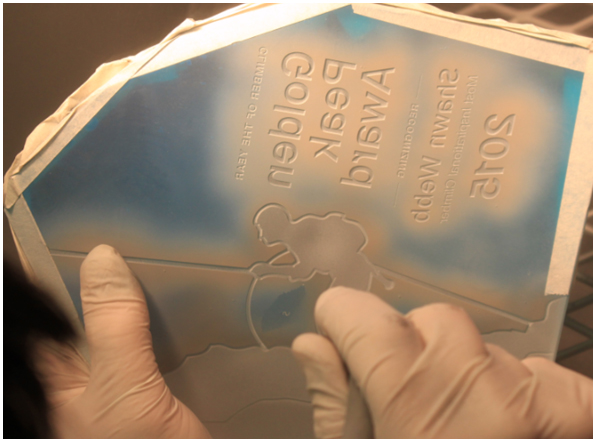
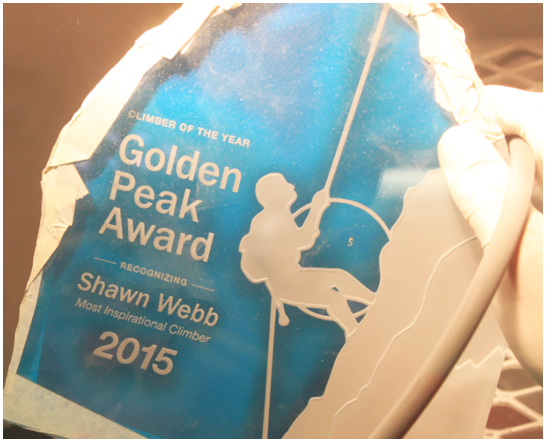
- Stage Five. This is the last stage and considered a shotgun blast. Find the #5 stage on your substrate and peel off the last layer of film. Pressure remains at 60 psi. Hold the nozzle roughly 18 inches away from the substrate and step on and off the foot pedal for just a few seconds. The abrasive at this distance comes out spread out and gives the clear glass a nice misty look to make the moon look more natural in its elements.

Step Six: Show Off the Finished Multi-Stage Carve Product
Remove any remaining film or stencil using warm water if needed. Next, show off your finished five-stage carved glass. Overall, this piece took under 30 minutes (start to finish) and would retail in any showroom for over $300 each.