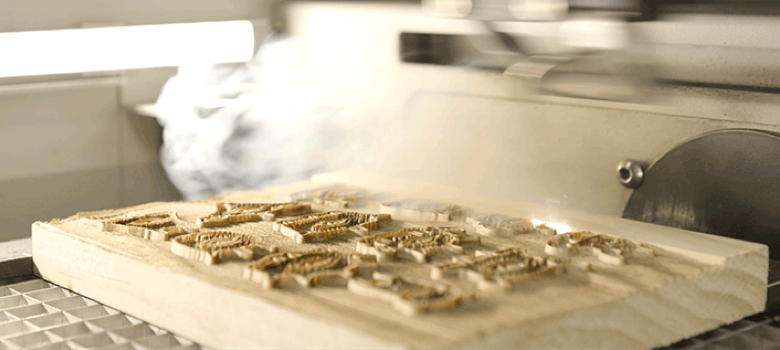
Woodblock printing is an ancient method of using wood carving to create impressions on fabric, paper, and other products.
In this sample, we create significant depth on wood blocks that are then colored and imprinted on various types of paper. Less complex than a letterpress, these wood blocks have an engraved relief pattern that, when applied with color and pressed against paper or fabric, creates a permanent impression or stamp.
These intricate designs add an elegant touch to invitations and announcements, scrapbook pages, and more. Check out the steps below and learn to create your own laser engraved wooden stamps…
Materials Needed:
- Scrap wood (Used in this example: 1-inch X 5-inch pine board)
- Roller
- Relief ink
- Matboard (Used in this example: 32-inch X 40-inch decorative matboard)
- Press or wooden spoon (Used in this example: Blick Speedball Press)
- Printmaking paper
- Laser system
Engraving settings: (Settings may vary depending on which machine you use.)
- Speed: 40 percent
- Power: 100 percent
Step One: Prepare materials and artwork
Trim down the paper to your preferred size. Import your graphics into your graphic software (pre-made graphics from Epilog Laser are available for download here). Make adjustments as necessary.

Wood stamp vector. (All images courtesy of Epilog Laser)
Step Two: Send to the laser
Send the job to the laser with the correct parameters for your machine wattage.
Step Three: Ink
Spread the ink out on flat surface, and use the roller to thin out the paint and roll onto the wood block. Important to note: do not over-ink the block.

Step Four: Printing
Place a sheet of paper on top of an inked block and use a press or a wooden spoon to ink the paper.
Hang up the printed copies to dry. Remember, oil paints can take up to several hours to days to completely dry, depending on the brand and pigment chosen.

-Amy Dallman, Epilog Laser


