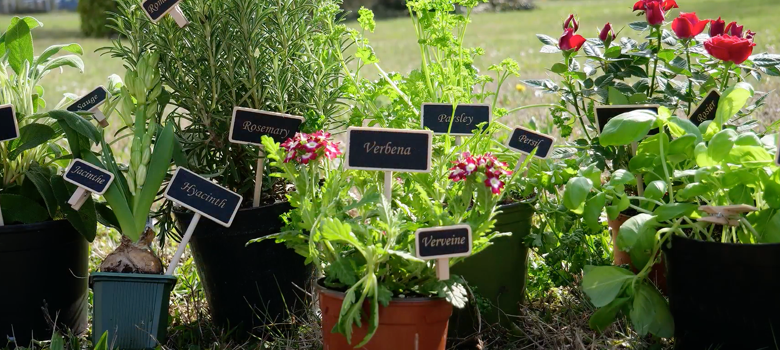
Chalkboard products are trending, and if you’re looking for a seasonal item to add to your shops, these plant markers are a popular option.
Materials Needed:
- Laser engraver (Used here: 30 Watt LS100EX Laser)
- Chalkboard plant markers (Note: because of the paint, you may notice slight variation in thickness if you’re using plain or another type of painted wood marker; this doesn’t change the settings on your CO2 laser)
- Two sheets of acrylic (Thickness varies depending on the markers you are using. Used here: 1/16 to 1/8 of an inch and 1/2-inch acrylic)
- Glue
Settings:
- dpi: 300-400
- Speed: 100 percent
- Power: 30-40 percent
Note: settings may vary depending on your laser.
Step One: Make the acrylic jig
Measure the dimensions of the sign part of the plant markers you are using, and create a template in your graphics software to match its size. Using the 1/16 to 1/8 of an inch acrylic, cut the first layer of the jig on your laser. This piece will sit directly on the laser bed to support the back of the marker, as it isn’t level with the stake.
For the second layer, measure the width of the stake, or if you are using smaller markers, the size of the clothes pin, and add this to the template you used for the first layer. Cut the 1/2-inch acrylic on your laser, then glue this layer on top of the first.

If you’ve done this correctly, the face of the marker will be level when placed in the jig. This is important in order to achieve even engraving.
Make any adjustments as necessary, and once complete, place the jig at the top left corner of your machine.

All images courtesy of Gravotech.
Step Two: Engraving
Place the blank plant markers into the slots in the jig and run the job at the necessary settings.

Optional Step Three: Decoration
Color-fill the engraved text with white paint. Make sure the color-fill product used is suitable for outdoors before application. After application of the color-fill, wipe away the excess using a soft cloth, such as a microfiber towel. This application enhances the readability of the sign and improves the weather-proofing.
Another option is to draw the plant or herb in chalk on the black background. You can market this feature as a fun way to involve the kids each time the garden needs watering.
-Elena Iogha, Gravotech