Try This: Create Artwork in Adobe Photoshop for Sandcarving Photographs
Successfully sandcarved items stem from good artwork.


When it comes to sandcarving, successfully etched products stem from great artwork. Once the basics and best practices are mastered, the possibilities are endless. Following is a how-to guide in creating artwork for sandcarving photographs. Adobe Photoshop is the artwork program of choice along with RapidMask photoresist film for sandcarving. RapidMask is the only dry process photoresist film on the market. It is engineered to hold high detail specifically for sandcarving halftones. Let’s begin.
Step One: Photograph
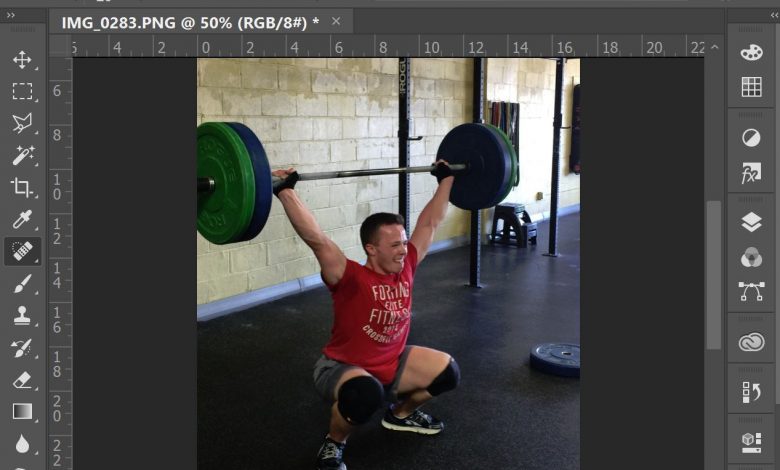
Open the original photo file in Adobe Photoshop. It’s ideal to start with a high-resolution image around 300 dpi. The higher the resolution, the better. (fig 01)
Step Two: Changing to grayscale
With halftones, photo color is unnecessary. Whether you’re working with a photo with color, or even if it’s black and white, the Image Mode must be changed to grayscale. Within the top menu, click on Image then Mode and select Grayscale. Photoshop will prompt to discard the color information. Simply click the Discard button. The image will be washed out in a grayscale color format. (fig 02)
Step Three: Address problem areas
Take a good look at the grayscale image. Stay away from 100 percent black and 100 percent white areas as those will not convert to the halftone pattern during the process. There are a few tools in Adobe Photoshop that are designed to lighten or darken those problem areas:
- Adjust the Image Levels by going to Image>Adjustments and click Levels. (fig 03)
- Replace Color by going to Image>Adjustments and click Replace Color. Use the Eye Dropper tool to select the desired color on the artboard. Then, in the Replace Color window, slide the Lightness level arrow up or down to find a happy medium.
- Dodge & Burn tool-this tool allows for the most control over specific problem areas. This instance adds brightness or darkness to any selected area. Adjusting the Range and Exposure percentages is also helpful in adding or removing the brightness or darkness. (fig 04)
Step Four: Scaling the image
Scale the image down to the correct size before the halftone process. After the halftone process has been applied, scaling or resizing the image will ruin the halftone pattern. Make sure the substrate size and exact sandcarving are known before the halftone process begins. Again, you must scale or resize the image before the halftone process. If you are using RapidMask, there must be a black border around the final image. This step occurs later in the process. A 1/4-inch border is recommended – that measurement should be taken into account when sizing the artwork to fit the substrate.
- Size the image before the halftone process by going to the top menu and clicking Image then Image Size. Adjust the settings from there. (fig 05)
Step Five: Start the halftone process
Time to start the halftone process. Go to the top menu and select Image then Mode, and select Bitmap to start the process. The Output Resolution should be set to 800 pixels per inch. Next, the Method portion: Be sure to select Halftone Screen, then click OK. (fig 06)
Step Six: Other settings
We’re on to the Halftone Screen, and the Frequency should be anywhere between 45 – 65 lines per inch. The higher the number, the more detailed the halftone image, and a bit more challenging to sandcarve. (This is what RapidMask 2-mil photoresist film is designed for.) Traditionally, the Angle is set to 45 degrees. It also really depends on the substrate, film, and complexity of the artwork. Start at 45 degrees and if you’re not satisfied, try using 37.5 – 52 degrees. A bit of testing may be required to find the best angle. Lastly, the shape should be set to Round, then click OK. (fig 07)
Step Seven: Inspection
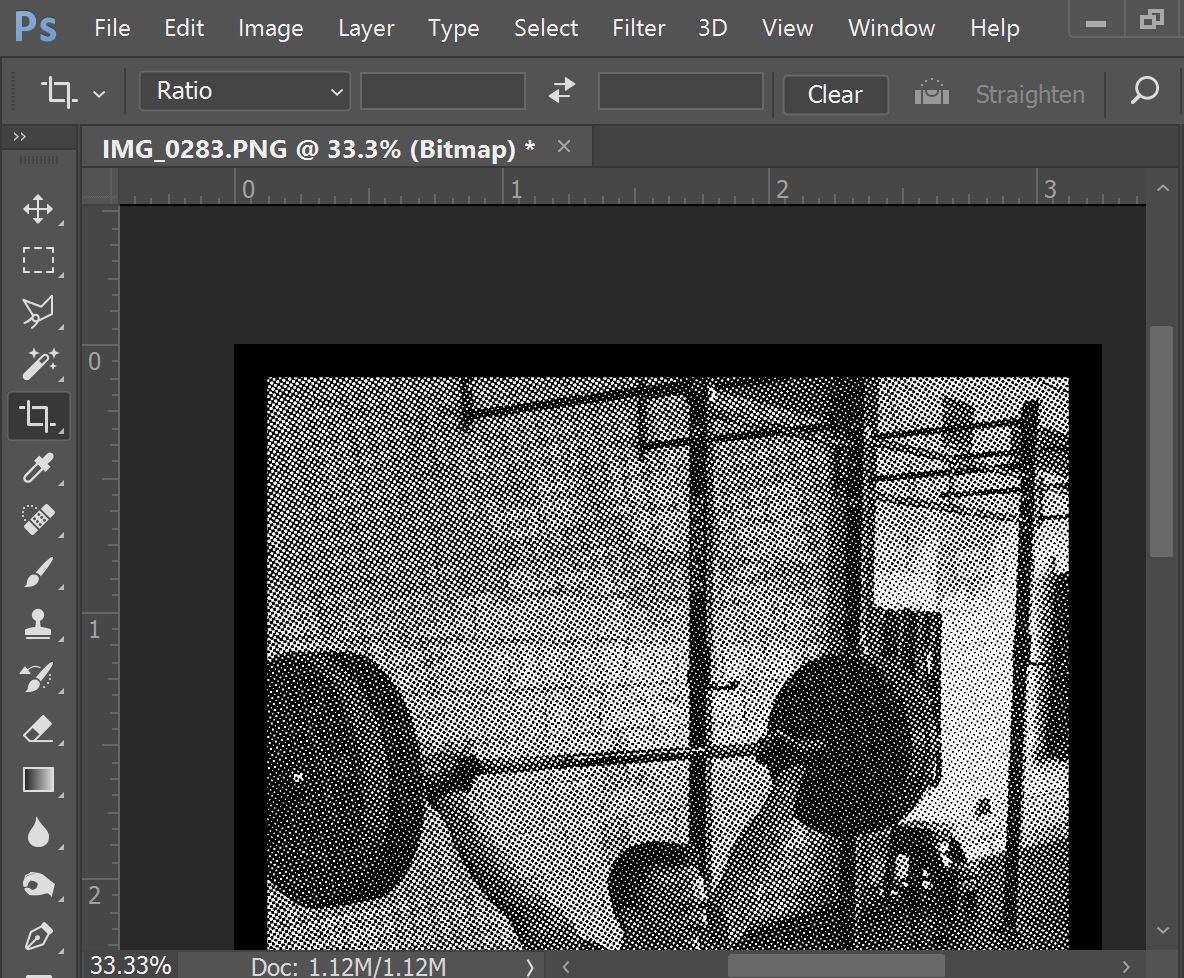
Review the halftone image and zoom in for inspection. Ideally, dots should be seen across the entire image. If you see an area without dots, adjust the black and white settings. Go back to Step Three and explore the lightening and darkening tool options to help eliminate those bright white and dark black areas. (fig 08, 08a)
Step Eight: Add a border
Next, add a 1/4-inch black border around the final halftone image. The border is only needed when using RapidMask photoresist film. The border helps to achieve sharp and clean lines clean around the finished halftone image. There’s no need to worry about masking tape accidentally covering the halftone pattern when taping off the substrate. Instead, the tape can be placed easily on the precise border. (fig 09)
- To add a black border to the finished halftone image, go to the top menu and click on Image then Canvas Size. From there, increase the canvas width and height by 1/4 of an inch. Note: We’re not changing the image size, only the canvas size. Make sure the Relative box is not checked. Next, toward the bottom, you’ll see Canvas Extension Color. Make sure that is set to Black, then click OK. A nice, even black border will appear around the image. If a wider border is needed, go back and increase the canvas size to a 1/2 of an inch.
Step Nine: Finishing touches
The halftone image is complete, ready to print, and then off to sandcarving. If the halftone file needs to be saved and imported into a different artwork program, the file should be saved as a .TIFF file, a high-quality image format. (fig 10)
-Darin Jones, IKONICS Imaging