Top Embroidery Problems & How to Fix Them
Have a look at some of the most frequently asked questions from customers who find themselves struggling with a specific embroidery challenge.
Several books have been written on this popular subject, but for the sake of brevity, let’s look at some of the most frequently asked questions from customers who find themselves struggling with a specific embroidery challenge.
My customer insists on all this copy in their logo, and it’s too hard to read!
While every day, general purpose embroidery thread is a standard 40 weight, try switching to a 60 or 75 weight in order to accomplish lots of small lettering, or very fine detail. For best results, you’ll need to switch to a #65/9 needle, to make a smaller penetration and have the letters appear as clear as possible. Also, adding a water-soluble topping will help to elevate the stitches and make small letters appear “crisp.”

This State Seal of New Hampshire was digitized for 75 weight thread in order to accommodate lots of lettering and intricate details. Make sure to tell your digitizer if you are going to try 60 or 75 weight thread so that they can choose the right density. (All images courtesy Madeira USA)
This slippery, stretchy performance wear is driving me crazy! How can I avoid the puckering?
You’ll need to make peace with performance wear, since “athleisure,” the category of clothing in which performance wear fits, is the fastest growing category of apparel. Since it was designed to be stretchy and move with the athlete, it makes sense that constricting the garment with too many stitches, in too bulky a design, stabilized with too heavy a backing, just won’t work! So, think light. Try to keep with low stitch count designs for performance wear. Use a lightweight backing, such as No Show Weblon or lightly woven performance backing. If your customer insists on a large design, try turning it into a badge and apply to the garment using only outline stitches. Finally, when hooping the garment, don’t over stretch it.
Help! My thread keeps breaking at the absolute worst time – every time I start a new job!
Tension might be the most overlooked aspect of setting up for each new embroidery job. Keep in mind that embroidery thread is not sewing thread, used for constructing garments. It is used only for decorating or embellishing, and by its nature is softer and more pliable. Using a tension gauge to measure the tension on your machine should be done at the beginning of each new job you start. Even if you change from rayon to polyester or vice versa, you will need to change the tension on your machine. Get familiar with those tension knobs and don’t be afraid to turn them!
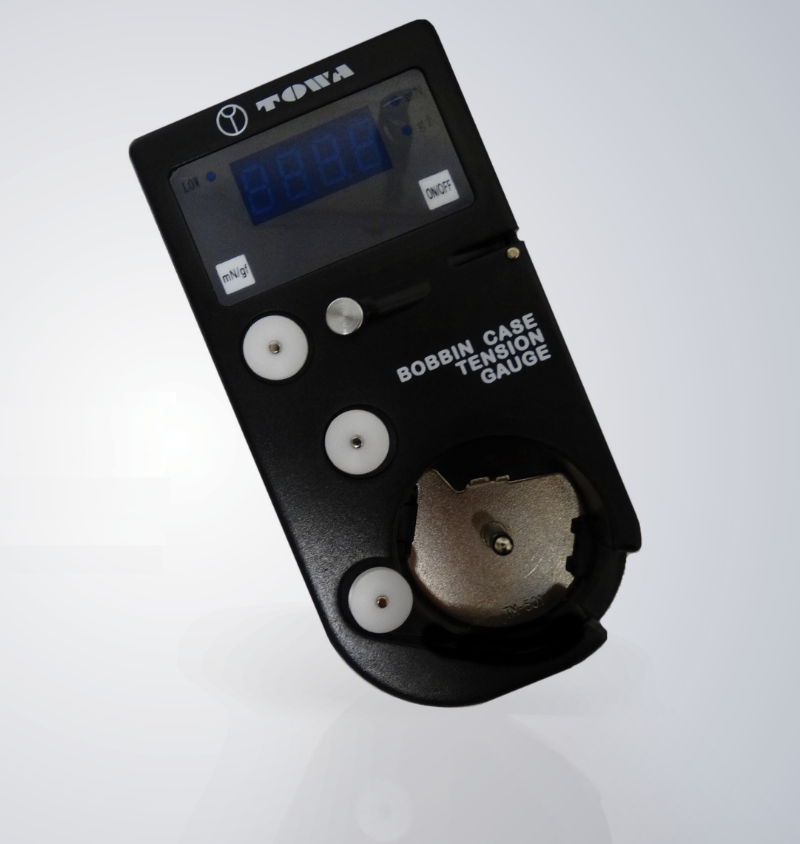
Tension gauges are now available in digital versions, making them even easier to use.
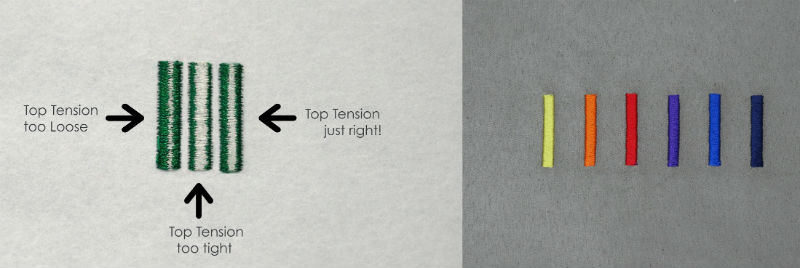
A tension test, pictured, is a good way to start out each new project. After stitching out a row of satin stitch columns, check the back side. The columns should appear 1/3 top thread / 1/3 bottom thread / 1/3 top thread. When you see those results, you’ll know you are good to go!
There are dozens of stabilizers on the market! How do I know which one to choose?
Certain rules of thumb will take you just so far. For example, use a Tear Away on stable woven fabrics and a Cut-Away on knits and lightly woven garments. But the industry tends to listen to what embroiderers request, providing them with backings and toppings of varying weights and attributes. There are Stick-On backings for difficult-to-hoop projects, fire resistant backings for safety concerns, No Show backings for lightweight apparel and athleisure. Allow yourself the time to study what is out there and ask for samples to try.
My customer wants their dance costumes to sparkle, and I’m afraid to go near that stuff!
Metallic embroidery threads have come a long way and are offered in many different weights. If you choose a smooth metallic, some of which are part metallic and part polyester, 40 weight, you should be able to simply substitute the metallic thread in for a color or two of your rayon or polyester thread. No needle change necessary! Stick with a design that does not consist of thousands of tiny stitches, and always check your machine tension before beginning. Twisted metallics will provide more “bling,” but do require a needle change and a little more TLC. Start with the smooth stuff and see how easy it is to master! And remember not to skimp on quality when it comes to metallic threads. A “bargain” might not end up being one.