The Flash: Understanding Flash Cure Basics for Your Printing
The November issue of Printwear puts a focus on flash-cure units and dryers. In this article, Taylor Landesman highlights some basics.

Understanding when to flash cure is important to any screen printer. Doing it correctly can mean a great looking screen print. However, the “best” or “proper” way to flash cure continuously splits opinions. For example, when to flash, what to flash, and the best type of flash-cure units are issues always open to friendly debate among printers. One of the best things about screen printing is the variety of methods, procedures, and variations printers can employ to get a job done. You can watch two screen printers accomplish the same job with entirely different means. Screen printing is both an art and science.
SETTING IT UP
Specific “rules” for printing exist, but there is often room for interpretation to fit a particular job. Even within the same shop, deviation from the typical process may occur. This change may be planned if a screen printing shop comes up with a better method, or it could be forced upon them when needing a temporary fix to get out a customer’s job in time. This article explores some of the possible approaches to flash curing.
When setting up each job in which you will use a flash unit, make sure to consider different flash methods. Think of flashing as another variable in the printing process. Just as you do not always use the same mesh count in every screen or the same durometer squeegee for every job, you may want to adjust the flash method. Analyze the purpose of using a flash-cure unit for each job. Taking this extra time will help to produce better quality prints.
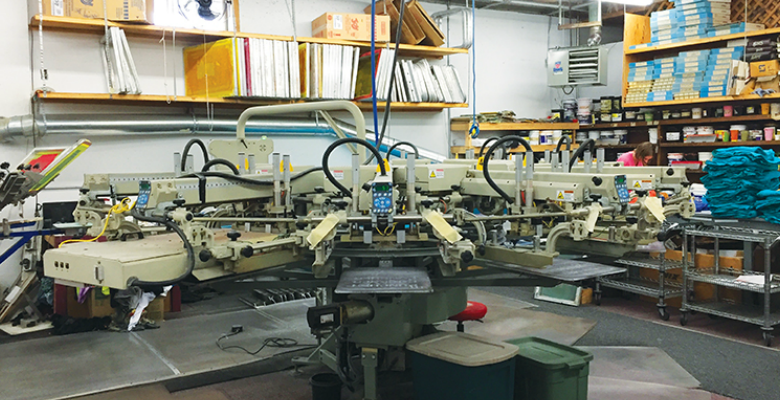
Right: No matter when you flash cure, a baseline principle for flashing is only supposed to cure to touch. You do not want to cure the print fully. If your ink fully cures, no other plastisol ink will adhere to it. (Image courtesy Ohio Screen)
Probably the most popular time for flashing is when printing on a dark garment. To get colors to pop on a dark colored shirt, you have two choices, either: 1) print, flash, print, or 2) print a white underbase, flash, and then print the colors on top. Typically, the basic print, flash, print method is used for single-color jobs as only one screen needs to be created. Utilizing the print, flash, print method for single-color jobs allows the second layer of ink to sit on top of the first layer to better stand out. For a multicolor job, printing a white underbase, flashing, and then printing the colors allows you to achieve a bright print. This is due to the colors sitting on top of the white ink instead of a dark shirt. The white underbase serves as a barrier that prevents the garment’s dark color from dulling the colors.
When printing a multicolor job, there is a split of opinion as to whether flashing between each color is the best practice. Flashing after each color helps prevent colors from “falling” into each other and losing any crispness or sharp edges of the design. The downside to this technique is the design can become thick or heavy, what many in the industry describe as a “bulletproof print” because the shirt feels heavy when wearing it. Depending on the client, this feeling is not necessarily bad. For example, when printing athletic uniforms, a thick print helps to make the design more “rugged” and able to withstand abrasion. If you are not looking for a thick athletic print, counteract the bulletproof feeling with higher mesh counts for your colors that deposit less ink.
Another common use of a flash unit is to print a job with a highlight white. This type of print utilizes a thinner underbase with colors on top. Typically, several flashes are used during the print process. For example, a printer would flash the underbase and flash the colors before finally putting down a thin layer of white ink. A screen-print job with a highlight white produces a shirt with bright colors and a dramatically bold white. As the name suggests, the highlight white is designed to make the final print stand out.
Printing with specialty inks is another time when flashing should be employed. When using a specialty ink, such as puff or glitter, you will need to flash the colors on the garment before printing the specialty ink. You must flash right before printing the final color/ink to help set and keep the image in tack before the special ink since these specialty inks tend to muddy the previously printed colors if printed wet-on-wet.
SHOPPING AROUND
Now that you have a sense of when to flash, you must decide what type of flash unit to use. There are two basic styles of flash units to choose from – infrared (I.R.) panels or quartz tube units. There are several differences in the manufacturing and operation of these units, but most notable is that quartz units consist of lamps that heat up quickly, while an I.R. unit is an electric panel.
Most screen printers decide which flash unit to use based on two factors. First, what type of printing are they doing, and second, cost. I.R. panels are more common for manual printing. They heat up slower and require a warm up and cool down period. They also have a lower price point than quartz units. Manual units tend to be 120 volts but will produce more heat (allowing you to print faster) if they are 220 volts.
Those printing automatically typically favor quartz units due to the faster flashing times. Quartz flash units heat up much quicker than their I.R. counterparts. Quartz units also often feature an “electronic eye” that senses when a garment or platen is moved underneath. This sensor allows the unit to turn on instantly and turn off with a timer. This automatic on/off is advantageous when printing (either manually or with an automatic) because it helps prevent scorching a shirt or burning up a platen. You might have heard countless stories about a printer forgetting to turn a flash unit off before going to lunch or stopping to answer a call and burning a platen. With automatic sensors, this issue is eliminated.
Flash units may also have a small air blower attached to them. These blowers are usually found on higher end quartz units. Not only does the blower cool the unit itself but helps reduce the temperature of the garment as well. This can be especially helpful when there are limited time and open stations for the garment to cool down before the next color is applied.
Like any screen-printing machine, you should do the required maintenance for your flash unit. Luckily, there is basically no maintenance needed for a standard infrared panel because it has only three major components: the heat panel, a thermocoupler, and a temperature controller. These are non-moving parts, so there is little, if any, maintenance to perform. Quality units can last years without replacements. If you do need to replace a part for a flash unit, make sure that it can withstand high temperatures.
If you are using a quartz flash, the bulbs do need to be changed every so often. Make sure to handle them with care, as the glass tubes are fragile. A clean bulb, as well as a reflector free of dirt, smudges, and fingerprints, helps create an even flash. Routine inspections are recommended.
Understanding what your flash unit is and when to deploy it is a critical building block for producing high-quality screen prints. Make sure to leave time in your schedule for experimentation, and you might even find a new way to flash so you have the best screen prints in town.


