Selling more apparel often means helping your customers stand out. A well-executed design, with an on-trend finish, results in more sales and a higher price per item. One of the most popular ways to get special effects with heat printing is by cutting designs from heat transfer materials on a vinyl cutter. While reflective, metallic, foils, and flock materials are all popular, one finish is clearly the most popular: glitter.
Cut and weeding advice
Glitter provides the sparkle to wow your customers, so it’s important to become efficient in using glitter in your shop. The first step towards success with glitter heat transfer vinyl (HTV) is processing it correctly on a vinyl cutter. Glitter material is thick and can be difficult to cut accurately without the proper equipment and technique. Accommodating all graphics and level of detail in glitter will not be possible without the right understanding.
Glitter is often difficult to weed as cutline are hard to see and the material tends to break. Weeding on a heated surface can help both of these issues.
The first tip to tackling this material is a sharp blade. The quality or the resulting cut of any heat transfer material is dependent on the sharpness of the blade. Too often, apparel decorators cause headaches and increased labor times because they do not maintain the blade on their cutter. If you are seeing incomplete cuts, skipped corners, or perforations, it is quite possible that it’s time for a blade change. While a higher-angle blade tends to do best with thicker materials like glitter, the standard 37- or 45-degree blade is suitable for the job as well. The key to either choice is having the proper blade extension. One of the most common mistakes is having the blade out too far, this is also a common cause of inaccurate cuts. The proper extension is the thickness of the actual material being cut. I’ve long recommended the distance of half a credit card’s thickness as a good starting point.
With a sharp blade at the proper extension, it’s time to turn to machine settings. If your vinyl cutter can be programmed to use an overcut setting, then this will certainly help with accuracy on details for glitter materials. With overcut enabled, the machine cuts a 90-degree angle a little over the edge on each side of a letter or graphic. This precaution helps to alleviate hang-ups on corners, which creates less room for error and ruined designs when weeding.
While some cutters don’t have the capability, the next recommendation, if available, would be enabling a setting called tangential emulation. Many cutters in the market use a drag knife technology for cutting, where, as the blade is cutting a corner, it may skip a bit as it makes the edge. Tangential machines lift and turn the blade at the corner to ensure reorientation of the sharp edge of the blade. Tangential emulation mimics this high-end capability by simply lifting the blade holder at the start and stop points of a cut to allow the blade to almost reset itself and begin along its path in a new direction. Once again, this helps to prevent skipping and ruined cuts and has been found to allow substantially more detailed cuts from glitter products.
Nearly any machine can cut glitter, but one last recommendation, particularly if you are looking to add more glitter or purchase a new machine, look for one with a servo motor rather than a stepper motor. Stated simply, this motor is more robust and usually provides for better material handling to prevent puckering of the roll as it travels through for cutting.
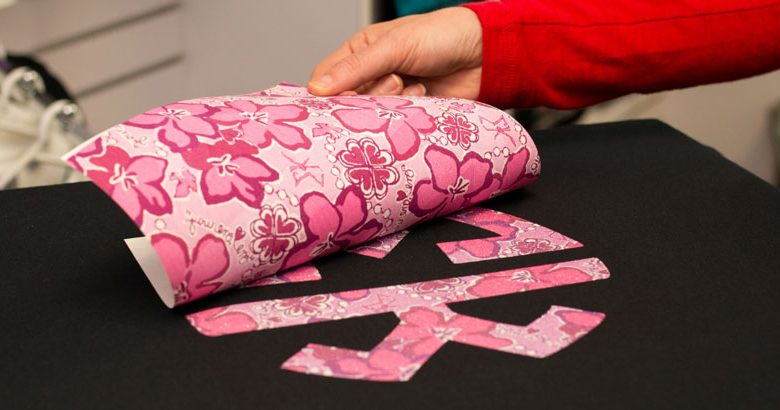
With a clean cut, we move onto making success in the weeding process. Weeding is the process of removing the excess material away and leaving the intended design. Glitter materials are some of the most difficult to weed. It’s tough to see the cut lines through the glitter, and the material tends to break when pulling which results in many start-and-stop actions to consume time.
There are some radical ideas like sprinkling baby powder or place the cuts in a freezer to expose the cut lines, but I don’t feel either are practical in a production environment. For this reason, the best recommendation is to have a print out of the graphic being weeded and utilize weed borders or squares around cut elements for easier identification.
A definite way to improve the breaking of the material when weeding is by placing the material on a heated surface. By warming the back of the material on a device such as a weeding table or heated weeding panel, you can save approximately 50-80 percent of production time. This advancement alone makes glitter products a viable addition to many shops that have struggled with them in the past.
Final considerations
Creating a gap in a design, you can create multicolor designs with glitter.
Glitter is often not recommended for direct layering on top of other glitter materials. This limitation means that multicolor designs must be approached creatively. One way is the garment gap approach. Consider creating multicolor designs with a garment gap of show-through. Another way is to utilize a technique called trapping. The trapping technique creates a complete punch through where the foreground overlaps the background. Since alignment of trapped designs can be challenging, the designer often creates a very small overlap in the process to make things easier on the heat press operator. Another important aspect of glitter is to ensure the style you are buying can be applied quickly for background layers. By tacking the background with the heat press for a few seconds when layering, you limit shrinking.
To do the trapping technique, the foreground lightly overlaps to trap the edges of the design.
One last application tip for glitter considers the garments that you sell it on. Be careful when using glitter on fleece. Some glitter has a rough texture, so it is important to consider the risk of pilling. To limit the risk of this happening, consider keeping your design size smaller and sourcing a pill-resistant garment for best results.
Also consider that many of the markets interested in glitter are also interested in garments constructed of heat sensitive, synthetic materials. Often, these synthetic fabrics will scorch at the required application temperature of glitter, which is normally between 300-330 degrees F. Newer lower platen heat technology helps to reach the melting point of the adhesive layer from inside of the garment, thus allowing top heat to be as low as 250 degrees, which virtually eliminates any chance of scorching.
When a business can process glitter accurately, the results are usually outstanding. This finish is perhaps the most in-demand effect since rhinestones and sequins. Go to any dance competition, cheer meet, or high school game and you’ll see glitter galore. Get in the game and give your shop this easy chance at success.