I have recently received several questions asking how to remove the white box from certain bitmap images in CorelDRAW (most notably for JPEG images). I had covered some of the techniques I have used in the past and have included here the article I submitted a couple of years ago. The following information applies to all versions of the program and should provide several ways to accomplish this task.
There are all sorts of capabilities within the CorelDRAW Graphics Suite. We will explore, some of the ways to use Photopaint to enhance the use of the program. Photopaint is a very capable raster (bitmap) image editor that rivals the abilities of Adobe Photoshop. Adobe Photoshop has received a lot of press as the ultimate bitmap editor, but the truth is that many programs equal or exceed the abilities of that overpriced program. One example of this is Corel Paint Shop Pro, a dedicated bitmap editor. Corel Photopaint is no less capable than Photoshop. So, since it is part of our possession of the Graphics Suite, we will begin with a few of the basic functions.
First, and likely the most useful, is the ability to remove the dreaded “white box” from an otherwise usable image. The image I am using, as an example, was acquired from the internet with photographic detail that met my purposes. Any raster image, like clipart, will likely be similar.
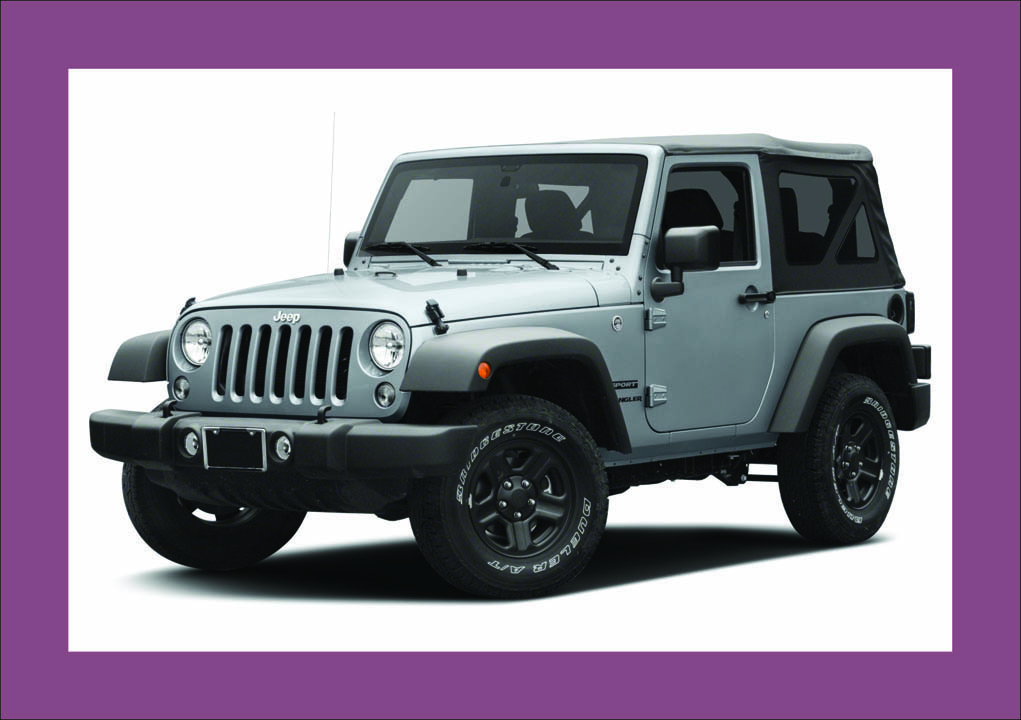
So, my first step was to import the acquired image into a new CorelDRAW document (Fig. 1). (Note that I placed a colored rectangle behind the image for clarity.) Secondly, I selected the bitmap image and pressed “Edit Bitmap” on the top task bar. After a few seconds, the image was opened in Photopaint. Here is where the fun begins.
In Photopaint, I went to the mask tool (third option from the top), choosing the “Magic Wand” option. With that tool, I first set a tolerance of 10 for the outside rectangle and clicked the white outside area and then, to include other areas (white within the wheel and above the rear spring), holding down my “shift” key was able to mask them as well by clicking each area to be included. I then changed tolerance to 2 and clicked each of the window areas with the “shift” key held down. The final change was setting tolerance to 32 and shift-clicking the area between the shadow and the vehicle. (The actual process is not as complicated as the description may sound as many images will not need the changes of tolerance.)
Once the mask had been applied to my liking, I went to: Object > Create > Cut from mask. I then chose “Save” and closed Photopaint. The image, with changes, once again appeared in my CorelDRAW document as a group of two objects. I then ungrouped the objects and selected only the background object (the offensive white area) and deleted it. The results are displayed in Fig. 2 with some added details.

Another possibility is, within CorelDRAW, with the bitmap selected, go to: Bitmaps > Bitmap color mask. A docker will open and with the eyedropper tool there, click on the white area to be removed. Use the tolerance slider to get as close to your goal as possible, then click apply. This may, or may not, reach your ultimate goal.
My mockup, using the same Jeep image, with tolerance set to eight, got rid of white around the image, but also removed a portion of white from the headlights. This is often a valuable tool to remove (or mask) unwanted parts of a bitmap. The tool includes the ability to choose several colors to eliminate, using the eyedropper tool, and is likely better used for clipart with sharply defined colors than for a photograph.
Another thing sometimes needed is the ability to procure only a segment of a photo without a background or some sort of rectangle shape. There are several ways to accomplish this, but, once again, we turn to Photopaint as the most expedient tool to reach our visual goal. The image I chose was again acquired from the internet as a JPEG image. Note: JPEG bitmaps are a “lossy” file type, meaning that “JPEG compression” always removes information from the file when compressed that can never be recovered. Some JPEG images from the internet have artifacts and less-than-usable qualities. The inclusion of PhotoZoom 4 in later versions of the Graphics Suite is of great value in cleaning up the artifacts and smoothing irregularities.
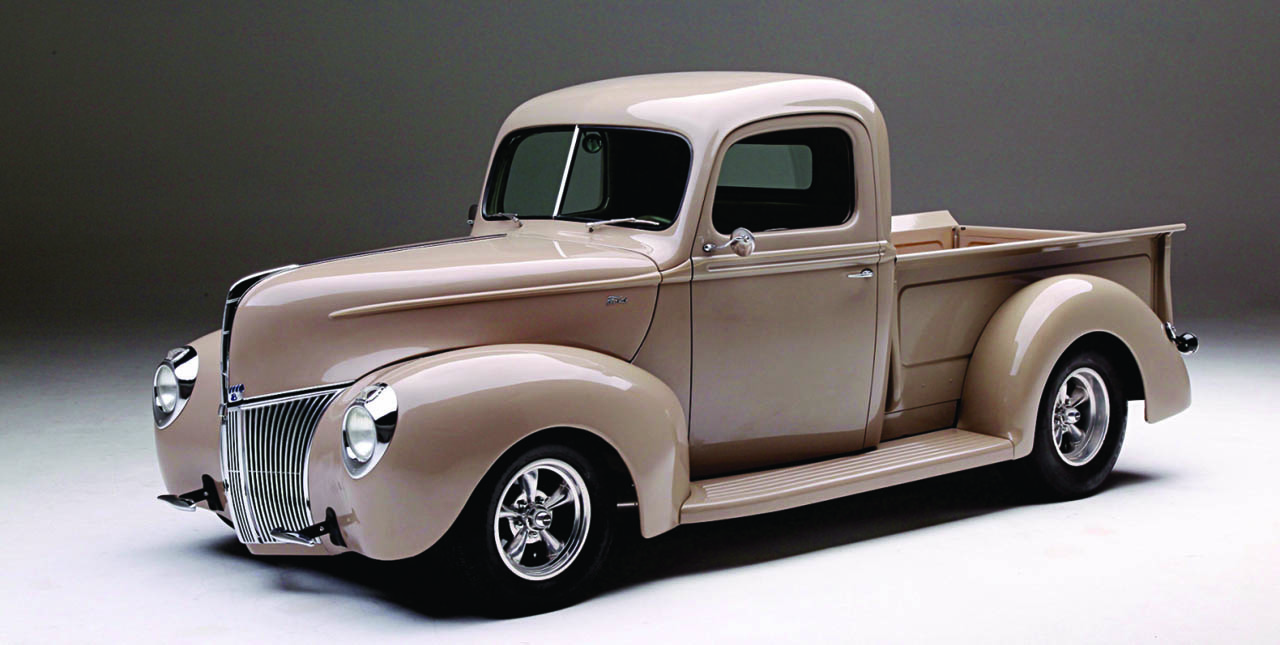
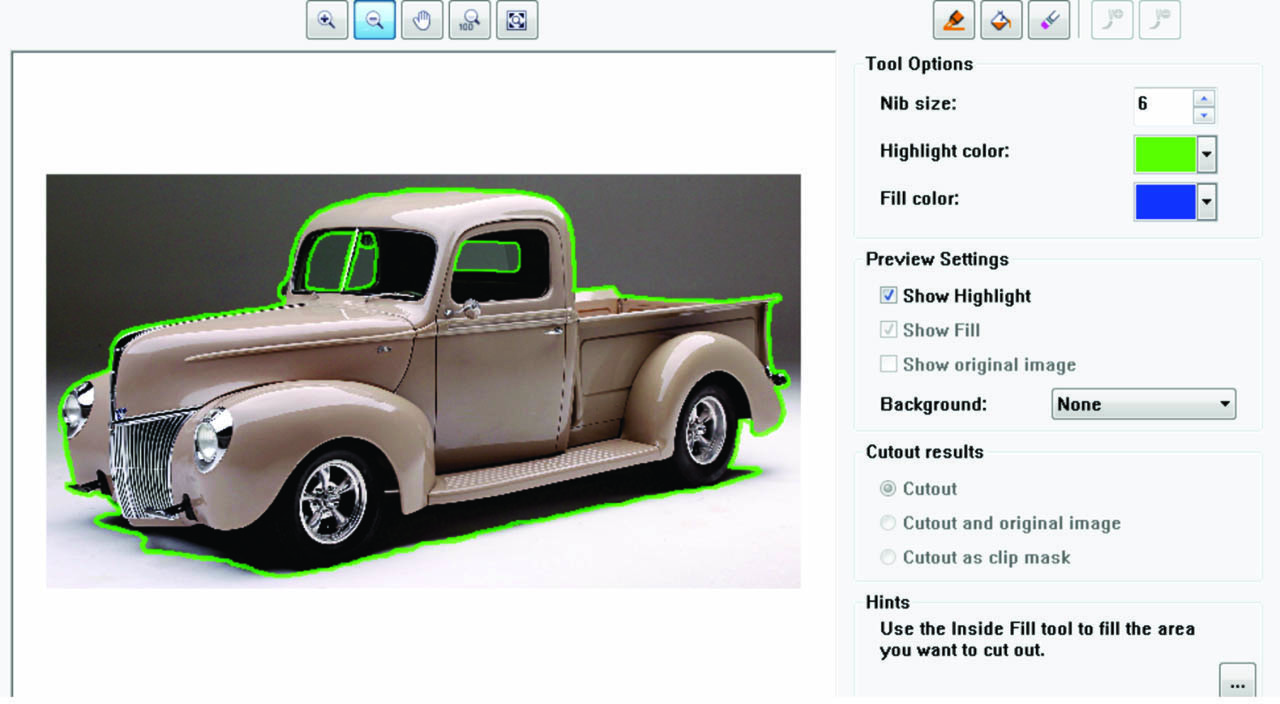
Let’s move on to our project. With a new document open in CorelDRAW, I imported the desired bitmap image, as in Fig. 3. (No matter where the image originates, the processes remain the same.) My desire is to cut the truck from the background and, once again, with my image selected, I select “Edit Bitmap” on the task bar. After a few seconds, the image opens in Photopaint. Now, in Photopaint, I choose Image > Cut out lab. A new dialog appears with several options and my image is included.
Next, I choose nib size, in this case 10. The idea is to draw a line, as precise as possible, around the image, overlapping, equally, the image and background. (Though possible using your mouse, the use of a pressure sensitive stylus and tablet makes the process much easier.) See Fig. 4. Once my outline was finished, I dropped the nib size to six and zoomed in to outline the window areas. After all the outlines were in place to my satisfaction, I chose the “Inside Fill” tool to place a fill color and pressed “OK.” The Cut out lab closes and the edited image appears in the Photopaint window.
Then, I chose “Save” and closed Photopaint. The results now appeared in my CorelDRAW document (Fig. 5). I included some text and 3D embellishments to finish the appearance. We’ll explore some “shadow” and 3D options in future articles, some of which I learned only by experimentation.
The preceding processes are only my recommendations as other options may be available. For instance, Tracing the bitmap is possible and then eliminating the offensive portions. The downside to this choice is that the photographic quality of the image is often somewhat compromised.
Another possibility, though more tedious and time consuming, is using the Bezier tool to draw around the desired image in CorelDRAW, then power-clip the bitmap into that object. Sometimes this works best, especially if you need an outside contour or outline applied to the image. Photopaint is not needed for this process as it is done entirely in CorelDRAW.

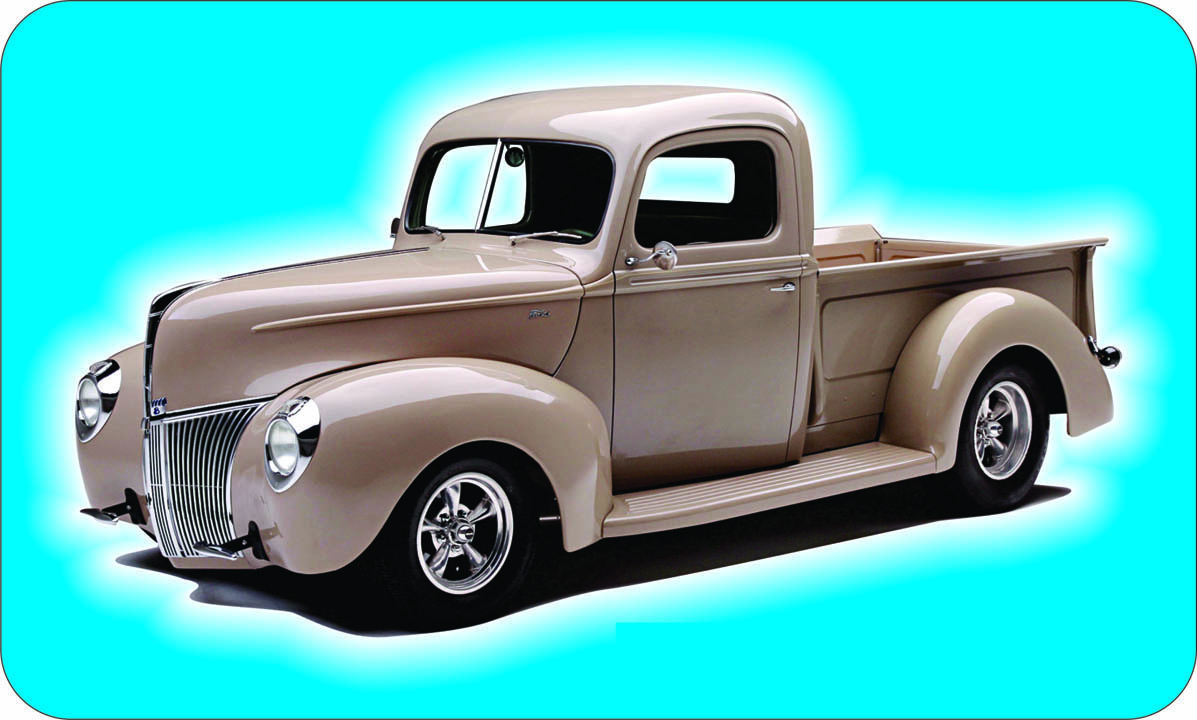
This is the process I used to create the image in Fig. 6. After drawing the outline shape with the Bezier tool, and being as accurate as possible, (after my initial drawing, I had to edit nodes to clean-up irregularities) I then drew around the inside windows, again with utmost accuracy, and then combined those inside objects with the outline I had drawn. Finally, when satisfied with my drawing, I power-clipped the bitmap into my drawn vector object. (Depending on the level of accuracy needed, this method may prove to be the best option, though more time consuming.)
I then added an outside, 20-step contour, adjusting Contour offset to my liking to simulate a glow around the image, having chosen white as my primary color and my ending color to match the background. In this case, I chose cyan. (If the image is to be resized, it is imperative to break the contour apart, prior to re-sizing, to retain the proper faded look.)
We have looked at various ways to accomplish our goal as designers. I have shared some of my insights, yet as you explore the CorelDRAW Graphics Suite you may find additional and/or easier ways to reach your final goal. As always, I encourage you to be open to finding solutions that may have escaped others. It seems that the program has so many abilities that I learn something new nearly every day.
After showing a friend some stuff about the program, she said that one of my suggestions would be easier accomplished by double-clicking, but I never learned the specifics to which she was referring. Nevertheless, as you use the program, it is possible, frequently, to find a new process that was previously unknown.
I relish any suggestions you may have found that advance my knowledge of the program. Please respond to dezender1@gmail.com with any questions or suggestions. I will be glad to clarify, as best I can, any questions related to the CorelDRAW Graphics Suite.