Preparing Files for 3D Printing
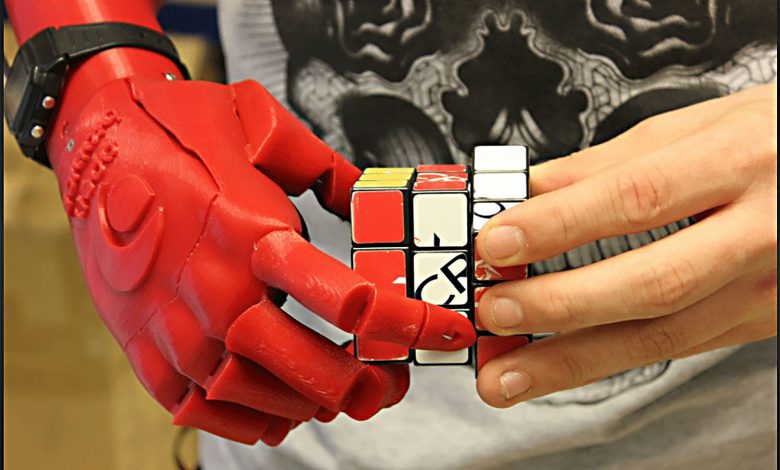
What is the best way to display how real-world objects look before they are manufactured? A photo or a drawing gives us a vague idea, but if you’re in product development and you need to show a working model that can be touched and felt by an investor, client, or customer, a 3D prototype is the best option. Handmade models of wood, metal, cardboard, or other materials are labor-intensive and can take weeks or months to develop, and the inevitable changes that need to be made take even more time. Here enters the 3D printer!
There are a lot of 3D printers on the market today, as this new technology has quickly carved a firm foothold in the manufacturing industry. Assuming that at some point, you may want to purchase a 3D printer or at least have a model printed, this article focuses on preparing files for output.
Rapid prototyping
The idea of rapid prototyping emerged during the 1980s. It is simply the automated method of developing models and prototypes. 3D printing is a logical extension of this idea in which product designers make their own rapid prototypes in hours, using software and sophisticated machines similar to inkjet printers. 3D printing is advantageous because it saves time, lowers costs, and offers unlimited design options for product development. As the technology evolves, more uses for 3D printing emerge. Today, 3D printers are used for the fabrication of everything from board game pieces to prosthetic limbs and 3D printers are more affordable and more reliable than ever.
3D modeling
Modeling software includes programs that design basic three-dimensional models of objects or characters, and often include supplemental features to flesh out models with realistic details. 3D modeling software can generate objects and often include painting features to add textures and color.
Some programs are used for 3D animation and rendering but most export to 3D printing compatible formats. If you own a version of Photoshop CC, all the tools you need are buried deep inside the program. There are dozens of other programs ranging from basic to ultra-sophisticated that model 3D objects.
3D fundamentals
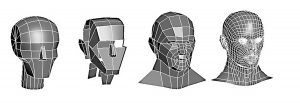
The basic principle of 3D modeling is the structuring of the surface of an object into polygons called “vertices.” The surface of an object can be captured using a 3D scanner or generated in 3D software. The contour of the object, consisting of polygons, is “mapped” and a virtual model is generated that can be reshaped, colored, and surfaced.
3D printer formats
The model’s data needs to be configured into a format that the 3D printer’s software can interpret. The software arranges the data into consecutive layers. During the printing process, the model’s contours are deposited layer by layer in a material such as plastic or metal by the printer’s emitter heads and fused by a heating method or ultraviolet light.
STL and WRL
The two most common file formats for 3D printing are STL and VRML. STL, or stereolithography, configures single-colored objects. STL is typically used with desktop 3D printers.
VRML, pronounced “vermal,” has a file extension of WRL. VRML stands for virtual reality modeling language. This 3D format enables color printers with more than one nozzle to emit multiple colored plastic filaments.
ATMF
Additive manufacturing file format (.AMF) is an XML-based open-standard for 3D printing. AMF supports multiple colors. AMF files use a compression scheme that reduces the file size of the document.
GCode
This format contains detailed instructions for a 3D printer to follow for each layer. It determines the starting point for each layer and the path that the nozzle will follow when the material is deposited.
Proprietary formats
Some 3D printer manufacturers have proprietary formats that contain instructions for a specific make and model of the printer and the printer’s software. Fortunately, proprietary file formats are generated from STL or WRL files, so any software that can export to these common formats can be used to create the model.
Choosing a printer
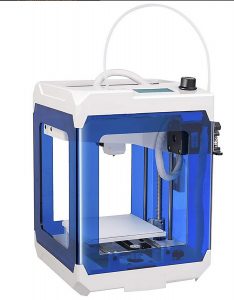
There are dozens of 3D printers on the market today, ranging in price from the low hundreds to the high thousands of dollars. With the price, the sizes, capabilities, and speeds increase, finding the best 3D printer for your situation is a matter of researching the specs and matching them to your needs. Here are a few questions you can ask:
- Does the printer print only one color, or does it have multi-color capability?
- What is the maximum size the printer can handle?
- How much time does it take to print a reasonably sized object?
- Are materials readily available, and are they expensive?
- What type of display does it have?
- Does it come with modeling software?
Printer problems
A 3D printer can produce amazing objects, but despite everything, a seemingly simple model may not print successfully due to a variety of reasons. When rendering a 3D object for print, there are specific characteristics that need to be considered.
First of all, is the object the correct size for your printer? Inexpensive desktop 3D printers are fairly small, so the object needs to be rendered with consideration to the printer’s capabilities. Furthermore, overly complex objects with areas that overlap can present problems. The most common problems have to do with the heads and the filament. Check out this article that addresses troubleshooting the most common 3D printer problems.
Websites
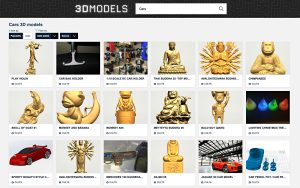
3D objects can be imported from many websites that offer free models, and more complex models can be purchased. Categories include furniture, people, animals, vehicles, and trees, among countless others. Once imported, these models can be modified in your 3D program by changing their shape, color, or texture.
Photographs
You can also generate 3D models from photographs or entirely from scratch. In this instance, I’ll demonstrate how to create a simple 3D object from a photograph and prepare it for output to a 3D printer.
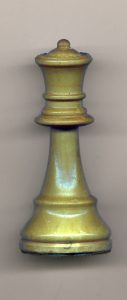
- Here is a picture of a queen chess piece against a plain background (Fig. 1). The camera was positioned at a reasonable distance to minimize distortion. Then the picture is opened in Photoshop.
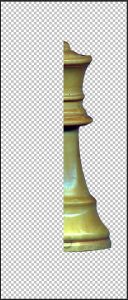
- The right half of the image is selected and copied to a new layer (Layer > New > Layer Via Copy). If the area has undercuts, they need to be refined to smooth them out, because they can confuse a desktop printer. (Fig. 2)
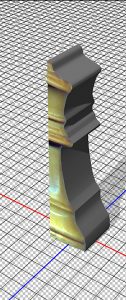
- From the 3D panel found in the Window menu, Selected Layer is chosen as the Source and 3D Extrusion as the method. Click the Create button to transform the layer into a 3D layer. Initially, the 3D object is extruded with the shape of the queen is on the face of the extrusion.
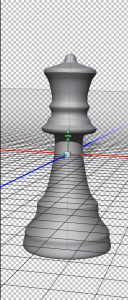
- With the camera view active, it’s a good idea to drag the workspace around to view the extruded object from different angles. Do not move the object itself. Shifting it off its base will distort it when it is reshaped. (Fig. 3)
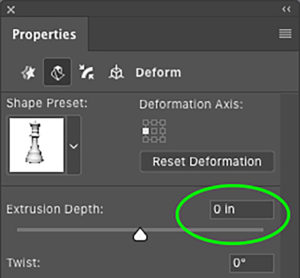
- Open the Properties panel and select the second icon at the top to switch to the Deform settings. Set the Extrusion Depth field to zero. The queen loses its extrusion depth.

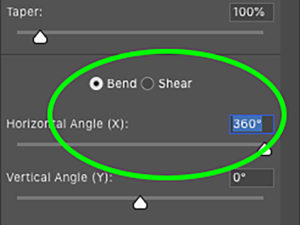
When the Extrusion Depth field is set to zero, the queen loses its extrusion depth. - This next step functions as a digital lathe. In the lower field of the Properties panel, click the Bend button. Drag the Horizontal Angle slider to 360 degrees. The object revolves around its center, producing a cylinder.

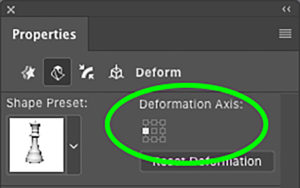
Drag the Horizontal Angle slider to 360 degrees to revolve the queen around its center to a cylinder. - At the top of the Properties panel, there is an icon consisting of nine little squares. Click the center-left square to revolve the queen’s left edge. Voila! A 3D replication of the object that we photographed is generated.

Click the center-left square to revolve the queen’s left edge to produce a 3D replication of the object that we photographed. 
- Before outputting the object, check to see that it is sitting flat on the ground plane. Click on the far right icon at the top of the Properties panel to switch to the Coordinates pane, and make sure the X, Y, and Z angles are all set to zero.
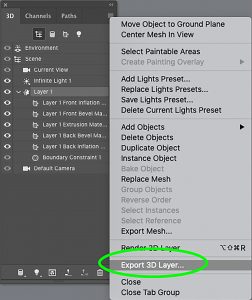
- Export the object to a compatible printing format by choosing Export to 3D Layer in the 3D panel options menu. Under 3D File Format choose STL if your object is one color or VRML If your object contains two or more colors.

Export the object to a print-compatible format. 
To export, choose Export to 3D Layer in the 3D panel options menu, then choose STL or WRL from the pull-down menu.
It’s surprising how easy it is to construct a simple one-color 3D object. This little tutorial is meant to show you the very basics of 3D modeling and formatting. More complex objects require a bit more training, of course, but fear not, 3D printing technology strives, for the most part, to simplify the procedure using printer-specific modeling software. There are countless applications for 3D printed objects, and I’m sure you’ll see this technology become as commonplace as inkjet and laser printers have over the years.
If you don’t want the hassle of purchasing and maintaining a 3D printer, there are numerous online printing services that will print files for you in any size, color, or material. Google “3D printing service” and you’ll see a slew of them. In the meantime, Happy modeling!
